How to Use CW Energy 450W Solar Panel: Examples, Pinouts, and Specs
Introduction
The CW Energy 450W Solar Panel (Part ID: CWT450-108TNFB10 450 Wp) is a high-efficiency photovoltaic module designed to convert sunlight into electrical energy. With a maximum power output of 450 watts, this solar panel is ideal for both residential and commercial solar power systems. Its robust construction ensures durability and reliable performance in diverse weather conditions, making it a versatile choice for sustainable energy solutions.
Explore Projects Built with CW Energy 450W Solar Panel
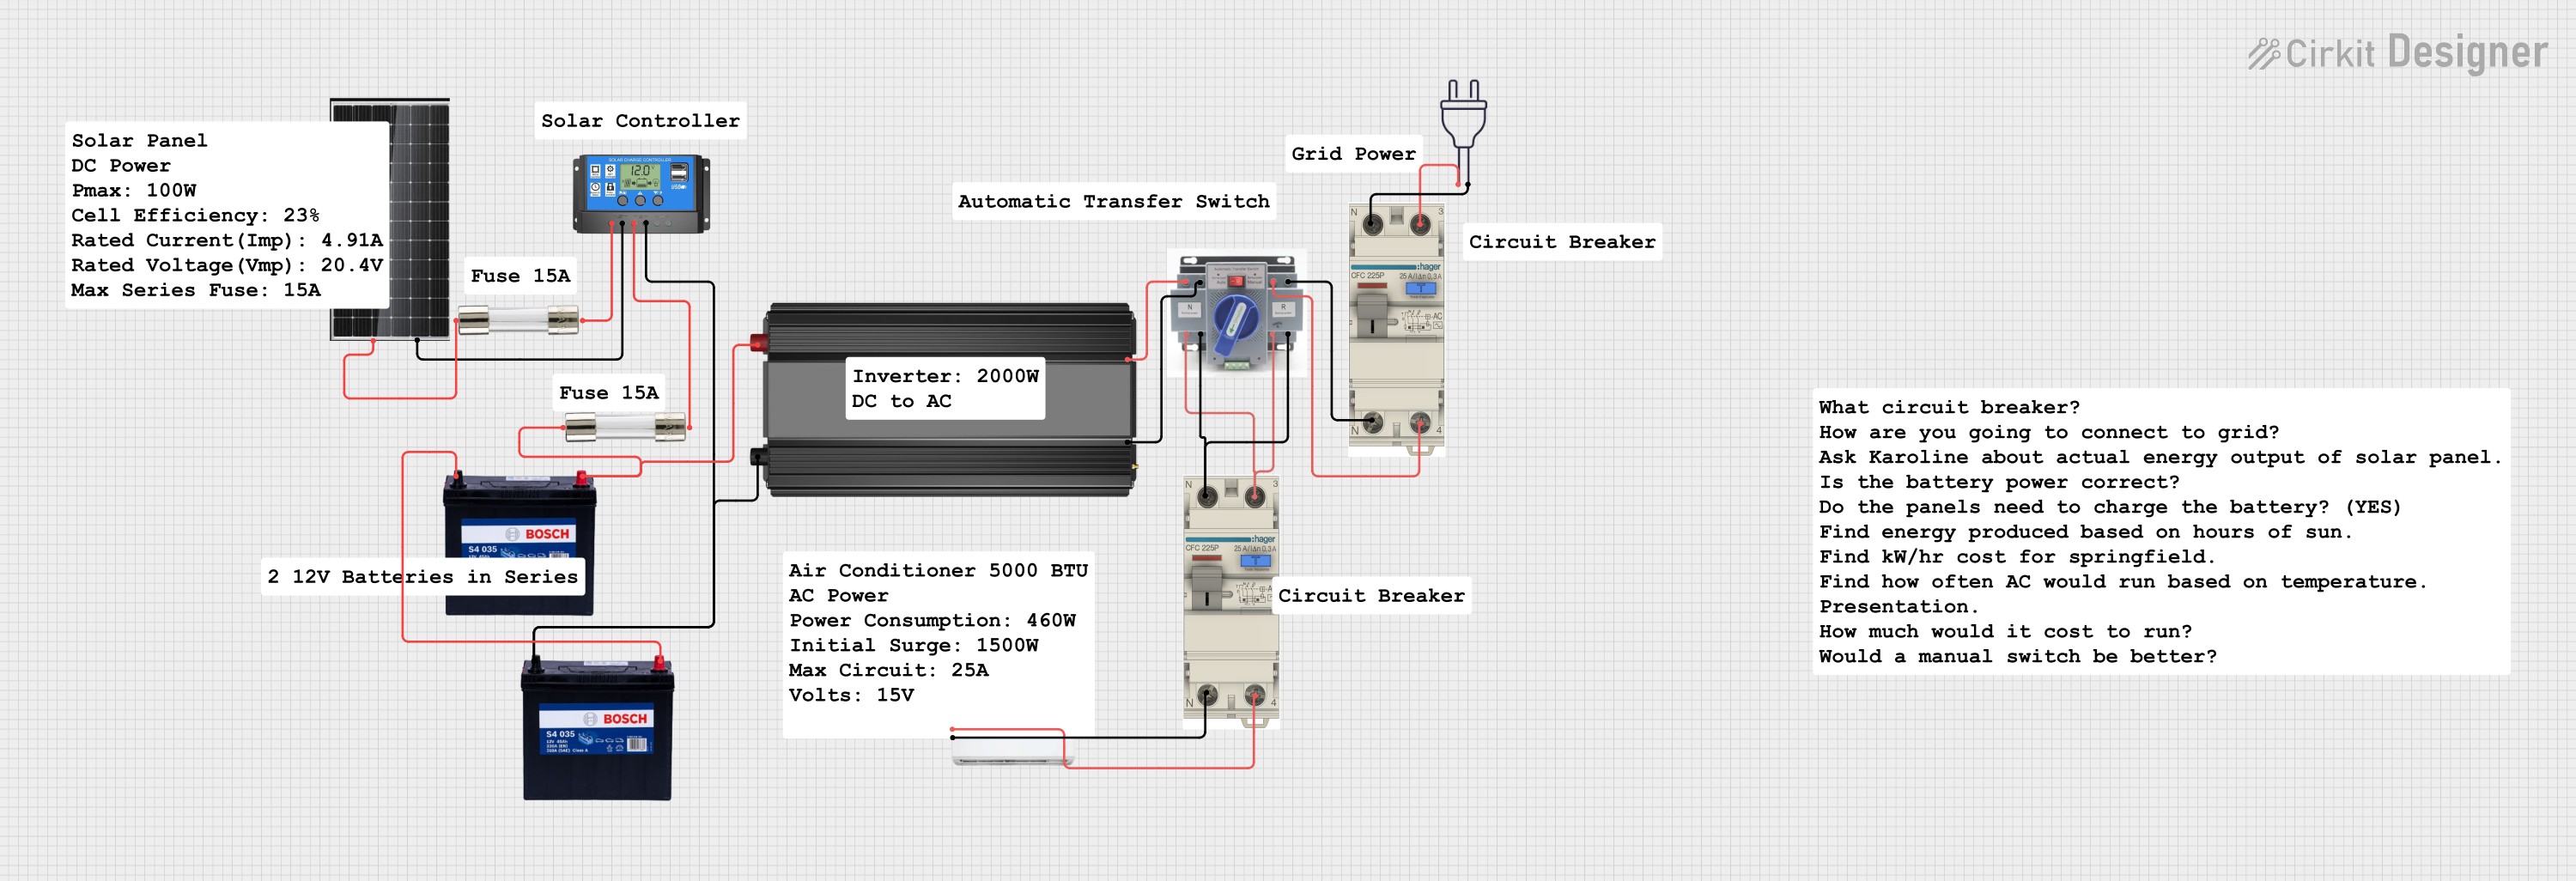
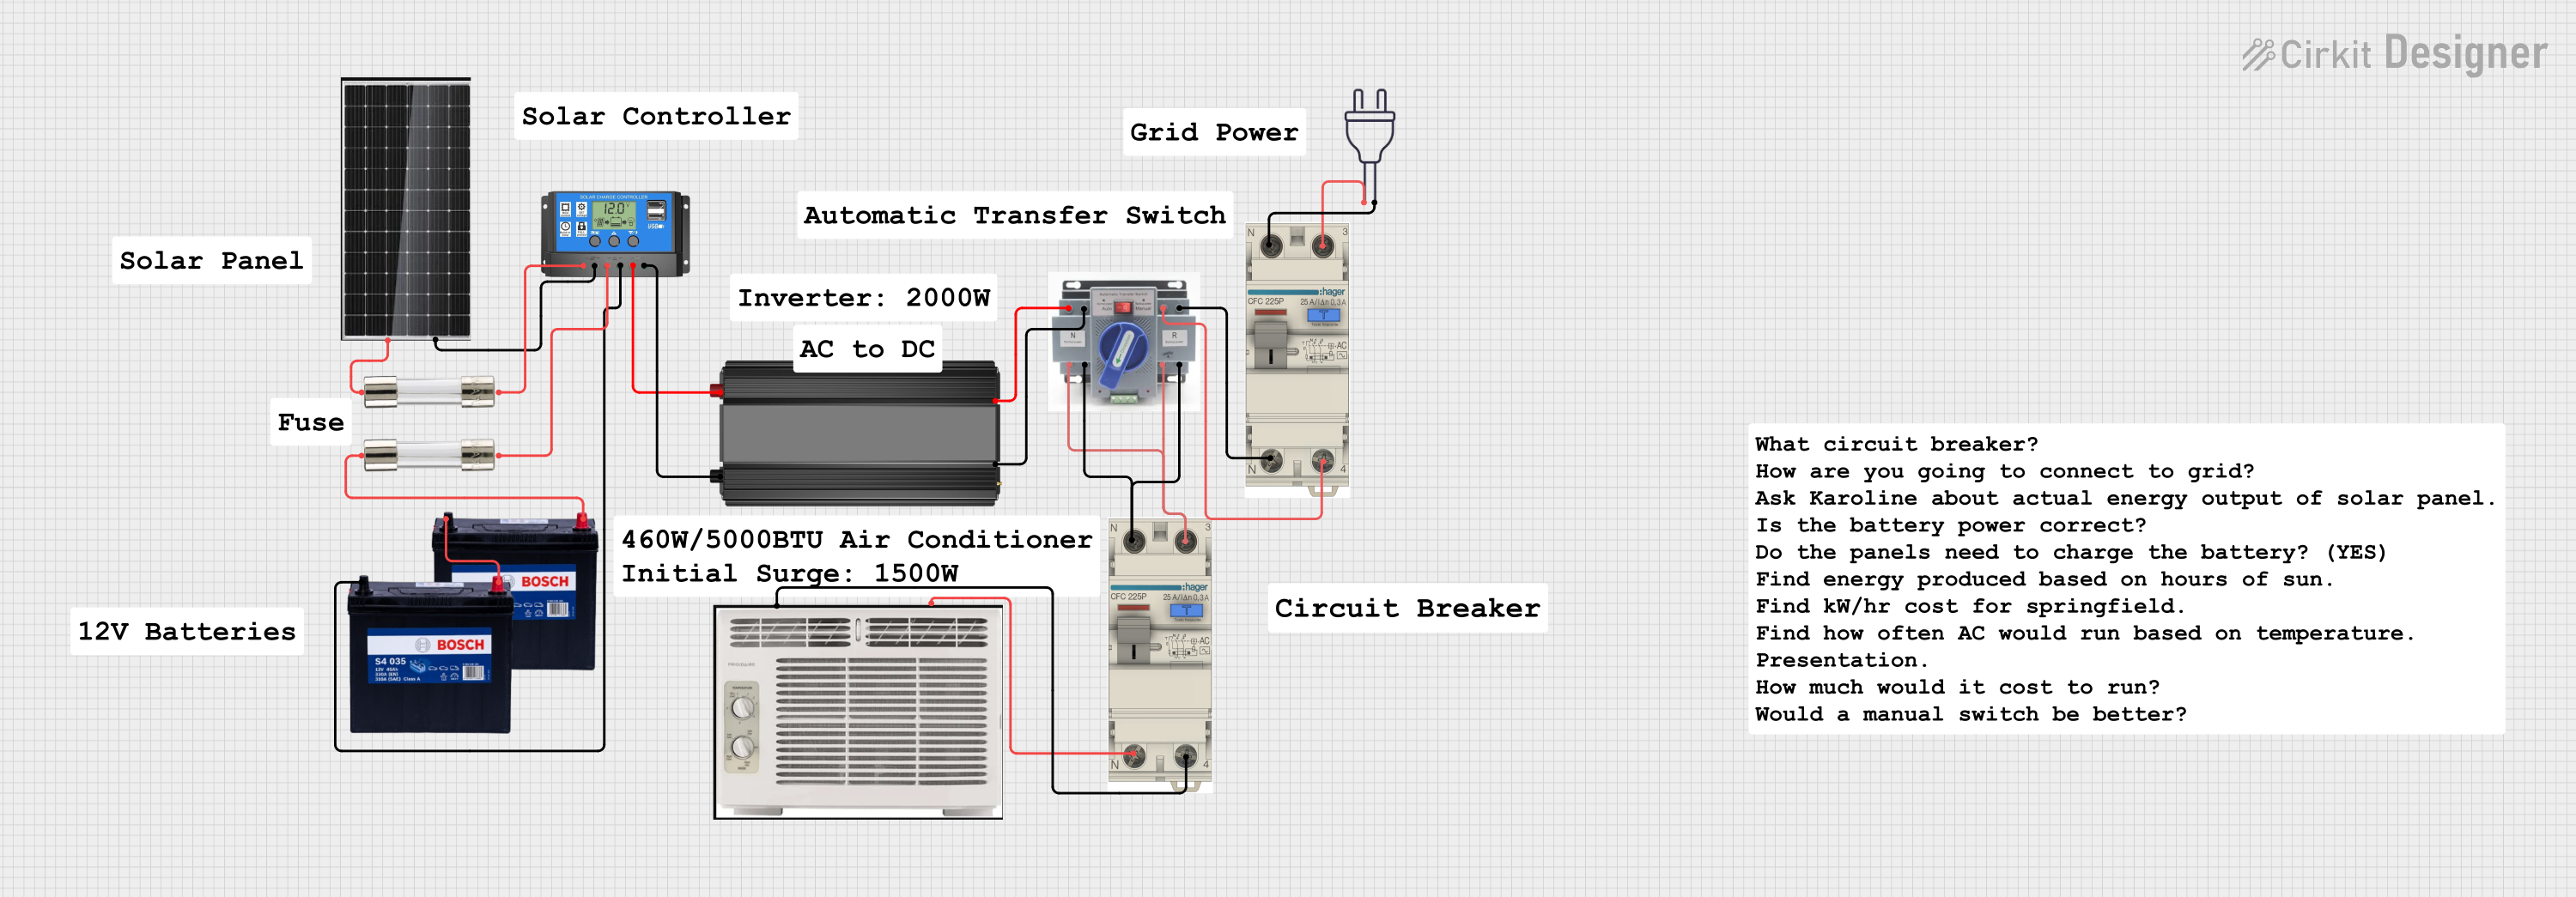

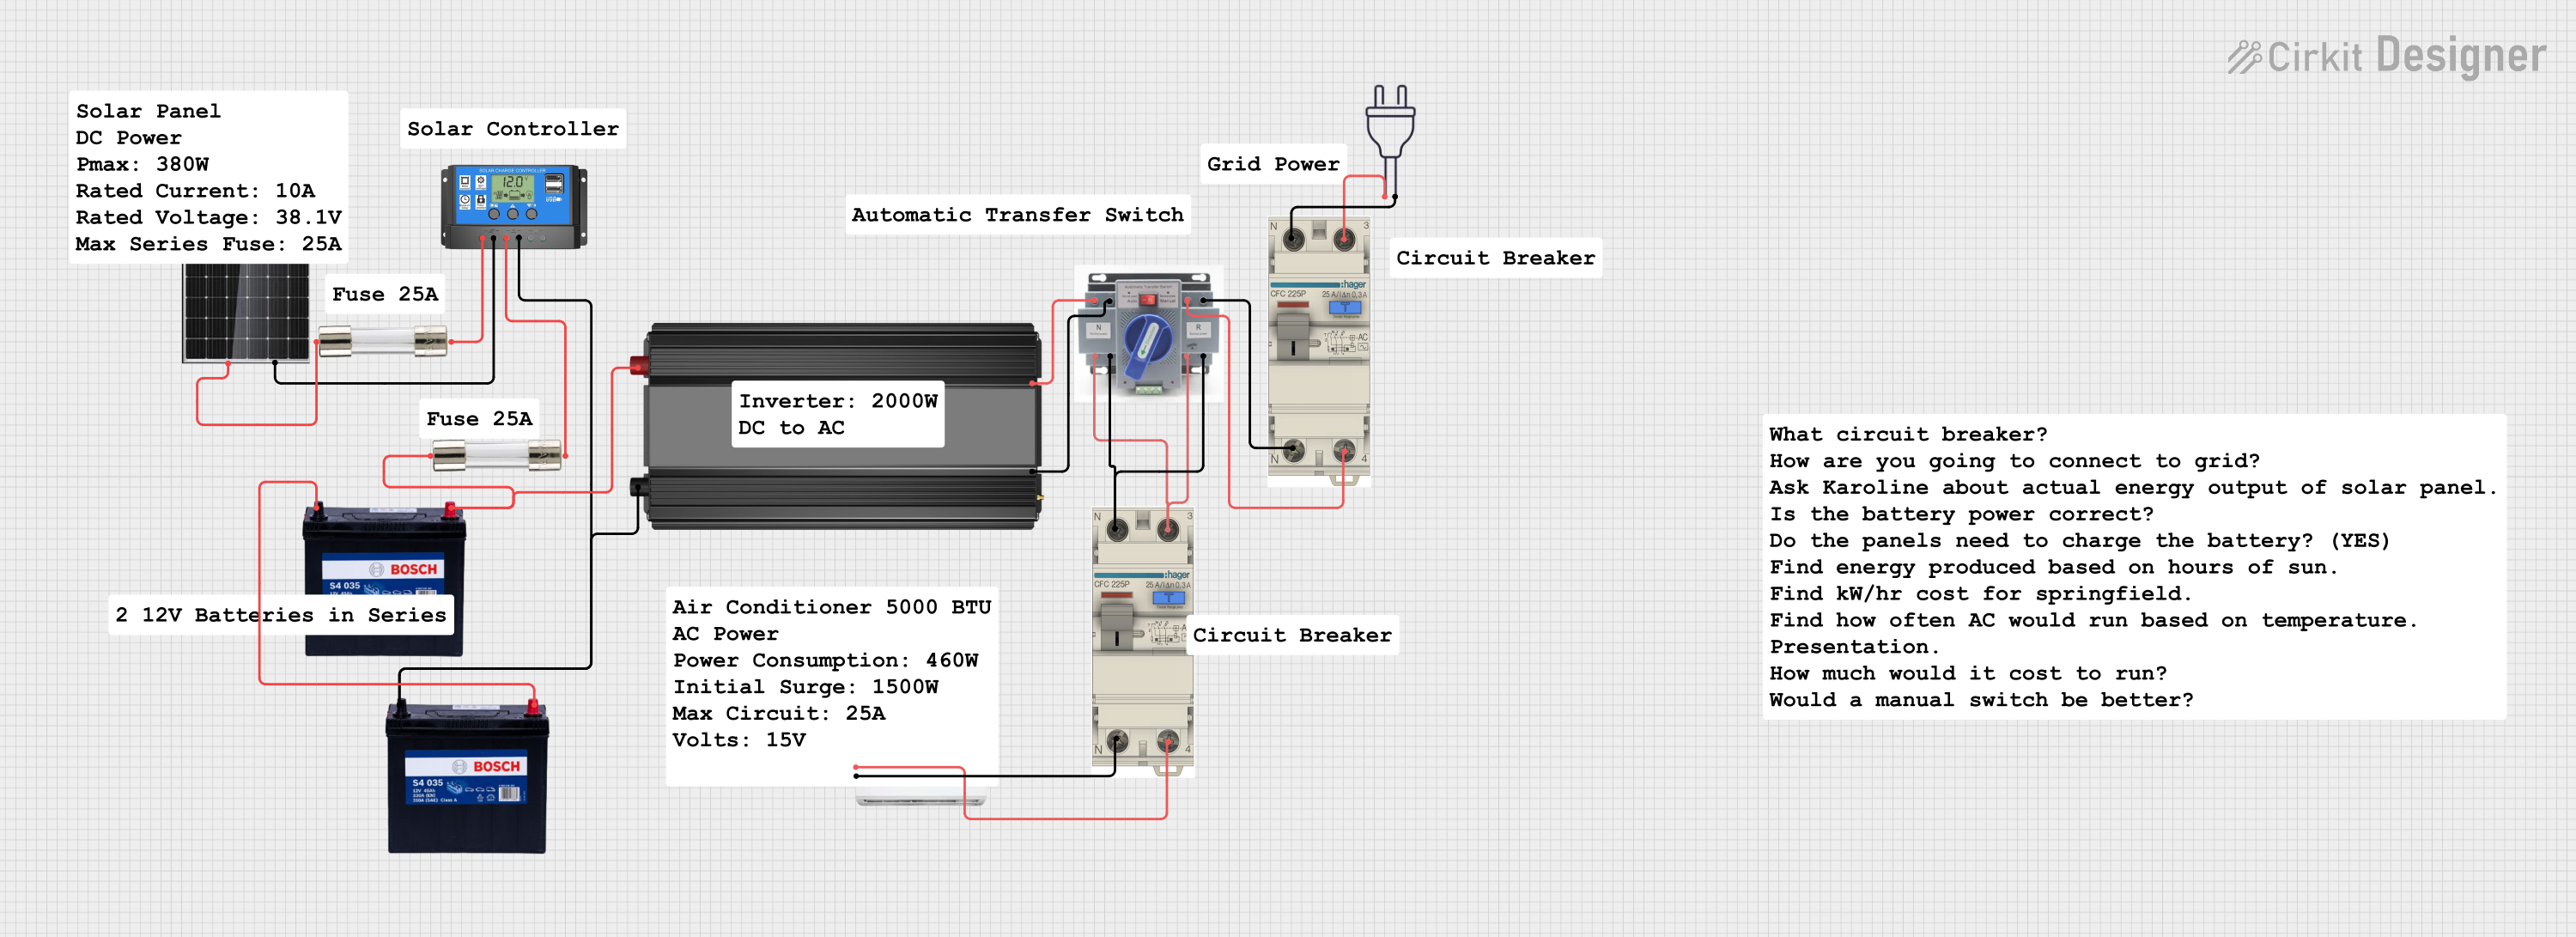
Explore Projects Built with CW Energy 450W Solar Panel
Common Applications and Use Cases
- Residential rooftop solar installations
- Commercial and industrial solar power systems
- Off-grid solar setups for remote locations
- Solar farms and large-scale renewable energy projects
- Backup power systems when paired with batteries
Technical Specifications
Key Technical Details
| Parameter | Value |
|---|---|
| Manufacturer | CW Energy |
| Part ID | CWT450-108TNFB10 450 Wp |
| Maximum Power Output (Pmax) | 450 W |
| Open Circuit Voltage (Voc) | 50.2 V |
| Short Circuit Current (Isc) | 11.3 A |
| Maximum Power Voltage (Vmp) | 41.8 V |
| Maximum Power Current (Imp) | 10.8 A |
| Module Efficiency | 20.5% |
| Operating Temperature Range | -40°C to +85°C |
| Maximum System Voltage | 1500 V DC |
| Dimensions | 1722 mm x 1134 mm x 30 mm |
| Weight | 23.5 kg |
| Cell Type | Monocrystalline silicon |
| Number of Cells | 108 (Half-cut cell design) |
| Frame Material | Anodized aluminum alloy |
| Front Cover | Tempered glass (3.2 mm thick) |
| Connector Type | MC4 compatible |
| IP Rating | IP68 |
| Warranty | 25 years (performance) |
Pin Configuration and Descriptions
The CW Energy 450W Solar Panel does not have traditional "pins" but instead uses two output cables with MC4-compatible connectors for electrical connections. Below is a description of the connectors:
| Connector Type | Description |
|---|---|
| Positive (+) | Red cable with MC4 connector (positive) |
| Negative (-) | Black cable with MC4 connector (negative) |
Usage Instructions
How to Use the Component in a Circuit
- Positioning the Panel: Install the solar panel in a location with maximum sunlight exposure. Ensure the tilt angle is optimized for your geographic location to maximize energy generation.
- Connecting the Panel:
- Use the MC4-compatible connectors to connect the panel to a charge controller or inverter.
- Ensure the positive (+) and negative (-) terminals are correctly matched to avoid reverse polarity.
- System Integration:
- For standalone systems, connect the panel to a charge controller, battery, and inverter.
- For grid-tied systems, connect the panel to a grid-tied inverter.
- Safety Precautions:
- Always disconnect the panel from the system before performing maintenance.
- Avoid short-circuiting the terminals, as this can damage the panel or connected devices.
Important Considerations and Best Practices
- Shading: Avoid partial shading of the panel, as it can significantly reduce its efficiency.
- Cleaning: Regularly clean the tempered glass surface with water and a soft cloth to remove dirt and debris.
- Ventilation: Ensure proper airflow around the panel to prevent overheating.
- Wiring: Use appropriately rated cables and connectors to handle the panel's voltage and current.
Example: Connecting to an Arduino UNO
While the CW Energy 450W Solar Panel is not directly compatible with an Arduino UNO due to its high power output, you can use a smaller solar panel or a voltage regulator to step down the voltage for Arduino projects. Below is an example of how to monitor solar panel voltage using an Arduino UNO:
// Example code to measure solar panel voltage using Arduino UNO
// Ensure the solar panel voltage is stepped down to a safe range (0-5V)
// using a voltage divider circuit before connecting to the Arduino.

const int voltagePin = A0;  // Analog pin connected to the voltage divider
float voltage = 0.0;        // Variable to store the measured voltage
const float R1 = 10000.0;   // Resistor value in the voltage divider (10k ohms)
const float R2 = 1000.0;    // Resistor value in the voltage divider (1k ohms)
const float VREF = 5.0;     // Reference voltage of the Arduino (5V)

void setup() {
  Serial.begin(9600);       // Initialize serial communication
}

void loop() {
  int sensorValue = analogRead(voltagePin);  // Read the analog input
  float sensorVoltage = (sensorValue / 1023.0) * VREF;  // Convert to voltage
  voltage = sensorVoltage * ((R1 + R2) / R2);  // Calculate actual panel voltage

  // Print the measured voltage to the Serial Monitor
  Serial.print("Solar Panel Voltage: ");
  Serial.print(voltage);
  Serial.println(" V");

  delay(1000);  // Wait for 1 second before the next reading
}
Troubleshooting and FAQs
Common Issues Users Might Face
Low Power Output:
- Cause: Shading, dirt on the panel, or incorrect tilt angle.
- Solution: Clean the panel, remove shading, and adjust the tilt angle.
No Output Voltage:
- Cause: Loose or incorrect connections.
- Solution: Check the MC4 connectors and ensure proper polarity.
Overheating:
- Cause: Poor ventilation or excessive ambient temperature.
- Solution: Ensure adequate airflow around the panel and avoid installation in confined spaces.
Connector Damage:
- Cause: Improper handling or environmental wear.
- Solution: Replace damaged connectors with MC4-compatible replacements.
Solutions and Tips for Troubleshooting
- Use a multimeter to measure the panel's open-circuit voltage (Voc) and short-circuit current (Isc) to verify its performance.
- Inspect the panel for physical damage, such as cracks in the tempered glass or bent frames.
- Ensure the charge controller or inverter is functioning correctly and is compatible with the panel's specifications.
By following this documentation, users can effectively integrate the CW Energy 450W Solar Panel into their solar power systems and maximize its performance.