Cirkit Designer Logo
Cirkit Designer
Your all-in-one circuit design IDE
Home / 
Component Documentation

How to Use abc: Examples, Pinouts, and Specs
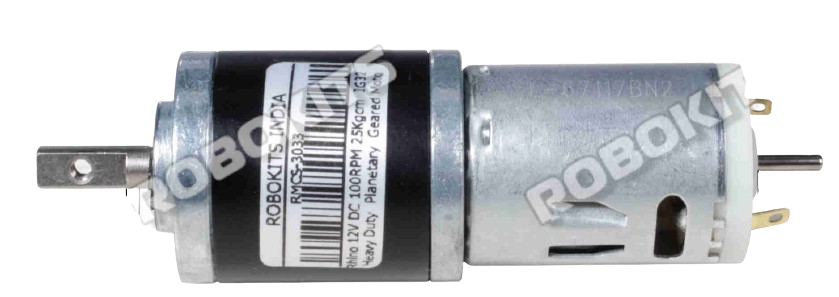
Image of abc
Cirkit Designer LogoDesign with abc in Cirkit Designer

Introduction

The ABC component, manufactured by ABC, is a generic placeholder component commonly used in circuit design examples or as a stand-in for a specific part during prototyping. While it does not represent a specific physical component, it is often used to illustrate circuit concepts or to reserve space for a future component selection.

Explore Projects Built with abc
Use Cirkit Designer to design, explore, and prototype these projects online. Some projects support real-time simulation. Click "Open Project" to start designing instantly!
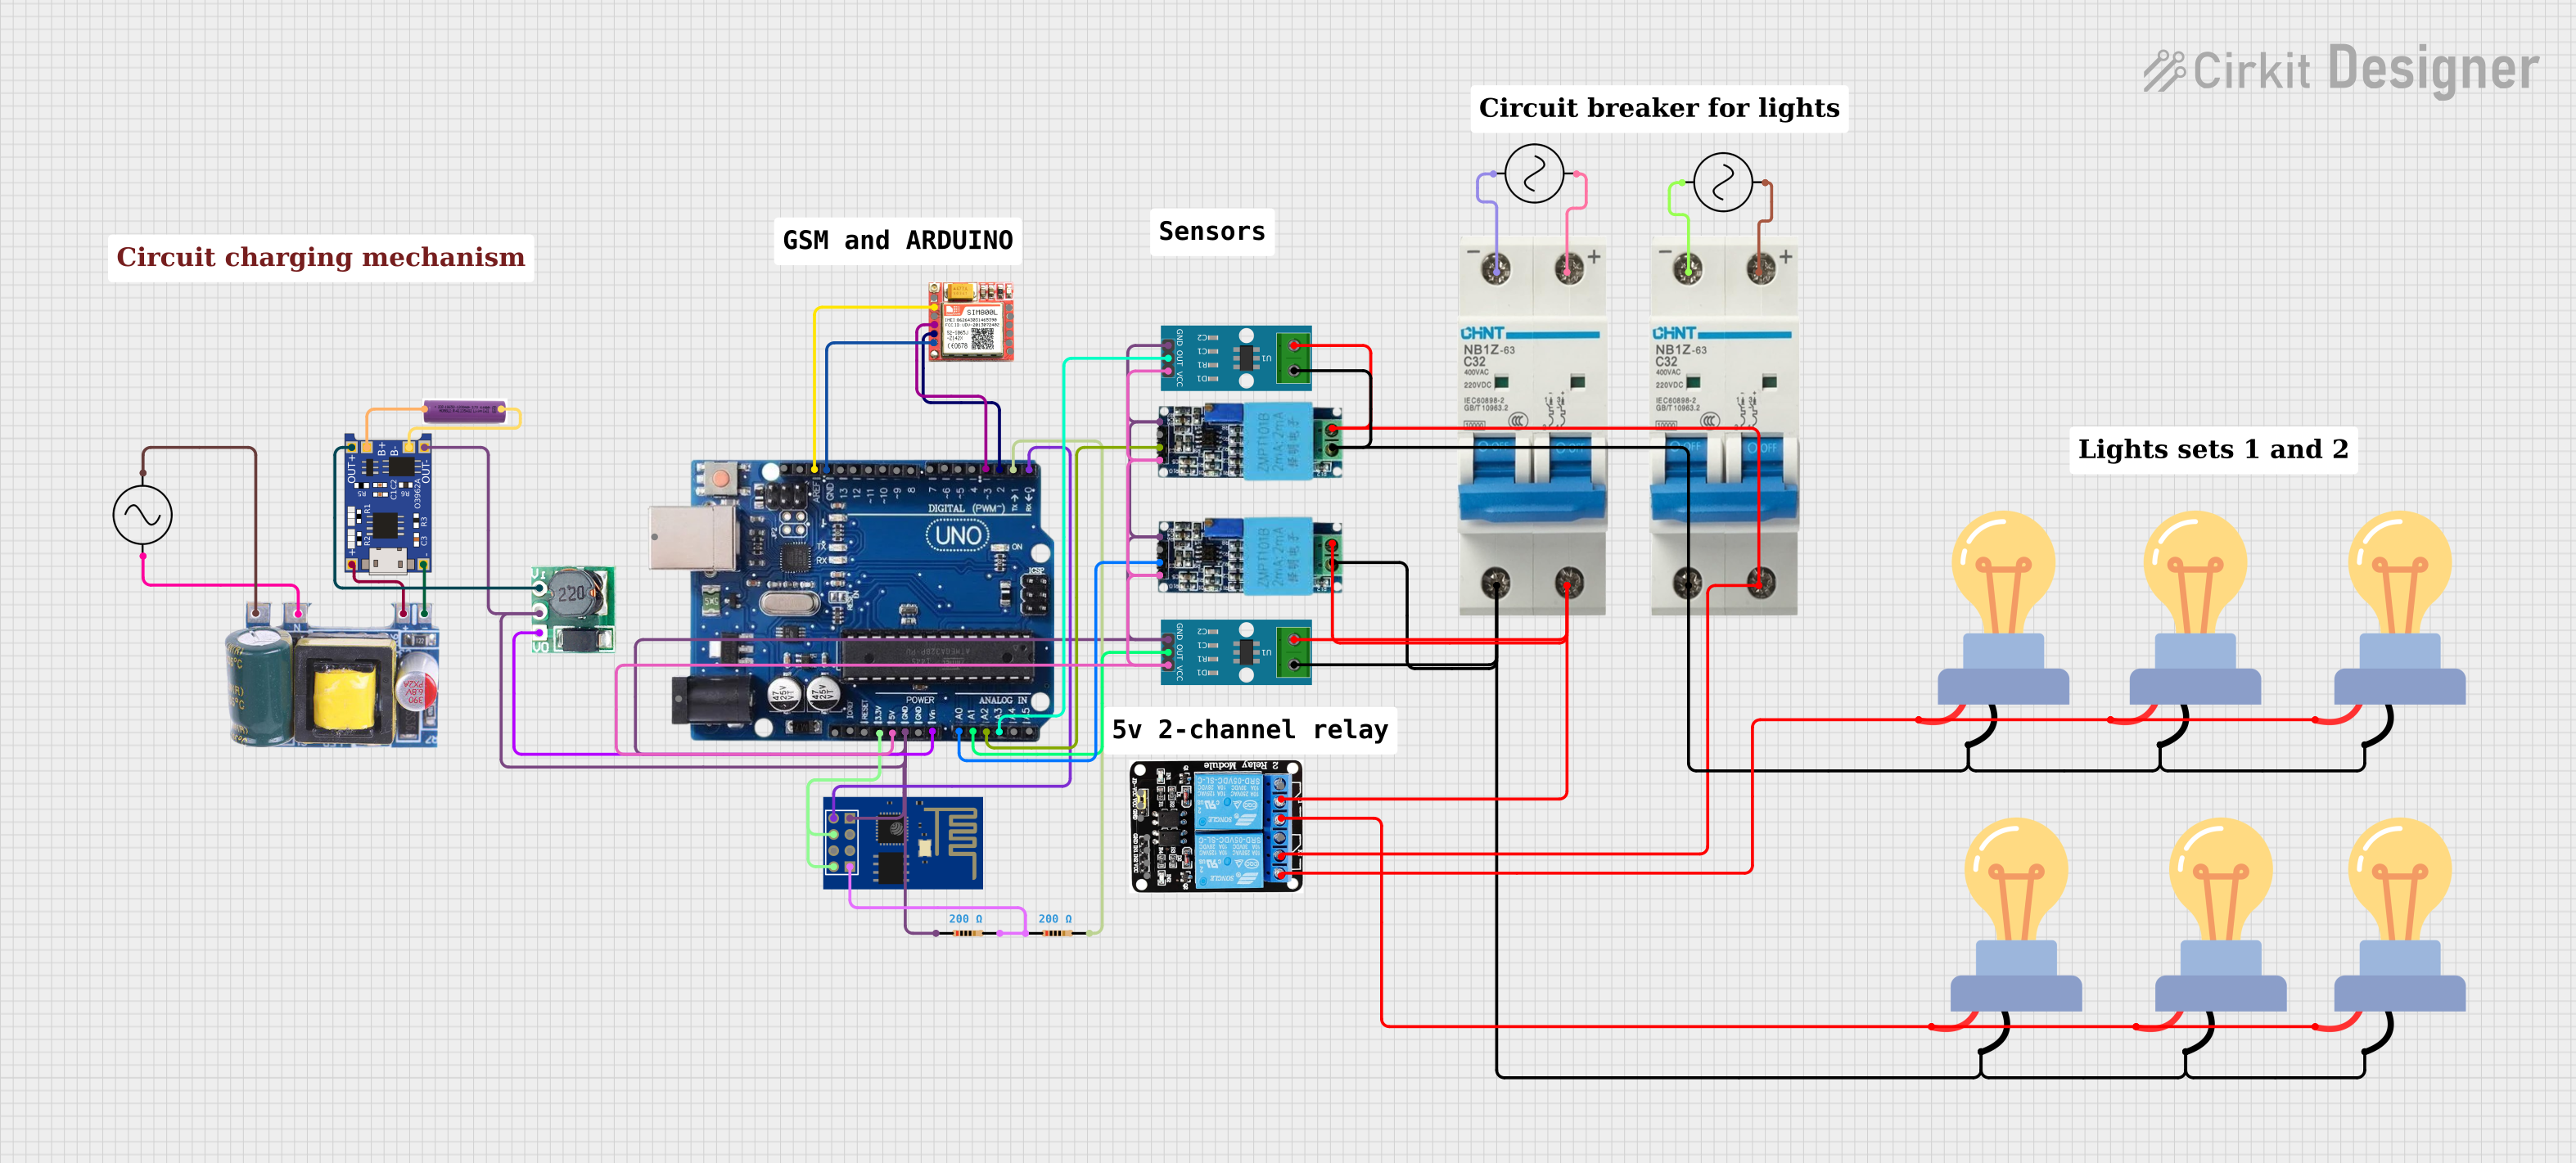
Arduino and GSM-Based Power Monitoring and Wi-Fi Controlled Lighting System
Image of light monitoring system: A project utilizing abc in a practical application
This circuit is designed to monitor voltage and current using ACS712 current sensors and voltage sensors, calculate power, and control lighting via relay modules. It features an Arduino Uno R3 for processing sensor data and executing control logic, which includes sending alerts via a GSM module (sim 800l) if power falls below a threshold and connecting to WiFi using an ESP8266 module. The circuit also includes a battery with a charging module (TP4056), a step-up boost converter, and multiple AC power supplies with circuit breakers for safety.
Cirkit Designer LogoOpen Project in Cirkit Designer
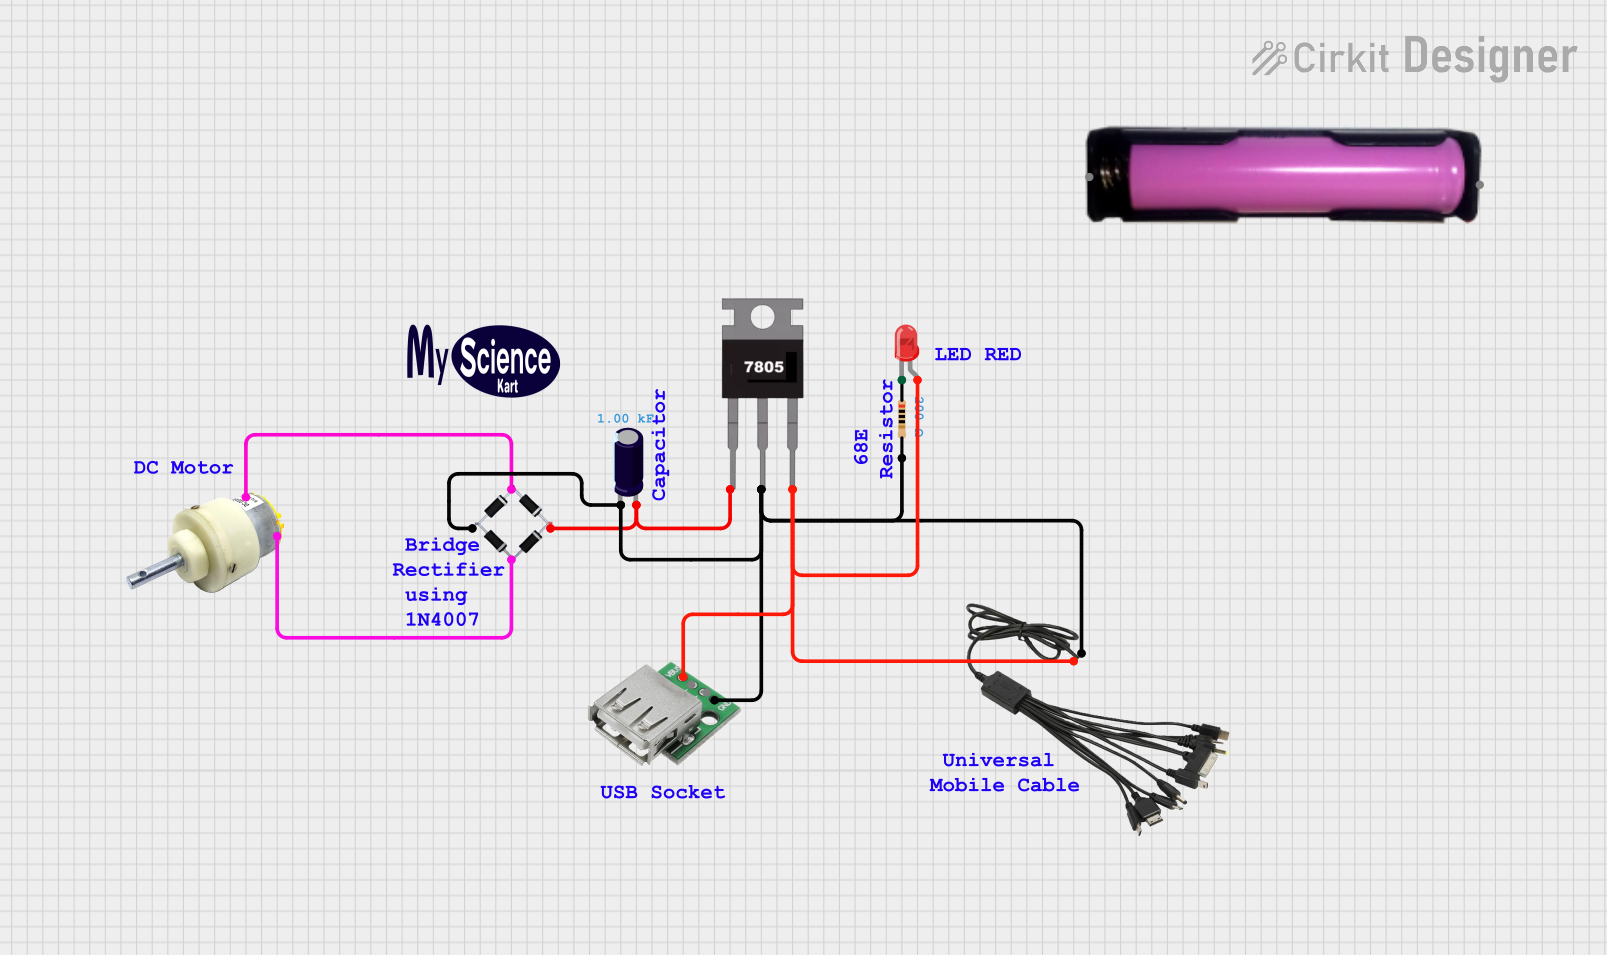
Battery-Powered USB Charger with LED Indicator and DC Motor
Image of Copy of Hand Crank mobile charger : A project utilizing abc in a practical application
This circuit converts AC power to DC using a bridge rectifier and regulates the voltage to 5V with a 7805 voltage regulator. It powers a USB port and indicates power status with an LED, while also providing a charging interface through a multi-charging cable.
Cirkit Designer LogoOpen Project in Cirkit Designer
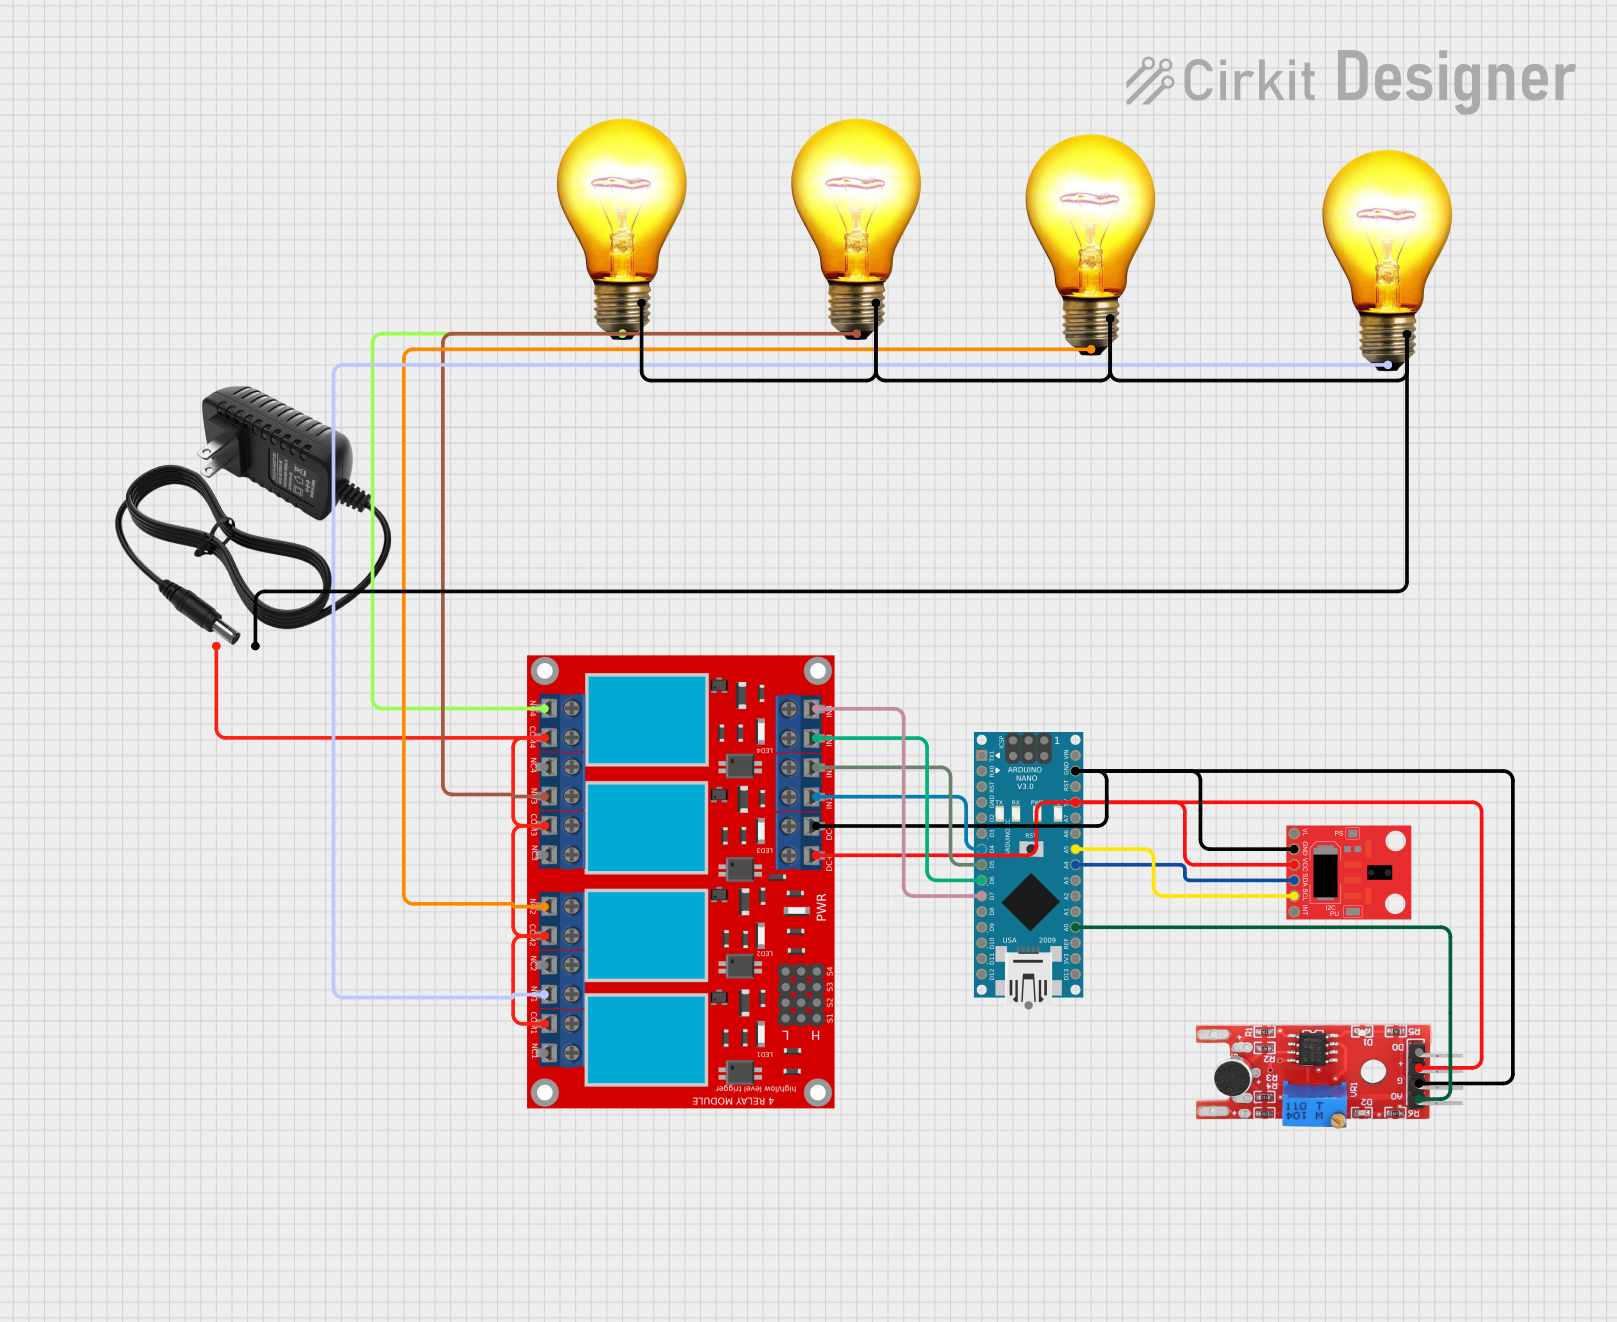
Arduino Nano-Controlled Lighting System with Gesture and Sound Interaction
Image of 4 load controll using hand gesture and sound controll: A project utilizing abc in a practical application
This circuit features an Arduino Nano microcontroller interfaced with an APDS-9960 RGB and Gesture Sensor for color and gesture detection, and a KY-038 microphone module for sound detection. The Arduino controls a 4-channel relay module, which in turn switches four AC bulbs on and off. The 12V power supply is used to power the relay module, and the bulbs are connected to the normally open (N.O.) contacts of the relays, allowing the Arduino to control the lighting based on sensor inputs.
Cirkit Designer LogoOpen Project in Cirkit Designer
AC to DC Power Supply with Transformer and Bridge Rectifier
Image of BRIDGE RECTIFIER: A project utilizing abc in a practical application
This circuit is a basic AC to DC power supply that steps down 220V AC to a lower voltage using a transformer, rectifies it to DC using a bridge rectifier made of diodes, and smooths the output with an electrolytic capacitor. A rocker switch is used to turn the power supply on and off.
Cirkit Designer LogoOpen Project in Cirkit Designer

Explore Projects Built with abc

Use Cirkit Designer to design, explore, and prototype these projects online. Some projects support real-time simulation. Click "Open Project" to start designing instantly!
Image of light monitoring system: A project utilizing abc in a practical application
Arduino and GSM-Based Power Monitoring and Wi-Fi Controlled Lighting System
This circuit is designed to monitor voltage and current using ACS712 current sensors and voltage sensors, calculate power, and control lighting via relay modules. It features an Arduino Uno R3 for processing sensor data and executing control logic, which includes sending alerts via a GSM module (sim 800l) if power falls below a threshold and connecting to WiFi using an ESP8266 module. The circuit also includes a battery with a charging module (TP4056), a step-up boost converter, and multiple AC power supplies with circuit breakers for safety.
Cirkit Designer LogoOpen Project in Cirkit Designer
Image of Copy of Hand Crank mobile charger : A project utilizing abc in a practical application
Battery-Powered USB Charger with LED Indicator and DC Motor
This circuit converts AC power to DC using a bridge rectifier and regulates the voltage to 5V with a 7805 voltage regulator. It powers a USB port and indicates power status with an LED, while also providing a charging interface through a multi-charging cable.
Cirkit Designer LogoOpen Project in Cirkit Designer
Image of 4 load controll using hand gesture and sound controll: A project utilizing abc in a practical application
Arduino Nano-Controlled Lighting System with Gesture and Sound Interaction
This circuit features an Arduino Nano microcontroller interfaced with an APDS-9960 RGB and Gesture Sensor for color and gesture detection, and a KY-038 microphone module for sound detection. The Arduino controls a 4-channel relay module, which in turn switches four AC bulbs on and off. The 12V power supply is used to power the relay module, and the bulbs are connected to the normally open (N.O.) contacts of the relays, allowing the Arduino to control the lighting based on sensor inputs.
Cirkit Designer LogoOpen Project in Cirkit Designer
Image of BRIDGE RECTIFIER: A project utilizing abc in a practical application
AC to DC Power Supply with Transformer and Bridge Rectifier
This circuit is a basic AC to DC power supply that steps down 220V AC to a lower voltage using a transformer, rectifies it to DC using a bridge rectifier made of diodes, and smooths the output with an electrolytic capacitor. A rocker switch is used to turn the power supply on and off.
Cirkit Designer LogoOpen Project in Cirkit Designer

Common Applications and Use Cases

  • Educational purposes in circuit design tutorials
  • Placeholder in schematic diagrams for future component selection
  • Prototyping and testing circuit layouts
  • Conceptual design and simulation in software tools

Technical Specifications

Since the ABC component is a generic placeholder, it does not have fixed technical specifications. However, in practical use, it is often replaced with components such as resistors, capacitors, diodes, or ICs, depending on the circuit requirements.

Pin Configuration and Descriptions

The pin configuration of the ABC component is flexible and depends on the intended replacement component. Below is an example table for a generic 2-pin placeholder:

Pin Number Pin Name Description
1 Pin 1 Generic input or connection point
2 Pin 2 Generic output or connection point

For more complex components, additional pins and descriptions may be added as needed.

Usage Instructions

The ABC component is not intended for direct use in physical circuits but serves as a placeholder in schematics or simulations. Below are some guidelines for its usage:

  1. In Circuit Design Software:

    • Use the ABC component to reserve space for a future component.
    • Label the placeholder with notes or comments to indicate the intended replacement part.
  2. In Prototyping:

    • Physically leave the space on the PCB or breadboard for the actual component.
    • Ensure that the placeholder's pin configuration matches the intended replacement.
  3. Best Practices:

    • Clearly document the purpose of the placeholder in your design notes.
    • Replace the ABC component with the actual part before finalizing the design.

Example: Using ABC with Arduino UNO

If the ABC component is intended to represent a resistor in an Arduino circuit, the following example demonstrates how to use it:

Circuit Description

  • The ABC component is used as a placeholder for a 220-ohm resistor connected to an LED.

Code Example

// Example code for controlling an LED with a placeholder resistor (ABC component)
// connected to pin 13 of the Arduino UNO.

const int ledPin = 13; // Pin connected to the LED (via ABC placeholder resistor)

void setup() {
  pinMode(ledPin, OUTPUT); // Set the LED pin as an output
}

void loop() {
  digitalWrite(ledPin, HIGH); // Turn the LED on
  delay(1000);               // Wait for 1 second
  digitalWrite(ledPin, LOW);  // Turn the LED off
  delay(1000);               // Wait for 1 second
}

Note: Replace the ABC component with a 220-ohm resistor in the actual circuit to limit the current through the LED.

Troubleshooting and FAQs

Common Issues

  1. What happens if the ABC component is not replaced?

    • If the placeholder is not replaced with the intended component, the circuit may not function as expected or could be incomplete.
  2. How do I know what component to replace the ABC with?

    • Refer to the design notes or schematic annotations for the intended replacement part.
  3. Can I use the ABC component in a physical circuit?

    • No, the ABC component is a conceptual placeholder and does not represent a physical part.

Solutions and Tips for Troubleshooting

  • Double-check the schematic: Ensure that all ABC placeholders are replaced with the correct components before assembling the circuit.
  • Simulate the circuit: Use circuit simulation software to verify the design before building it physically.
  • Label placeholders clearly: Add notes or comments in your design to avoid confusion during assembly.

By following these guidelines, the ABC component can be effectively used as a placeholder in your circuit designs and simulations.