How to Use ICHIOT DWM1000: Examples, Pinouts, and Specs
Introduction
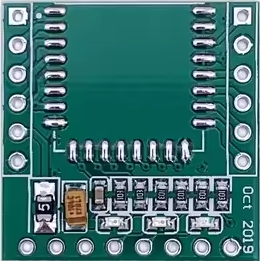
The ICHiot DWM1000 is a compact, low-power module designed for precise indoor positioning and ranging applications. It leverages Ultra-Wideband (UWB) technology to deliver highly accurate distance measurements and supports high-speed data transmission. This module is ideal for Internet of Things (IoT) devices, enabling location tracking, communication, and real-time navigation in environments where GPS signals may be unreliable or unavailable.
Explore Projects Built with ICHIOT DWM1000


Explore Projects Built with ICHIOT DWM1000
Common Applications
- Indoor navigation systems
- Asset tracking in warehouses and factories
- Real-time location systems (RTLS)
- Robotics and autonomous vehicles
- Smart home and IoT devices
- Healthcare monitoring systems
Technical Specifications
Key Technical Details
| Parameter | Value |
|---|---|
| Manufacturer | ICHiot |
| Part ID | module_Uwb |
| Technology | Ultra-Wideband (UWB) |
| Frequency Range | 3.5 GHz to 6.5 GHz |
| Data Rate | Up to 6.8 Mbps |
| Ranging Accuracy | ±10 cm |
| Operating Voltage | 2.8V to 3.6V |
| Current Consumption | 50 mA (active), 1 µA (sleep mode) |
| Communication Interface | SPI |
| Operating Temperature | -40°C to +85°C |
| Dimensions | 23 mm x 13 mm x 2.2 mm |
Pin Configuration and Descriptions
| Pin Number | Pin Name | Description |
|---|---|---|
| 1 | VCC | Power supply input (2.8V to 3.6V) |
| 2 | GND | Ground |
| 3 | SPI_MOSI | SPI Master Out Slave In |
| 4 | SPI_MISO | SPI Master In Slave Out |
| 5 | SPI_CLK | SPI Clock |
| 6 | SPI_CS | SPI Chip Select |
| 7 | RESET | Module reset (active low) |
| 8 | IRQ | Interrupt request output |
| 9 | WAKEUP | Wake-up signal for sleep mode |
| 10 | NC | Not connected |
Usage Instructions
How to Use the ICHiot DWM1000 in a Circuit
- Power Supply: Connect the VCC pin to a stable 3.3V power source and the GND pin to the ground of your circuit.
- SPI Communication: Use the SPI interface (MOSI, MISO, CLK, CS) to communicate with a microcontroller or processor. Ensure the SPI clock speed does not exceed the module's specifications.
- Reset and Wake-Up: Use the RESET pin to initialize the module and the WAKEUP pin to bring it out of sleep mode.
- Interrupt Handling: Connect the IRQ pin to a microcontroller GPIO pin to handle interrupts for events like data reception or ranging completion.
Important Considerations
- Antenna Placement: Ensure the module's antenna has a clear line of sight for optimal UWB performance. Avoid placing it near metal objects or other sources of interference.
- Power Supply Filtering: Use decoupling capacitors (e.g., 0.1 µF and 10 µF) close to the VCC pin to reduce noise and ensure stable operation.
- SPI Configuration: Configure the SPI interface on your microcontroller to match the module's settings (e.g., clock polarity and phase).
Example Code for Arduino UNO
Below is an example of how to interface the ICHiot DWM1000 with an Arduino UNO using the SPI library:
#include <SPI.h>

// Pin definitions
#define SPI_CS_PIN 10  // Chip Select pin
#define RESET_PIN 9    // Reset pin
#define IRQ_PIN 2      // Interrupt pin

void setup() {
  // Initialize serial communication for debugging
  Serial.begin(9600);

  // Configure SPI pins
  pinMode(SPI_CS_PIN, OUTPUT);
  pinMode(RESET_PIN, OUTPUT);
  pinMode(IRQ_PIN, INPUT);

  // Set initial states
  digitalWrite(SPI_CS_PIN, HIGH);  // Deselect the module
  digitalWrite(RESET_PIN, HIGH);  // Keep the module out of reset

  // Initialize SPI
  SPI.begin();
  SPI.setClockDivider(SPI_CLOCK_DIV16);  // Set SPI clock speed
  SPI.setDataMode(SPI_MODE0);           // SPI mode 0

  // Reset the module
  digitalWrite(RESET_PIN, LOW);
  delay(10);  // Hold reset for 10 ms
  digitalWrite(RESET_PIN, HIGH);
  delay(100); // Wait for the module to initialize

  Serial.println("ICHiot DWM1000 initialized.");
}

void loop() {
  // Example: Send a command to the module
  digitalWrite(SPI_CS_PIN, LOW);  // Select the module
  SPI.transfer(0x01);             // Example command byte
  digitalWrite(SPI_CS_PIN, HIGH); // Deselect the module

  delay(1000);  // Wait for 1 second
}
Notes
- Replace
0x01in theSPI.transfer()function with the actual command byte for your application. - Ensure the IRQ pin is properly configured to handle interrupts if needed.
Troubleshooting and FAQs
Common Issues and Solutions
Module Not Responding
- Cause: Incorrect power supply or SPI configuration.
- Solution: Verify the VCC and GND connections. Check the SPI clock speed and mode.
Inaccurate Ranging Results
- Cause: Obstructions or interference near the antenna.
- Solution: Ensure a clear line of sight and avoid placing the module near metal objects.
High Power Consumption
- Cause: Module not entering sleep mode.
- Solution: Use the WAKEUP pin to control sleep mode and verify the microcontroller's logic.
Interrupts Not Triggering
- Cause: IRQ pin not connected or configured.
- Solution: Connect the IRQ pin to a GPIO pin and configure it as an input.
FAQs
Q: Can the DWM1000 be used outdoors?
- A: While the module is designed for indoor use, it can be used outdoors in controlled environments. However, UWB performance may degrade due to environmental factors.
Q: What is the maximum range of the DWM1000?
- A: The module supports a maximum range of approximately 30 meters in ideal conditions.
Q: Is the DWM1000 compatible with other UWB modules?
- A: Yes, the DWM1000 is interoperable with other UWB modules that comply with the IEEE 802.15.4-2011 UWB standard.
Q: How do I update the firmware?
- A: Firmware updates can be performed via the SPI interface. Refer to the manufacturer's documentation for detailed instructions.