How to Use Audio Amp: Examples, Pinouts, and Specs
Introduction
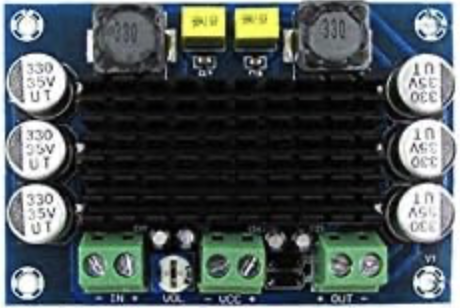
The HiLetgo TPA3116 100W Audio Amplifier is a high-performance, efficient Class D amplifier designed to boost low-level audio signals to a higher level, enabling them to drive speakers or headphones for sound reproduction. This amplifier is based on the TPA3116 chip, which is known for its low distortion, high efficiency, and excellent sound quality.
Explore Projects Built with Audio Amp
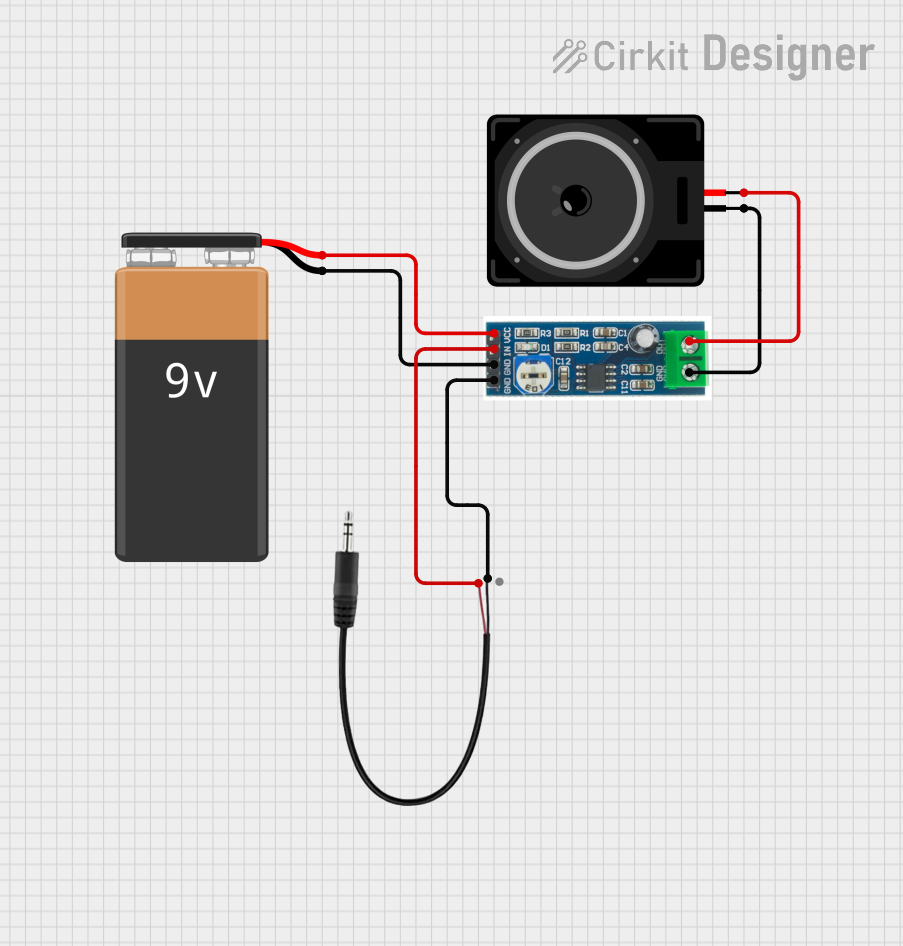


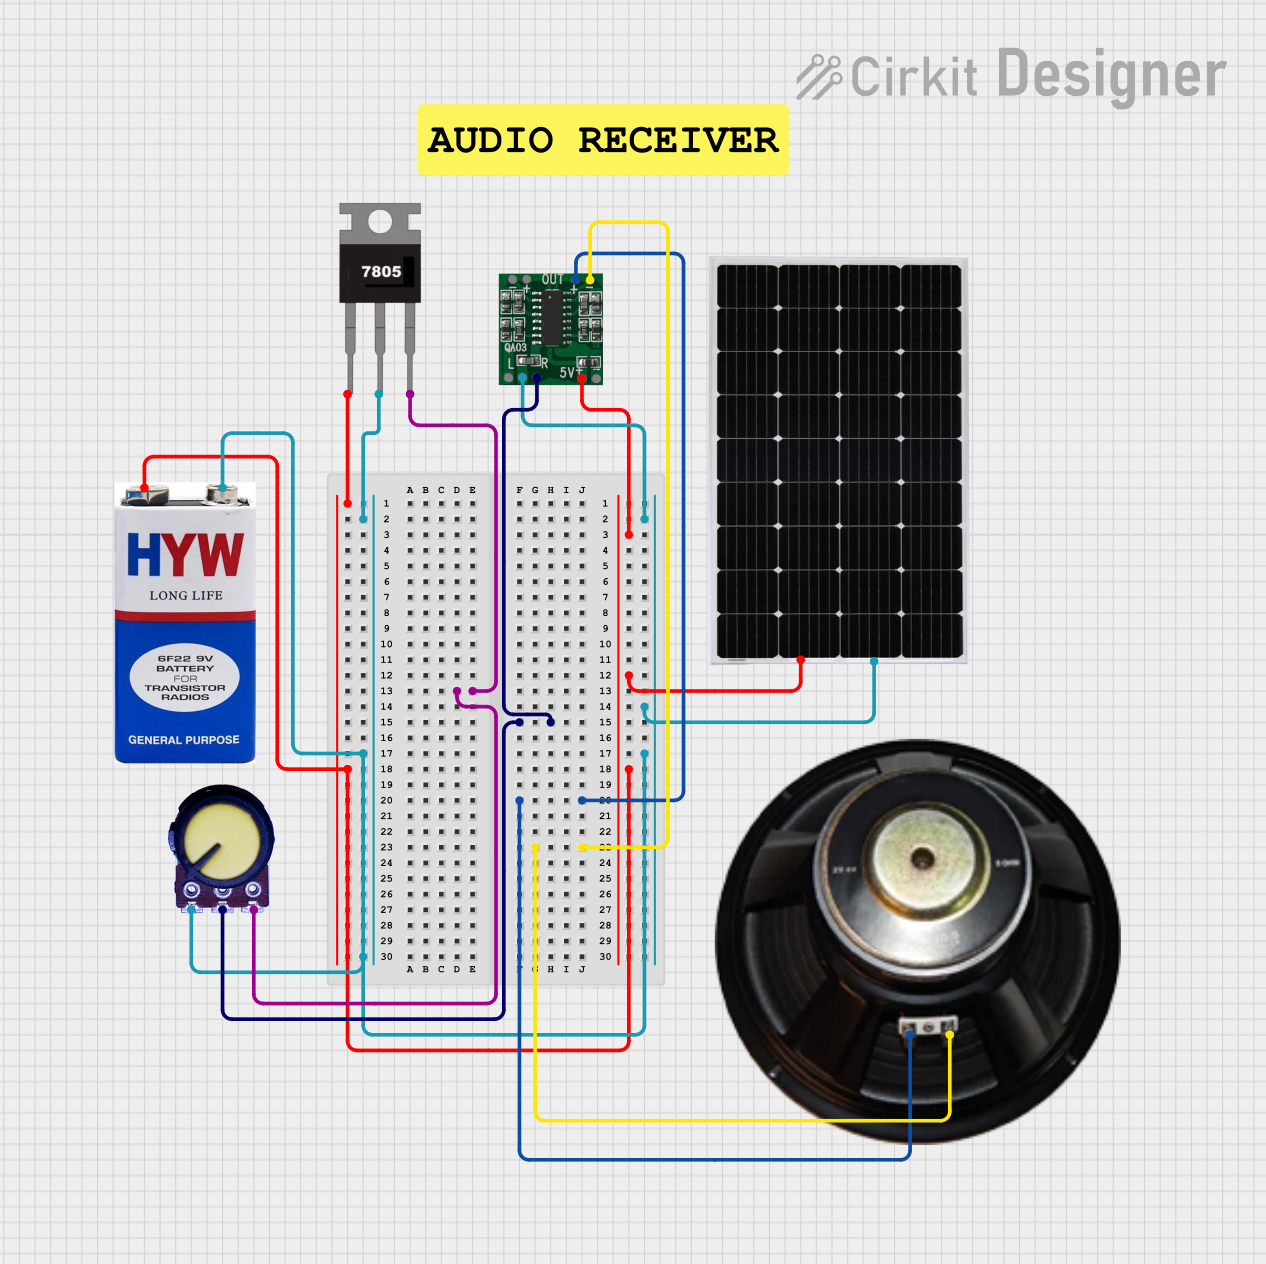
Explore Projects Built with Audio Amp
Common Applications and Use Cases
- Home audio systems
- DIY speaker projects
- Portable Bluetooth speakers
- Car audio systems
- Public address (PA) systems
- Audio signal amplification for headphones or small speakers
Technical Specifications
The following table outlines the key technical details of the HiLetgo TPA3116 100W Audio Amplifier:
| Parameter | Value |
|---|---|
| Manufacturer | HiLetgo |
| Part ID | TPA3116 100W |
| Amplifier Type | Class D |
| Output Power | Up to 100W per channel (stereo) |
| Operating Voltage Range | 8V to 26V DC |
| Efficiency | Up to 90% |
| Signal-to-Noise Ratio | ≥ 100 dB |
| Total Harmonic Distortion | ≤ 0.1% |
| Input Impedance | 20 kΩ |
| Frequency Response | 20 Hz to 20 kHz |
| Dimensions | 82mm x 52mm x 20mm |
Pin Configuration and Descriptions
The HiLetgo TPA3116 100W Audio Amplifier has the following pin connections:
| Pin Name | Description |
|---|---|
| VIN | Power input (8V to 26V DC) |
| GND | Ground connection |
| L_IN | Left channel audio input |
| R_IN | Right channel audio input |
| L_OUT+ | Positive output for the left speaker |
| L_OUT- | Negative output for the left speaker |
| R_OUT+ | Positive output for the right speaker |
| R_OUT- | Negative output for the right speaker |
| GND (Audio) | Ground for audio signal |
| Volume Pot | Connects to an external potentiometer for volume control (optional) |
Usage Instructions
How to Use the Component in a Circuit
- Power Supply: Connect a DC power supply (8V to 26V) to the
VINandGNDpins. Ensure the power supply can provide sufficient current for the desired output power. - Audio Input: Connect the left and right audio input signals to the
L_INandR_INpins, respectively. These signals can come from a preamplifier, audio source, or microcontroller. - Speaker Connection: Connect the left speaker to the
L_OUT+andL_OUT-pins, and the right speaker to theR_OUT+andR_OUT-pins. Ensure the speakers match the amplifier's power rating. - Volume Control (Optional): If desired, connect a potentiometer to the volume control pins to adjust the output volume.
- Power On: Turn on the power supply. The amplifier will begin boosting the audio signal to drive the connected speakers.
Important Considerations and Best Practices
- Heat Dissipation: The TPA3116 amplifier can generate heat during operation. Use a heatsink or active cooling to prevent overheating, especially at high power levels.
- Speaker Impedance: Ensure the connected speakers have an impedance of 4Ω to 8Ω for optimal performance.
- Power Supply: Use a stable and noise-free power supply to avoid introducing unwanted noise into the audio signal.
- Signal Grounding: Properly ground the audio input and power supply to minimize noise and interference.
- Volume Adjustment: If using a potentiometer for volume control, ensure it is rated for audio applications and connected correctly.
Example: Connecting to an Arduino UNO
The TPA3116 amplifier can be used with an Arduino UNO to amplify audio signals generated by the microcontroller. Below is an example code snippet to generate a simple tone:
// Example: Generating a tone for the TPA3116 amplifier using Arduino UNO
// Connect the Arduino's PWM pin (e.g., pin 9) to the amplifier's audio input (L_IN or R_IN).

const int audioPin = 9; // PWM pin connected to the amplifier's audio input

void setup() {
  pinMode(audioPin, OUTPUT); // Set the audio pin as an output
}

void loop() {
  // Generate a 1 kHz tone
  tone(audioPin, 1000); // Play a 1 kHz tone on the audio pin
  delay(1000);          // Play the tone for 1 second
  noTone(audioPin);     // Stop the tone
  delay(1000);          // Wait for 1 second before repeating
}
Note: The Arduino's PWM output is not a high-quality audio source. For better sound quality, use a dedicated audio DAC or preamplifier.
Troubleshooting and FAQs
Common Issues and Solutions
No Sound Output
- Cause: Incorrect wiring or loose connections.
- Solution: Double-check all connections, especially the power supply, audio input, and speaker connections.
Distorted Audio
- Cause: Overdriving the amplifier or using mismatched speakers.
- Solution: Reduce the input signal level or ensure the speakers match the amplifier's power and impedance ratings.
Overheating
- Cause: Insufficient cooling or operating at high power levels for extended periods.
- Solution: Add a heatsink or active cooling to the amplifier.
Noise or Interference
- Cause: Poor grounding or noisy power supply.
- Solution: Use a clean, stable power supply and ensure proper grounding of all components.
FAQs
Q1: Can I use this amplifier with a 12V power supply?
A1: Yes, the TPA3116 amplifier works with a 12V power supply. However, the output power will be lower compared to using a higher voltage supply.
Q2: What is the maximum speaker impedance supported?
A2: The amplifier is optimized for speakers with an impedance of 4Ω to 8Ω.
Q3: Can I use this amplifier for mono audio?
A3: Yes, you can use only one channel (left or right) for mono audio. Simply connect the desired input and output pins.
Q4: Is it possible to connect this amplifier to a Bluetooth module?
A4: Yes, you can connect the audio output of a Bluetooth module to the amplifier's L_IN and R_IN pins for wireless audio playback.
Q5: How do I adjust the volume?
A5: You can adjust the volume using an external potentiometer connected to the amplifier's volume control pins or by controlling the input signal level.