
How to Use NHD-TFT40: Examples, Pinouts, and Specs
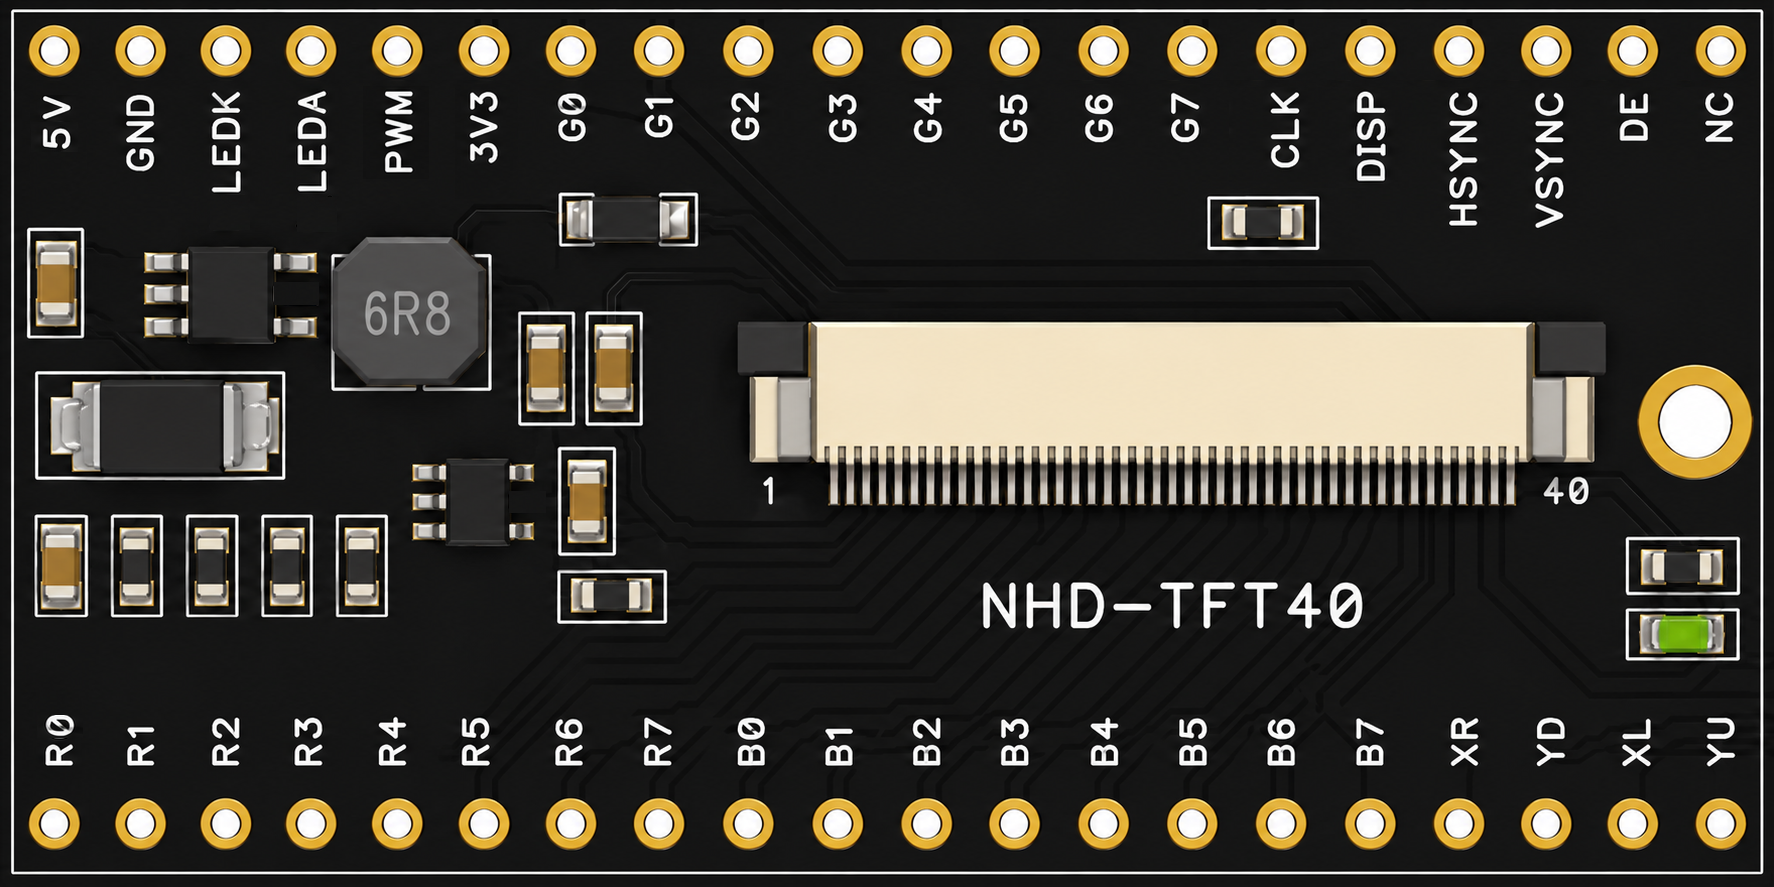
 Design with NHD-TFT40 in Cirkit Designer
Introduction
The NHD-TFT40 is a 4-inch TFT LCD display module manufactured by Newhaven. It features a high-resolution color display, making it ideal for applications requiring vibrant and detailed visual output. This module is commonly used in embedded systems, graphical user interfaces, industrial control panels, and consumer electronics. With its integrated controller, the NHD-TFT40 simplifies interfacing with microcontrollers, enabling developers to create visually appealing and interactive designs.
Explore Projects Built with NHD-TFT40
 Open Project in Cirkit Designer
 Open Project in Cirkit Designer
 Open Project in Cirkit Designer
 Open Project in Cirkit Designer
Explore Projects Built with NHD-TFT40
Open Project in Cirkit DesignerOpen Project in Cirkit DesignerOpen Project in Cirkit DesignerOpen Project in Cirkit DesignerTechnical Specifications
Below are the key technical details of the NHD-TFT40:
| Parameter | Specification |
|---|---|
| Display Type | TFT LCD |
| Screen Size | 4 inches |
| Resolution | 480 x 272 pixels |
| Interface | 24-bit RGB Parallel |
| Controller | Integrated (e.g., SSD1963 or similar) |
| Operating Voltage | 3.3V (logic) |
| Backlight Voltage | 9.6V (typical) |
| Backlight Current | 40mA (typical) |
| Viewing Angle | 12 o'clock |
| Operating Temperature | -20°C to 70°C |
| Storage Temperature | -30°C to 80°C |
Pin Configuration and Descriptions
The NHD-TFT40 module typically includes a 40-pin interface. Below is the pin configuration:
| Pin Number | Pin Name | Description |
|---|---|---|
| 1-8 | DB0-DB7 | Data Bus (Lower Byte) |
| 9-16 | DB8-DB15 | Data Bus (Upper Byte) |
| 17 | HSYNC | Horizontal Sync Signal |
| 18 | VSYNC | Vertical Sync Signal |
| 19 | DOTCLK | Pixel Clock |
| 20 | ENABLE | Data Enable Signal |
| 21 | RESET | Reset Signal (Active Low) |
| 22 | CS | Chip Select (Active Low) |
| 23 | RS | Register Select (Command/Data Selection) |
| 24 | WR | Write Signal |
| 25 | RD | Read Signal |
| 26 | VCC | Power Supply (3.3V) |
| 27 | GND | Ground |
| 28-40 | LED+ / LED- | Backlight Power and Ground |
Note: The exact pinout may vary depending on the specific variant of the NHD-TFT40. Always refer to the manufacturer's datasheet for precise details.
Usage Instructions
How to Use the NHD-TFT40 in a Circuit
- Power Supply: Connect the VCC pin to a 3.3V regulated power source and GND to ground. Ensure the backlight pins (LED+ and LED-) are connected to a suitable power source (e.g., 9.6V with a current-limiting resistor if required).
- Data Interface: Use the 24-bit RGB parallel interface to send pixel data. Connect the data bus pins (DB0-DB15) to the microcontroller or driver IC.
- Control Signals: Connect the control pins (HSYNC, VSYNC, DOTCLK, ENABLE, RESET, etc.) to the appropriate microcontroller GPIOs.
- Initialization: Configure the display controller (e.g., SSD1963) with the correct initialization sequence. This includes setting the resolution, timing parameters, and enabling the display.
- Software Integration: Use a compatible graphics library (e.g., Adafruit GFX or custom code) to render images, text, and other graphical elements.
Important Considerations and Best Practices
- Voltage Levels: Ensure all signal levels are compatible with the 3.3V logic of the NHD-TFT40. Use level shifters if interfacing with a 5V microcontroller.
- Backlight Control: Use a PWM signal to control the brightness of the backlight for power efficiency and user comfort.
- Timing Parameters: Configure the horizontal and vertical sync signals according to the datasheet to avoid display artifacts.
- Static Protection: Handle the module with care to prevent damage from electrostatic discharge (ESD).
Example Code for Arduino UNO
Below is an example of how to interface the NHD-TFT40 with an Arduino UNO using a compatible display controller (e.g., SSD1963):
#include <Adafruit_GFX.h>  // Include Adafruit GFX library for graphics
#include <TFTLCD.h>        // Include a library for the TFT controller

#define LCD_CS A3  // Chip Select pin
#define LCD_CD A2  // Command/Data pin
#define LCD_WR A1  // Write pin
#define LCD_RD A0  // Read pin
#define LCD_RESET A4  // Reset pin

// Initialize the TFT display object
TFTLCD tft(LCD_CS, LCD_CD, LCD_WR, LCD_RD, LCD_RESET);

void setup() {
  tft.reset();  // Reset the display
  tft.begin(0x1963);  // Initialize with the SSD1963 controller ID

  // Set up the display
  tft.fillScreen(0x0000);  // Clear the screen (black)
  tft.setCursor(0, 0);     // Set cursor to top-left corner
  tft.setTextColor(0xFFFF); // Set text color to white
  tft.setTextSize(2);      // Set text size
  tft.println("Hello, NHD-TFT40!");  // Display text
}

void loop() {
  // Add your code here to update the display
}
Note: Ensure the appropriate libraries are installed and the wiring matches the pin definitions in the code.
Troubleshooting and FAQs
Common Issues
No Display Output:
- Verify the power connections (VCC and GND).
- Check the backlight connections (LED+ and LED-).
- Ensure the initialization sequence is correctly implemented in the code.
Distorted or Flickering Display:
- Confirm the timing parameters (HSYNC, VSYNC, DOTCLK) match the datasheet specifications.
- Check for loose or incorrect wiring on the data bus.
Display Not Responding to Commands:
- Ensure the control signals (CS, RS, WR, RD) are correctly connected and toggled.
- Verify the microcontroller logic levels are compatible with the display.
Tips for Troubleshooting
- Use a multimeter to check voltage levels at the power and signal pins.
- Test the display with a known working example code to rule out software issues.
- Refer to the manufacturer's datasheet for detailed electrical and timing requirements.
FAQ: Can the NHD-TFT40 be used with a 5V microcontroller? Answer: Yes, but you must use level shifters to convert the 5V logic signals to 3.3V to avoid damaging the display.
By following this documentation, you can successfully integrate the NHD-TFT40 into your project and create stunning graphical interfaces.