How to Use 12V Air Pump: Examples, Pinouts, and Specs
Introduction
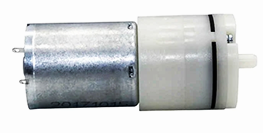
The DEWIN 12V Air Pump (Part ID: Pump) is a compact and efficient device designed to compress air and inflate various objects such as tires, balloons, air mattresses, and other inflatable items. Powered by a 12V DC power supply, this air pump is ideal for portable and automotive applications, offering convenience and reliability in a wide range of scenarios.
Explore Projects Built with 12V Air Pump

Explore Projects Built with 12V Air Pump
Common Applications and Use Cases
- Inflating car, bike, or motorcycle tires
- Filling air mattresses, inflatable pools, or camping gear
- Inflating sports equipment such as basketballs or soccer balls
- General-purpose air compression tasks in DIY projects
Technical Specifications
The following table outlines the key technical details of the DEWIN 12V Air Pump:
| Parameter | Specification |
|---|---|
| Operating Voltage | 12V DC |
| Current Consumption | 3A (typical) |
| Maximum Pressure | 120 PSI |
| Air Flow Rate | 25 liters per minute (L/min) |
| Dimensions | 150mm x 80mm x 60mm |
| Weight | 0.8 kg |
| Noise Level | ≤ 65 dB |
| Operating Temperature | -10°C to 60°C |
| Connector Type | DC barrel jack or alligator clips |
Pin Configuration and Descriptions
The DEWIN 12V Air Pump has a simple two-wire connection for power input:
| Pin/Connection | Description |
|---|---|
| Red Wire (+) | Positive terminal (12V DC) |
| Black Wire (-) | Negative terminal (Ground) |
Usage Instructions
How to Use the 12V Air Pump in a Circuit
- Power Supply: Connect the red wire to the positive terminal of a 12V DC power source and the black wire to the ground terminal. Ensure the power supply can provide at least 3A of current.
- Switch Control: Optionally, include a switch in series with the red wire to control the pump's operation.
- Load Connection: Attach the air pump's nozzle securely to the object you wish to inflate.
- Operation: Turn on the power supply or switch to activate the pump. Monitor the inflation process to avoid over-pressurizing the object.
Important Considerations and Best Practices
- Power Source: Use a stable 12V DC power supply capable of delivering at least 3A to ensure proper operation.
- Heat Management: Avoid running the pump continuously for more than 10 minutes to prevent overheating. Allow the pump to cool down between uses.
- Pressure Monitoring: Use a pressure gauge to monitor the inflation process and avoid exceeding the maximum pressure rating of the object being inflated.
- Polarity Check: Ensure correct polarity when connecting the wires to prevent damage to the pump.
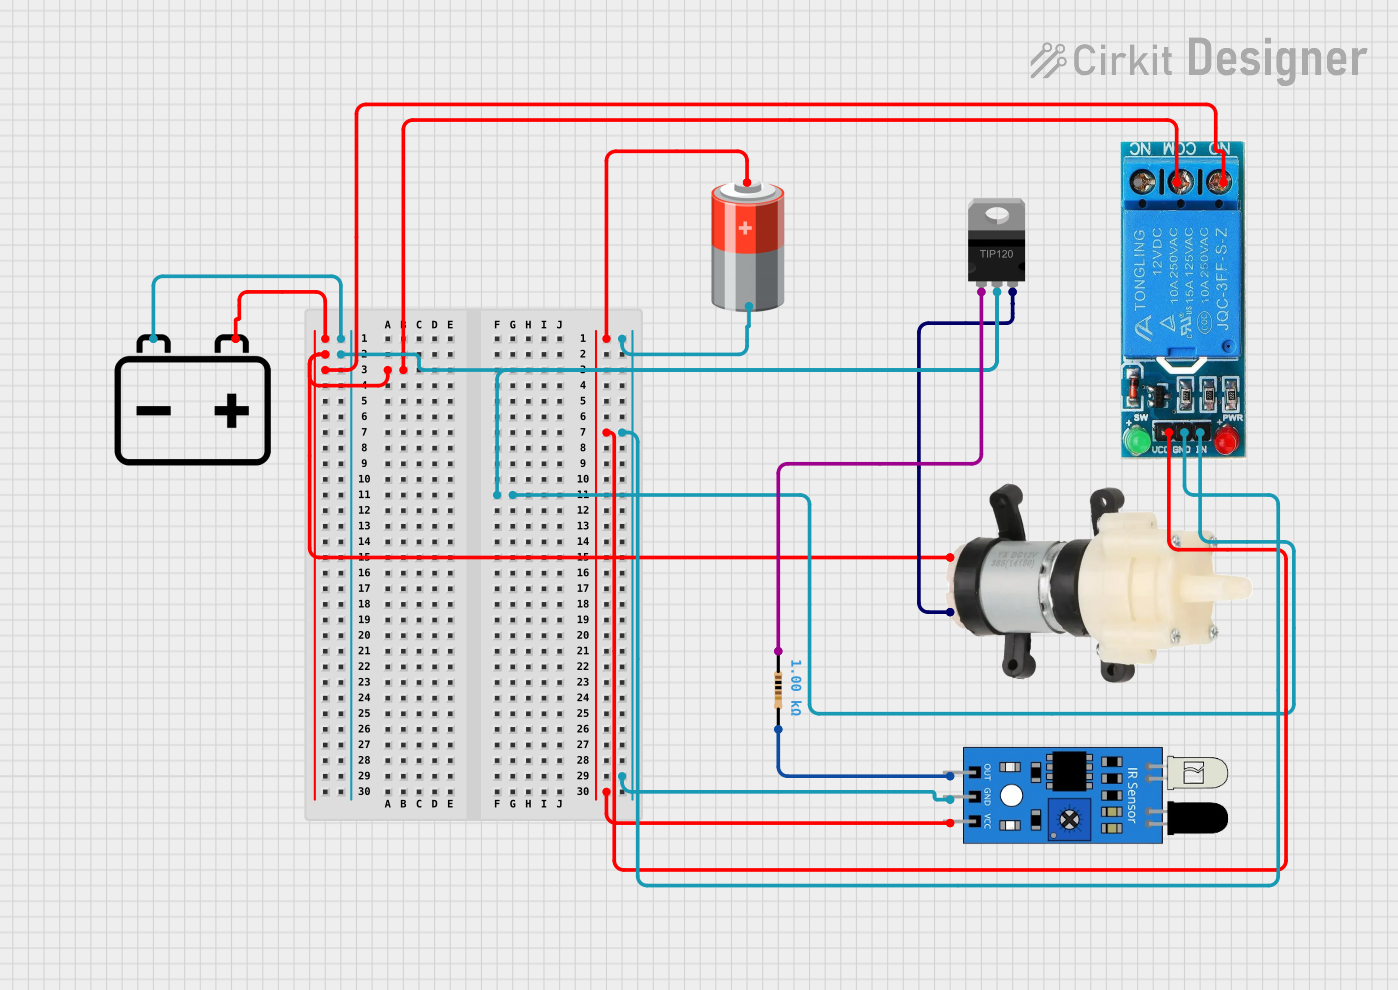
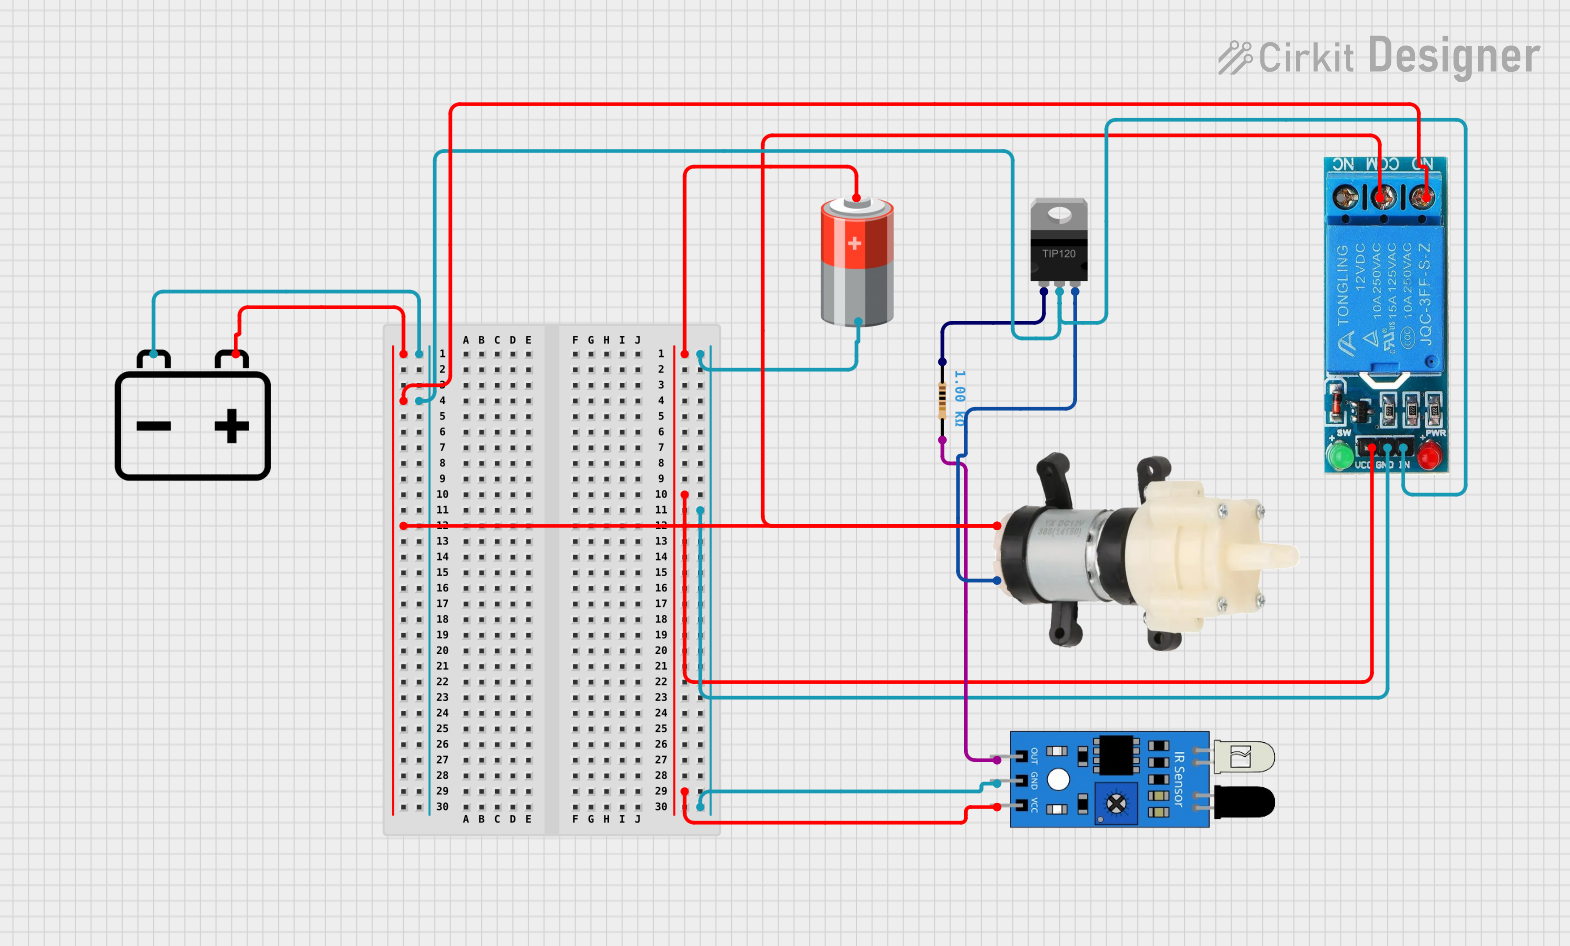
Example: Controlling the Air Pump with an Arduino UNO
The DEWIN 12V Air Pump can be controlled using an Arduino UNO and a relay module. Below is an example circuit and code:
Circuit Diagram
- Connect the red wire of the pump to the NO (Normally Open) terminal of the relay.
- Connect the COM (Common) terminal of the relay to the 12V DC power supply.
- Connect the black wire of the pump to the ground terminal of the power supply.
- Connect the relay module's control pin to Arduino pin 7.
Arduino Code
// This code demonstrates how to control the DEWIN 12V Air Pump using an Arduino UNO
// and a relay module. The pump will turn on for 5 seconds and then turn off.

const int relayPin = 7; // Pin connected to the relay module

void setup() {
  pinMode(relayPin, OUTPUT); // Set the relay pin as an output
  digitalWrite(relayPin, LOW); // Ensure the relay is off at startup
}

void loop() {
  digitalWrite(relayPin, HIGH); // Turn on the pump
  delay(5000); // Keep the pump on for 5 seconds
  digitalWrite(relayPin, LOW); // Turn off the pump
  delay(10000); // Wait for 10 seconds before repeating
}
Troubleshooting and FAQs
Common Issues and Solutions
Pump Does Not Start
- Cause: Insufficient power supply or incorrect wiring.
- Solution: Verify that the power supply provides 12V DC and at least 3A. Check the wiring for proper connections and polarity.
Pump Overheats
- Cause: Prolonged operation without cooling.
- Solution: Limit the pump's runtime to 10 minutes and allow it to cool before restarting.
Low Air Pressure
- Cause: Blocked or loose nozzle connection.
- Solution: Ensure the nozzle is securely attached and free of obstructions.
Excessive Noise
- Cause: Loose mounting or worn components.
- Solution: Secure the pump to a stable surface and inspect for wear or damage.
FAQs
Q: Can I use the pump with a car battery?
A: Yes, the pump can be powered directly from a 12V car battery using alligator clips.Q: Is the pump waterproof?
A: No, the pump is not waterproof. Avoid exposing it to water or moisture.Q: Can the pump be used for vacuum applications?
A: No, this pump is designed for air compression and inflation only.Q: What is the maximum runtime for the pump?
A: The pump should not be operated continuously for more than 10 minutes to prevent overheating.