How to Use Leonardo Tiny Atmega32U4: Examples, Pinouts, and Specs
Introduction
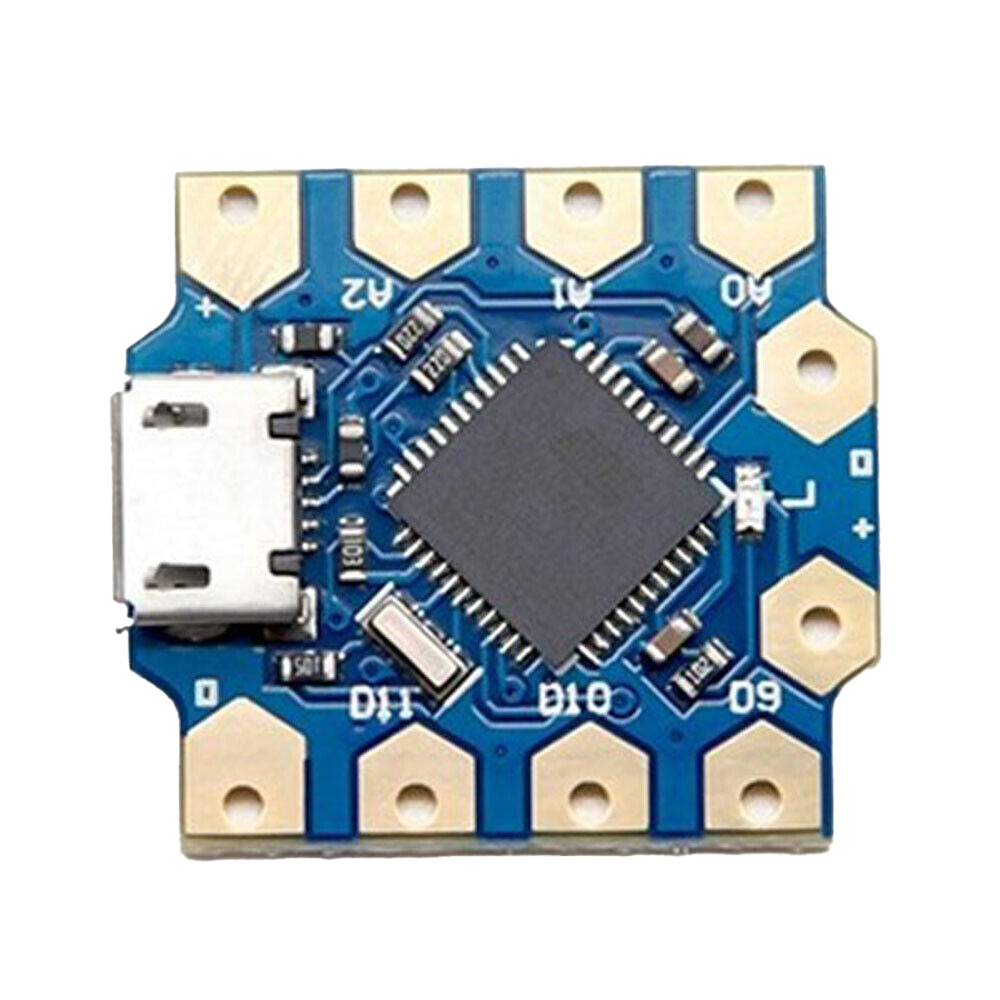
The Leonardo Tiny Atmega32U4 is a compact microcontroller board designed by Duinotech, part of Jaycar Electronics' range of electronic components. Based on the ATmega32U4 microcontroller, this board stands out for its built-in USB communication, allowing it to emulate a computer keyboard, mouse, or other HID class USB devices. This feature makes it particularly suitable for projects that require interfacing with a computer or other USB hosts directly without the need for an additional USB-serial converter.
Explore Projects Built with Leonardo Tiny Atmega32U4

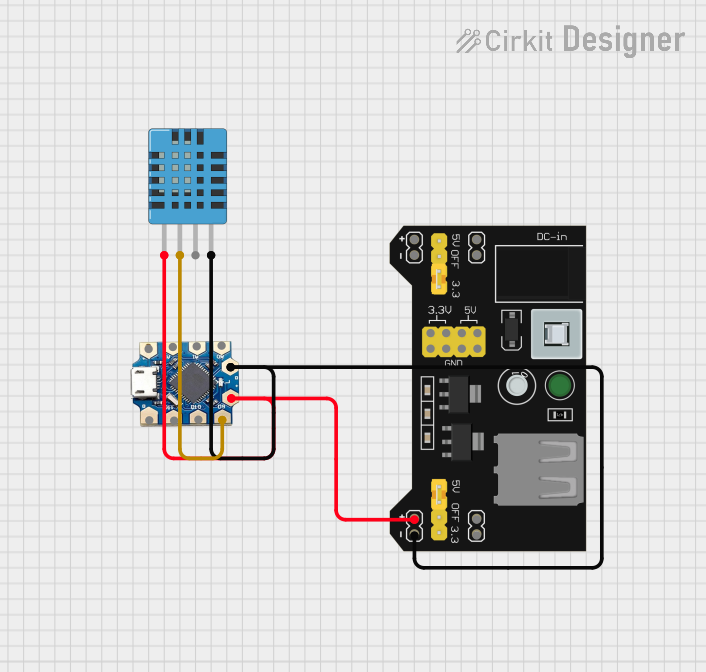
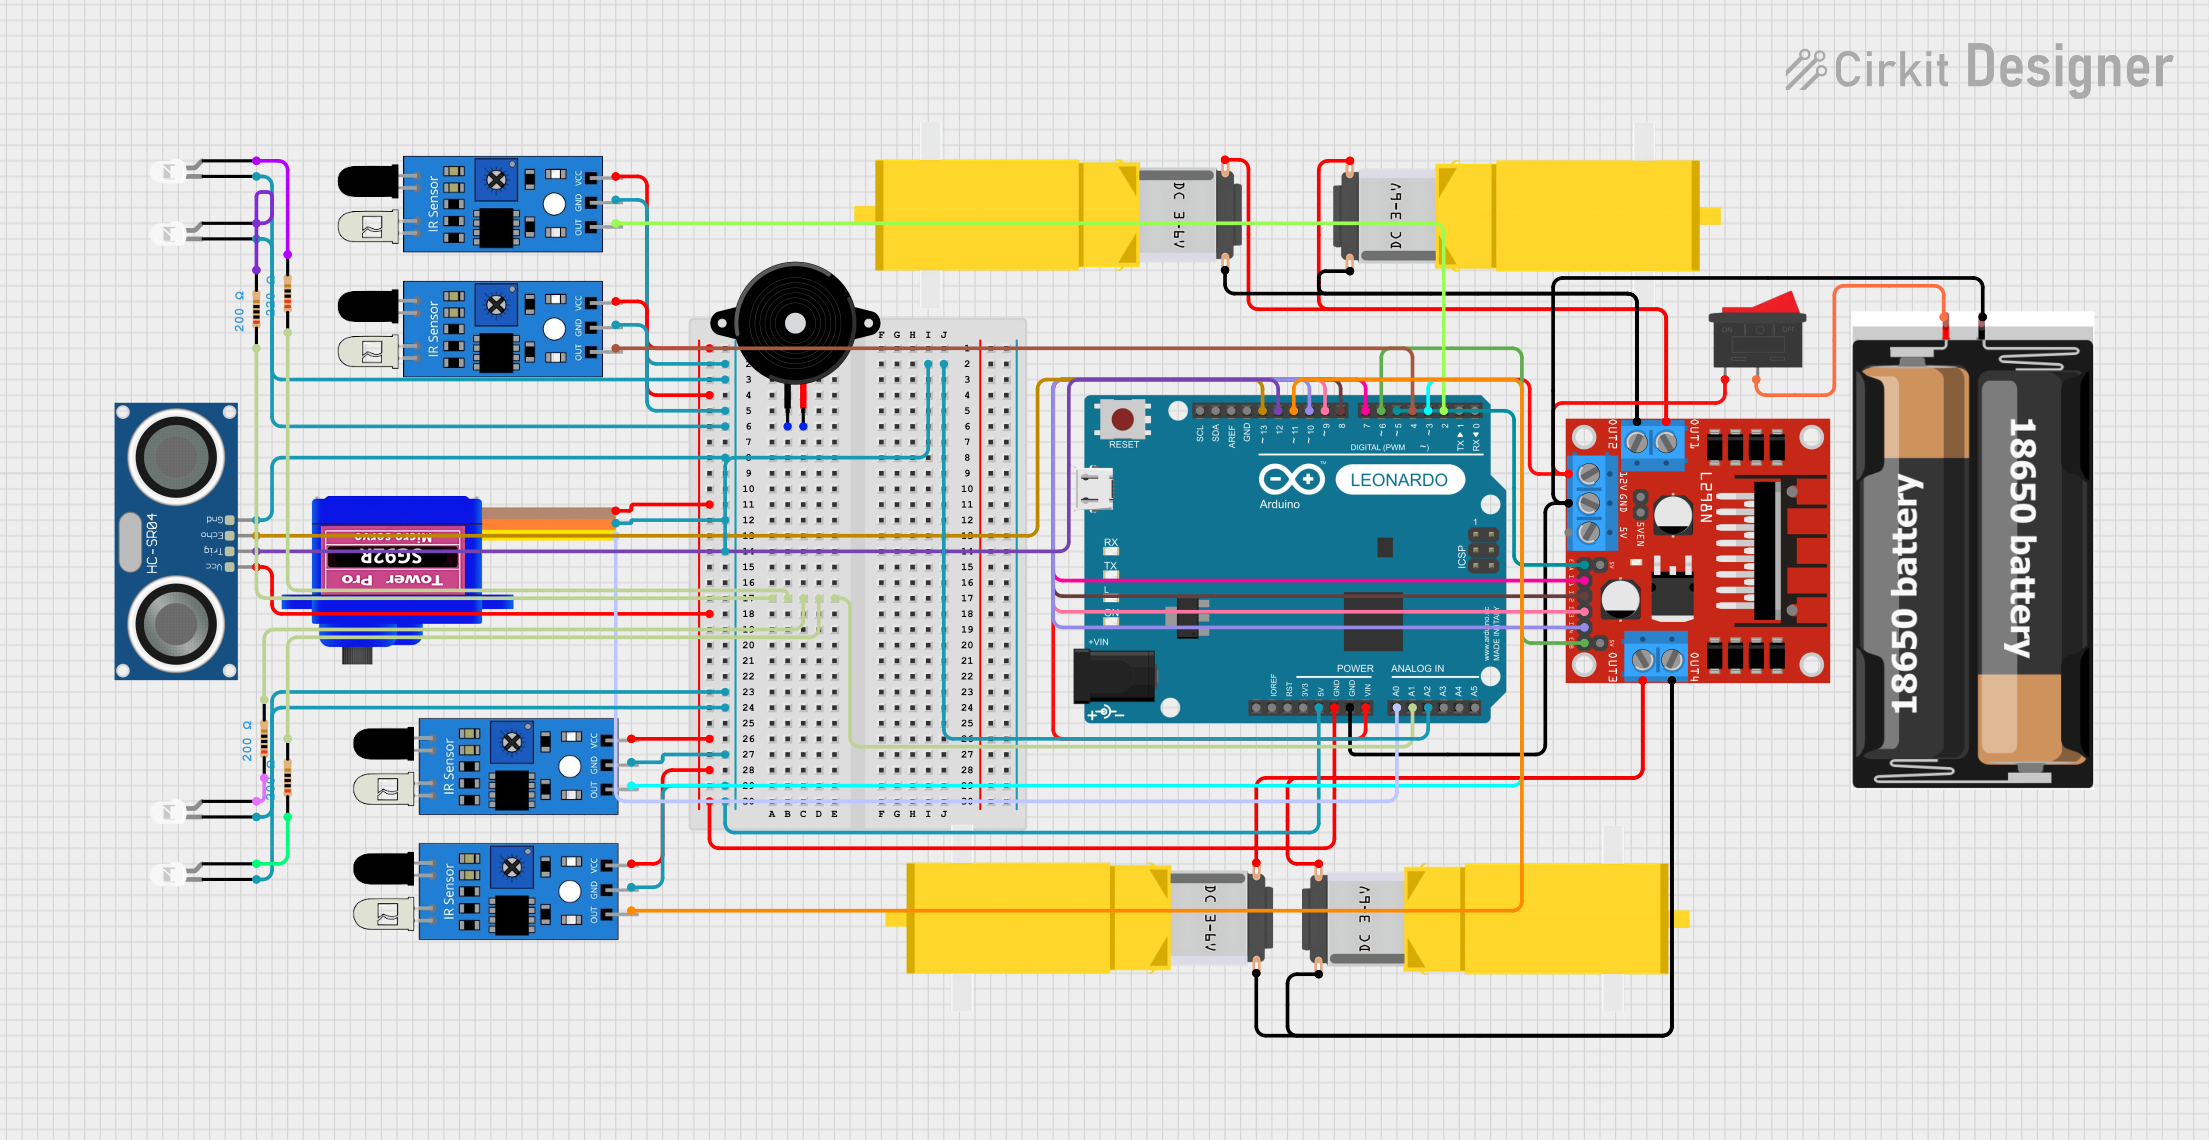
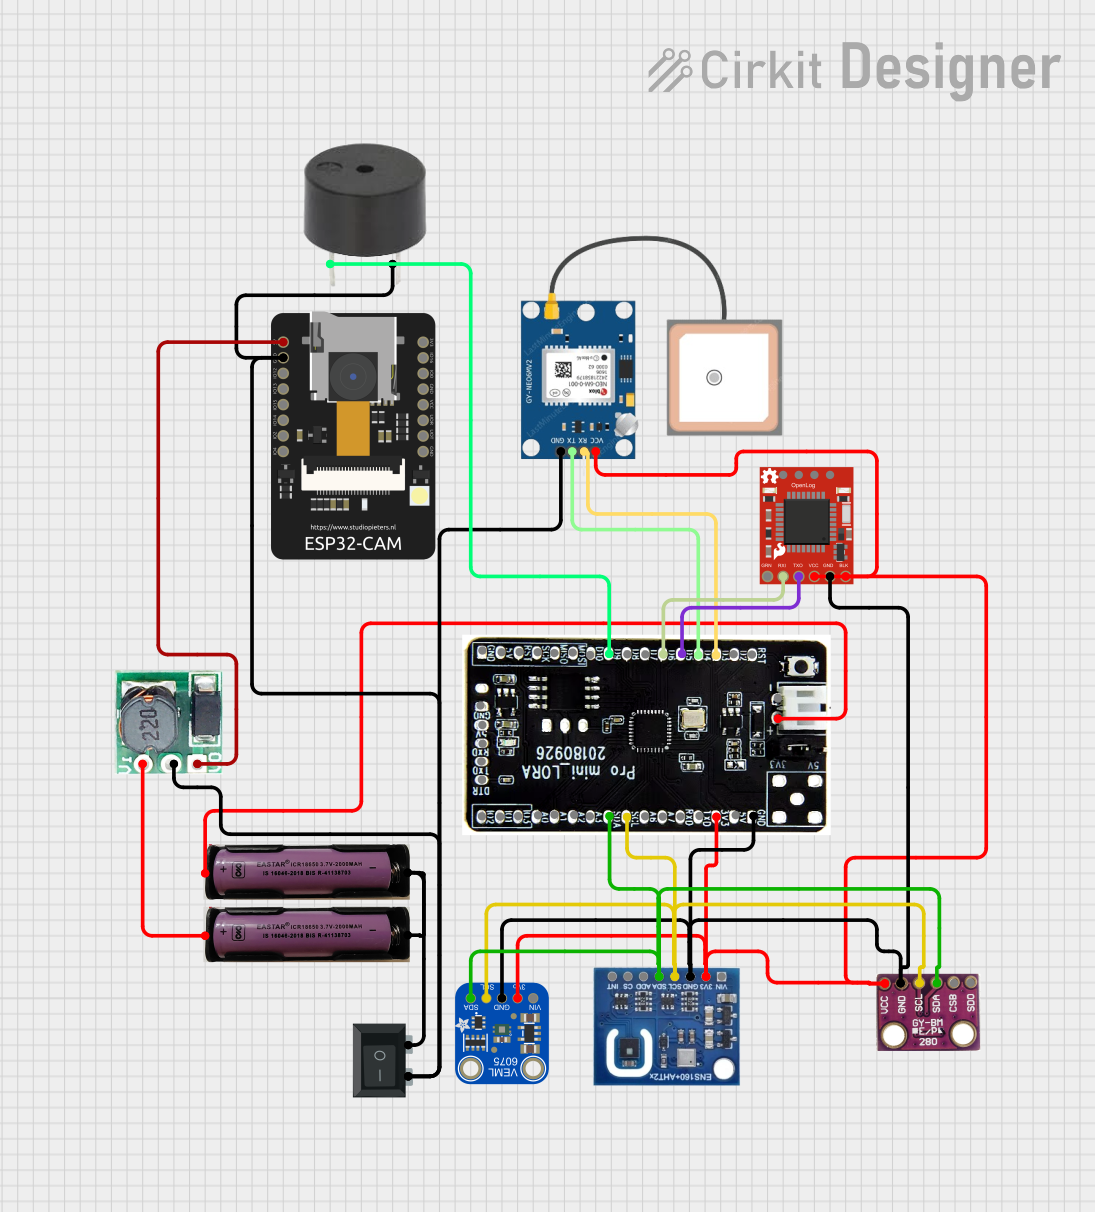
Explore Projects Built with Leonardo Tiny Atmega32U4
Common Applications and Use Cases
- USB Human Interface Device (HID) projects
- Keyboard or mouse emulators
- USB game controllers
- DIY USB instruments
- Prototyping USB devices
- Educational purposes for learning microcontroller basics and USB communication
Technical Specifications
Key Technical Details
- Microcontroller: ATmega32U4
- Operating Voltage: 5V
- Input Voltage (recommended): 7-12V
- Input Voltage (limits): 6-20V
- Digital I/O Pins: 20
- PWM Channels: 7
- Analog Input Channels: 12
- DC Current per I/O Pin: 40 mA
- DC Current for 3.3V Pin: 50 mA
- Flash Memory: 32 KB (ATmega32U4) of which 4 KB used by bootloader
- SRAM: 2.5 KB (ATmega32U4)
- EEPROM: 1 KB (ATmega32U4)
- Clock Speed: 16 MHz
Pin Configuration and Descriptions
| Pin Number | Function | Description |
|---|---|---|
| 1 | TXD/INT3/PD3 | Serial transmit (can be used as GPIO) |
| 2 | RXD/INT2/PD2 | Serial receive (can be used as GPIO) |
| 3 | SDA/INT1/PD1 | I2C Data line (can be used as GPIO) |
| 4 | SCL/INT0/PD0 | I2C Clock line (can be used as GPIO) |
| ... | ... | ... |
| 20 | AREF | Analog reference voltage |
Note: This table is not exhaustive and only includes a selection of pins for illustration.
Usage Instructions
How to Use the Component in a Circuit
Powering the Board:
- Connect a 7-12V power supply to the VIN and GND pins for optimal performance.
- Alternatively, the board can be powered via the USB connection.
Connecting I/O Devices:
- Digital devices can be connected to the digital I/O pins.
- Analog sensors can be connected to the analog input pins.
Programming the Board:
- Connect the board to a computer using a USB cable.
- Use the Arduino IDE or other compatible software to write and upload sketches.
Important Considerations and Best Practices
- Ensure that the input voltage does not exceed the recommended limits to prevent damage.
- Observe proper electrostatic discharge (ESD) precautions when handling the board.
- When using PWM outputs, ensure that the connected devices are compatible with the provided PWM frequency and voltage.
- Avoid drawing more than the maximum current from the I/O pins and the 3.3V pin.
Troubleshooting and FAQs
Common Issues
Board Not Recognized by Computer:
- Check the USB cable and connections.
- Ensure the correct drivers are installed.
- Try resetting the board by briefly connecting the RST pin to GND.
Sketch Not Uploading:
- Verify the correct board and port are selected in the Arduino IDE.
- Check for errors in the code that may prevent compilation.
- Ensure the bootloader is intact; if necessary, re-burn the bootloader using an ISP programmer.
FAQs
Q: Can I use the Leonardo Tiny Atmega32U4 as a keyboard emulator?
- A: Yes, the ATmega32U4's native USB capabilities allow it to act as a keyboard emulator.
Q: What is the maximum number of external interrupts available?
- A: The ATmega32U4 supports up to 5 external interrupts on specific pins.
Q: How do I connect an I2C device to the Leonardo Tiny Atmega32U4?
- A: Connect the I2C device's SDA line to pin 3 and the SCL line to pin 4, along with appropriate power and ground connections.
Example Code for Arduino UNO
// Example sketch for Leonardo Tiny Atmega32U4
// This sketch turns the Leonardo Tiny Atmega32U4 into a simple USB keyboard

#include "Keyboard.h"

void setup() {
  // Start the keyboard emulation
  Keyboard.begin();
}

void loop() {
  // Press and release the 'A' key
  Keyboard.press('a');
  delay(100); // Wait for 100 milliseconds
  Keyboard.release('a');
  delay(1000); // Wait for a second before sending the next key

  // Add additional keyboard actions here
}

// Note: The Keyboard library is only compatible with boards that have native USB
// capabilities such as the Leonardo Tiny Atmega32U4. It will not work with boards
// like the Arduino UNO without additional hardware.
Note: The above code is a simple demonstration of using the Leonardo Tiny Atmega32U4 as a USB keyboard. For more complex interactions, refer to the Keyboard library documentation and examples.
This documentation provides an overview of the Leonardo Tiny Atmega32U4, its technical specifications, usage instructions, and troubleshooting tips. For further assistance, consult the manufacturer's resources or community forums.