Cirkit Designer Logo
Cirkit Designer
Your all-in-one circuit design IDE
Home / 
Component Documentation

How to Use Loudspeaker: Examples, Pinouts, and Specs

Image of Loudspeaker
Cirkit Designer LogoDesign with Loudspeaker in Cirkit Designer

Introduction

A loudspeaker, commonly referred to as a speaker, is an electroacoustic transducer designed to convert electrical signals into audible sound. Loudspeakers are ubiquitous in modern technology, found in devices ranging from simple alarm clocks to complex public address systems. They are essential components in home theaters, car audio systems, smartphones, and many other applications where sound output is required.

Explore Projects Built with Loudspeaker

Use Cirkit Designer to design, explore, and prototype these projects online. Some projects support real-time simulation. Click "Open Project" to start designing instantly!
AC-Powered Loudspeaker Circuit with Capacitor and Resistor
Image of 4BL Plot 2 diagram: A project utilizing Loudspeaker in a practical application
This circuit consists of an AC supply, a ceramic capacitor, a resistor, and a loudspeaker. The AC supply powers the circuit, with the capacitor and resistor forming a filter network that drives the loudspeaker, likely to produce sound based on the AC signal.
Cirkit Designer LogoOpen Project in Cirkit Designer
Bluetooth-Controlled Arduino Speaker with Integrated Microphone
Image of sp circuit: A project utilizing Loudspeaker in a practical application
This circuit is a Bluetooth-enabled audio system with a microphone input. It uses a 5V Bluetooth Audio Receiver to receive audio signals wirelessly, which are then amplified by a PAM8403 amplifier before being output to a loudspeaker. Additionally, a condenser microphone is connected to the amplifier, allowing for audio input, and an Arduino UNO is present for potential control or further expansion, although it currently has no active code for operation.
Cirkit Designer LogoOpen Project in Cirkit Designer
Arduino Nano Controlled PAM8403 Audio Amplifier with Voice Synthesis
Image of Talking-Volt-meter-Using-Arduino: A project utilizing Loudspeaker in a practical application
This circuit is designed to drive a loudspeaker using an Arduino Nano and a PAM8403 audio amplifier. The Arduino Nano is programmed to generate voice signals using the Talkie library, which are then fed into the PAM8403 amplifier's right channel input. A resistor is connected to the ground and input pins of the PAM8403, likely for noise reduction or signal conditioning.
Cirkit Designer LogoOpen Project in Cirkit Designer
LM386 Amplifier Circuit with 3.5mm Audio Input and Loudspeaker Output
Image of DIY Speaker: A project utilizing Loudspeaker in a practical application
This circuit is an audio amplification system. It uses an LM386 audio amplifier module to amplify the audio signal from a 3.5mm audio jack input and drives a loudspeaker. The system is powered by a 9V battery, with the audio input connected to the left channel of the audio jack.
Cirkit Designer LogoOpen Project in Cirkit Designer

Explore Projects Built with Loudspeaker

Use Cirkit Designer to design, explore, and prototype these projects online. Some projects support real-time simulation. Click "Open Project" to start designing instantly!
Image of 4BL Plot 2 diagram: A project utilizing Loudspeaker in a practical application
AC-Powered Loudspeaker Circuit with Capacitor and Resistor
This circuit consists of an AC supply, a ceramic capacitor, a resistor, and a loudspeaker. The AC supply powers the circuit, with the capacitor and resistor forming a filter network that drives the loudspeaker, likely to produce sound based on the AC signal.
Cirkit Designer LogoOpen Project in Cirkit Designer
Image of sp circuit: A project utilizing Loudspeaker in a practical application
Bluetooth-Controlled Arduino Speaker with Integrated Microphone
This circuit is a Bluetooth-enabled audio system with a microphone input. It uses a 5V Bluetooth Audio Receiver to receive audio signals wirelessly, which are then amplified by a PAM8403 amplifier before being output to a loudspeaker. Additionally, a condenser microphone is connected to the amplifier, allowing for audio input, and an Arduino UNO is present for potential control or further expansion, although it currently has no active code for operation.
Cirkit Designer LogoOpen Project in Cirkit Designer
Image of Talking-Volt-meter-Using-Arduino: A project utilizing Loudspeaker in a practical application
Arduino Nano Controlled PAM8403 Audio Amplifier with Voice Synthesis
This circuit is designed to drive a loudspeaker using an Arduino Nano and a PAM8403 audio amplifier. The Arduino Nano is programmed to generate voice signals using the Talkie library, which are then fed into the PAM8403 amplifier's right channel input. A resistor is connected to the ground and input pins of the PAM8403, likely for noise reduction or signal conditioning.
Cirkit Designer LogoOpen Project in Cirkit Designer
Image of DIY Speaker: A project utilizing Loudspeaker in a practical application
LM386 Amplifier Circuit with 3.5mm Audio Input and Loudspeaker Output
This circuit is an audio amplification system. It uses an LM386 audio amplifier module to amplify the audio signal from a 3.5mm audio jack input and drives a loudspeaker. The system is powered by a 9V battery, with the audio input connected to the left channel of the audio jack.
Cirkit Designer LogoOpen Project in Cirkit Designer

Technical Specifications

General Specifications

  • Type: Dynamic loudspeaker
  • Impedance: Typically 4, 8, or 16 ohms
  • Frequency Response: Varies with design, commonly 20 Hz to 20 kHz
  • Sensitivity: Expressed in dB SPL at 1W/1m, varies with design
  • Power Handling: Rated in watts (W), varies with size and design

Pin Configuration and Descriptions

Pin Number Description
1 Positive Terminal (+)
2 Negative Terminal (-)

Usage Instructions

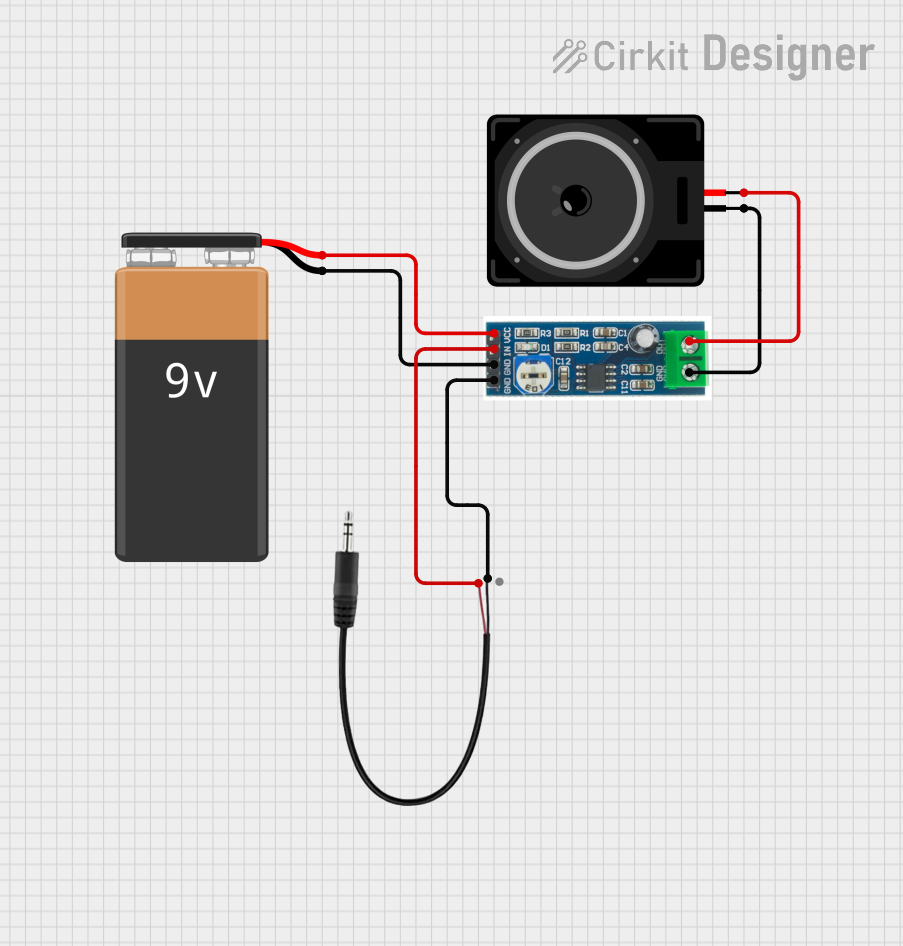
Integration into a Circuit

To use a loudspeaker in a circuit, follow these steps:

  1. Identify the Impedance: Ensure the loudspeaker's impedance matches the output impedance of the amplifier to maximize power transfer.
  2. Connect the Terminals: Connect the positive terminal of the loudspeaker to the positive output of the amplifier, and the negative terminal to the negative output.
  3. Power Considerations: Do not exceed the rated power handling of the loudspeaker to avoid damage.

Best Practices

  • Enclosure Use: For optimal sound quality, mount the loudspeaker in an appropriate enclosure to enhance the acoustic response.
  • Avoid Distortion: Ensure the input signal is clean and free of distortion to prevent damage to the loudspeaker.
  • Crossover Networks: For multi-driver systems, use crossover networks to direct appropriate frequencies to each loudspeaker.

Troubleshooting and FAQs

Common Issues

  • Distortion: If the sound is distorted, check the input signal level and reduce it if necessary.
  • No Sound: Verify connections and ensure the amplifier is functioning correctly.
  • Low Volume: Ensure the amplifier has sufficient power for the loudspeaker and that the volume control is set appropriately.

FAQs

Q: Can I connect multiple loudspeakers to one amplifier output? A: Yes, but ensure the total impedance is within the amplifier's capability by wiring them in series or parallel appropriately.

Q: What happens if I exceed the power rating of the loudspeaker? A: Exceeding the power rating can cause permanent damage to the loudspeaker, including burnt voice coils or damaged diaphragms.

Q: How can I improve the bass response of my loudspeaker? A: Use a properly designed enclosure and consider adding a subwoofer for lower frequencies.

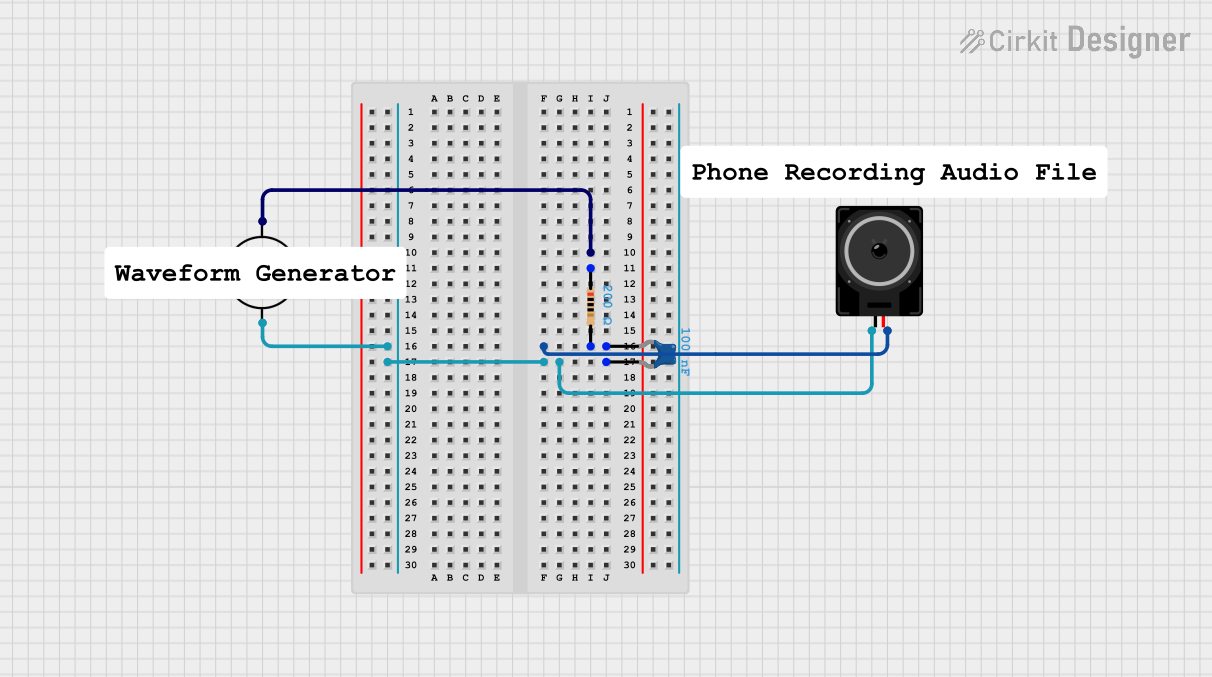
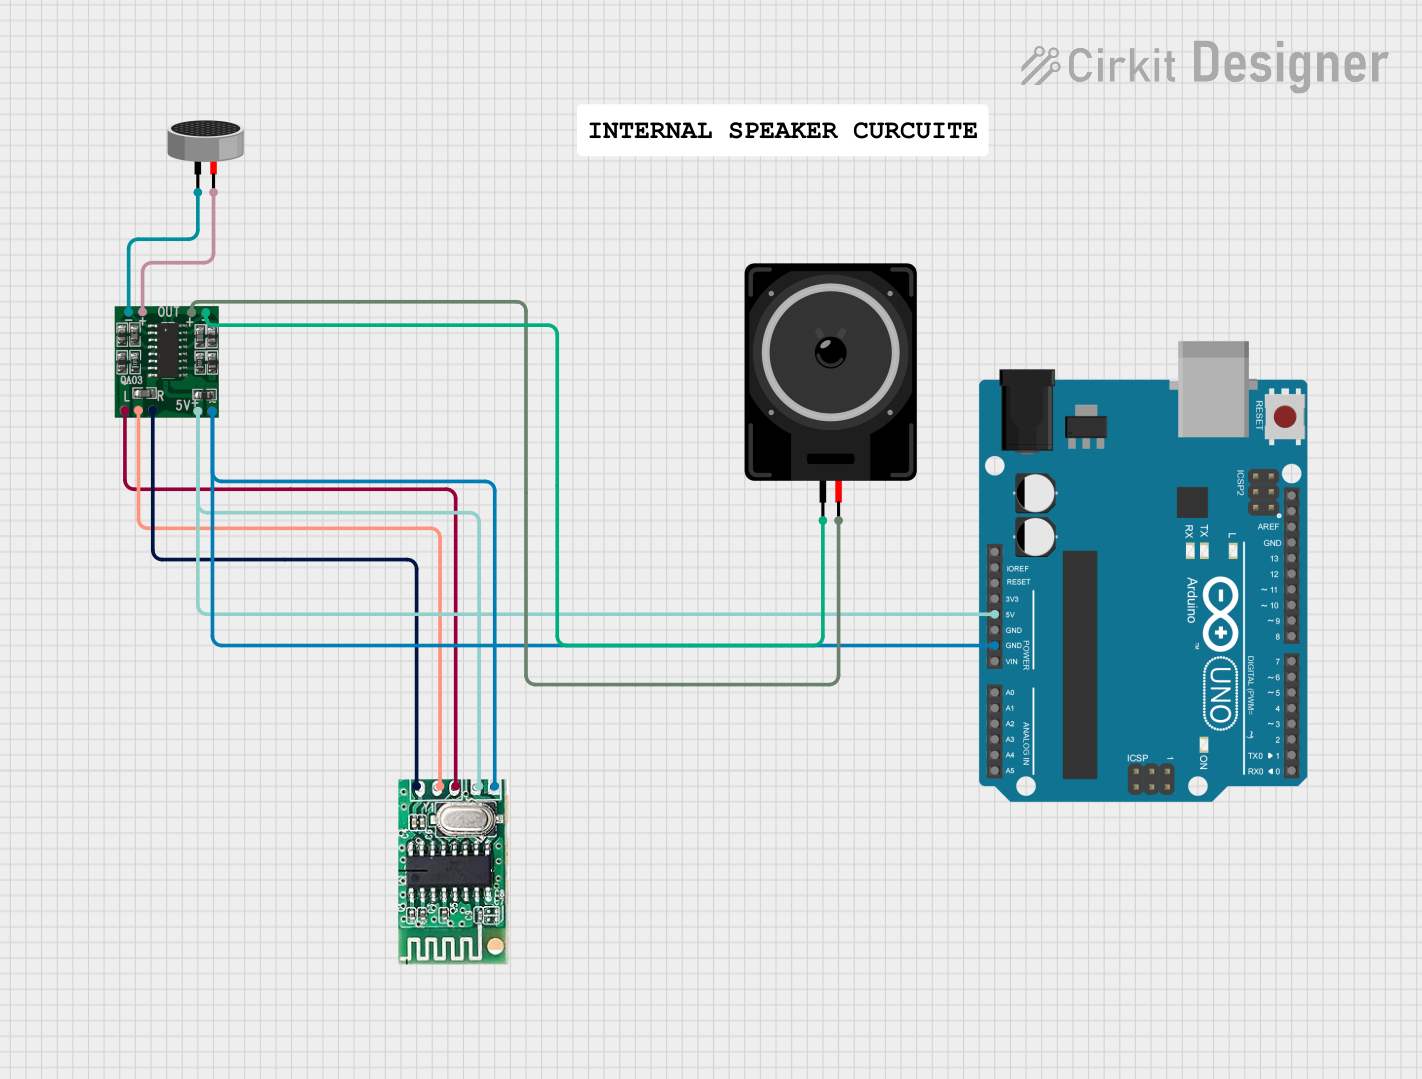
Example Arduino UNO Connection

Here's a simple example of how to connect a loudspeaker to an Arduino UNO to produce a tone.

// Define the speaker pin
const int speakerPin = 9;

void setup() {
  // Initialize the speaker pin as an output
  pinMode(speakerPin, OUTPUT);
}

void loop() {
  // Produce a 1kHz tone for 1 second
  tone(speakerPin, 1000, 1000);
  delay(1500); // Wait for 1.5 seconds
  // Note: The tone() function generates a square wave of the specified frequency
  // (and 50% duty cycle) on a pin. A duration can be specified, otherwise the
  // tone will continue until a noTone() is called.
}

Remember to connect the positive terminal of the loudspeaker to the speakerPin and the negative terminal to the GND pin on the Arduino UNO. Ensure the loudspeaker's power rating is suitable for the output provided by the Arduino pin.