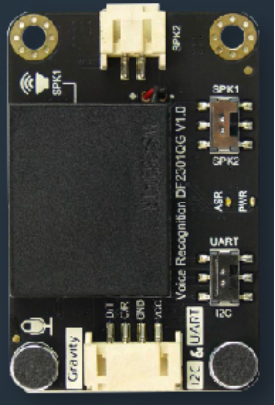
The DF Robot Gravity Voice Recognition Module is an advanced yet user-friendly electronic component that enables voice command recognition for a variety of projects. It is designed to integrate seamlessly with microcontrollers and development boards, such as Arduino, to provide a natural voice interface for controlling robots, smart home devices, and other interactive applications.
Explore Projects Built with DF ROBOT GRAVITY VOICE RECOGNITION MODULE
Use Cirkit Designer to design, explore, and prototype these projects online. Some projects support real-time simulation. Click "Open Project" to start designing instantly!
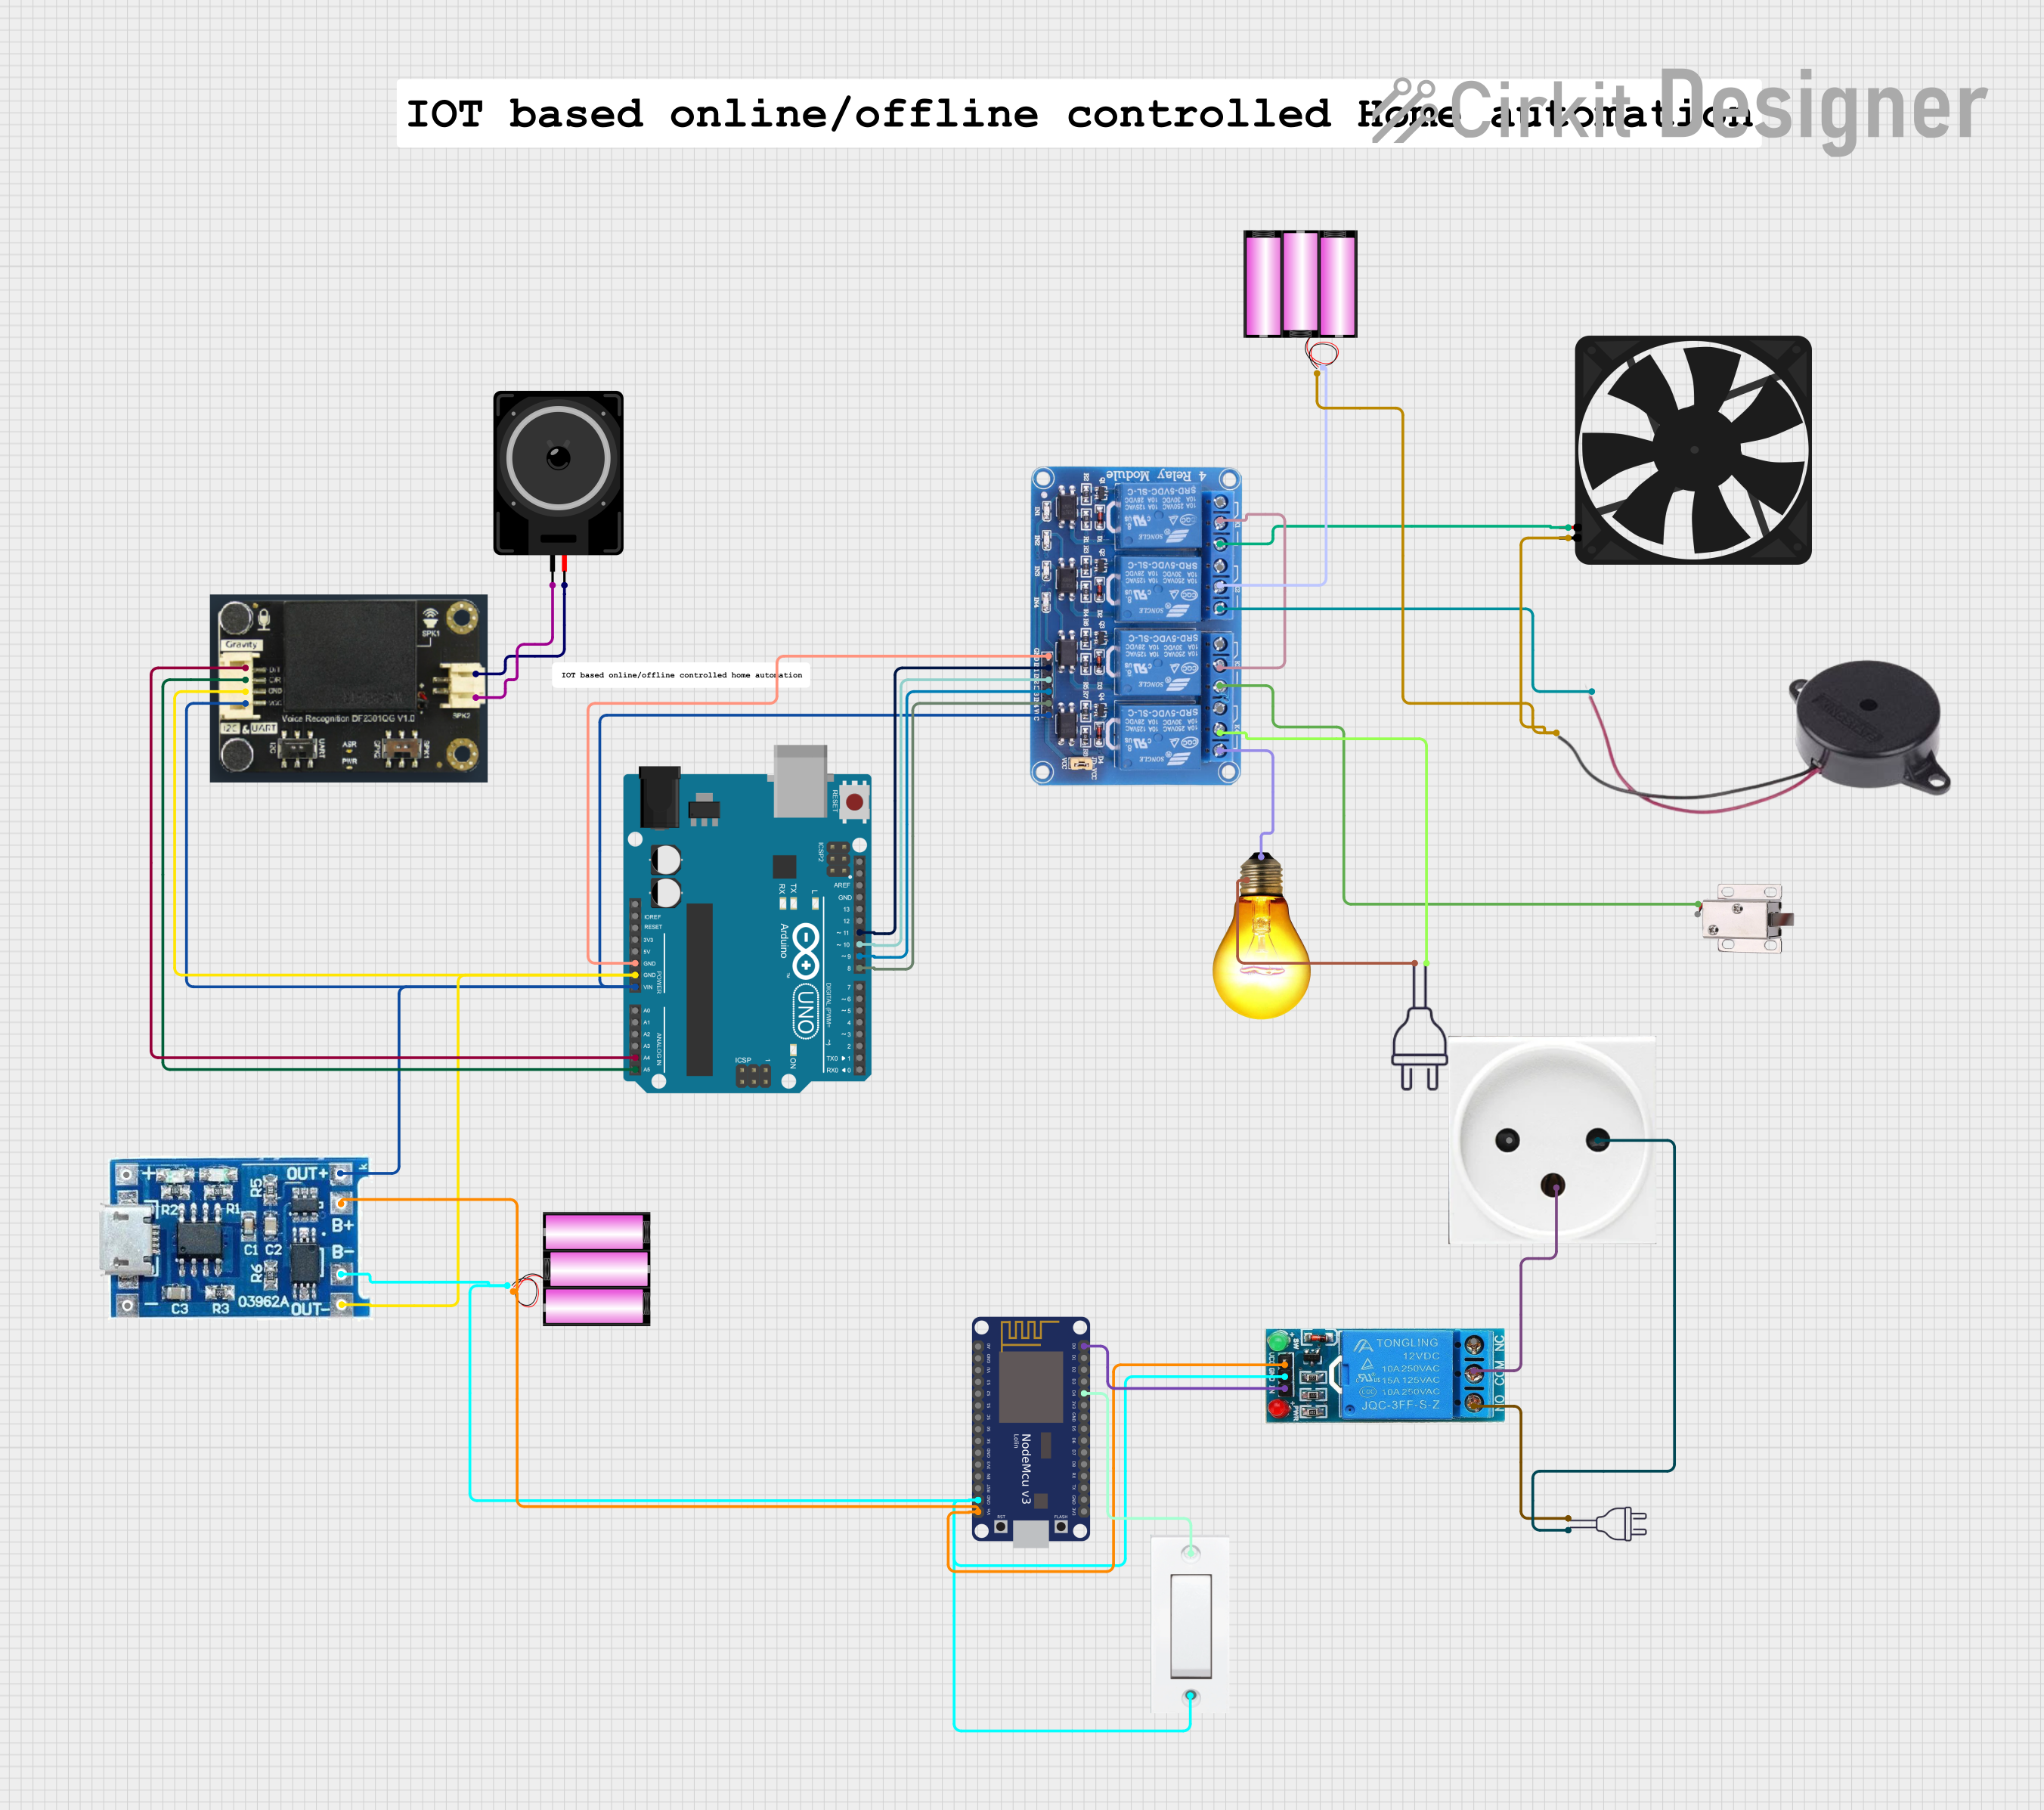
This is a voice-activated control system powered by solar energy with battery backup. It uses an Arduino UNO to interpret voice commands via a DF Robot Gravity voice recognition module and control a 4-channel relay that switches a fan, buzzer, solenoid lock, and AC bulb. A NodeMCU ESP8266 is included for potential IoT connectivity.
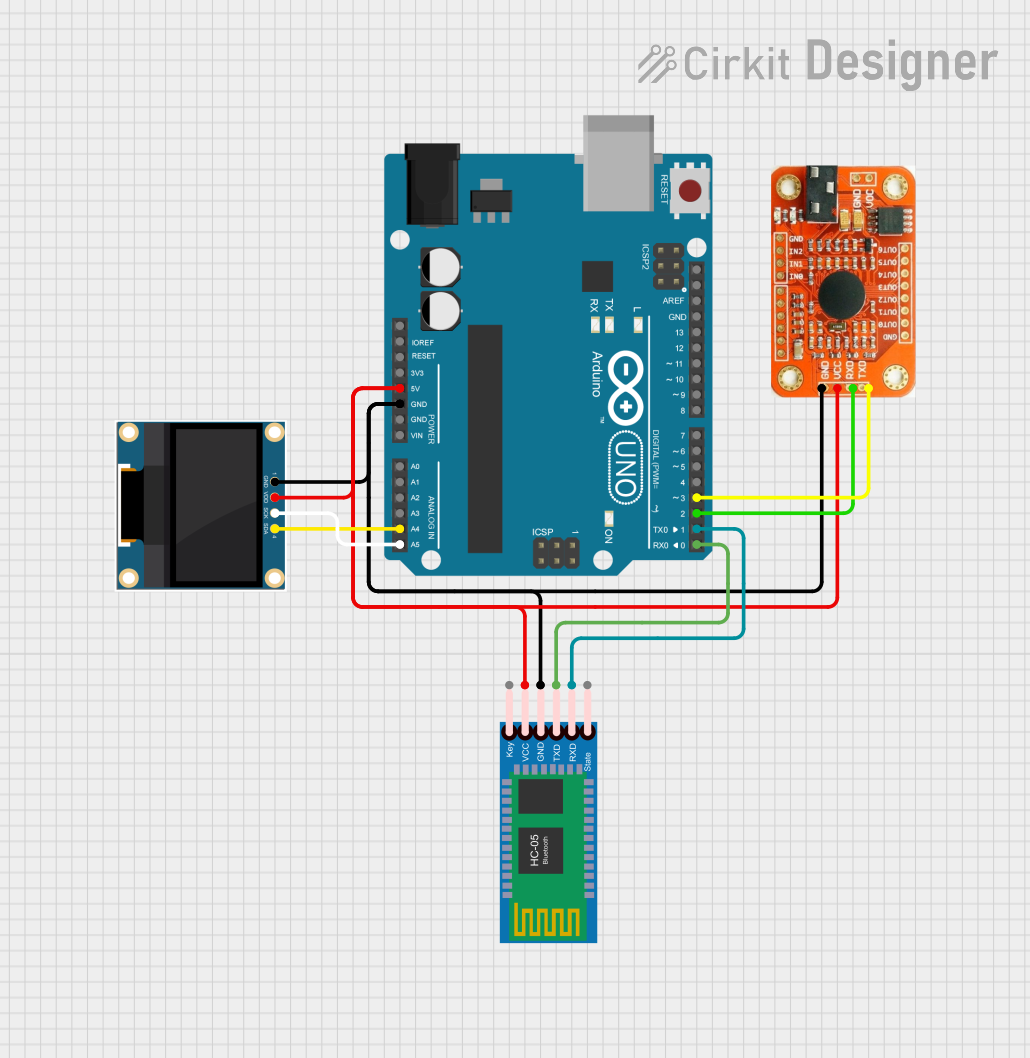
This circuit features an Arduino UNO microcontroller interfaced with a voice recognition module for audio input commands, an HC-05 Bluetooth module for wireless communication, and a 0.96" OLED display for visual output. The Arduino is programmed to handle inputs and outputs, with the voice recognition module connected to digital pins for serial communication, and the OLED display connected via I2C to the analog pins A4 (SDA) and A5 (SCL). The Bluetooth module is also connected to the Arduino's serial pins for remote data exchange.
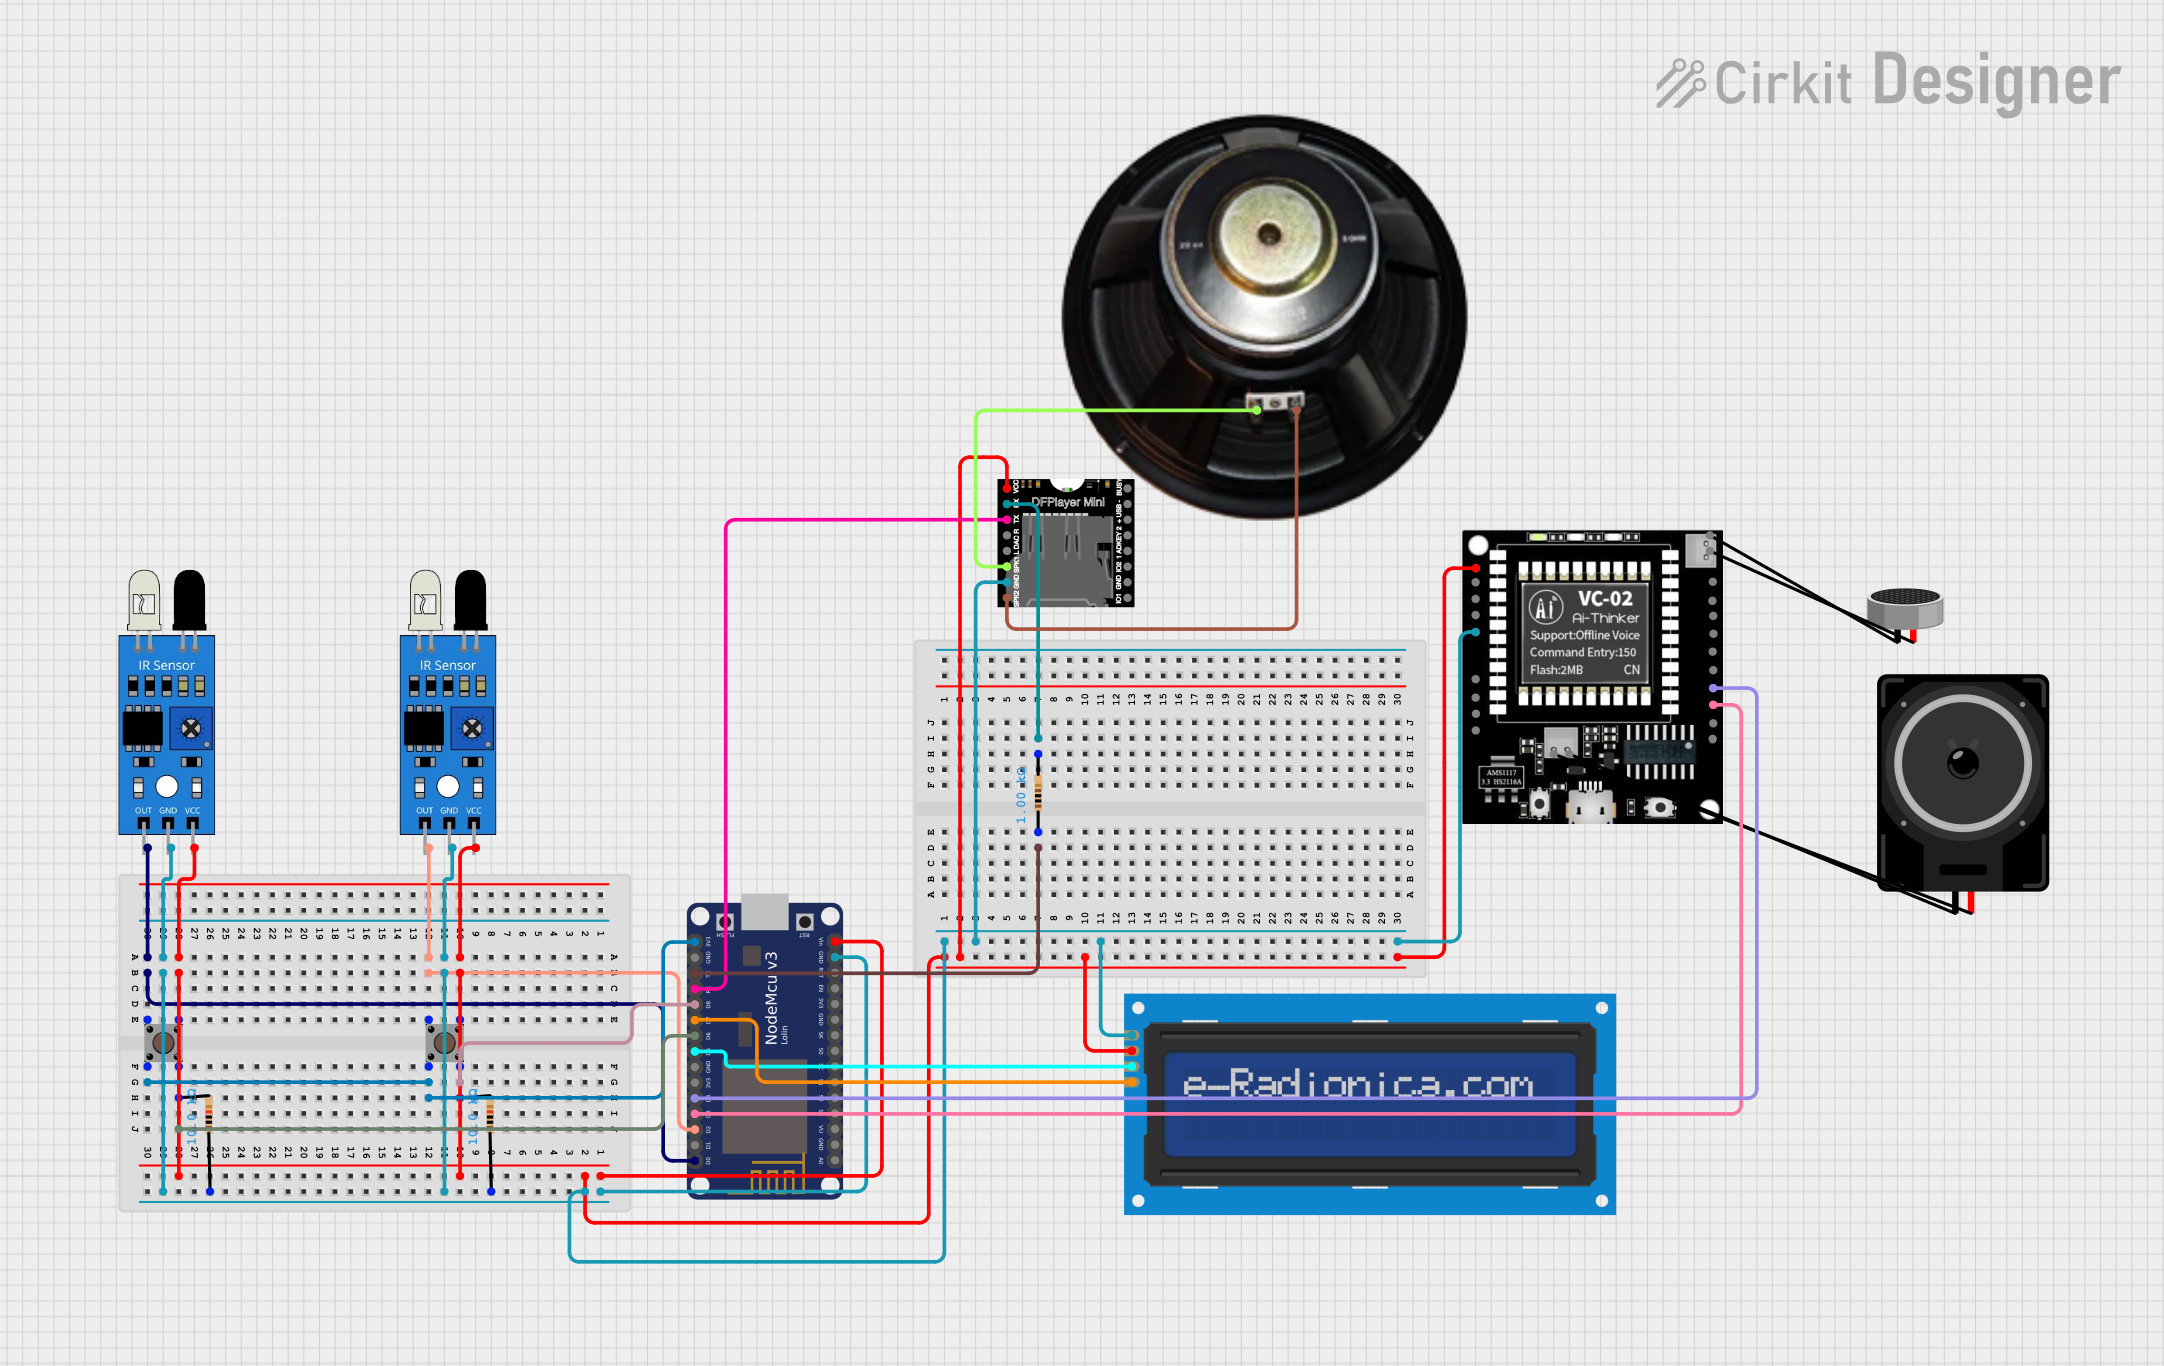
This circuit is an IoT-based smart lift system designed for blind and disabled individuals. It uses IR sensors, pushbuttons, an LCD screen, a DFPlayer module, and a VC-02 module to detect floor selection via finger presence or voice commands, and announces the selected floor through a speaker while displaying it on the LCD.
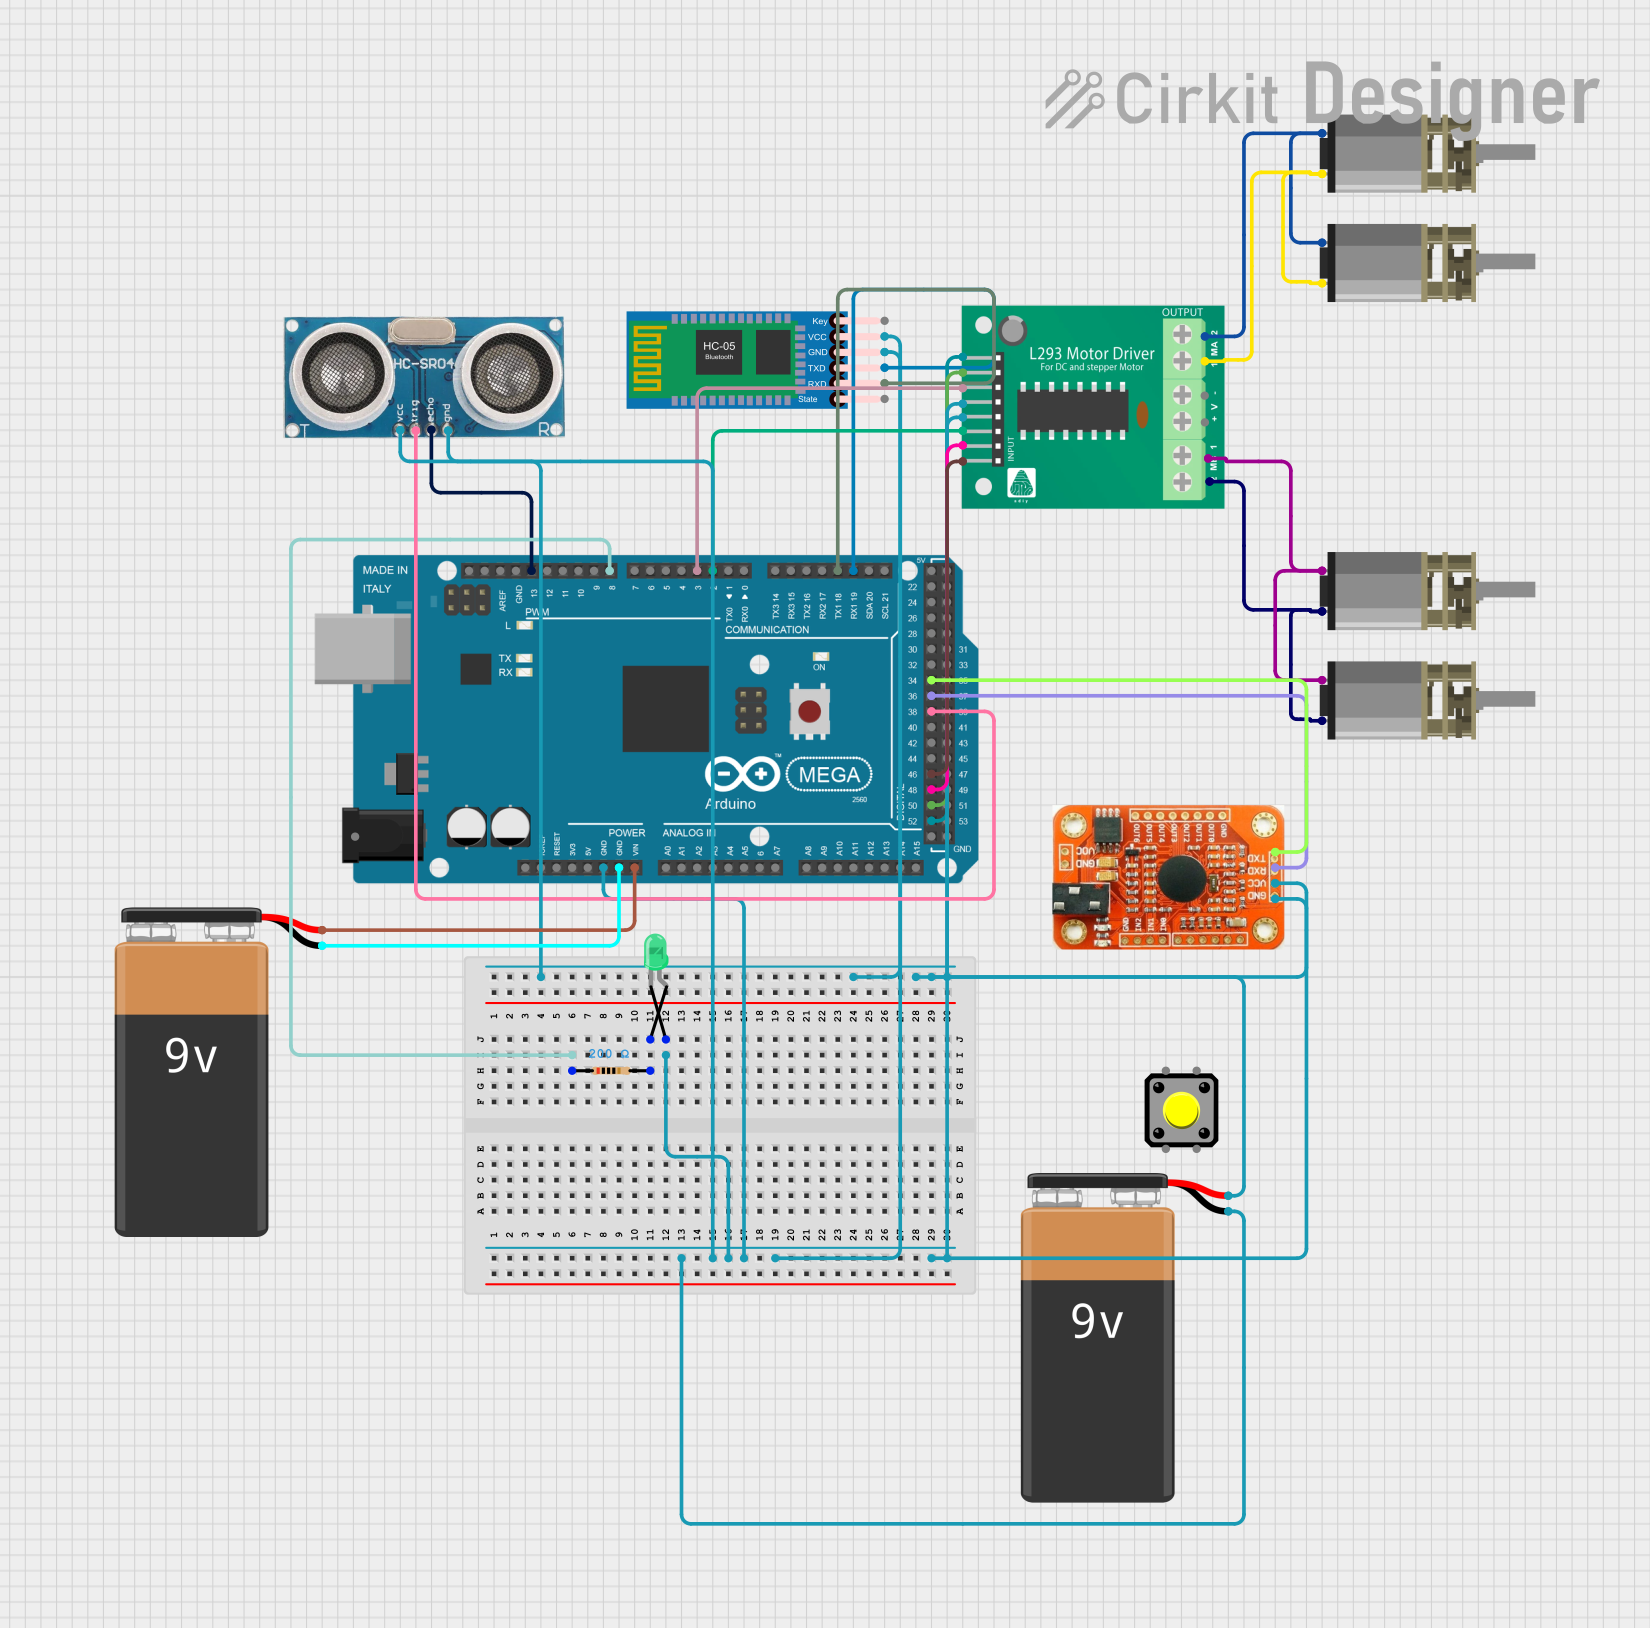
This circuit is a robotic system controlled by an Arduino Mega 2560, featuring Bluetooth communication via an HC-05 module, voice recognition, and ultrasonic sensing for obstacle detection. It drives four DC motors through an L293D motor driver and includes a green LED indicator. The system is powered by two 9V batteries.
Power Connection: Connect the VCC pin to a 5V power supply and the GND pin to the ground.
Data Connection: Connect the RX pin to the TX pin of your microcontroller and the TX pin to the RX pin of your microcontroller.
Initialization: Power on the module and wait for it to initialize and calibrate for the environment.
Important Considerations and Best Practices
Ensure that the power supply is stable and within the specified voltage range.
Avoid placing the module in noisy environments to prevent false triggers or misrecognition.
For optimal performance, speak clearly and at a moderate pace when issuing voice commands.
When integrating with a microcontroller, ensure that the UART settings (baud rate, data bits, etc.) match those of the module.
Example Code for Arduino UNO
#include <SoftwareSerial.h>

SoftwareSerial mySerial(10, 11); // RX, TX

void setup() {
  mySerial.begin(9600); // Set the baud rate to match the module
  Serial.begin(9600);   // Start serial communication with the computer
  Serial.println("Voice Recognition Module Initialized");
}

void loop() {
  if (mySerial.available()) { // Check if data is available from the module
    String command = mySerial.readStringUntil('\n'); // Read the command
    Serial.println("Command received: " + command);
    // Add your command handling code here
  }
}
Troubleshooting and FAQs
Common Issues Users Might Face
Module does not power on: Check the power connections and ensure the supply voltage is within the specified range.
No response to voice commands: Ensure the module is not in a noisy environment and that the microphone is not obstructed.
Misrecognition of commands: Calibrate the module for the user's voice and ensure clear articulation of commands.
Solutions and Tips for Troubleshooting
Power Issues: Verify connections and measure the voltage with a multimeter.
Recognition Issues: Speak directly to the microphone and maintain a consistent volume and pace.
Serial Communication Issues: Check the wiring between the module and the microcontroller, and ensure the UART settings are correct.
FAQs
Q: How many commands can the module recognize?
A: The module can recognize 15 pre-stored commands, which can be expanded to 80.
Q: Can I add my own voice commands?
A: Yes, you can train the module to recognize new voice commands following the procedures outlined in the module's user manual.
Q: Is the module compatible with other microcontrollers besides Arduino?
A: Yes, as long as the microcontroller supports UART communication and operates within the module's voltage range.
Q: How can I improve the recognition accuracy of the module?
A: Use the module in a quiet environment, train the module with different voice samples, and ensure proper calibration.
This documentation provides a comprehensive guide to using the DF Robot Gravity Voice Recognition Module. For further assistance, consult the manufacturer's user manual or contact technical support.

 Open Project in Cirkit Designer