How to Use Small Bulb with holder: Examples, Pinouts, and Specs
Introduction
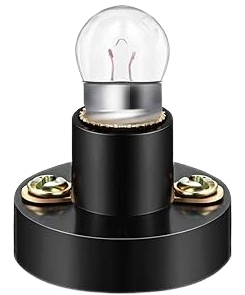
- The small bulb with holder is a compact lighting component designed for easy integration into various electronic and electrical systems. The bulb provides illumination, while the holder ensures secure mounting and reliable electrical connections.
- Common applications include indicator lights, small-scale lighting projects, educational electronics kits, and low-power decorative lighting.
Explore Projects Built with Small Bulb with holder
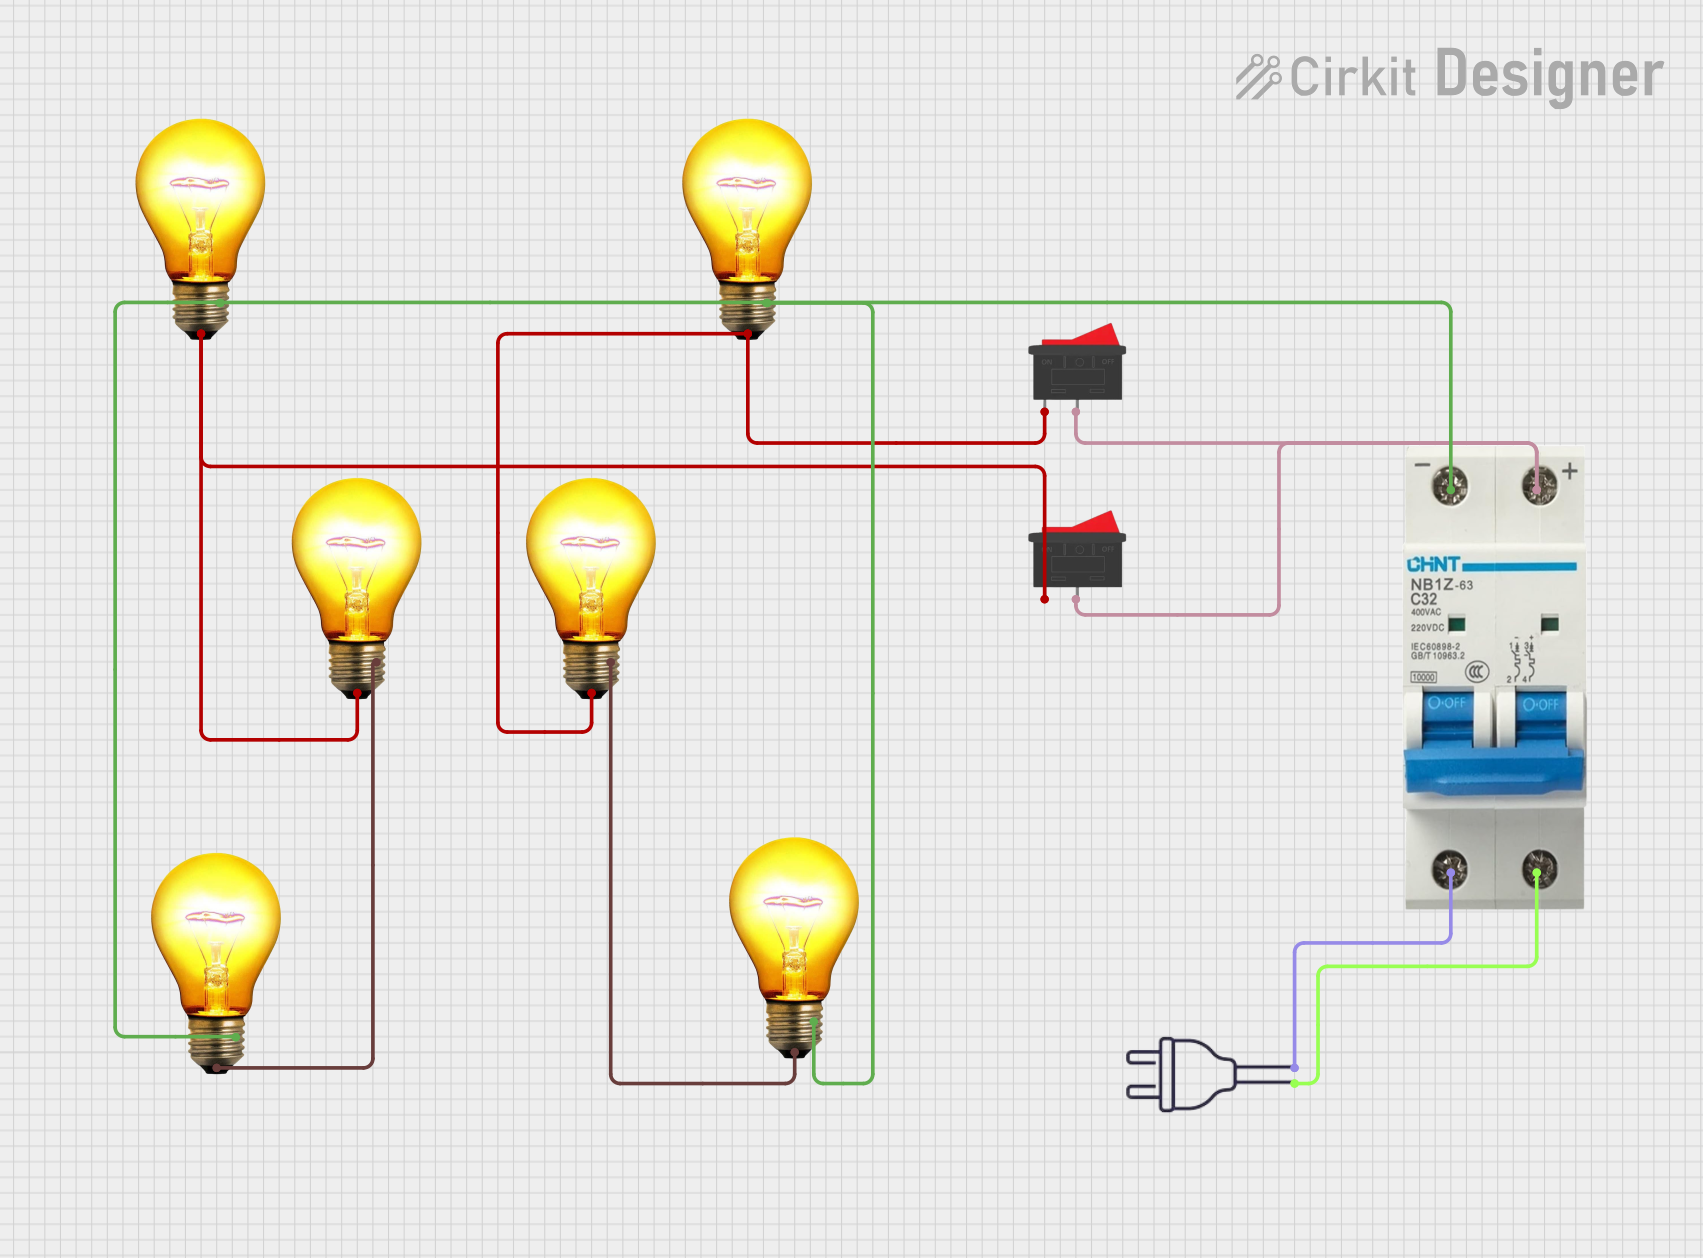
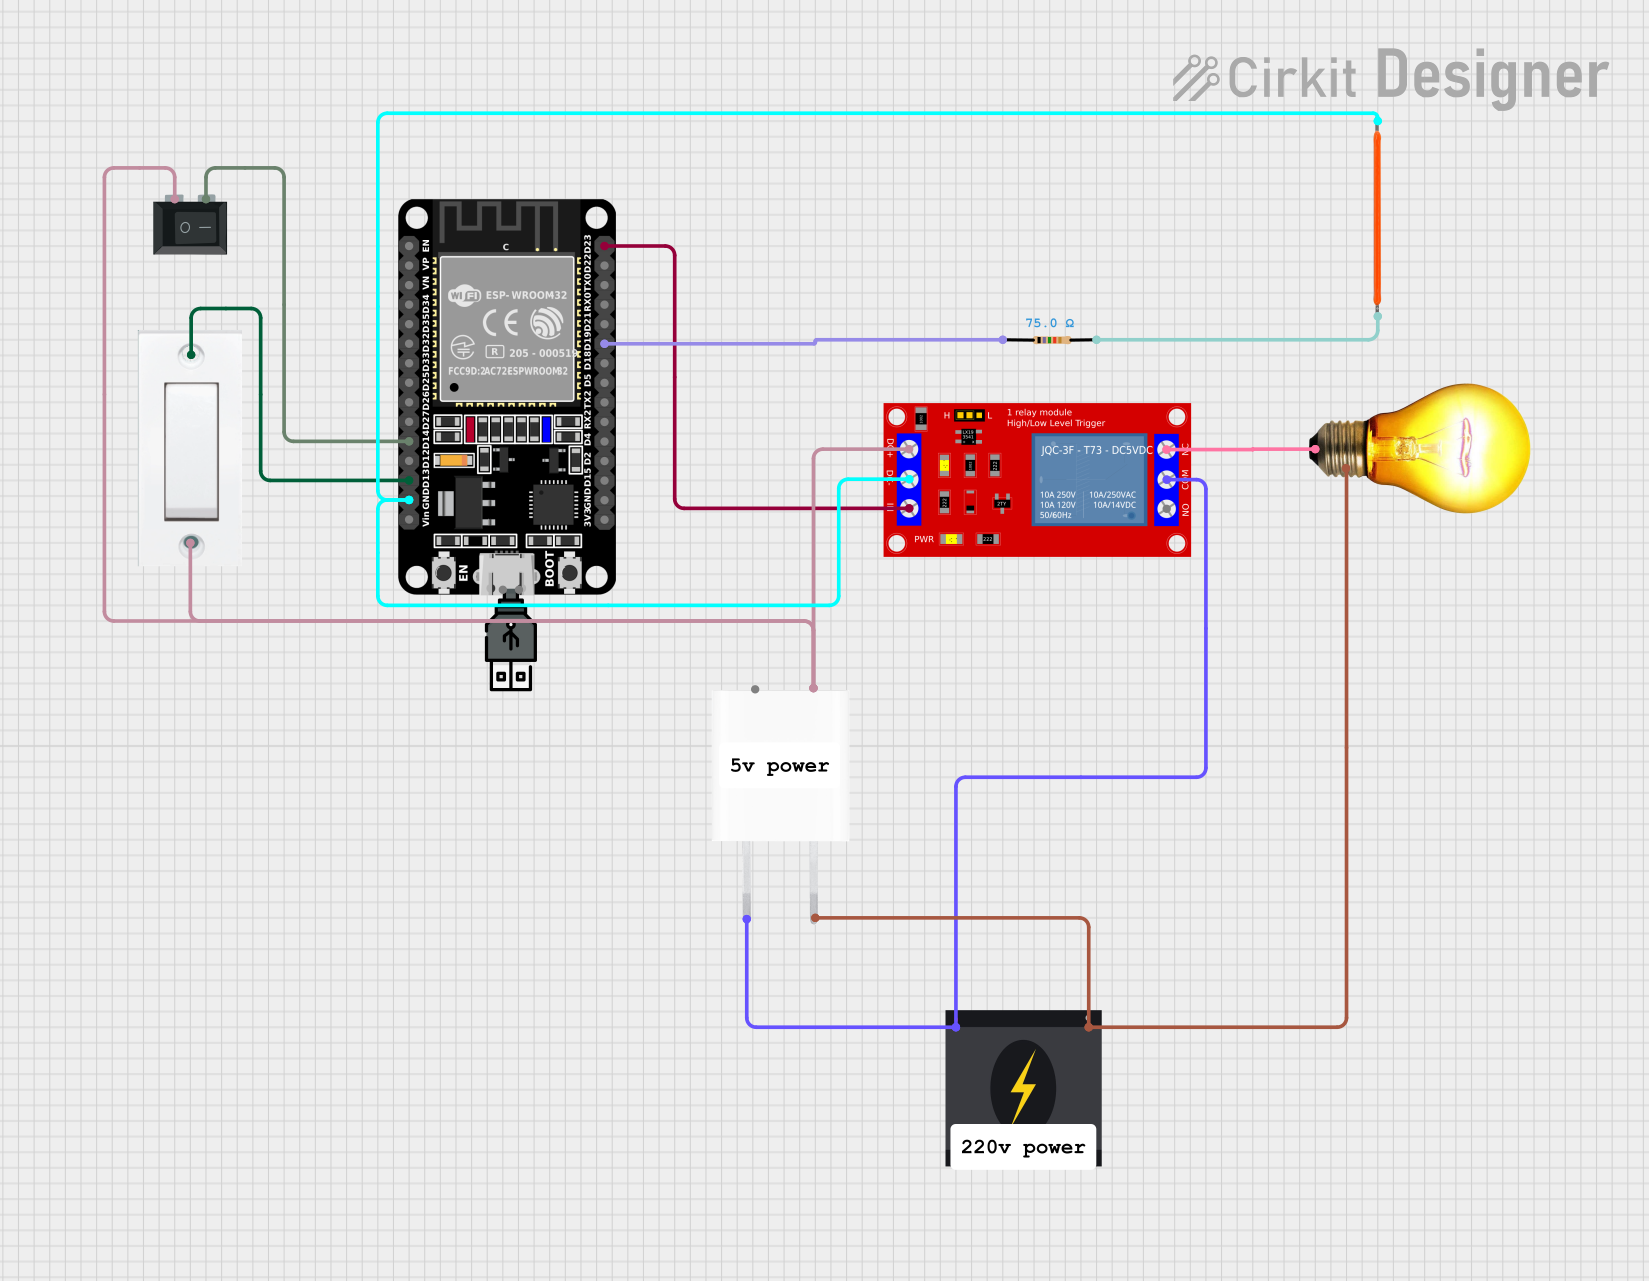
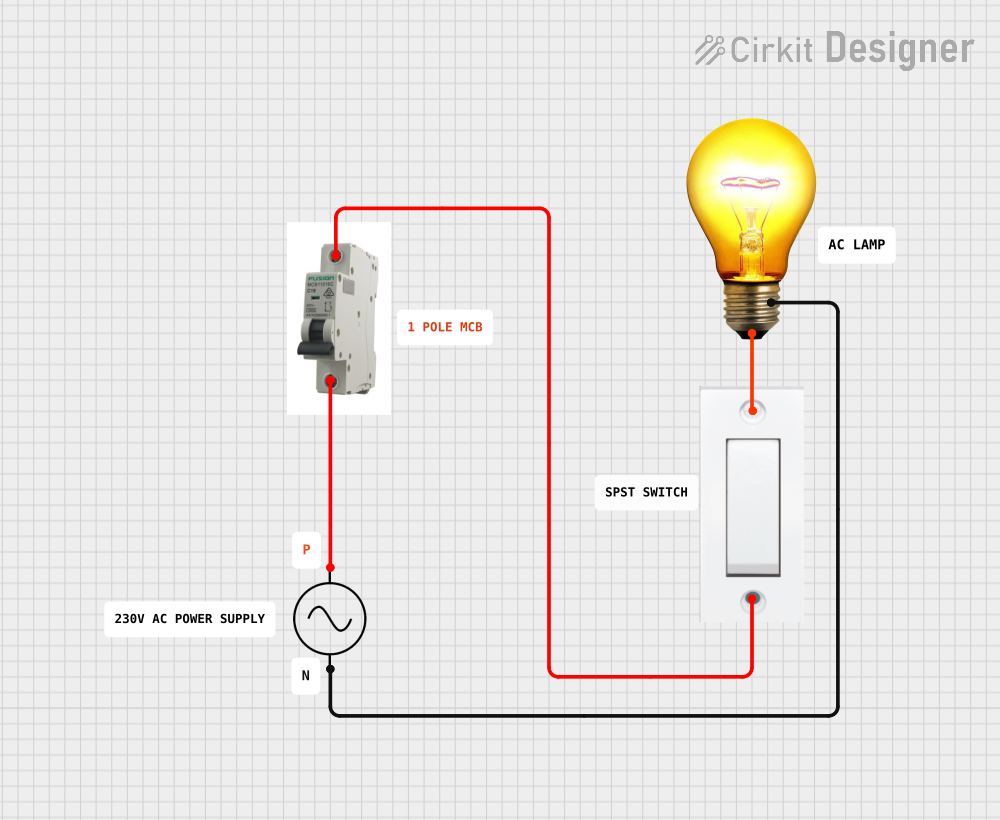
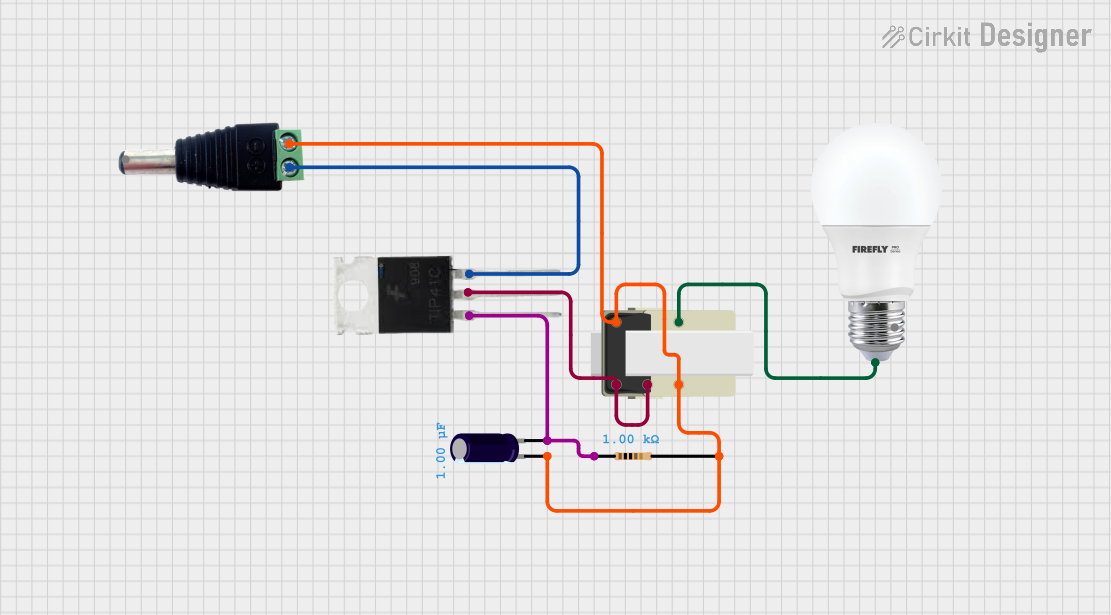
Explore Projects Built with Small Bulb with holder
Technical Specifications
Bulb Specifications
| Parameter | Value |
|---|---|
| Voltage Rating | 3V to 12V (depending on model) |
| Current Rating | 50mA to 300mA |
| Power Rating | 0.15W to 3.6W |
| Light Output | Varies (e.g., 5-50 lumens) |
| Bulb Type | Incandescent or LED |
| Base Type | Screw or bayonet |
Holder Specifications
| Parameter | Value |
|---|---|
| Material | Plastic or metal |
| Mounting Type | Panel mount or free-standing |
| Connection Type | Solder terminals or screw terminals |
| Dimensions | Varies (e.g., 10mm to 20mm diameter) |
Pin Configuration and Descriptions
| Pin/Terminal | Description |
|---|---|
| Positive Terminal | Connects to the positive side of the power source. |
| Negative Terminal | Connects to the negative side of the power source. |
Usage Instructions
How to Use the Small Bulb with Holder in a Circuit
- Determine Voltage and Current Requirements: Check the bulb's voltage and current ratings to ensure compatibility with your power source.
- Connect the Terminals:
- Identify the positive and negative terminals on the holder.
- Connect the positive terminal to the positive side of the power source and the negative terminal to the ground or negative side.
- Secure the Bulb: Insert the bulb into the holder and ensure it is firmly seated.
- Power On: Turn on the power source to illuminate the bulb.
Important Considerations and Best Practices
- Voltage Matching: Always use a power source that matches the bulb's voltage rating to avoid damage.
- Current Limiting: If using an LED bulb, include a current-limiting resistor in the circuit to prevent overcurrent.
- Heat Management: Ensure proper ventilation if the bulb generates heat during operation.
- Polarity Check: For LED bulbs, ensure correct polarity when connecting to the power source.
Example: Connecting to an Arduino UNO
You can use the small bulb with holder as an indicator light in an Arduino project. Below is an example of how to connect and control the bulb using a digital pin.
Circuit Setup
- Connect the positive terminal of the bulb holder to a digital pin on the Arduino (e.g., pin 9) through a current-limiting resistor (e.g., 220Ω).
- Connect the negative terminal of the bulb holder to the Arduino's GND pin.
Arduino Code
// Small Bulb Control with Arduino UNO
// This code turns the bulb ON for 1 second and OFF for 1 second in a loop.

const int bulbPin = 9; // Define the pin connected to the bulb

void setup() {
  pinMode(bulbPin, OUTPUT); // Set the bulb pin as an output
}

void loop() {
  digitalWrite(bulbPin, HIGH); // Turn the bulb ON
  delay(1000); // Wait for 1 second
  digitalWrite(bulbPin, LOW); // Turn the bulb OFF
  delay(1000); // Wait for 1 second
}
Troubleshooting and FAQs
Common Issues
Bulb Does Not Light Up:
- Cause: Incorrect wiring or insufficient power supply.
- Solution: Double-check the connections and ensure the power source matches the bulb's voltage rating.
Bulb Flickers:
- Cause: Loose connections or unstable power supply.
- Solution: Secure all connections and use a stable power source.
Bulb Burns Out Quickly:
- Cause: Overvoltage or excessive current.
- Solution: Verify the voltage and current ratings and use a current-limiting resistor if necessary.
Holder Feels Hot:
- Cause: Prolonged use or high-power bulb.
- Solution: Use a lower-power bulb or ensure proper ventilation.
FAQs
Can I use the small bulb with a battery? Yes, as long as the battery voltage matches the bulb's voltage rating.
What type of resistor should I use with an LED bulb? Use Ohm's Law (R = V/I) to calculate the resistor value based on the voltage drop and desired current.
Can I replace the bulb in the holder? Yes, most holders are designed for easy bulb replacement. Ensure the replacement bulb matches the holder's specifications.
Is the holder waterproof? Most holders are not waterproof unless explicitly stated. Use appropriate enclosures for outdoor applications.