How to Use Incubator: Examples, Pinouts, and Specs
Incubator Documentation
1. Introduction
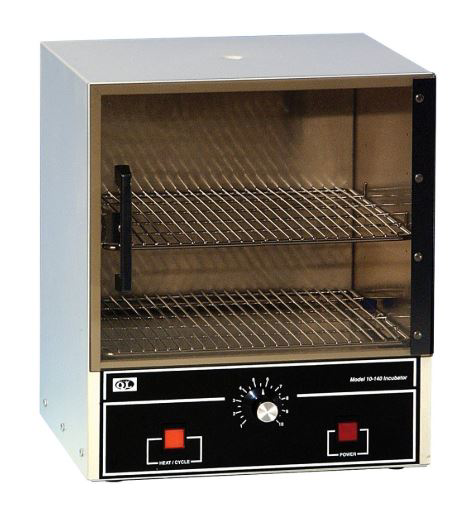
The Glory Incubator is a specialized device designed to grow and maintain microbiological cultures or cell cultures by providing optimal environmental conditions such as temperature, humidity, and sometimes CO2 levels. This device is essential in laboratories for research, clinical diagnostics, and industrial applications.
Common Applications and Use Cases
- Microbiological Research: Cultivating bacteria, fungi, and other microorganisms.
- Cell Culture: Growing mammalian cells for research and pharmaceutical development.
- Clinical Diagnostics: Incubating samples for pathogen detection.
- Industrial Applications: Fermentation processes and quality control in food and beverage industries.
2. Technical Specifications
Key Technical Details
| Parameter | Value |
|---|---|
| Temperature Range | 5°C above ambient to 60°C |
| Temperature Accuracy | ±0.1°C |
| Humidity Range | 40% to 95% RH |
| Power Supply | 110V/220V AC, 50/60Hz |
| Power Consumption | 150W |
| Internal Dimensions | 400mm x 400mm x 400mm |
| External Dimensions | 600mm x 600mm x 800mm |
| Weight | 25 kg |
Pin Configuration and Descriptions
| Pin Number | Pin Name | Description |
|---|---|---|
| 1 | VCC | Power Supply (110V/220V AC) |
| 2 | GND | Ground |
| 3 | TEMP | Temperature Sensor Input |
| 4 | HUM | Humidity Sensor Input |
| 5 | CO2 | CO2 Sensor Input (optional) |
| 6 | CTRL | Control Signal for External Devices |
| 7 | ALARM | Alarm Output |
| 8 | COMM | Communication Interface (RS232/USB) |
3. Usage Instructions
How to Use the Component in a Circuit
Power Connection:
- Connect the VCC pin to the power supply (110V/220V AC).
- Connect the GND pin to the ground.
Sensor Connections:
- Connect the temperature sensor to the TEMP pin.
- Connect the humidity sensor to the HUM pin.
- If using a CO2 sensor, connect it to the CO2 pin.
Control and Communication:
- Use the CTRL pin to control external devices like fans or heaters.
- Connect the ALARM pin to an external alarm system if needed.
- Use the COMM pin for communication with a computer or microcontroller (e.g., Arduino UNO).
Important Considerations and Best Practices
- Calibration: Regularly calibrate the sensors to ensure accurate readings.
- Maintenance: Clean the incubator chamber periodically to prevent contamination.
- Safety: Ensure proper grounding and avoid overloading the power supply.
- Environment: Place the incubator in a stable environment to avoid temperature fluctuations.
4. Troubleshooting and FAQs
Common Issues and Solutions
Temperature Fluctuations:
- Solution: Check the calibration of the temperature sensor and ensure the incubator is placed in a stable environment.
Humidity Levels Not Stable:
- Solution: Verify the humidity sensor's calibration and check for any leaks in the incubator chamber.
Power Issues:
- Solution: Ensure the power supply is stable and the connections are secure. Check for any blown fuses.
Communication Problems:
- Solution: Verify the communication interface settings and ensure the correct drivers are installed if using a computer.
FAQs
Q1: Can I use the incubator for anaerobic cultures?
- A1: Yes, but you will need to ensure the incubator is properly sealed and may require additional equipment to maintain anaerobic conditions.
Q2: How often should I calibrate the sensors?
- A2: It is recommended to calibrate the sensors every 3-6 months, depending on usage.
Q3: Can I connect the incubator to an Arduino UNO?
- A3: Yes, you can use the COMM pin to interface with an Arduino UNO. Below is an example code snippet for reading temperature and humidity data.
#include <SoftwareSerial.h>

SoftwareSerial incubatorSerial(10, 11); // RX, TX

void setup() {
  Serial.begin(9600);
  incubatorSerial.begin(9600);
}

void loop() {
  if (incubatorSerial.available()) {
    String data = incubatorSerial.readStringUntil('\n');
    Serial.println("Incubator Data: " + data);
  }
  delay(1000);
}
This code sets up a software serial connection on pins 10 and 11 of the Arduino UNO to communicate with the incubator. It reads data from the incubator and prints it to the serial monitor.
By following this documentation, users can effectively utilize the Glory Incubator for various applications, ensuring optimal performance and reliability.
Explore Projects Built with Incubator

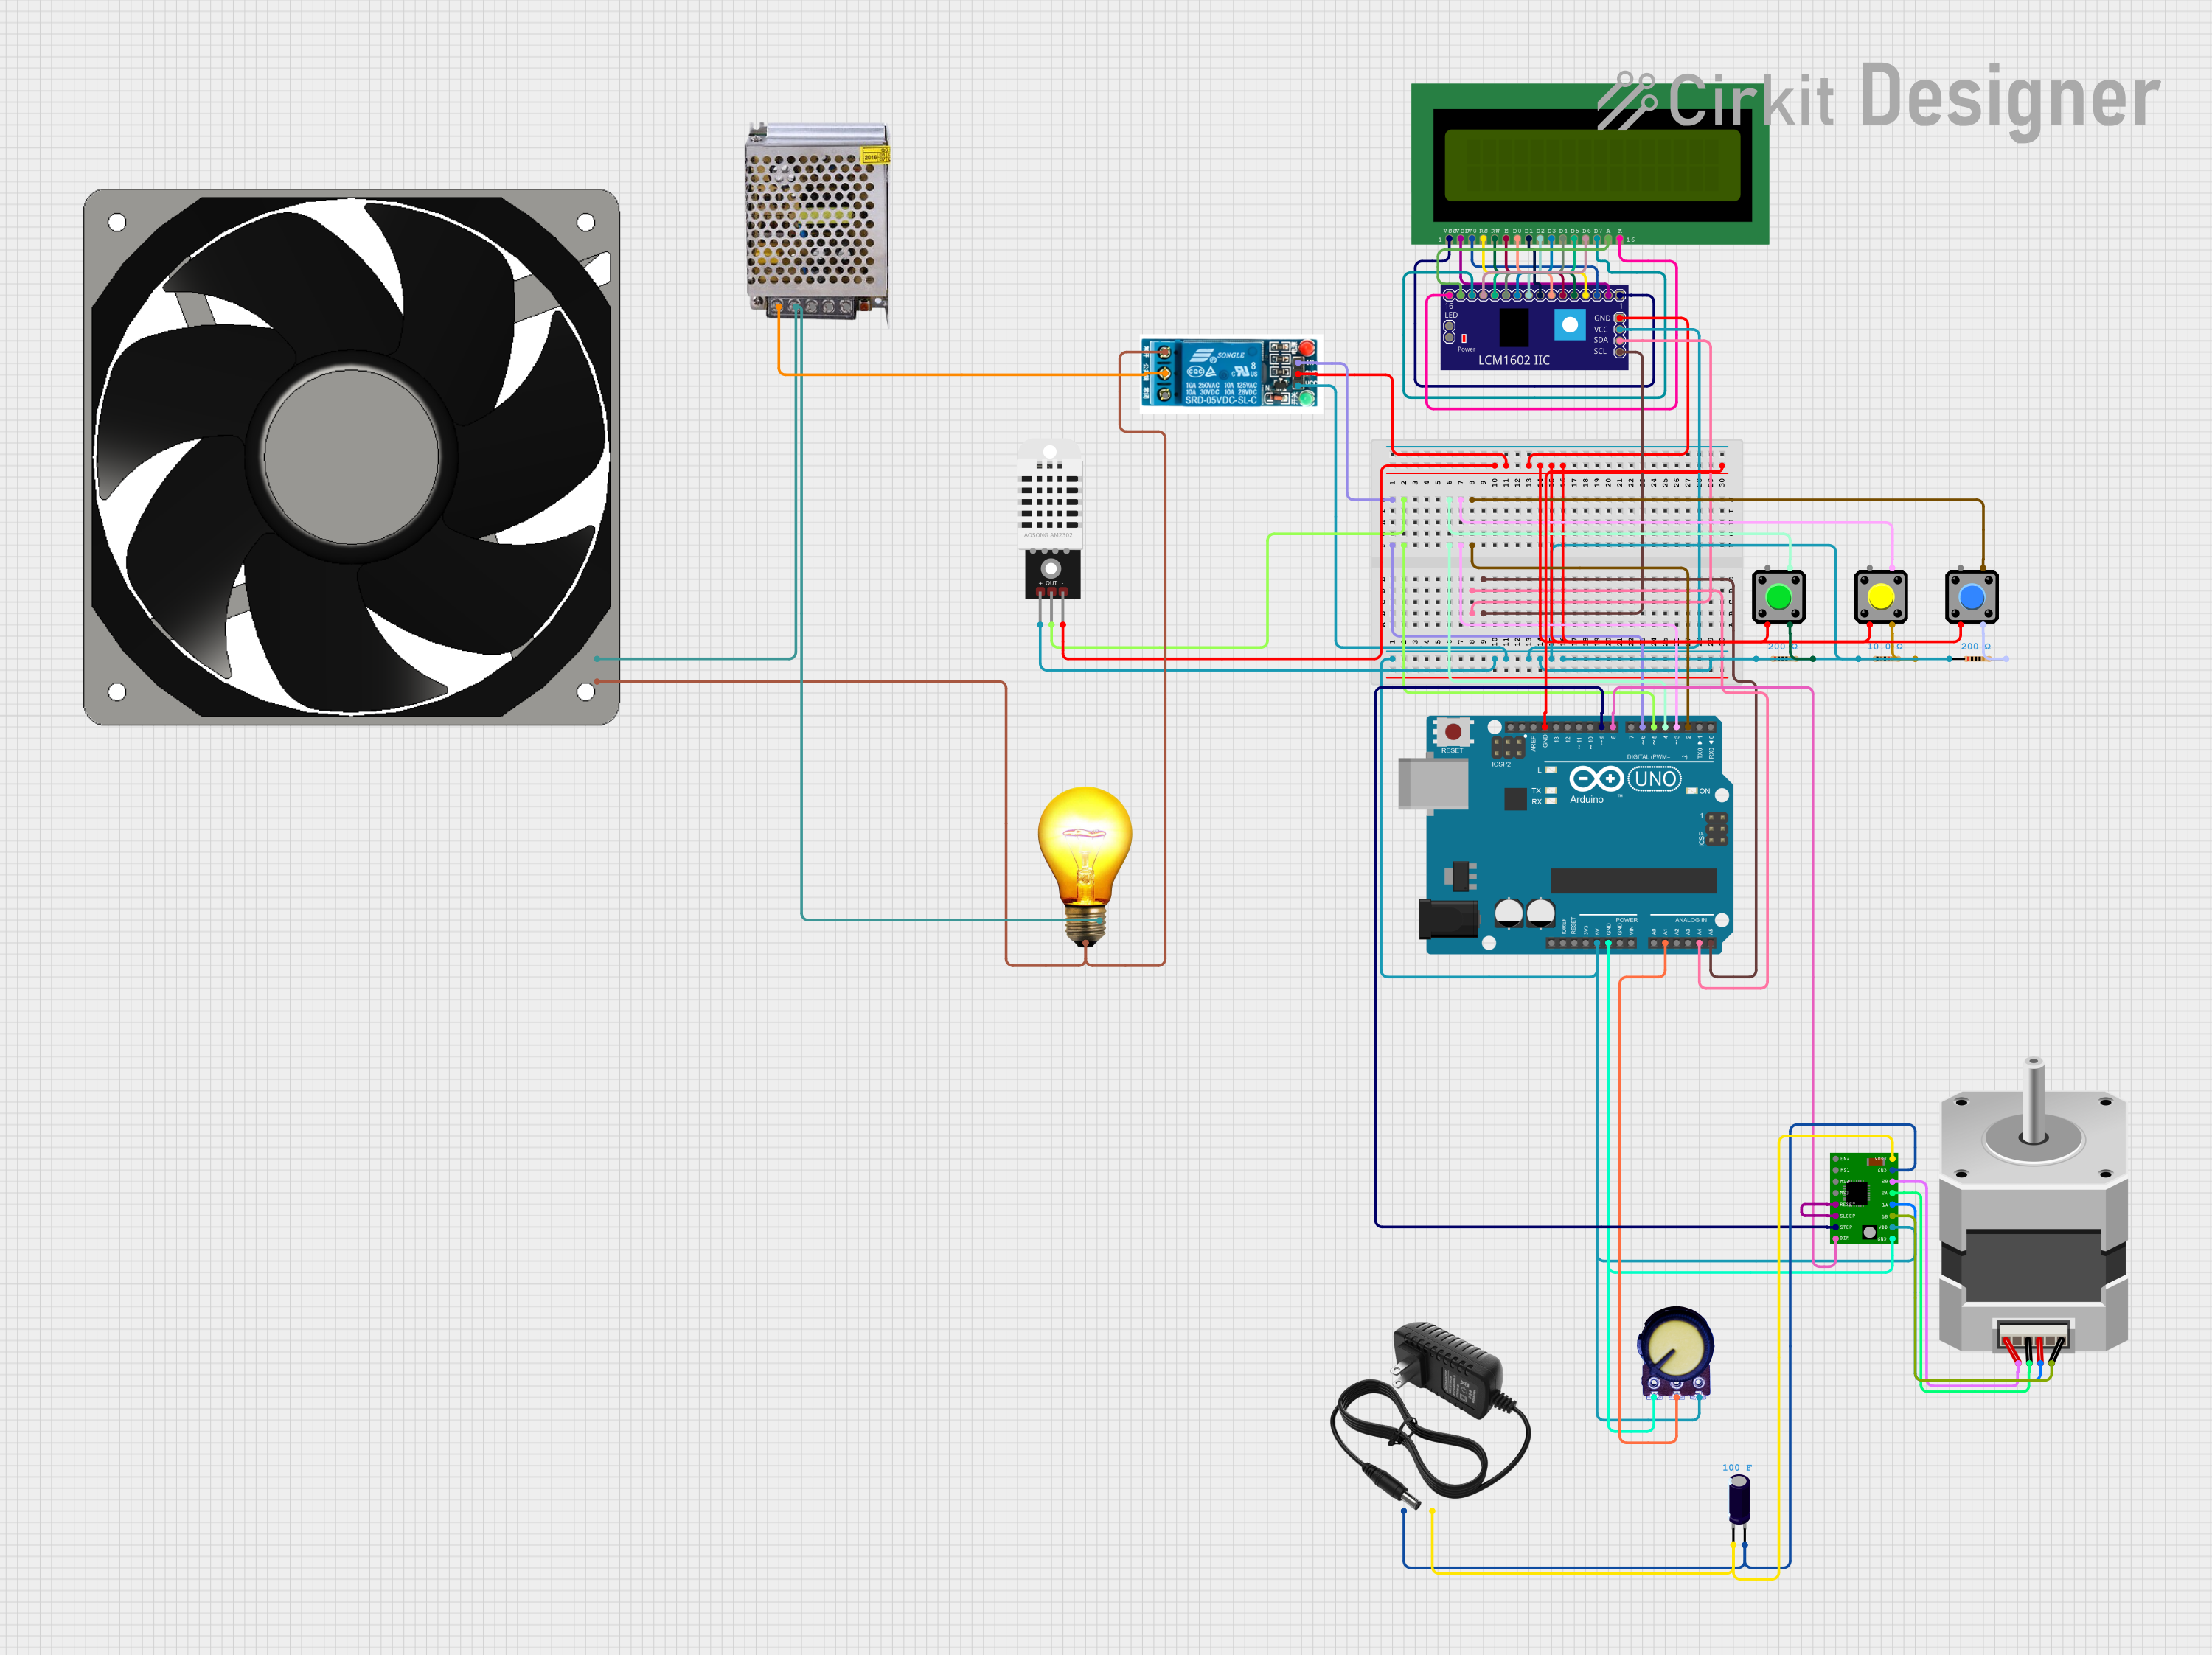
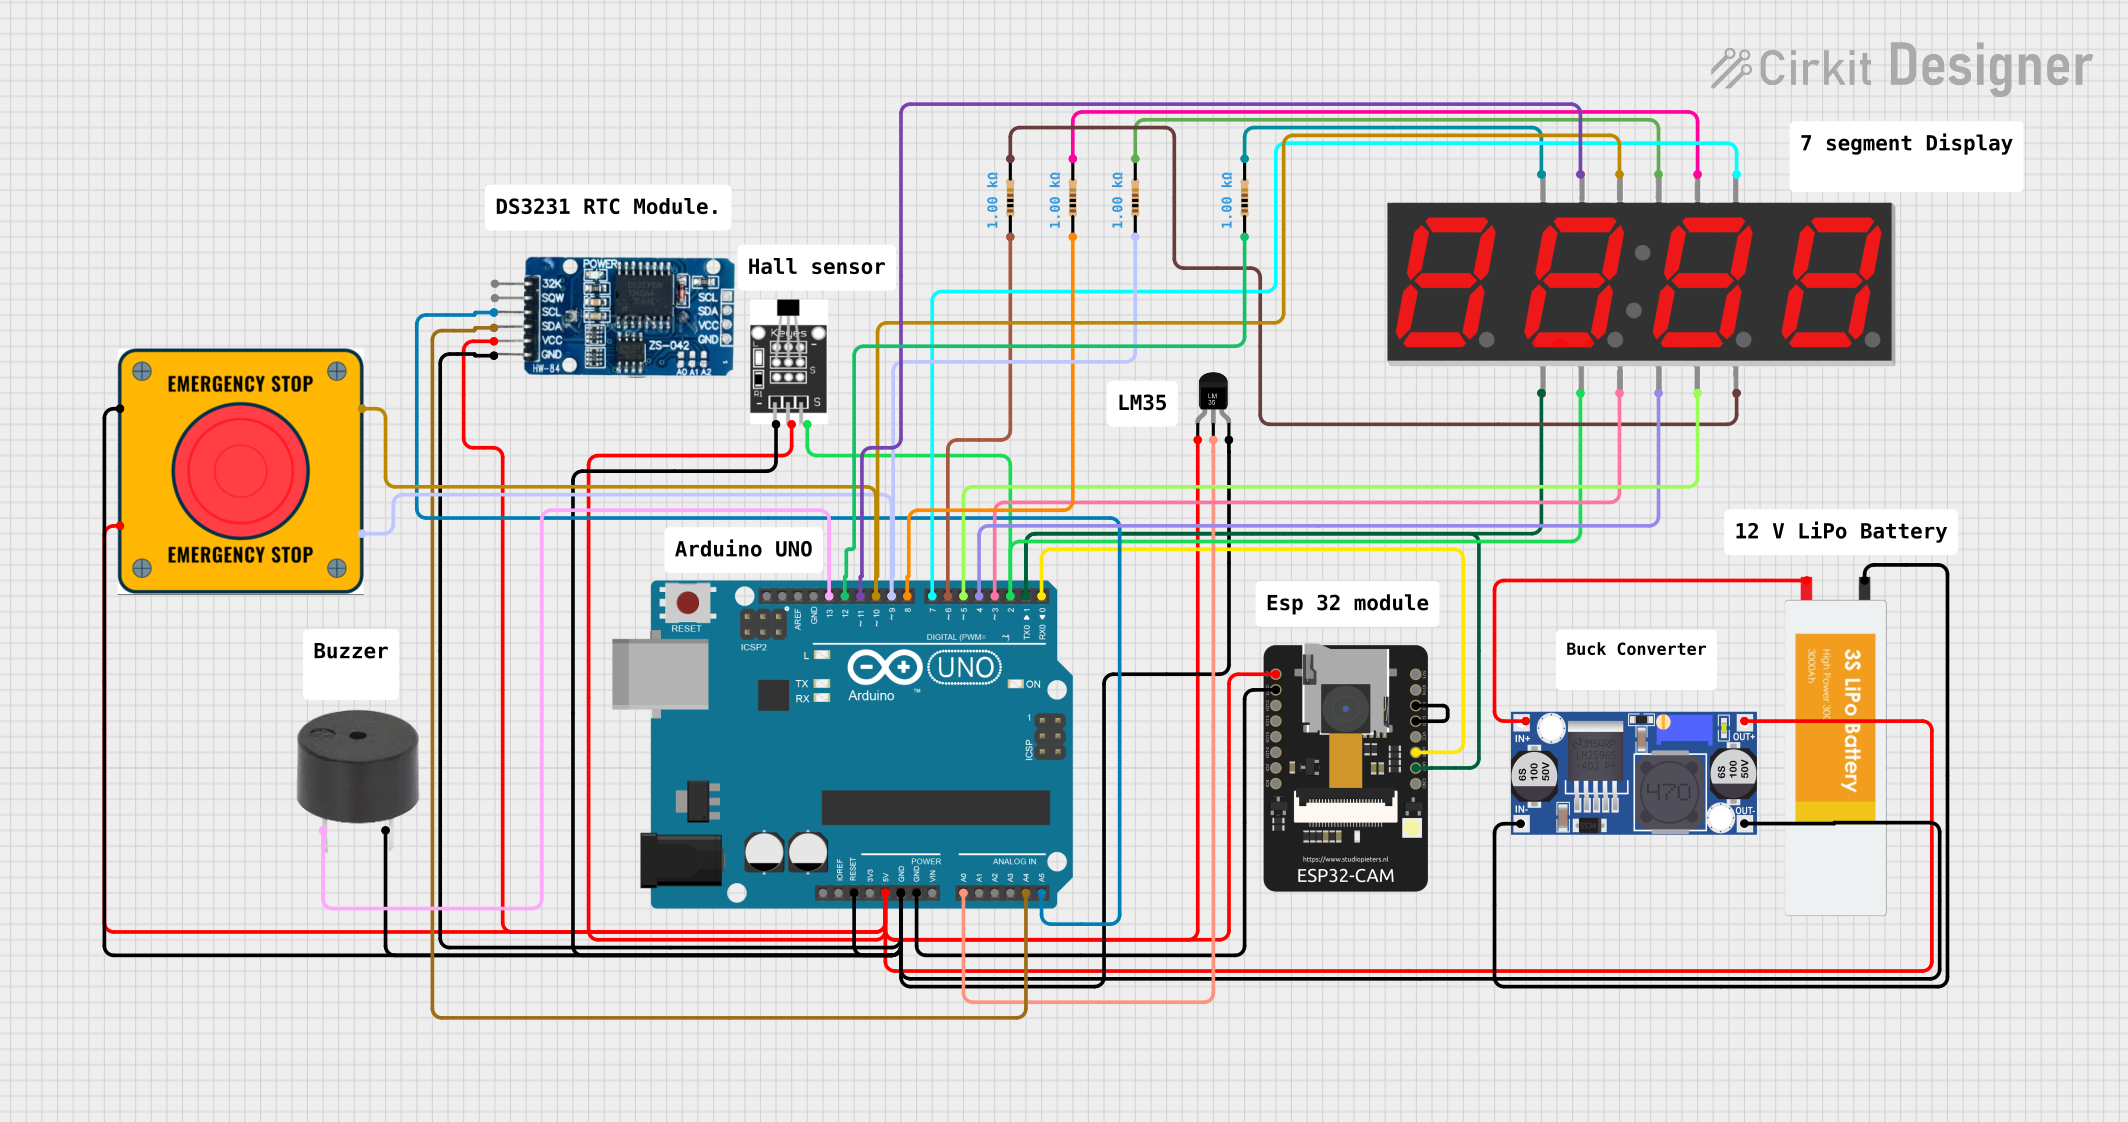
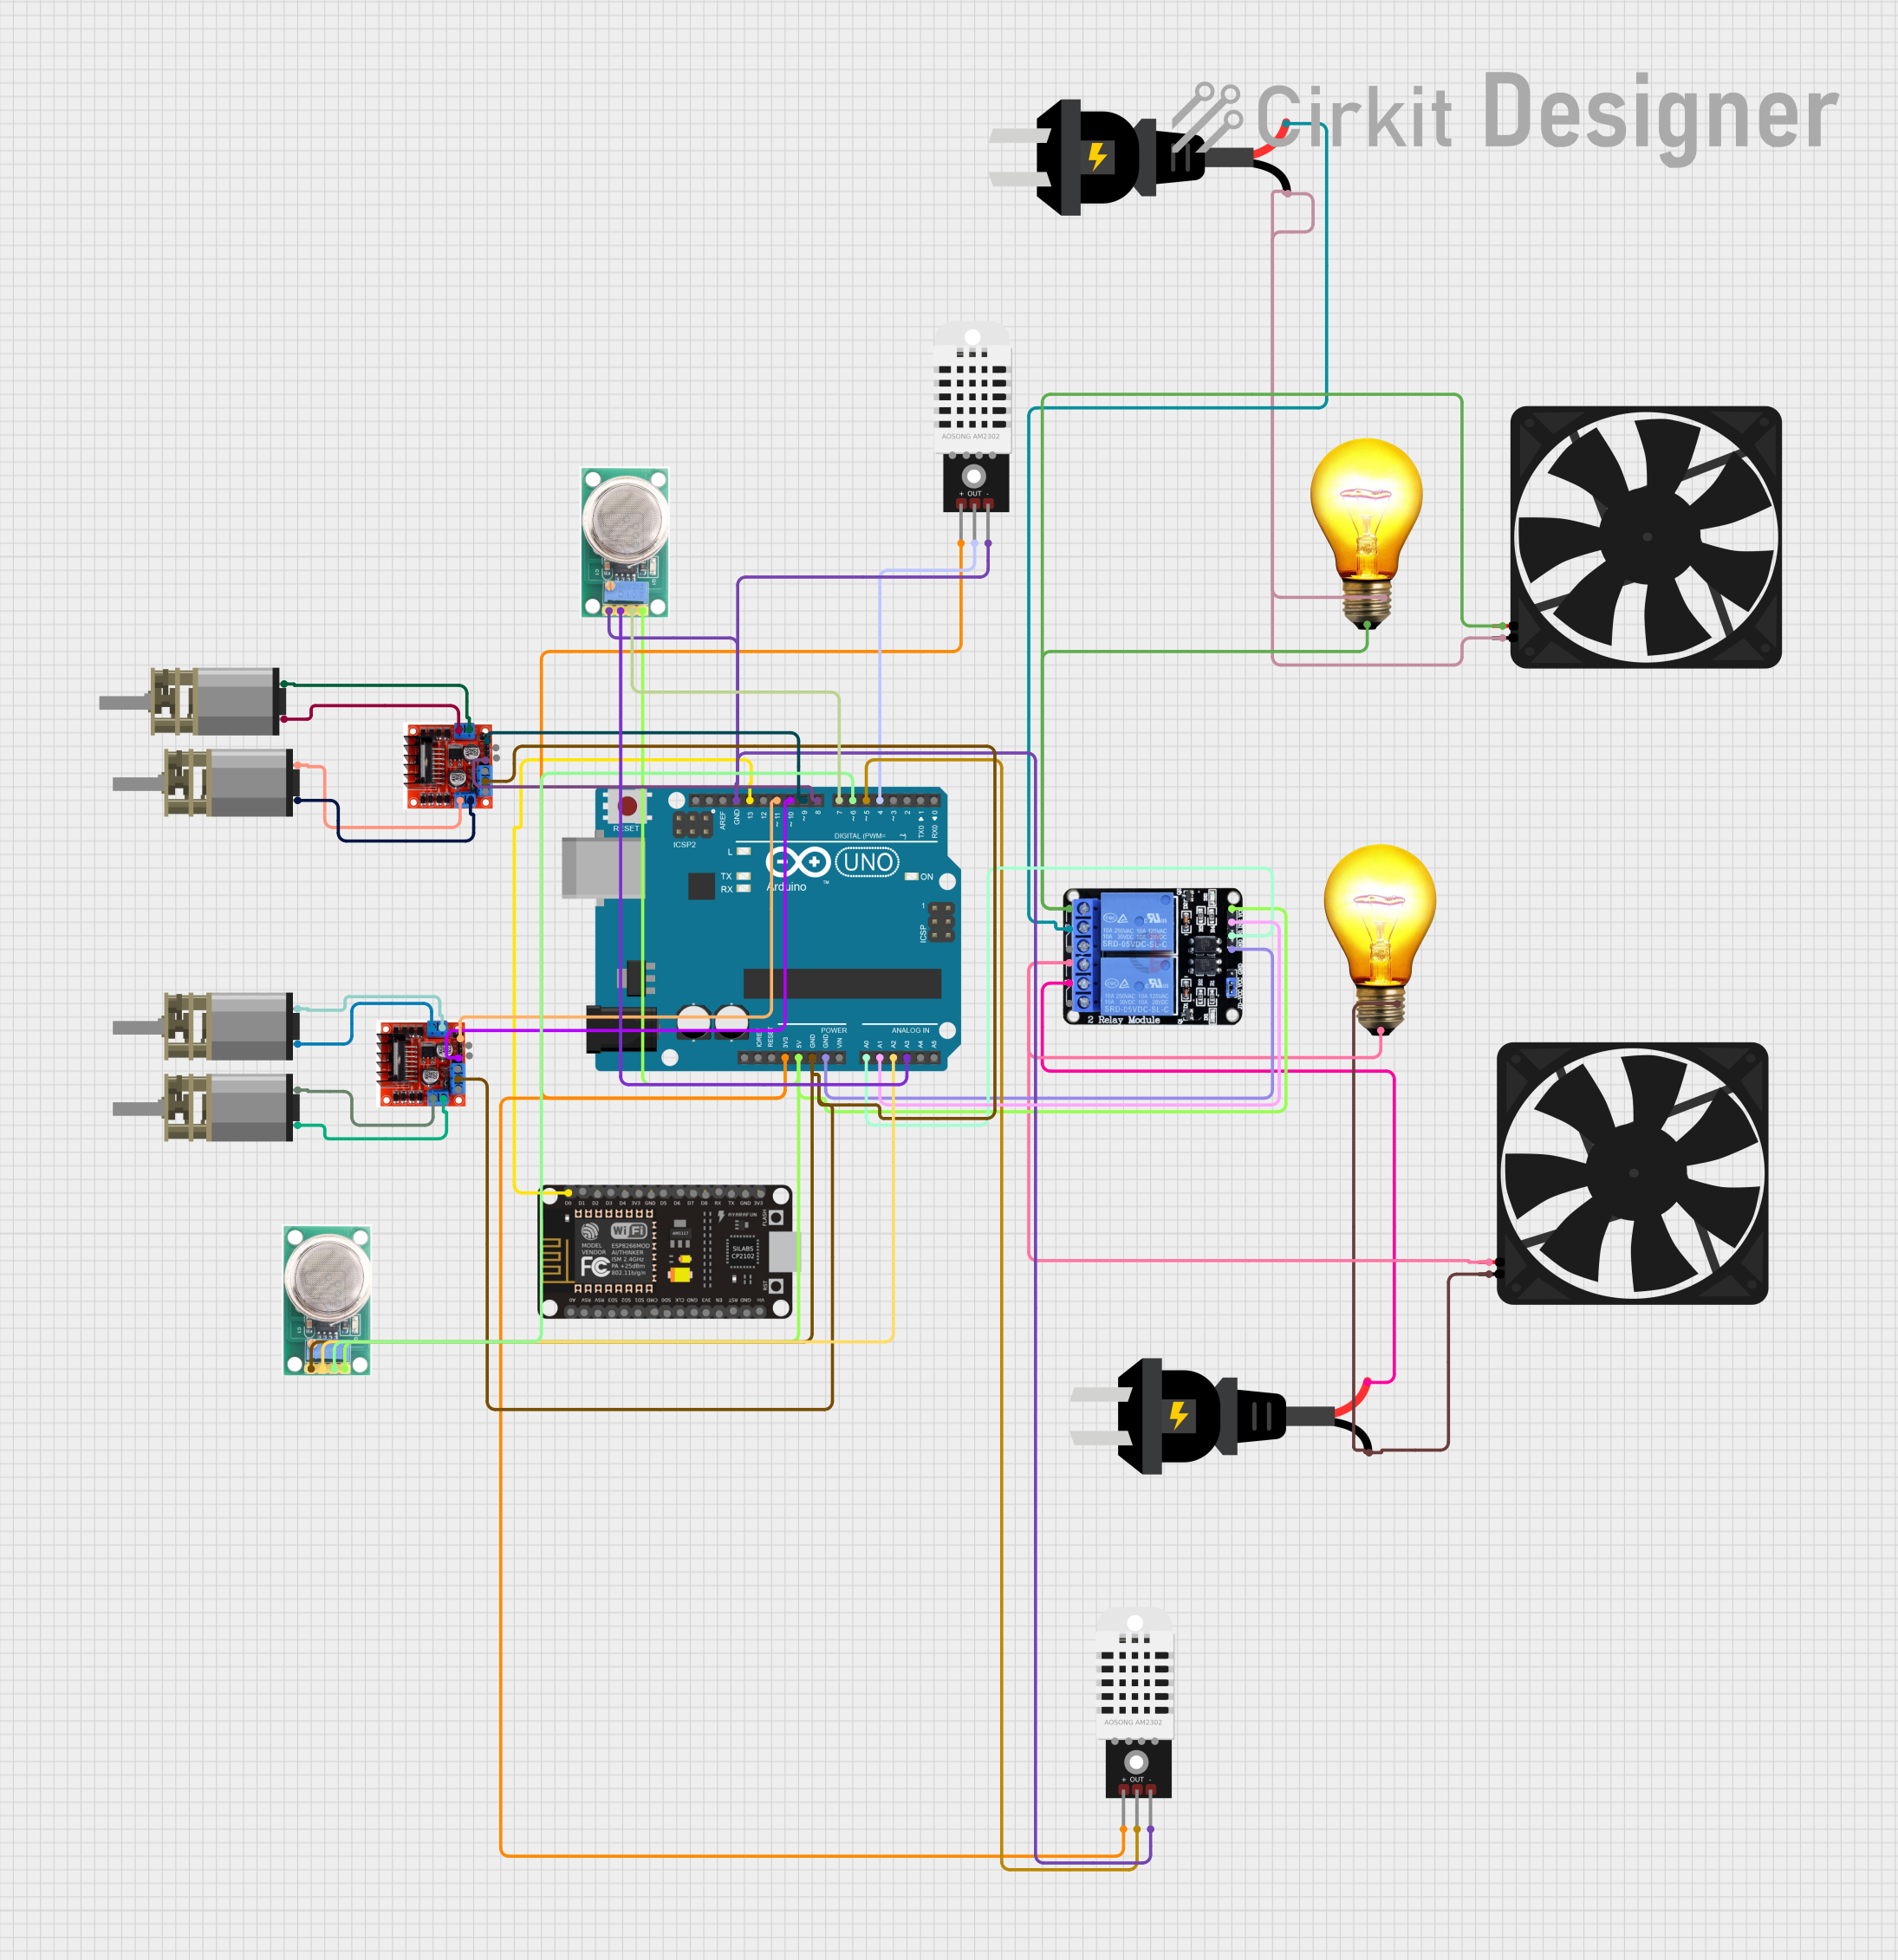
Explore Projects Built with Incubator