How to Use 12v 20ah: Examples, Pinouts, and Specs
Introduction
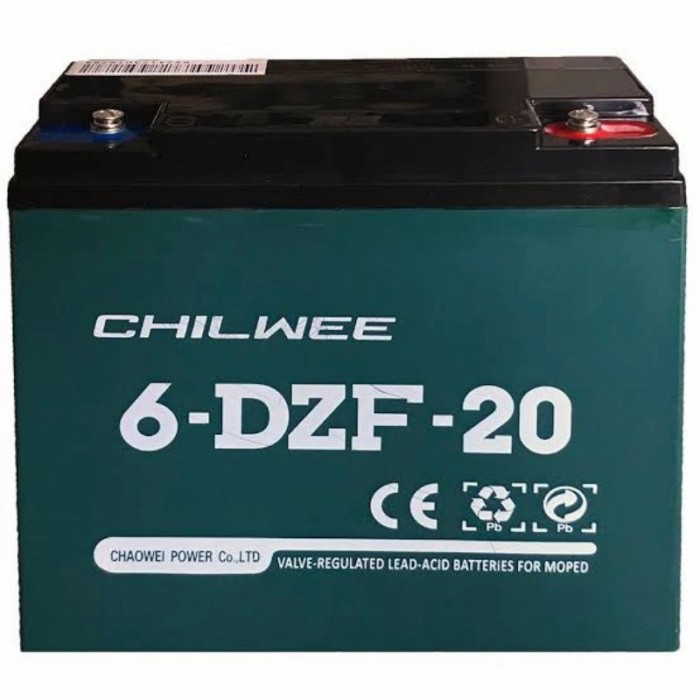
The Chilwee 6-DZF-20 is a 12-volt battery with a capacity of 20 ampere-hours (Ah). This battery is designed for a wide range of applications, including backup power systems, electric vehicles, and renewable energy systems. Its robust design and reliable performance make it a popular choice for both commercial and residential use.
Explore Projects Built with 12v 20ah
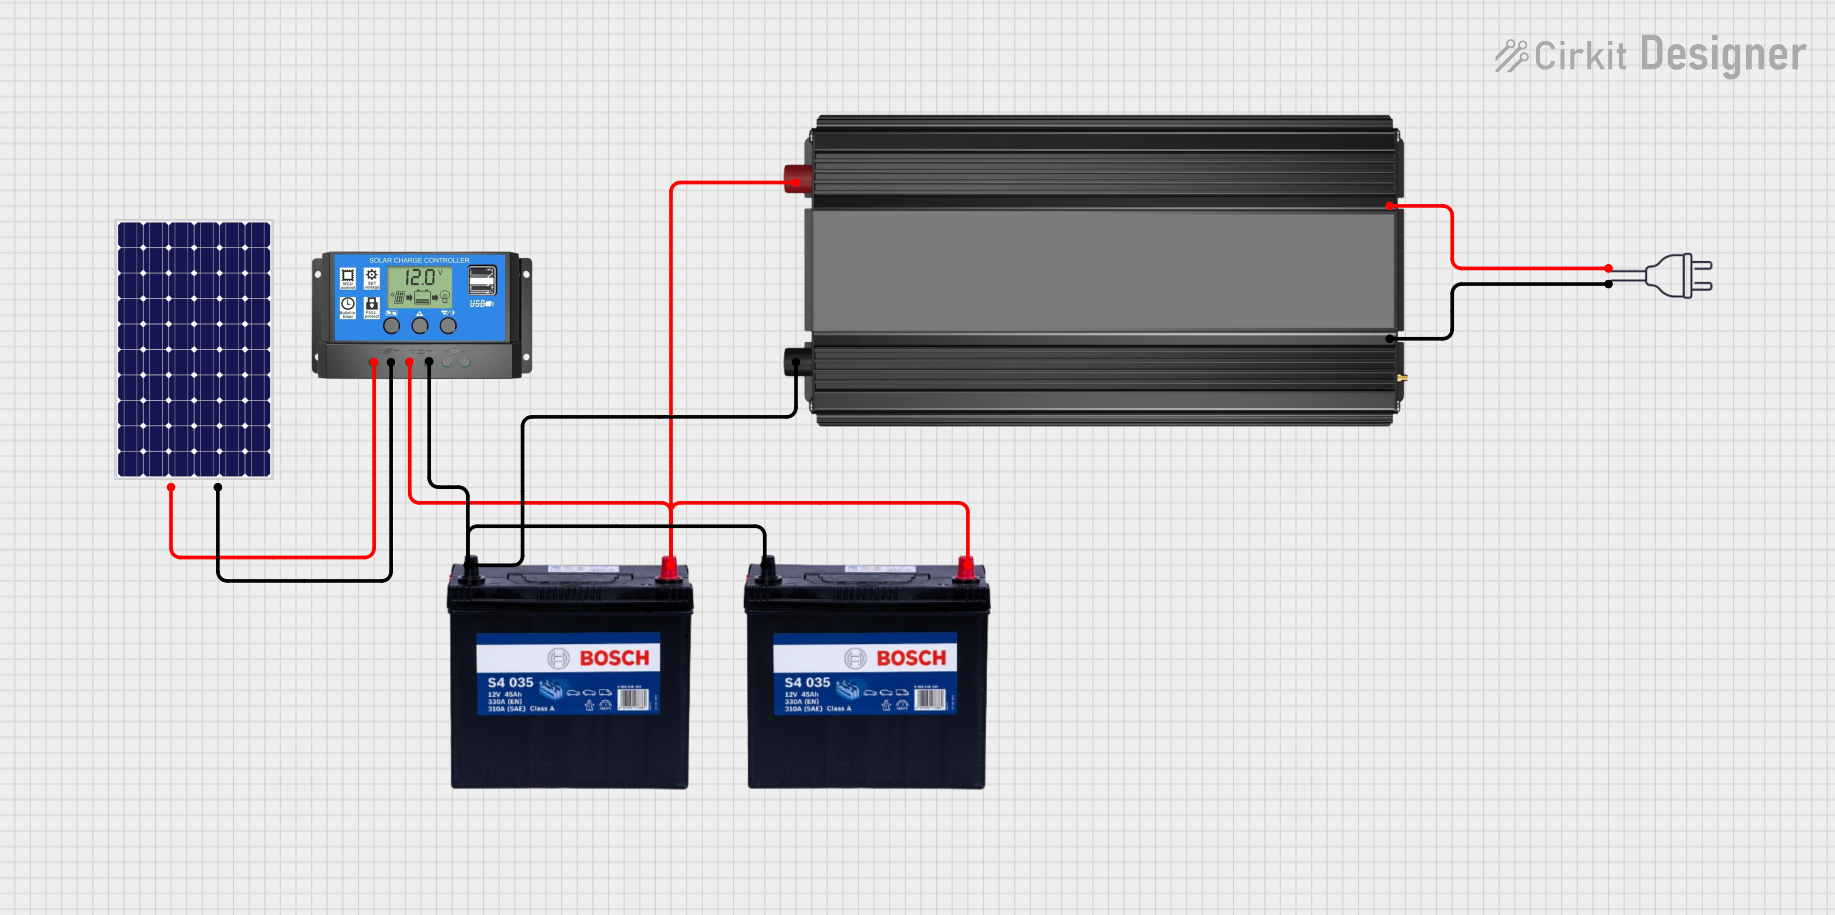
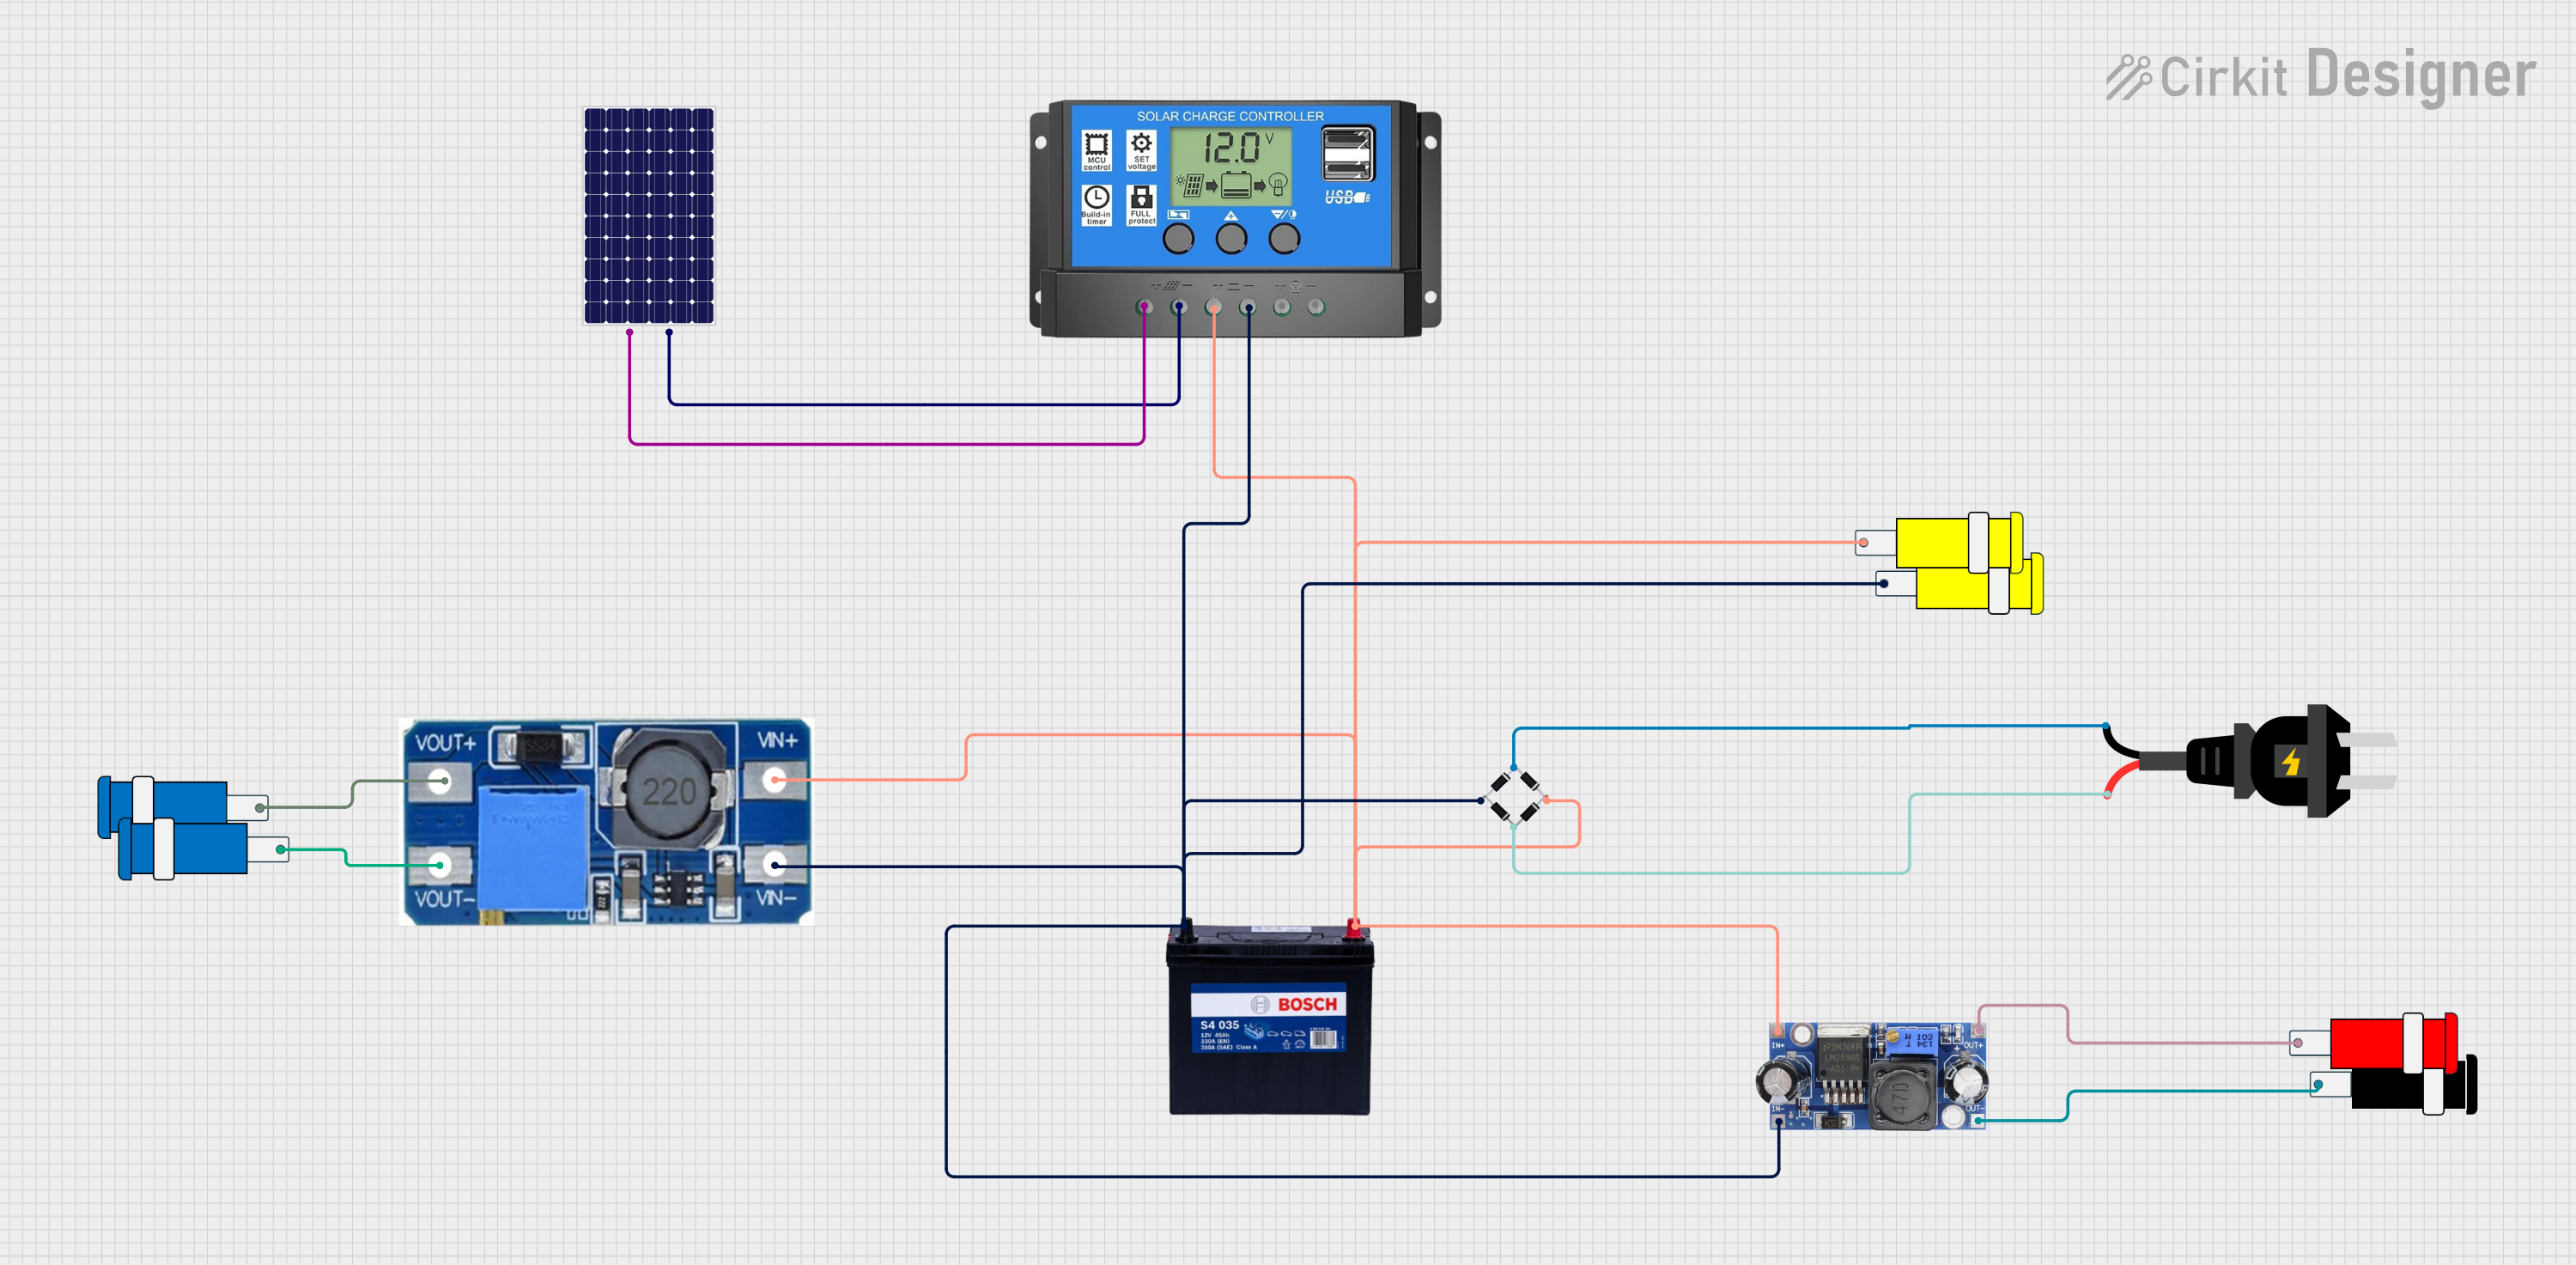
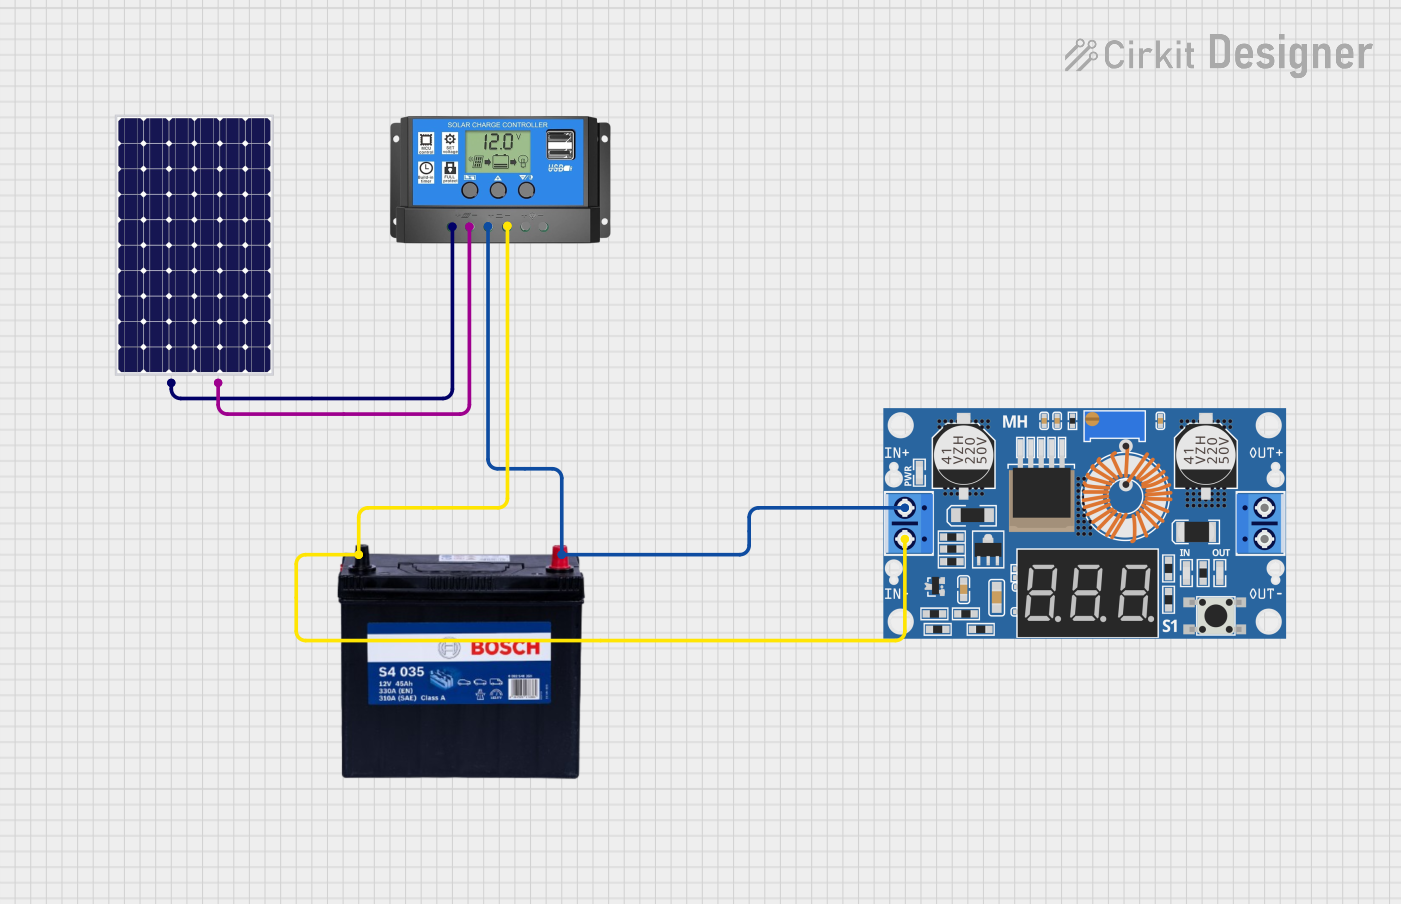
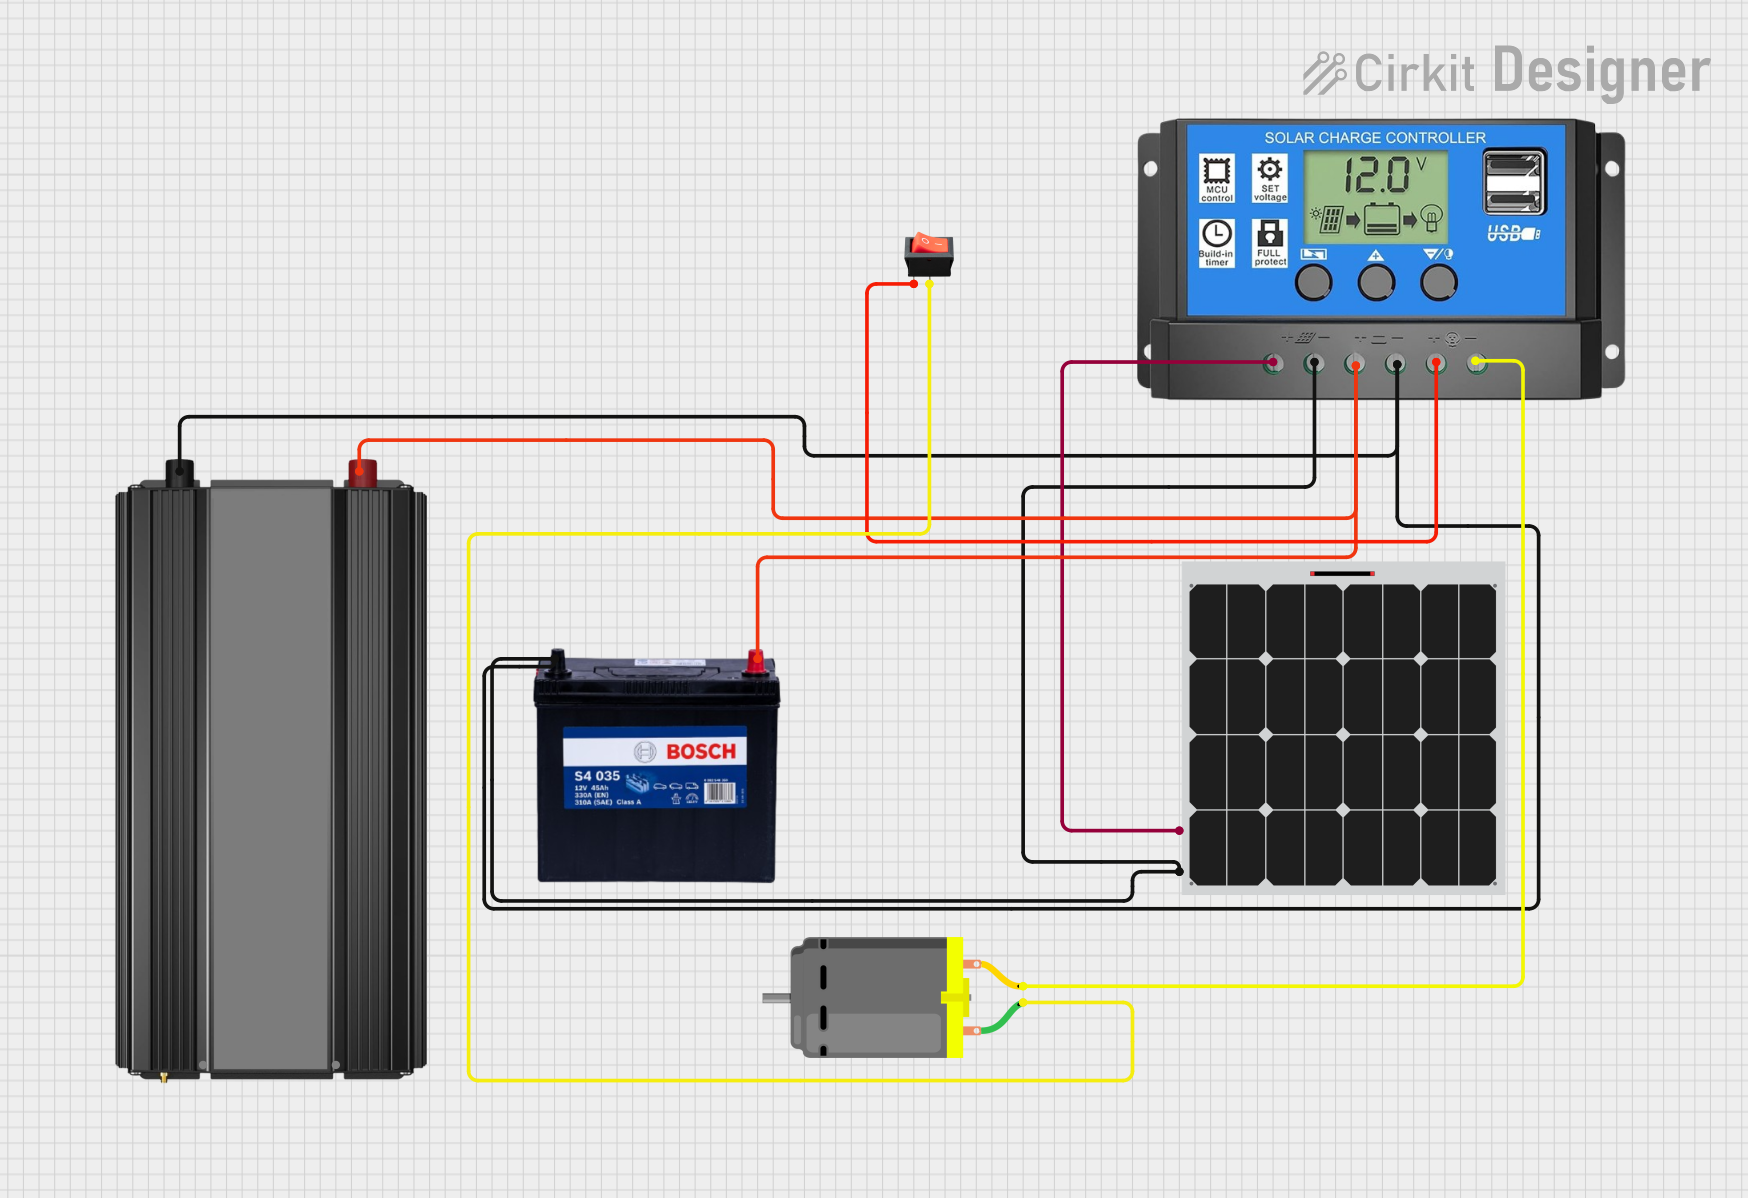
Explore Projects Built with 12v 20ah
Technical Specifications
Key Technical Details
| Parameter | Value |
|---|---|
| Nominal Voltage | 12V |
| Capacity | 20Ah |
| Dimensions (LxWxH) | 181mm x 77mm x 167mm |
| Weight | 6.5 kg |
| Terminal Type | T2 |
| Maximum Discharge Current | 60A (5 sec) |
| Internal Resistance | ≤ 15mΩ |
| Self-Discharge Rate | ≤ 3% per month |
| Operating Temperature Range | -15°C to 50°C |
Pin Configuration and Descriptions
| Pin Number | Description |
|---|---|
| 1 | Positive Terminal (+) |
| 2 | Negative Terminal (-) |
Usage Instructions
How to Use the Component in a Circuit
Connecting the Battery:
- Identify the positive (+) and negative (-) terminals of the battery.
- Connect the positive terminal to the positive rail of your circuit.
- Connect the negative terminal to the ground (GND) of your circuit.
Charging the Battery:
- Use a compatible 12V battery charger.
- Ensure the charger is set to the correct voltage and current settings.
- Connect the charger's positive lead to the battery's positive terminal.
- Connect the charger's negative lead to the battery's negative terminal.
- Monitor the charging process to avoid overcharging.
Discharging the Battery:
- Ensure the load connected to the battery does not exceed the maximum discharge current (60A for 5 seconds).
- Monitor the battery voltage to avoid deep discharge, which can damage the battery.
Important Considerations and Best Practices
- Safety First: Always handle the battery with care. Avoid short-circuiting the terminals.
- Proper Storage: Store the battery in a cool, dry place. Avoid exposure to extreme temperatures.
- Regular Maintenance: Periodically check the battery's voltage and charge status. Recharge if necessary.
- Avoid Overcharging: Use a charger with an automatic cutoff feature to prevent overcharging.
Troubleshooting and FAQs
Common Issues Users Might Face
Battery Not Holding Charge:
- Solution: Check the battery's voltage. If it's significantly lower than 12V, the battery may be deeply discharged or damaged. Recharge the battery and monitor its performance. If the issue persists, consider replacing the battery.
Battery Overheating:
- Solution: Ensure the battery is not exposed to high temperatures. Check the load connected to the battery; it should not exceed the maximum discharge current. If overheating continues, inspect the battery for any signs of damage.
Slow Charging:
- Solution: Verify the charger's output voltage and current. Ensure the charger is compatible with the battery. Check the connections for any loose or corroded terminals.
FAQs
Can I use this battery with an Arduino UNO?
- Yes, you can use the Chilwee 6-DZF-20 battery to power an Arduino UNO. Ensure you use a voltage regulator to step down the 12V to 5V, which is the operating voltage for the Arduino UNO.
How long will the battery last on a full charge?
- The battery's runtime depends on the load connected to it. For example, a 20W load will last approximately 12 hours (20Ah / 1.67A = 12 hours).
Is it safe to use this battery indoors?
- Yes, the Chilwee 6-DZF-20 battery can be used indoors. Ensure proper ventilation and avoid placing the battery near flammable materials.
Example Code for Arduino UNO
Here is an example of how to use the Chilwee 6-DZF-20 battery to power an Arduino UNO with a voltage regulator:
// Example code to read analog input from a sensor
// and print the value to the Serial Monitor

const int sensorPin = A0; // Analog input pin connected to the sensor
int sensorValue = 0;      // Variable to store the value from the sensor

void setup() {
  Serial.begin(9600); // Initialize serial communication at 9600 baud
}

void loop() {
  sensorValue = analogRead(sensorPin); // Read the analog input
  Serial.println(sensorValue);         // Print the sensor value to the Serial Monitor
  delay(1000);                         // Wait for 1 second before the next reading
}
Note: Ensure you use a voltage regulator to step down the 12V from the battery to 5V for the Arduino UNO. Connect the output of the voltage regulator to the 5V pin of the Arduino UNO.
By following this documentation, users can effectively utilize the Chilwee 6-DZF-20 12V 20Ah battery in their projects, ensuring optimal performance and safety.