How to Use Bluetooth module HM-10: Examples, Pinouts, and Specs
Introduction
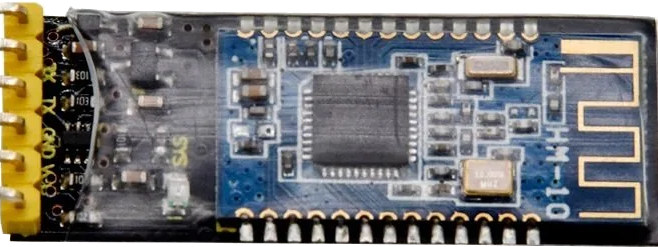
The Bluetooth module HM-10, manufactured by Keyestudio (part ID: KS0174), is a versatile and low-cost module designed for wireless communication between devices. Utilizing Bluetooth 4.0 technology, it is particularly suitable for embedded systems and Internet of Things (IoT) projects, enabling seamless data transfer and communication over Bluetooth. Common applications include home automation, sensor data collection, and remote device control.
Explore Projects Built with Bluetooth module HM-10

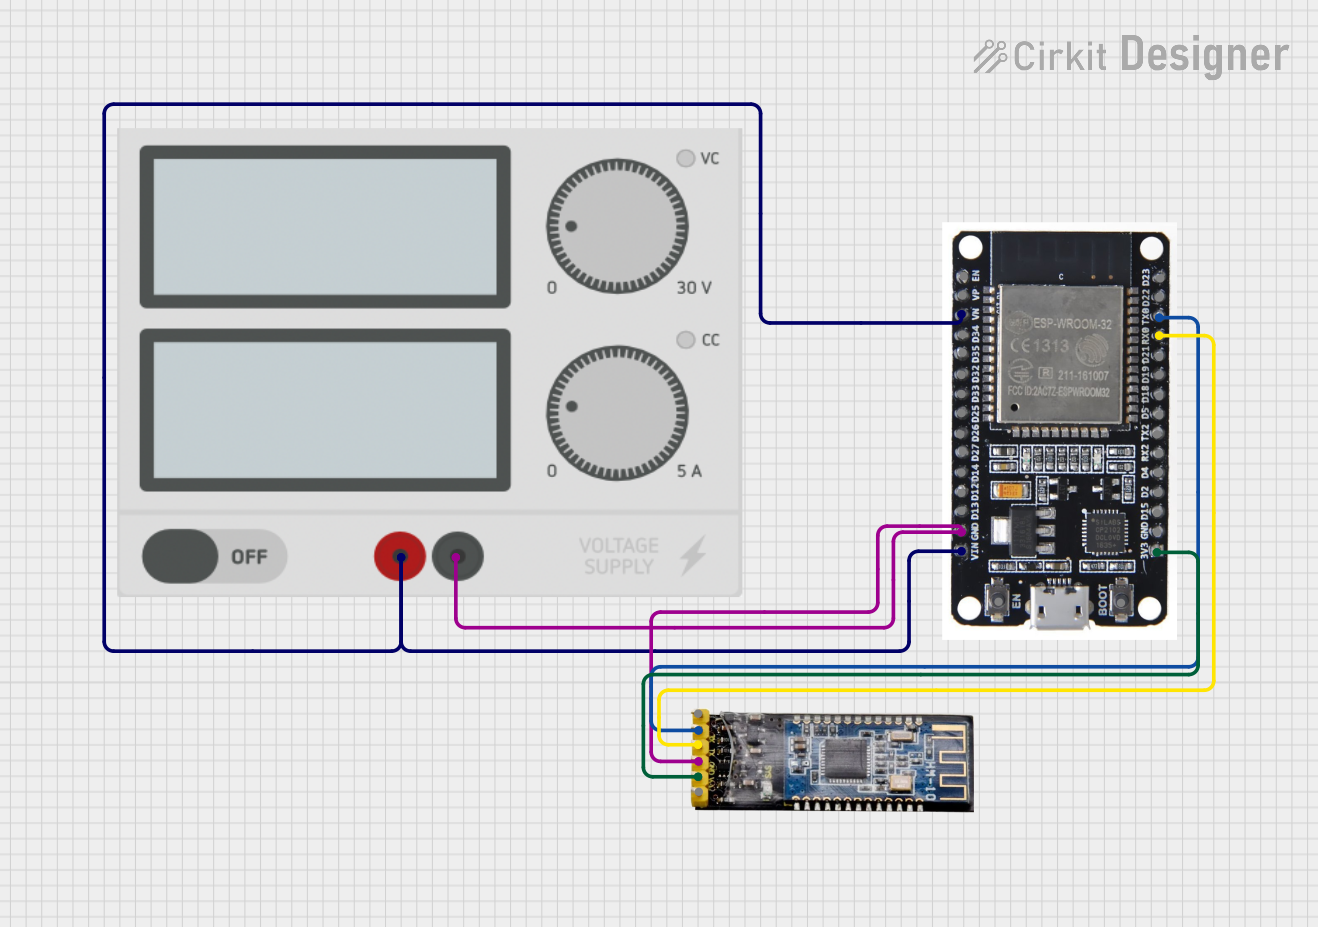
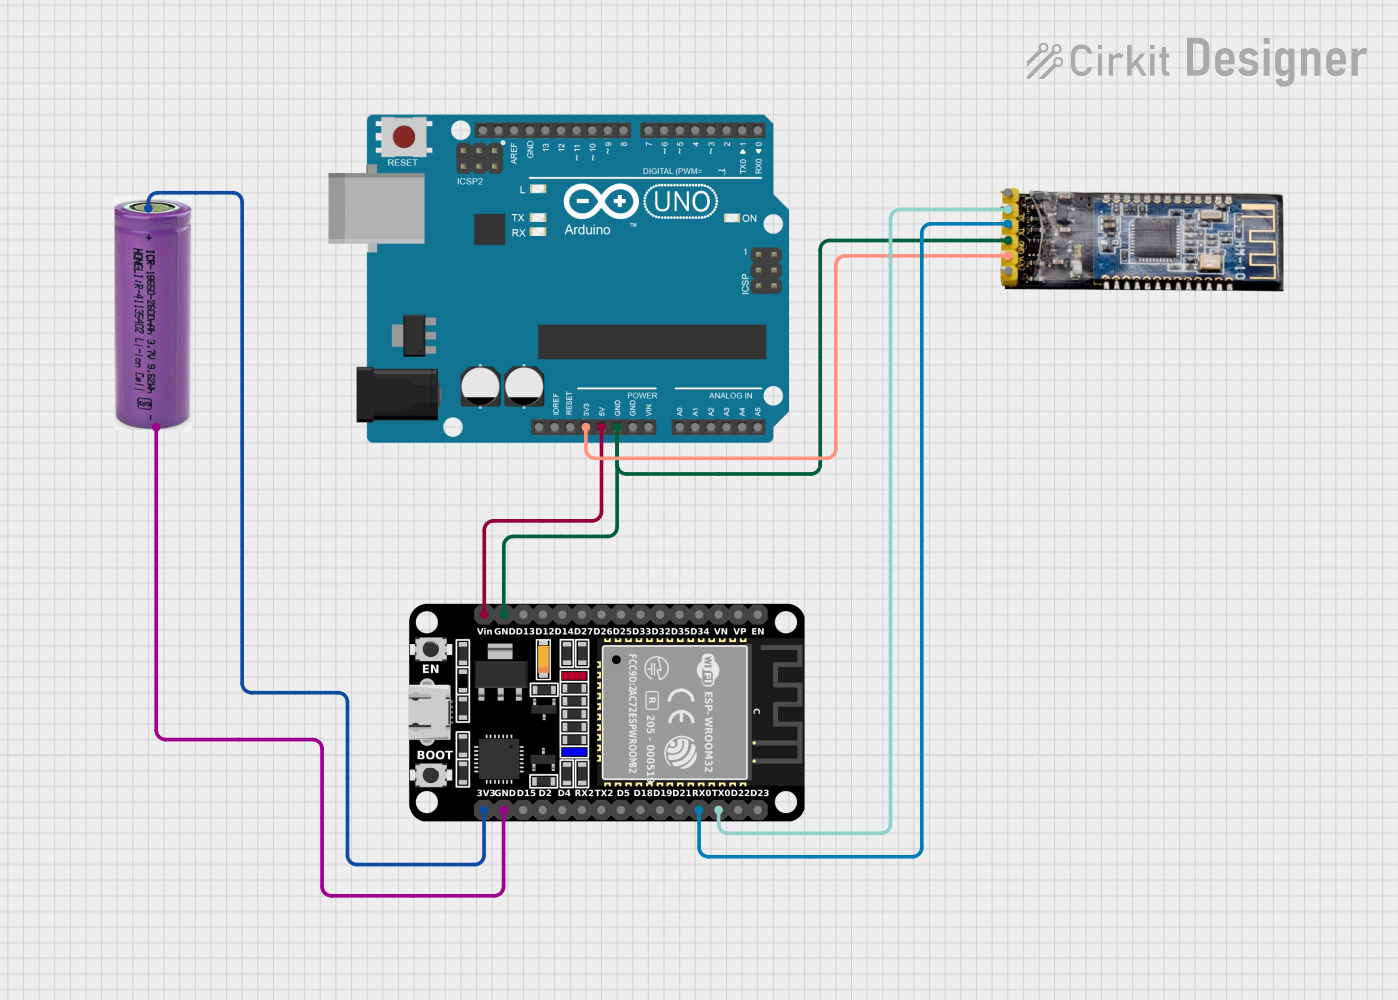
Explore Projects Built with Bluetooth module HM-10
Technical Specifications
General Features
- Bluetooth Specification: Bluetooth 4.0 (BLE)
- Frequency: 2.4GHz ISM band
- Modulation: GFSK (Gaussian Frequency Shift Keying)
- Power Supply: 3.3V to 6V DC
- Operating Temperature: -40°C to +85°C
Electrical Characteristics
- Power Consumption: 8.5mA (active), 400uA (sleep mode)
- Transmit Power: +4dBm
- Receiver Sensitivity: -93dBm
- Range: Up to 100 meters in open space
Pin Configuration and Descriptions
| Pin Number | Name | Description |
|---|---|---|
| 1 | VCC | Power supply (3.3V to 6V DC) |
| 2 | GND | Ground connection |
| 3 | TXD | Transmit data (connect to RXD of host device) |
| 4 | RXD | Receive data (connect to TXD of host device) |
| 5 | STATE | Indicates the module status |
| 6 | BRK | Breakout pin, not commonly used |
Usage Instructions
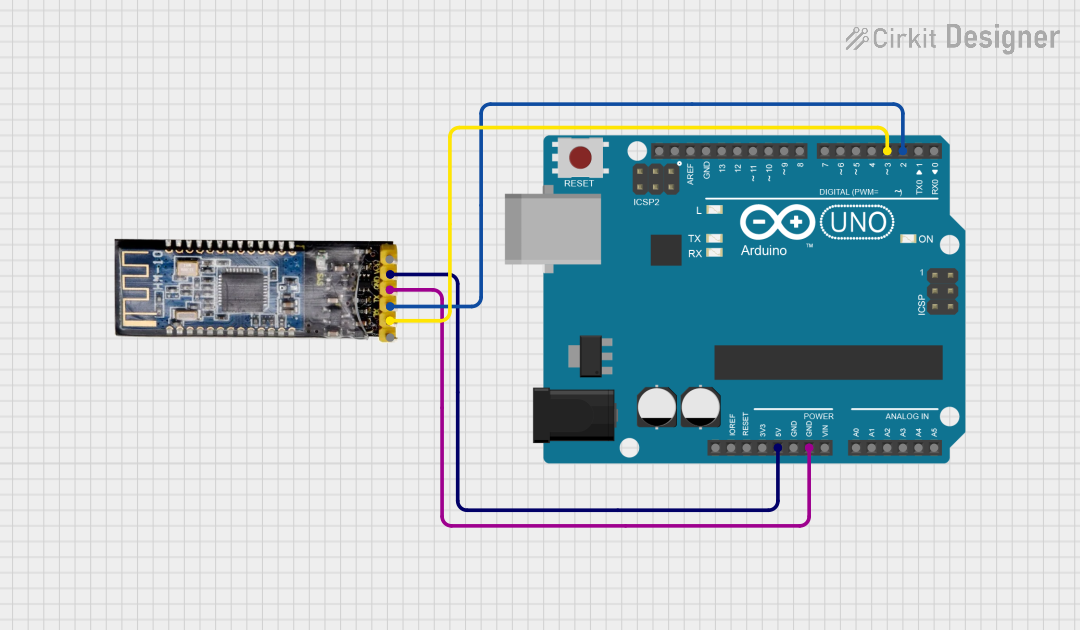
Connecting to an Arduino UNO
- Connect the HM-10 module's VCC pin to the 3.3V output on the Arduino UNO.
- Connect the GND pin to one of the GND pins on the Arduino UNO.
- Connect the TXD pin of the HM-10 to the RX pin (Pin 0) on the Arduino UNO.
- Connect the RXD pin of the HM-10 to the TX pin (Pin 1) on the Arduino UNO.
Important Considerations
- Ensure that the power supply voltage does not exceed 6V to prevent damage.
- When connecting to devices that operate at 5V logic levels, use a logic level converter for the TX and RX lines.
- For stable operation, add a decoupling capacitor (typically 100nF to 1μF) between VCC and GND near the module.
Best Practices
- Always disconnect the Bluetooth module when uploading sketches to the Arduino to avoid conflicts on the serial port.
- Use external antennas if necessary to extend the range in open space.
- Avoid placing the module near metal objects or in areas with high electromagnetic interference.
Example Arduino Code
#include <SoftwareSerial.h>

SoftwareSerial HM10(10, 11); // RX = 10, TX = 11

void setup() {
  Serial.begin(9600);
  HM10.begin(9600); // Default baud rate of the HM-10 module
  Serial.println("HM-10 Bluetooth module is ready");
  // Make sure the baud rate matches the setting on the HM-10 module.
}

void loop() {
  // Forward any data received from the HM-10 to the Serial Monitor
  if (HM10.available()) {
    Serial.write(HM10.read());
  }
  // Forward any data received from the Serial Monitor to the HM-10
  if (Serial.available()) {
    HM10.write(Serial.read());
  }
}
Troubleshooting and FAQs
Common Issues
- Module not responding: Ensure that the module is powered correctly and the TX/RX connections are not reversed.
- Cannot pair or connect: Verify that the device you are trying to connect to is compatible with Bluetooth 4.0 (BLE) and is in pairing mode.
- Intermittent connectivity: Check for sources of interference or move the module away from metal objects.
Solutions and Tips
- If the module is not discoverable, reset the power or use AT commands to restore factory settings.
- For issues related to data transmission, ensure that the baud rate of the HM-10 matches the baud rate set in your code.
- Update the firmware of the HM-10 module if you are experiencing compatibility issues with newer devices.
FAQs
Q: Can the HM-10 module communicate with Bluetooth 2.0 or 3.0 devices? A: No, the HM-10 is a BLE module and is not backward compatible with earlier Bluetooth versions.
Q: How do I change the baud rate of the HM-10 module?
A: You can change the baud rate using AT commands. For example, sending AT+BAUD4 will set the baud rate to 9600.
Q: What is the default PIN code for pairing?
A: The default PIN code is typically 000000 or 123456. Check the module's datasheet for the exact PIN.
Remember to consult the HM-10 datasheet provided by Keyestudio for more detailed information and advanced configurations.