How to Use Arduino MKR Zero: Examples, Pinouts, and Specs
Introduction
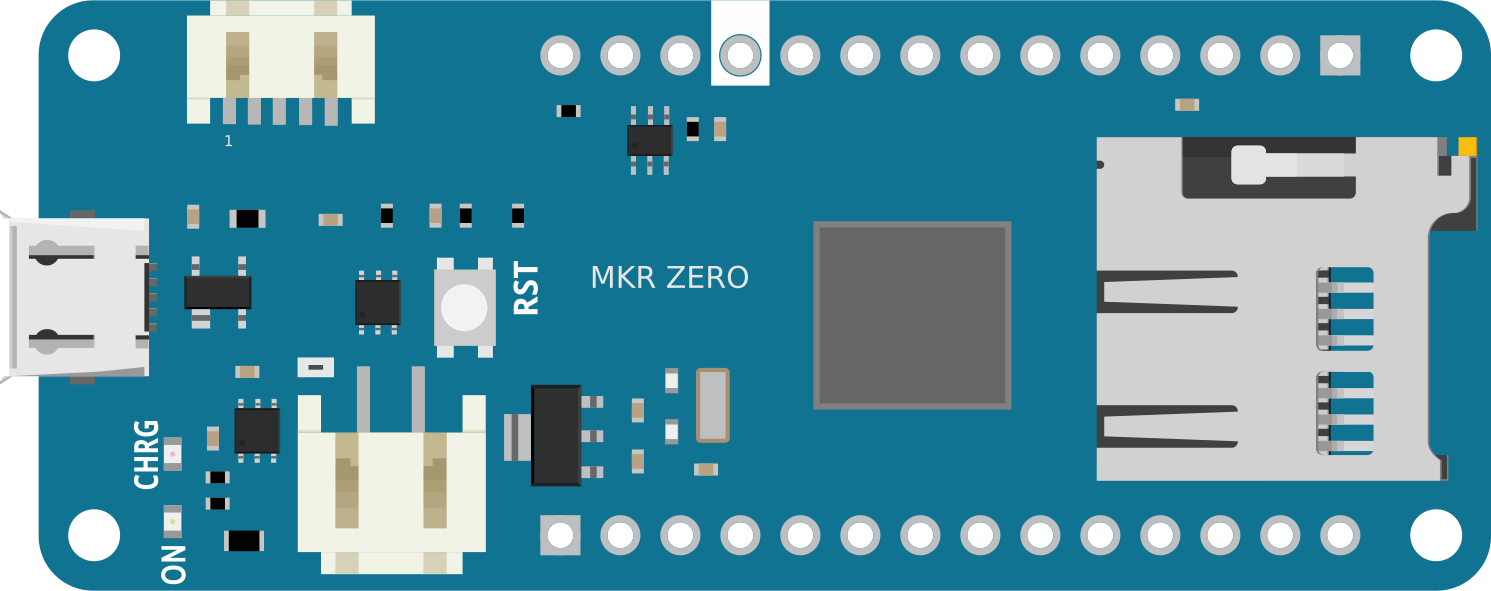
The Arduino MKR Zero is a compact microcontroller board powered by the SAMD21 Cortex-M0+ 32-bit ARM processor. Designed for Internet of Things (IoT) applications, it combines powerful processing capabilities with low power consumption. The board features a built-in SD card slot for data logging, USB connectivity for easy programming and communication, and a small form factor ideal for portable and embedded projects.
Explore Projects Built with Arduino MKR Zero
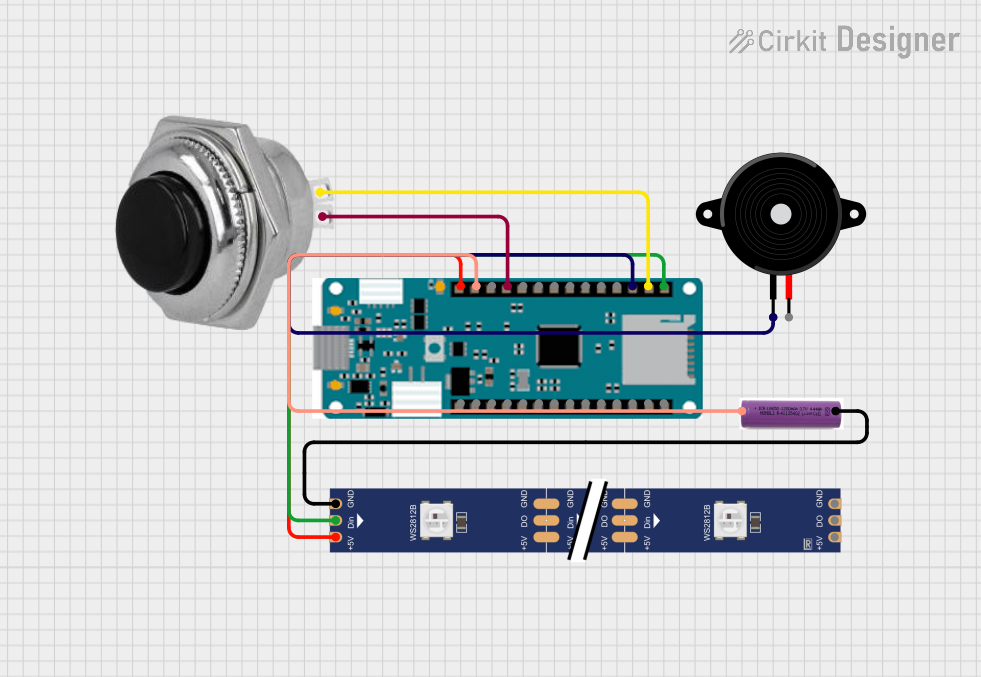
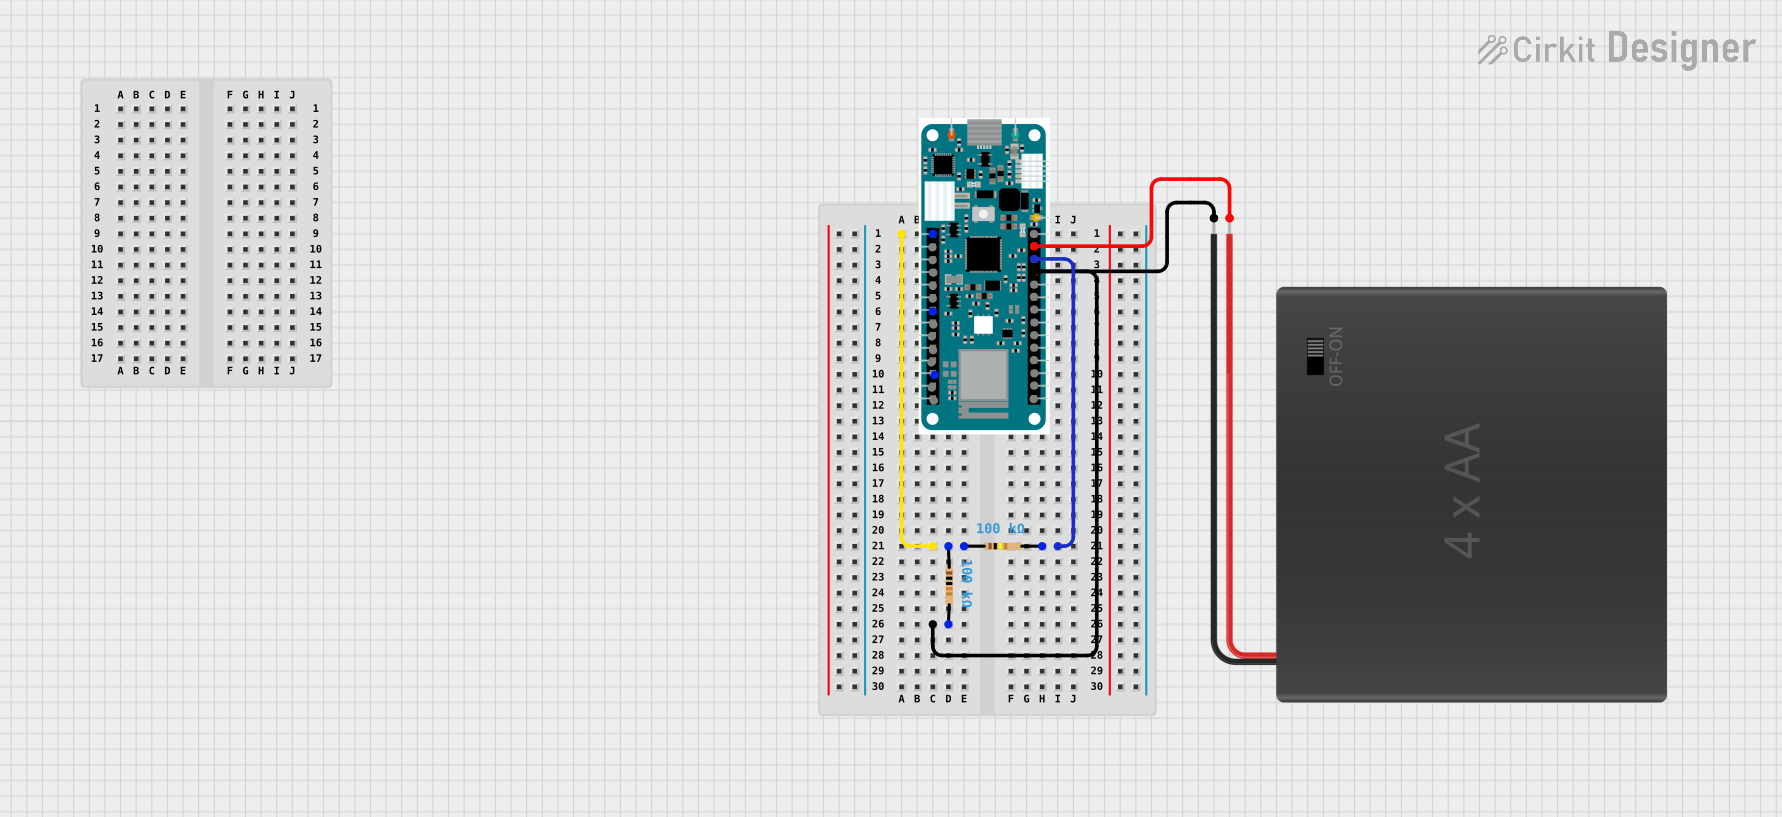
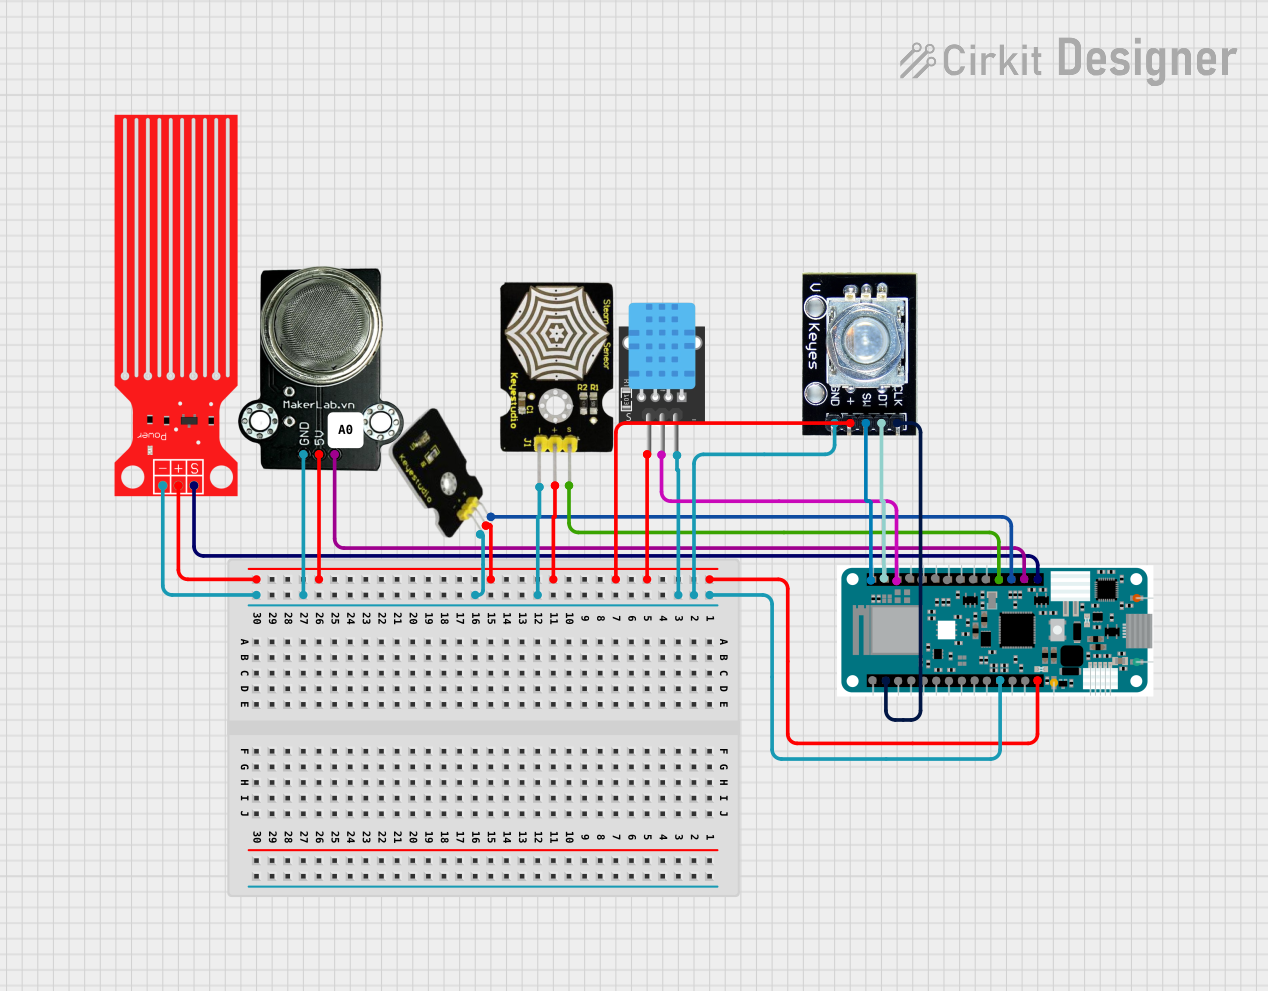
Explore Projects Built with Arduino MKR Zero
Common Applications and Use Cases
- Data logging and storage using the SD card slot
- IoT devices and smart sensors
- Audio processing and playback
- Portable and battery-powered projects
- Educational and prototyping purposes
Technical Specifications
Key Technical Details
| Specification | Value |
|---|---|
| Microcontroller | SAMD21 Cortex-M0+ 32-bit ARM MCU |
| Operating Voltage | 3.3V |
| Input Voltage (VIN) | 5V to 6V |
| Digital I/O Pins | 8 |
| PWM Pins | 12 |
| Analog Input Pins | 7 (12-bit ADC) |
| Analog Output Pins | 1 (10-bit DAC) |
| Flash Memory | 256 KB |
| SRAM | 32 KB |
| Clock Speed | 48 MHz |
| Built-in SD Card Slot | Yes |
| USB Interface | Micro USB |
| Dimensions | 61.5 mm x 25 mm |
Pin Configuration and Descriptions
| Pin Name | Description |
|---|---|
| VIN | Input voltage pin (5V to 6V) for powering the board. |
| 3.3V | Regulated 3.3V output pin. |
| GND | Ground pin. |
| Digital Pins | D0 to D7: General-purpose digital I/O pins. |
| PWM Pins | D0 to D7: Can also be used for PWM output. |
| Analog Pins | A0 to A6: Analog input pins with 12-bit resolution. |
| DAC | A0: Can also be used as a 10-bit analog output (DAC). |
| I2C | SDA (D11) and SCL (D12): I2C communication pins. |
| SPI | MOSI (D8), MISO (D10), SCK (D9): SPI communication pins. |
| UART | TX (D14) and RX (D13): Serial communication pins. |
| SD Card Slot | Built-in slot for microSD cards, connected via SPI. |
| Reset | Resets the board when pressed. |
Usage Instructions
How to Use the Arduino MKR Zero in a Circuit
Powering the Board:
- Use the VIN pin (5V to 6V) or connect via the Micro USB port.
- Ensure the power source provides sufficient current for your application.
Programming the Board:
- Connect the board to your computer using a Micro USB cable.
- Open the Arduino IDE, select "Arduino MKR Zero" from the board menu, and upload your code.
Using the SD Card Slot:
- Insert a formatted microSD card into the slot.
- Use the
SDlibrary in the Arduino IDE to read/write data to the card.
Connecting Sensors and Actuators:
- Use the digital and analog pins for interfacing with sensors, actuators, and other peripherals.
- For I2C or SPI devices, connect to the appropriate communication pins.
Important Considerations and Best Practices
- Voltage Levels: The MKR Zero operates at 3.3V. Ensure all connected components are compatible with 3.3V logic levels to avoid damage.
- Power Consumption: For battery-powered projects, use the low-power features of the SAMD21 processor to extend battery life.
- SD Card Compatibility: Use microSD cards formatted with FAT16 or FAT32 for best results.
- Libraries: Install the required libraries (e.g.,
SD,SPI) in the Arduino IDE for specific functionalities.
Example Code: Reading from an SD Card
#include <SPI.h>
#include <SD.h>

const int chipSelect = 4; // SD card chip select pin

void setup() {
  Serial.begin(9600); // Initialize serial communication
  while (!Serial) {
    ; // Wait for the serial port to connect
  }

  Serial.println("Initializing SD card...");

  if (!SD.begin(chipSelect)) {
    Serial.println("Card failed, or not present");
    // Stop the program if the SD card is not detected
    while (1);
  }
  Serial.println("Card initialized successfully.");

  // Open the file for reading
  File dataFile = SD.open("example.txt");
  if (dataFile) {
    Serial.println("Reading from example.txt:");
    while (dataFile.available()) {
      Serial.write(dataFile.read()); // Print file contents to Serial Monitor
    }
    dataFile.close(); // Close the file
  } else {
    Serial.println("Error opening example.txt");
  }
}

void loop() {
  // Nothing to do here
}
Troubleshooting and FAQs
Common Issues and Solutions
The board is not detected by the Arduino IDE:
- Ensure the correct board ("Arduino MKR Zero") and port are selected in the IDE.
- Check the USB cable and connection. Use a data-capable USB cable, not a charge-only cable.
SD card is not recognized:
- Verify the SD card is properly inserted and formatted as FAT16 or FAT32.
- Check the wiring to the SD card slot and ensure the
chipSelectpin is correctly defined in your code.
Power issues:
- Ensure the power supply provides sufficient voltage (5V to 6V) and current.
- Avoid connecting components that exceed the 3.3V logic level.
Code upload fails:
- Press the reset button on the board and try uploading the code again.
- Ensure no other program is using the COM port.
FAQs
Q: Can I power the MKR Zero with a battery?
A: Yes, you can power the board using a Li-Po battery (3.7V) connected to the battery connector or via the VIN pin (5V to 6V).
Q: What is the maximum size of the SD card supported?
A: The MKR Zero supports microSD cards up to 32GB formatted with FAT16 or FAT32.
Q: Can I use the MKR Zero with Arduino shields?
A: The MKR Zero is not directly compatible with standard Arduino shields due to its smaller form factor. However, you can use jumper wires or adapters to connect shields.
Q: Does the MKR Zero support Wi-Fi or Bluetooth?
A: No, the MKR Zero does not have built-in Wi-Fi or Bluetooth. For wireless connectivity, consider using external modules or other MKR boards like the MKR WiFi 1010.