Cirkit Designer Logo
Cirkit Designer
Your all-in-one circuit design IDE
Home / 
Component Documentation

How to Use RC Battery 2S LiPo Battery: Examples, Pinouts, and Specs

Image of RC Battery 2S LiPo Battery
Cirkit Designer LogoDesign with RC Battery 2S LiPo Battery in Cirkit Designer

Introduction

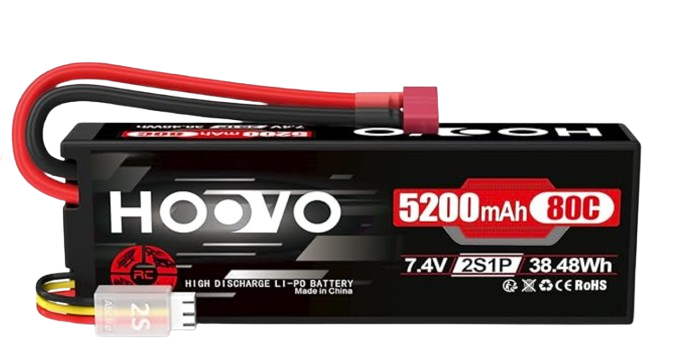
The HOOVO RC Battery 2S LiPo Battery is a 2-cell lithium polymer (LiPo) battery designed for high-performance remote control (RC) applications. With its lightweight construction and high energy density, this battery is ideal for powering RC vehicles, drones, and other hobbyist electronics requiring reliable and efficient energy storage.

Explore Projects Built with RC Battery 2S LiPo Battery

Use Cirkit Designer to design, explore, and prototype these projects online. Some projects support real-time simulation. Click "Open Project" to start designing instantly!
Battery-Powered Servo Control System with 2S 30A BMS and TP5100 Charger
Image of servo power supply: A project utilizing RC Battery 2S LiPo Battery in a practical application
This circuit is a battery management and charging system for a 2S lithium-ion battery pack, which powers multiple MG996R servos. The TP5100 module charges the battery pack from a 12V power supply, while the 2S 30A BMS ensures safe operation and distribution of power to the servos.
Cirkit Designer LogoOpen Project in Cirkit Designer
Battery-Powered Adjustable Voltage Regulator with Li-ion 18650 Batteries and BMS
Image of mini ups: A project utilizing RC Battery 2S LiPo Battery in a practical application
This circuit is a power management system that uses four Li-ion 18650 batteries connected to a 2S 30A BMS for battery management and protection. The system includes step-up and step-down voltage regulators to provide adjustable output voltages, controlled by a rocker switch, and multiple DC jacks for power input and output.
Cirkit Designer LogoOpen Project in Cirkit Designer
Battery-Powered 18650 Li-ion Charger with USB Output and Adjustable Voltage Regulator
Image of Breadboard: A project utilizing RC Battery 2S LiPo Battery in a practical application
This circuit is a battery management and power supply system that uses three 3.7V batteries connected to a 3S 10A Li-ion 18650 Charger Protection Board Module for balanced charging and protection. The system includes a TP4056 Battery Charging Protection Module for additional charging safety, a Step Up Boost Power Converter to regulate and boost the voltage, and a USB regulator to provide a stable 5V output, controlled by a push switch.
Cirkit Designer LogoOpen Project in Cirkit Designer
Battery-Powered UPS System with Waveshare UPS 3S and Solar Charger
Image of Copy of s: A project utilizing RC Battery 2S LiPo Battery in a practical application
This circuit is a power management system that integrates a 12V power supply, a solar charger power bank, and multiple Li-ion batteries to provide a stable power output. The Waveshare UPS 3S manages the input from the power sources and batteries, ensuring continuous power delivery. The MRB045 module is used to interface the solar charger with the rest of the system.
Cirkit Designer LogoOpen Project in Cirkit Designer

Explore Projects Built with RC Battery 2S LiPo Battery

Use Cirkit Designer to design, explore, and prototype these projects online. Some projects support real-time simulation. Click "Open Project" to start designing instantly!
Image of servo power supply: A project utilizing RC Battery 2S LiPo Battery in a practical application
Battery-Powered Servo Control System with 2S 30A BMS and TP5100 Charger
This circuit is a battery management and charging system for a 2S lithium-ion battery pack, which powers multiple MG996R servos. The TP5100 module charges the battery pack from a 12V power supply, while the 2S 30A BMS ensures safe operation and distribution of power to the servos.
Cirkit Designer LogoOpen Project in Cirkit Designer
Image of mini ups: A project utilizing RC Battery 2S LiPo Battery in a practical application
Battery-Powered Adjustable Voltage Regulator with Li-ion 18650 Batteries and BMS
This circuit is a power management system that uses four Li-ion 18650 batteries connected to a 2S 30A BMS for battery management and protection. The system includes step-up and step-down voltage regulators to provide adjustable output voltages, controlled by a rocker switch, and multiple DC jacks for power input and output.
Cirkit Designer LogoOpen Project in Cirkit Designer
Image of Breadboard: A project utilizing RC Battery 2S LiPo Battery in a practical application
Battery-Powered 18650 Li-ion Charger with USB Output and Adjustable Voltage Regulator
This circuit is a battery management and power supply system that uses three 3.7V batteries connected to a 3S 10A Li-ion 18650 Charger Protection Board Module for balanced charging and protection. The system includes a TP4056 Battery Charging Protection Module for additional charging safety, a Step Up Boost Power Converter to regulate and boost the voltage, and a USB regulator to provide a stable 5V output, controlled by a push switch.
Cirkit Designer LogoOpen Project in Cirkit Designer
Image of Copy of s: A project utilizing RC Battery 2S LiPo Battery in a practical application
Battery-Powered UPS System with Waveshare UPS 3S and Solar Charger
This circuit is a power management system that integrates a 12V power supply, a solar charger power bank, and multiple Li-ion batteries to provide a stable power output. The Waveshare UPS 3S manages the input from the power sources and batteries, ensuring continuous power delivery. The MRB045 module is used to interface the solar charger with the rest of the system.
Cirkit Designer LogoOpen Project in Cirkit Designer

Common Applications

  • RC cars, trucks, and buggies
  • RC drones and quadcopters
  • RC boats and planes
  • Robotics and DIY electronics projects

Technical Specifications

Below are the key technical details of the HOOVO RC Battery 2S LiPo Battery:

Specification Value
Nominal Voltage 7.4V (2S configuration)
Capacity 2200mAh (varies by model)
Discharge Rate (C-Rating) 50C (constant), 100C (burst)
Cell Configuration 2S (2 cells in series)
Dimensions 106mm x 33mm x 18mm (approx.)
Weight ~120g
Connector Type XT60 or Deans T-Plug (varies)
Charging Voltage 8.4V (maximum)
Minimum Discharge Voltage 6.0V
Operating Temperature -20°C to 60°C
Storage Temperature 0°C to 40°C

Pin Configuration and Descriptions

The battery typically includes two connectors:

  1. Main Power Connector (XT60 or Deans T-Plug):
    • Supplies power to the RC device.
    • Positive and negative terminals are clearly marked.
  2. Balance Connector (JST-XH):
    • Used for charging and balancing the cells.
    • Pinout for JST-XH (3-pin):
      Pin Description
      Pin 1 Cell 1 Positive (+)
      Pin 2 Cell 2 Positive (+)
      Pin 3 Common Ground (-)

Usage Instructions

How to Use the Battery in a Circuit

  1. Connecting the Battery:

    • Connect the main power connector (XT60 or Deans T-Plug) to the input of your RC device or electronic circuit.
    • Ensure the polarity matches the device's input terminals to avoid damage.
    • Use the balance connector with a compatible LiPo charger for safe charging.
  2. Charging the Battery:

    • Use a LiPo-compatible balance charger.
    • Set the charger to 2S (7.4V) mode and ensure the charging current does not exceed 1C (e.g., 2.2A for a 2200mAh battery).
    • Connect the balance connector to the charger for proper cell balancing.
  3. Discharging the Battery:

    • Avoid discharging below 6.0V to prevent damage to the cells.
    • Use a low-voltage alarm or cutoff circuit to monitor the battery voltage during use.

Important Considerations and Best Practices

  • Storage: Store the battery at 3.8V per cell (storage charge) in a cool, dry place.
  • Safety: Never puncture, short-circuit, or expose the battery to fire or water.
  • Inspection: Regularly inspect the battery for swelling, damage, or loose connectors.
  • Charging Location: Always charge the battery on a non-flammable surface and never leave it unattended.

Example: Using with Arduino UNO

While the battery is not directly connected to an Arduino UNO, it can power an Arduino-based RC project via a voltage regulator or motor driver. Below is an example of using the battery with an Arduino UNO and a motor driver:

// Example: Controlling a motor with Arduino UNO and 2S LiPo Battery
#include <Servo.h> // Include Servo library for motor control

Servo motor; // Create a Servo object to control the motor

void setup() {
  motor.attach(9); // Attach motor control to pin 9
  motor.write(0);  // Set motor to initial position (stopped)
}

void loop() {
  motor.write(90); // Set motor to half-speed
  delay(2000);     // Run motor for 2 seconds

  motor.write(0);  // Stop motor
  delay(1000);     // Wait for 1 second
}

Note: Use a voltage regulator (e.g., LM7805) to step down the 7.4V from the battery to 5V for the Arduino UNO.

Troubleshooting and FAQs

Common Issues

  1. Battery Swelling:

    • Cause: Overcharging, over-discharging, or physical damage.
    • Solution: Stop using the battery immediately. Dispose of it safely according to local regulations.
  2. Battery Not Charging:

    • Cause: Faulty charger, damaged balance connector, or incorrect settings.
    • Solution: Verify charger settings (2S mode, correct current). Inspect connectors for damage.
  3. RC Device Shuts Down Prematurely:

    • Cause: Low battery voltage or high current draw.
    • Solution: Check the battery voltage and ensure it is above the minimum discharge limit (6.0V). Use a battery with a higher capacity or C-rating if needed.

FAQs

Q1: Can I use this battery with a 3S charger?
A1: No, always use a charger compatible with 2S LiPo batteries to avoid overcharging and damage.

Q2: How do I know when the battery is fully charged?
A2: The charger will indicate a full charge when the voltage reaches 8.4V (4.2V per cell).

Q3: What is the maximum safe discharge current?
A3: For a 2200mAh 50C battery, the maximum safe discharge current is 110A (2200mAh × 50C).

Q4: Can I use this battery in cold weather?
A4: Yes, but performance may decrease below -10°C. Warm the battery to room temperature before use for optimal performance.