How to Use ATOM-QR-CODE: Examples, Pinouts, and Specs
Introduction
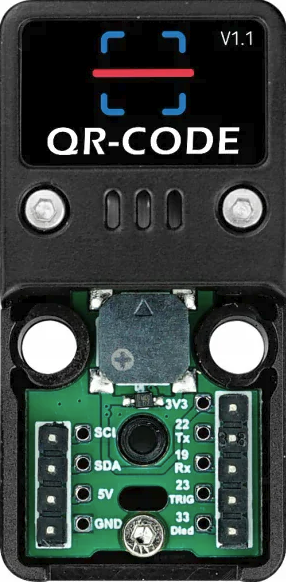
The ATOM-QR-CODE (Manufacturer Part ID: K041) is a compact and versatile module developed by M5Stack. It is designed to generate and read QR codes, making it an ideal solution for applications requiring data encoding and quick access to information. This module is widely used in IoT systems, access control, inventory management, and mobile payment systems. Its small form factor and ease of integration make it suitable for both hobbyist and professional projects.
Explore Projects Built with ATOM-QR-CODE
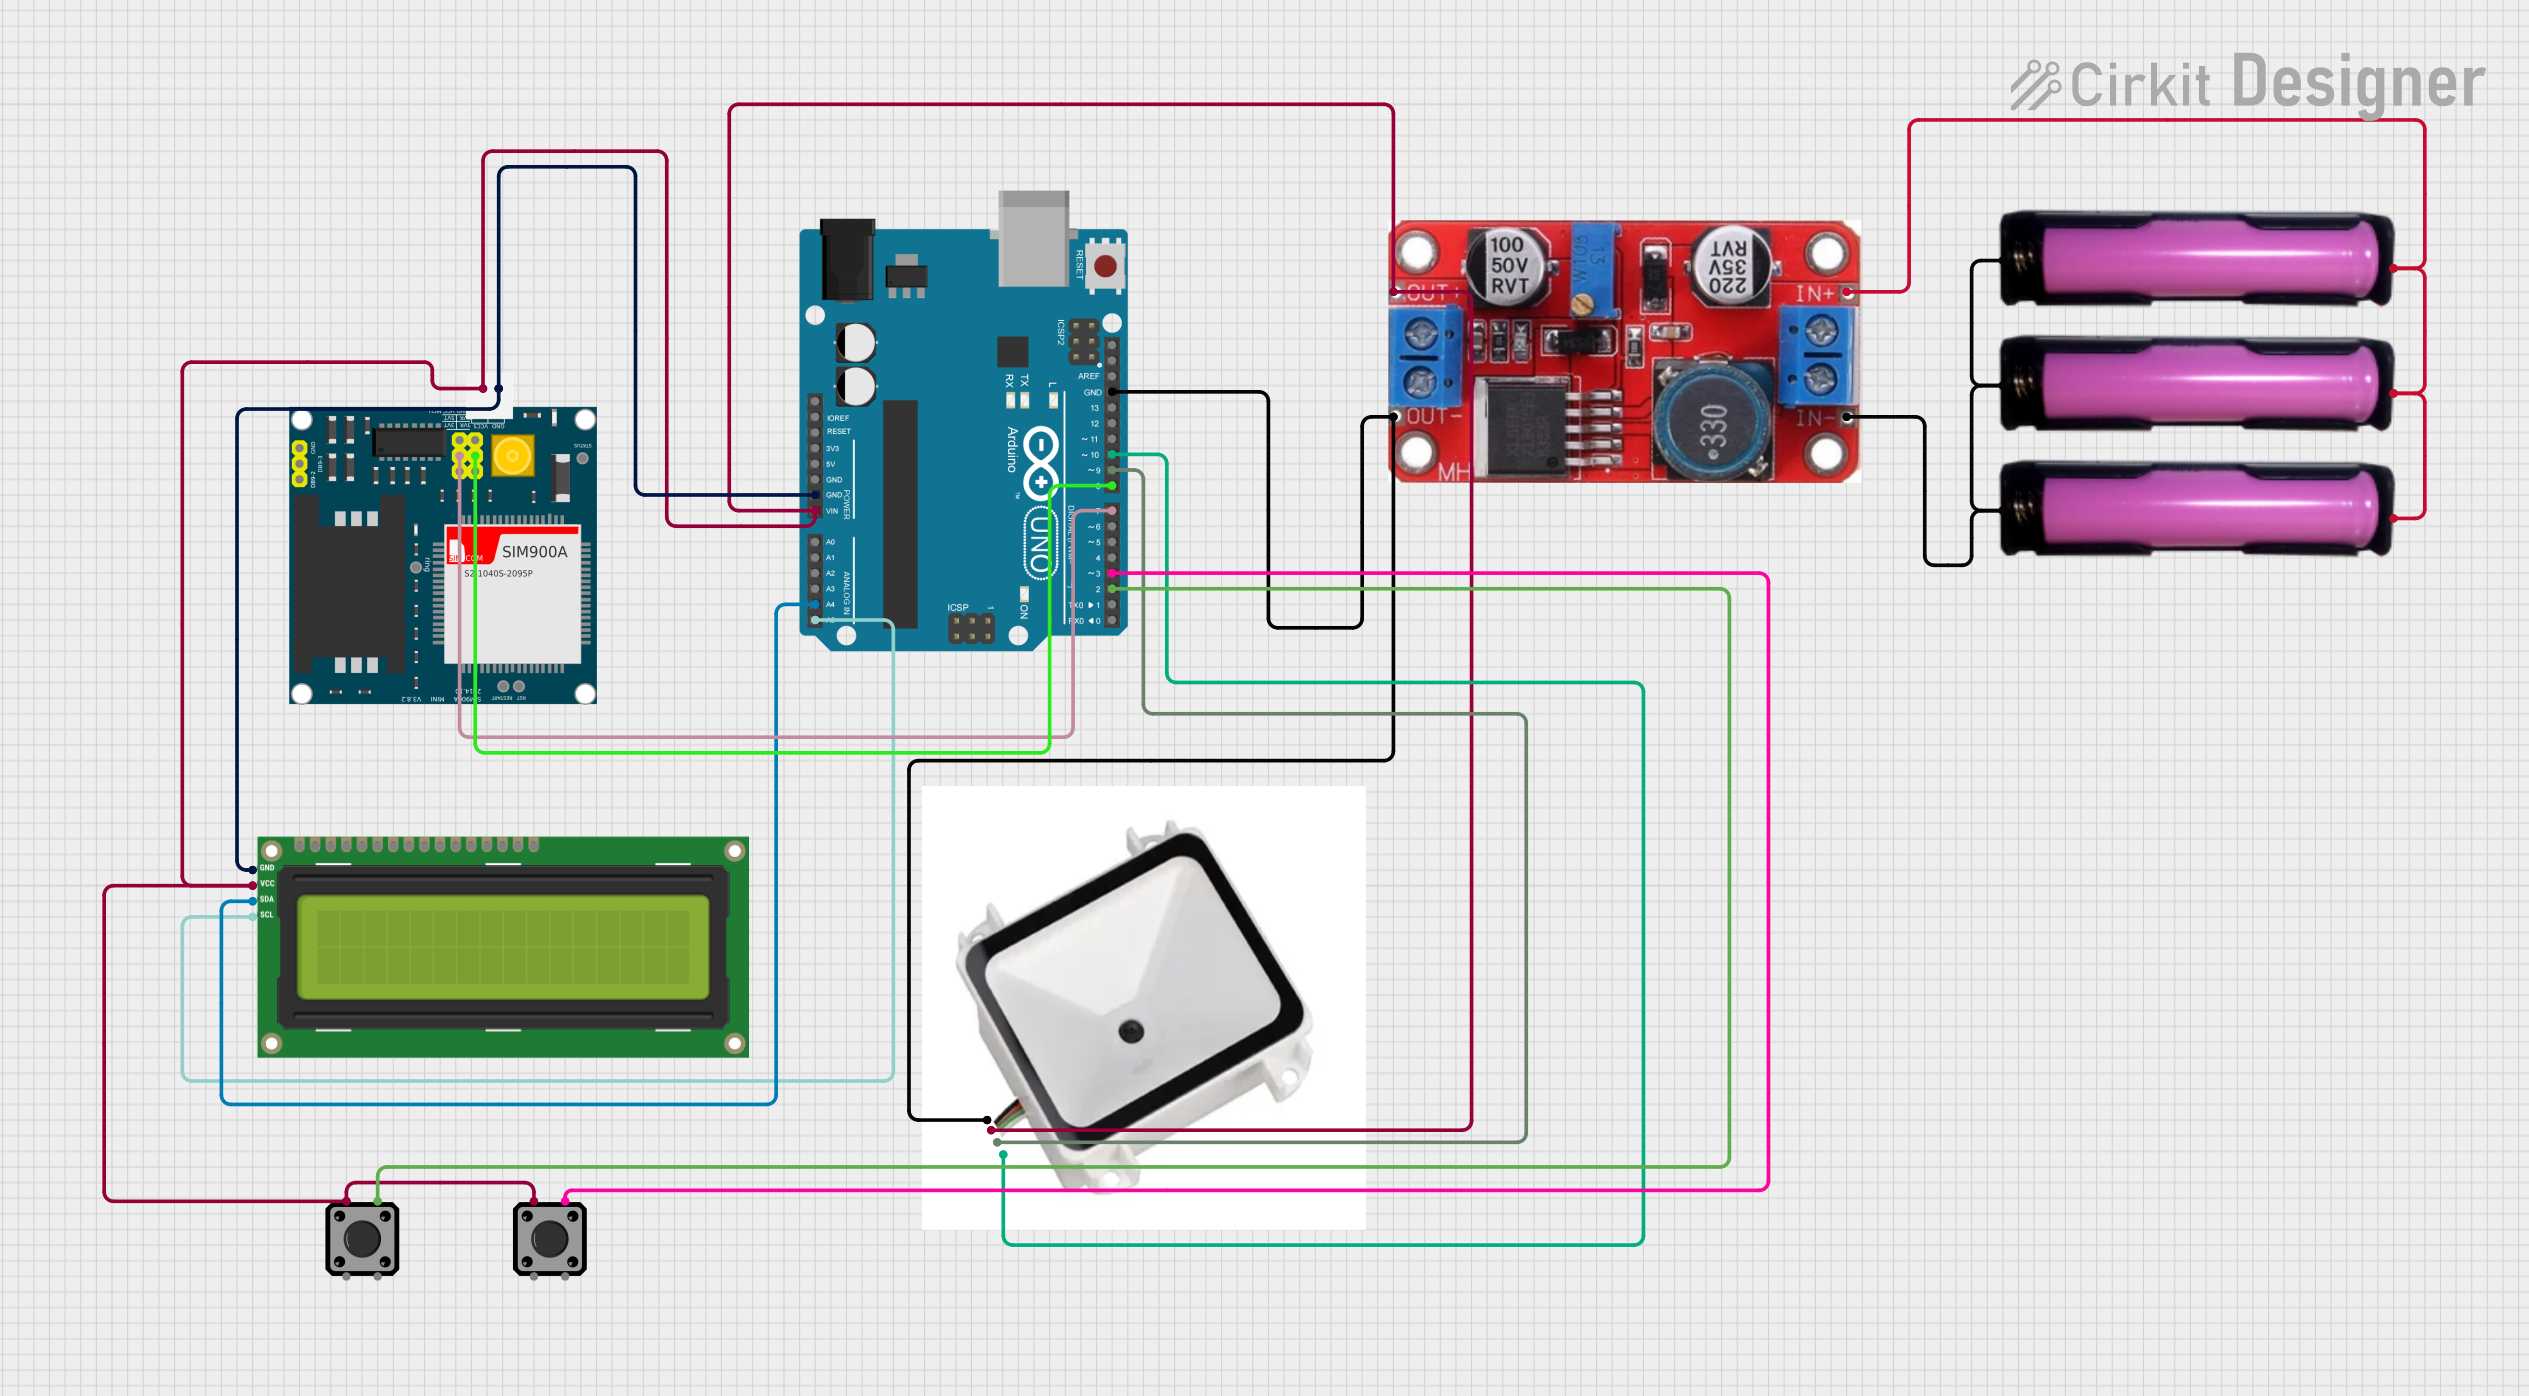
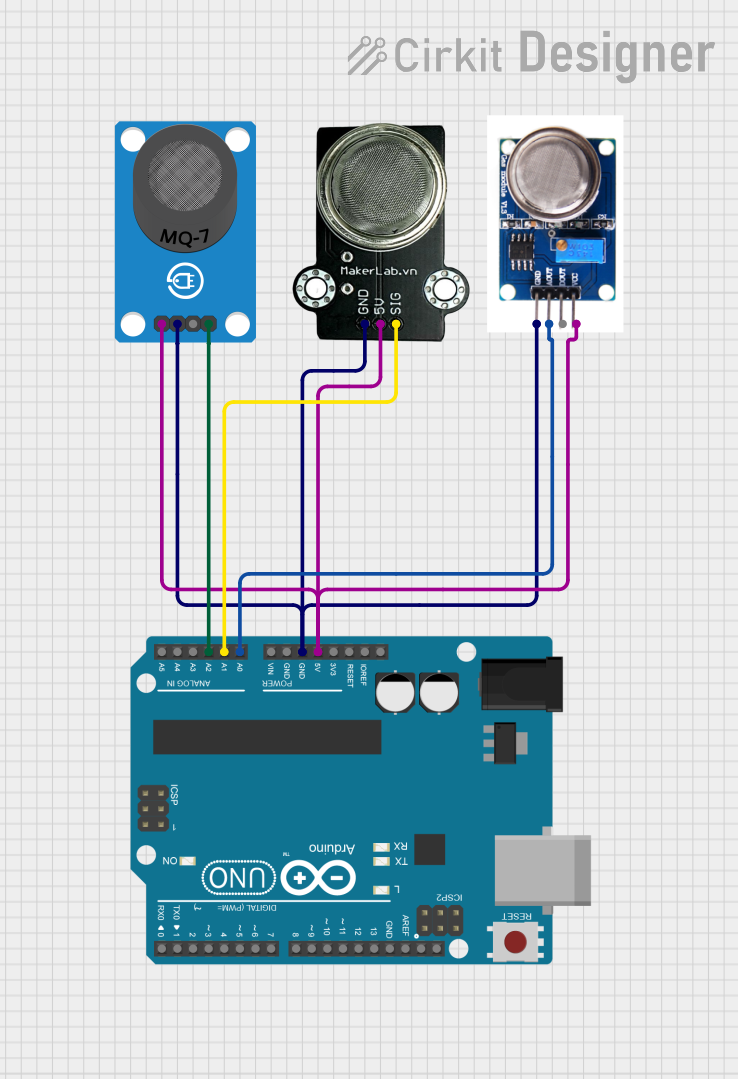

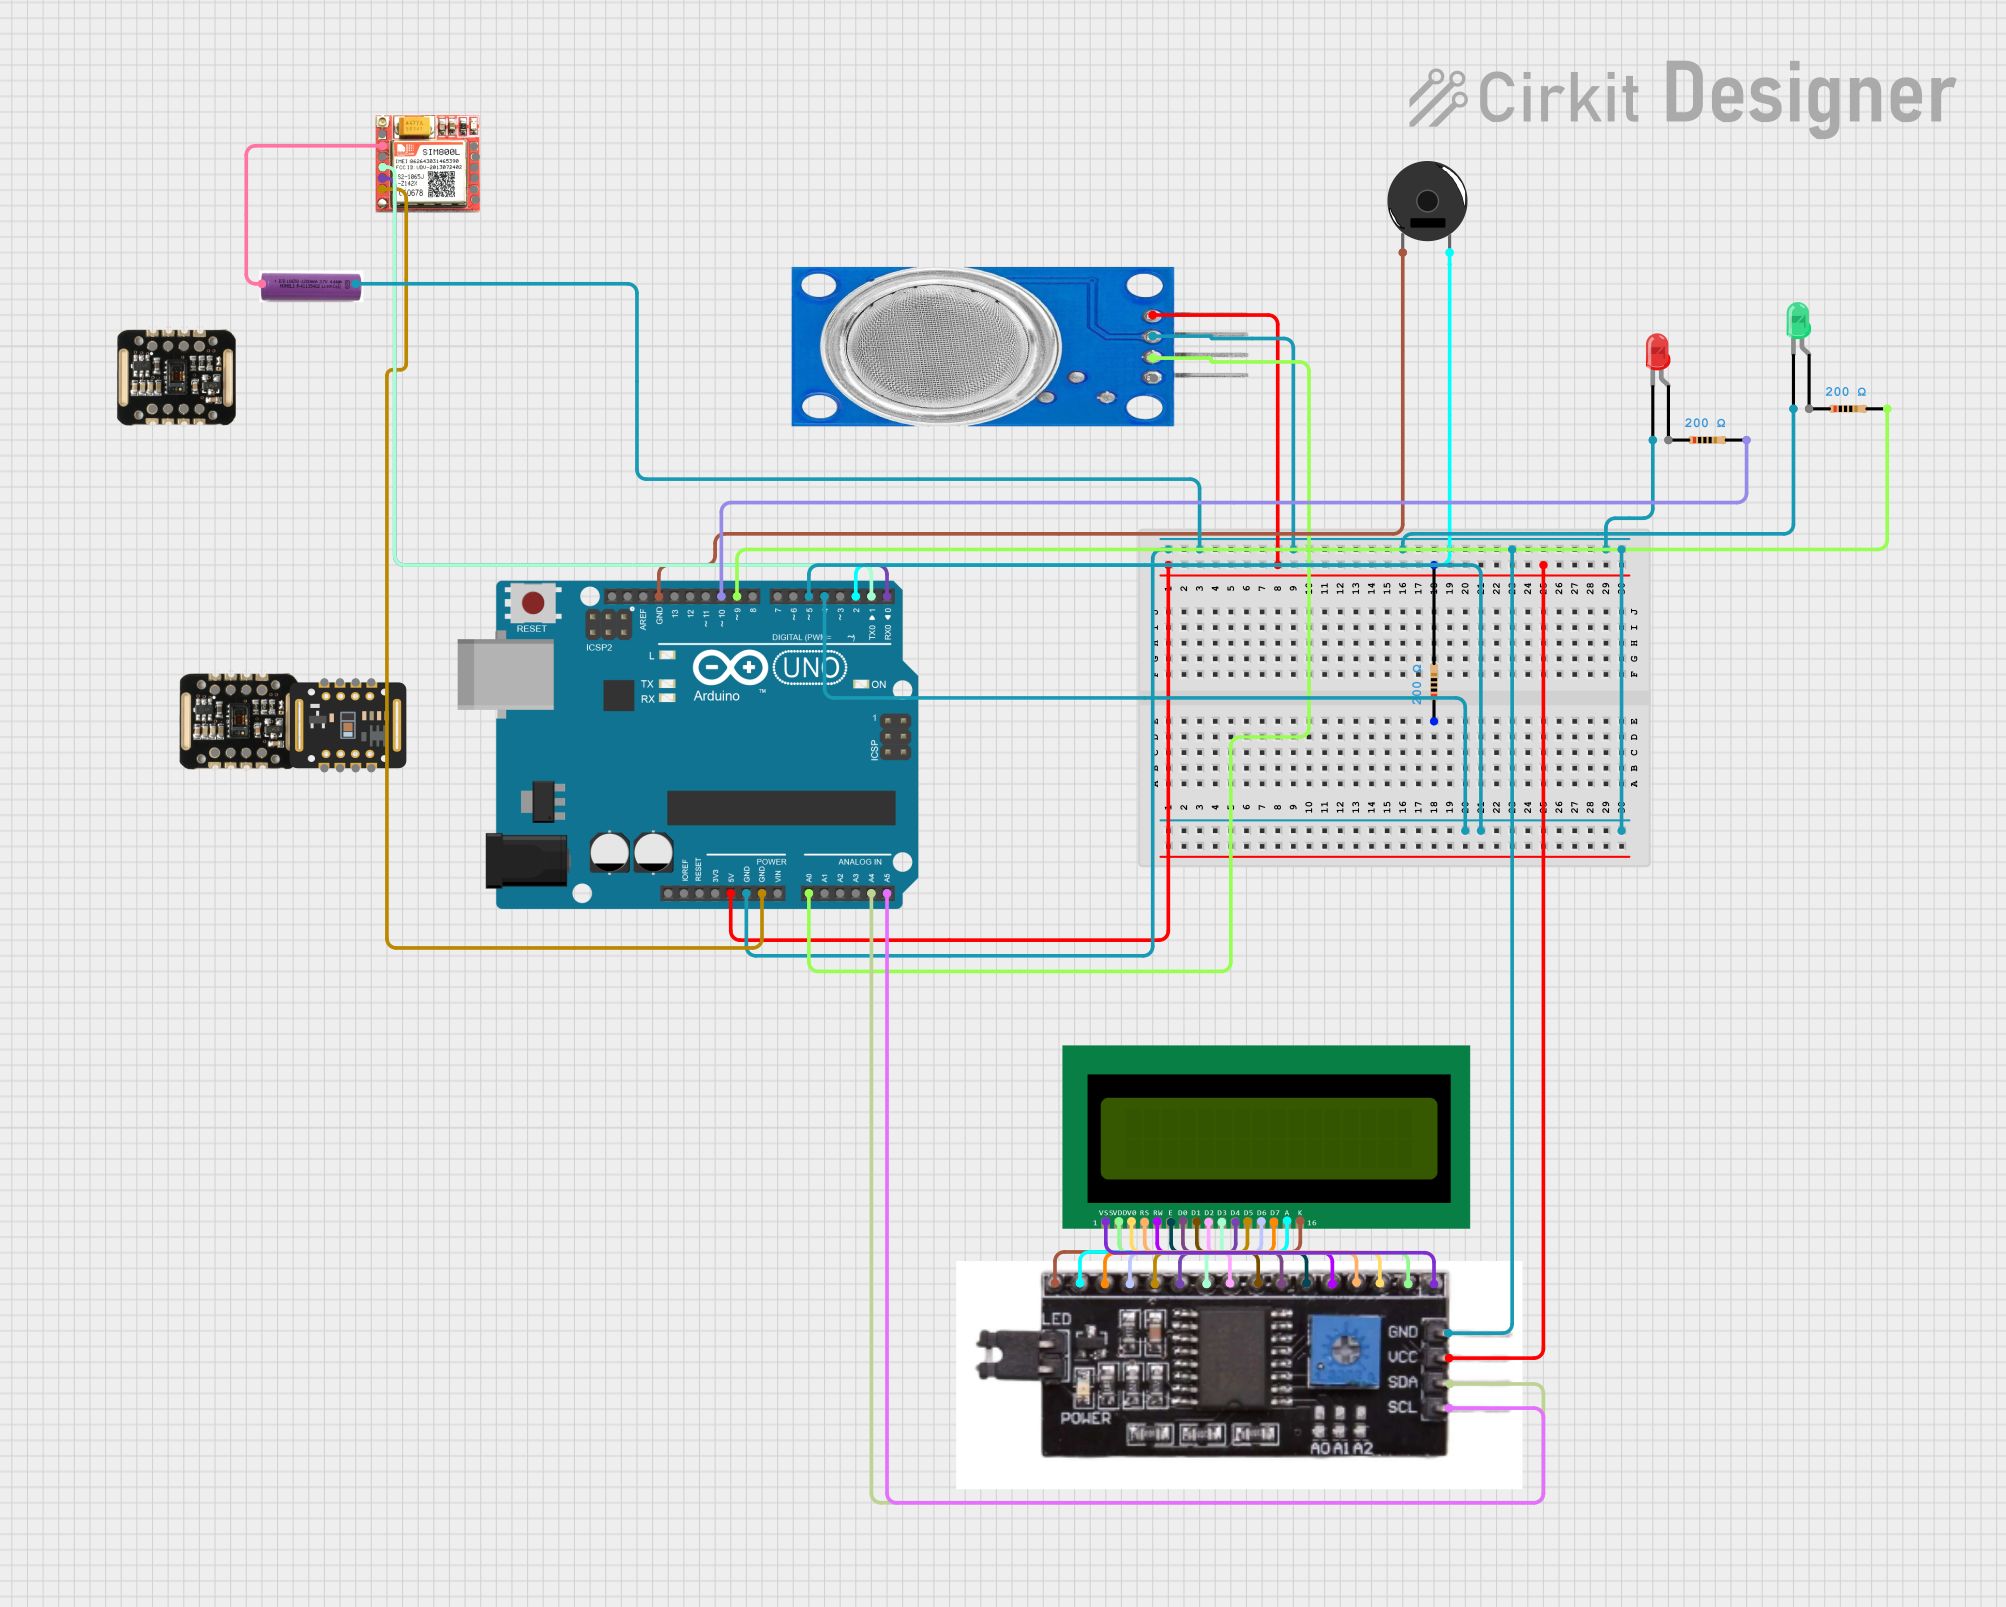
Explore Projects Built with ATOM-QR-CODE
Common Applications
- QR code-based access control systems
- Inventory and asset tracking
- Mobile payment terminals
- IoT devices requiring data encoding and decoding
- Educational projects involving QR code technology
Technical Specifications
Key Technical Details
| Parameter | Value |
|---|---|
| Manufacturer | M5Stack |
| Part ID | K041 |
| Operating Voltage | 5V DC |
| Communication Interface | UART (default baud rate: 115200) |
| Dimensions | 24mm x 24mm x 10mm |
| QR Code Support | QR Code Model 1/2, Micro QR |
| Operating Temperature | -10°C to 50°C |
| Power Consumption | < 0.5W |
Pin Configuration and Descriptions
| Pin Name | Pin Number | Description |
|---|---|---|
| 5V | 1 | Power supply input (5V DC) |
| GND | 2 | Ground |
| TX | 3 | UART Transmit (data output) |
| RX | 4 | UART Receive (data input) |
Usage Instructions
How to Use the Component in a Circuit
- Power the Module: Connect the
5Vpin to a 5V DC power source and theGNDpin to ground. - Establish Communication: Use the
TXandRXpins to establish UART communication with a microcontroller or computer. Ensure the baud rate is set to 115200. - Generate QR Codes: Send the desired data string to the module via the UART interface. The module will generate a QR code and display it on the connected screen (if applicable).
- Read QR Codes: Position the QR code in front of the module's scanner. The decoded data will be sent via the
TXpin to the connected device.
Important Considerations and Best Practices
- Ensure the module is powered with a stable 5V DC supply to avoid malfunctions.
- Use a logic level converter if connecting the module to a 3.3V microcontroller.
- Maintain a clear line of sight between the QR code and the scanner for accurate reading.
- Avoid exposing the module to direct sunlight or reflective surfaces, as this may interfere with QR code scanning.
Example: Connecting to an Arduino UNO
Below is an example of how to use the ATOM-QR-CODE module with an Arduino UNO to read and display QR code data.
Circuit Connections
| ATOM-QR-CODE Pin | Arduino UNO Pin |
|---|---|
| 5V | 5V |
| GND | GND |
| TX | RX (Pin 0) |
| RX | TX (Pin 1) |
Arduino Code
// Example code to read QR code data from the ATOM-QR-CODE module
// and display it on the Serial Monitor.

void setup() {
  Serial.begin(115200); // Initialize Serial Monitor at 115200 baud
  Serial1.begin(115200); // Initialize UART communication with the module
}

void loop() {
  // Check if data is available from the ATOM-QR-CODE module
  if (Serial1.available()) {
    // Read the data and forward it to the Serial Monitor
    while (Serial1.available()) {
      char qrData = Serial1.read();
      Serial.print(qrData); // Print the received QR code data
    }
    Serial.println(); // Add a new line after the data
  }
}
Notes
- The
Serial1object is used for UART communication. If your Arduino board does not supportSerial1, you may need to use a software serial library. - Ensure the baud rate matches the module's default setting (115200).
Troubleshooting and FAQs
Common Issues and Solutions
No Data Received from the Module
- Cause: Incorrect wiring or baud rate mismatch.
- Solution: Double-check the connections and ensure the baud rate is set to 115200.
QR Code Not Scanned
- Cause: Poor lighting or incorrect positioning of the QR code.
- Solution: Ensure proper lighting and position the QR code within the scanner's field of view.
Module Not Powering On
- Cause: Insufficient power supply.
- Solution: Verify that the
5Vpin is connected to a stable 5V DC source.
FAQs
Q1: Can the module generate colored QR codes?
A1: No, the ATOM-QR-CODE module generates standard black-and-white QR codes.
Q2: What is the maximum data capacity of the QR codes?
A2: The data capacity depends on the QR code version and error correction level. For most applications, it supports up to 3KB of alphanumeric data.
Q3: Can I use this module with a Raspberry Pi?
A3: Yes, the module can be connected to a Raspberry Pi via UART. Ensure the Raspberry Pi's GPIO pins are configured for 3.3V logic levels.
Q4: Does the module support other barcode formats?
A4: No, the module is specifically designed for QR code generation and scanning. Other barcode formats are not supported.