How to Use Seeed Studio XIAO nRF54L15: Examples, Pinouts, and Specs
Introduction
The Seeed Studio XIAO nRF54L15 is a compact and powerful microcontroller board built around the Nordic Semiconductor nRF5340 SoC. This dual-core SoC is designed for low-power Bluetooth applications and IoT projects, making it ideal for wearable devices, smart home systems, and industrial IoT solutions. The board features built-in support for various sensors and peripherals, enabling seamless integration into a wide range of projects.
Explore Projects Built with Seeed Studio XIAO nRF54L15


Explore Projects Built with Seeed Studio XIAO nRF54L15
Common Applications and Use Cases
- Low-power Bluetooth communication for IoT devices
- Wearable technology and health monitoring systems
- Smart home automation and control
- Industrial IoT applications
- Prototyping for Bluetooth Low Energy (BLE) projects
- Sensor data acquisition and processing
Technical Specifications
The following table outlines the key technical specifications of the Seeed Studio XIAO nRF54L15:
| Specification | Details |
|---|---|
| Microcontroller | Nordic nRF5340 SoC (dual-core Arm Cortex-M33) |
| Bluetooth | Bluetooth 5.4 (Low Energy) |
| Flash Memory | 1 MB (application core) + 256 KB (network core) |
| RAM | 512 KB (application core) + 64 KB (network core) |
| Operating Voltage | 3.3V |
| Input Voltage Range | 3.3V to 5V |
| GPIO Pins | 11 (including analog, digital, and PWM support) |
| Communication Interfaces | I2C, SPI, UART, PDM, QSPI, and USB-C |
| Power Consumption | Ultra-low power consumption (optimized for battery-powered applications) |
| Dimensions | 21 x 17.5 mm |
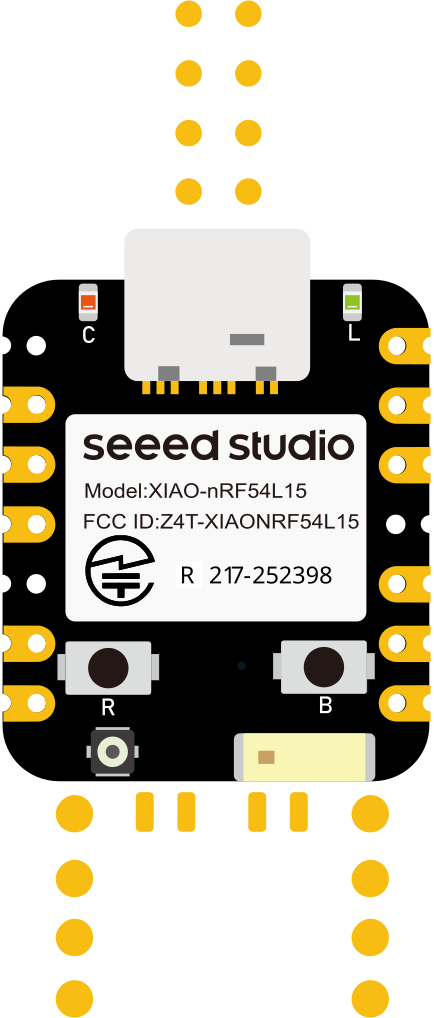
Pin Configuration and Descriptions
The Seeed Studio XIAO nRF54L15 features a total of 11 GPIO pins, which are multifunctional and can be configured for various purposes. Below is the pinout description:
| Pin | Function | Description |
|---|---|---|
| D0 | Digital I/O, PWM | General-purpose digital pin with PWM support |
| D1 | Digital I/O, PWM | General-purpose digital pin with PWM support |
| D2 | Digital I/O, PWM | General-purpose digital pin with PWM support |
| D3 | Digital I/O, PWM | General-purpose digital pin with PWM support |
| A0 | Analog Input, Digital I/O | Can be used as an analog input or digital I/O |
| A1 | Analog Input, Digital I/O | Can be used as an analog input or digital I/O |
| SDA | I2C Data | I2C data line for communication with sensors and peripherals |
| SCL | I2C Clock | I2C clock line for communication with sensors and peripherals |
| RX | UART Receive | UART receive pin for serial communication |
| TX | UART Transmit | UART transmit pin for serial communication |
| USB-C | Power, Data | USB-C port for power supply and programming |
Usage Instructions
How to Use the Component in a Circuit
- Powering the Board: Connect the Seeed Studio XIAO nRF54L15 to a power source using the USB-C port. The board operates at 3.3V but can accept input voltages between 3.3V and 5V.
- Programming the Board: Use the Arduino IDE or Nordic's nRF Connect SDK to program the board. Install the necessary board support package (BSP) for the XIAO nRF54L15.
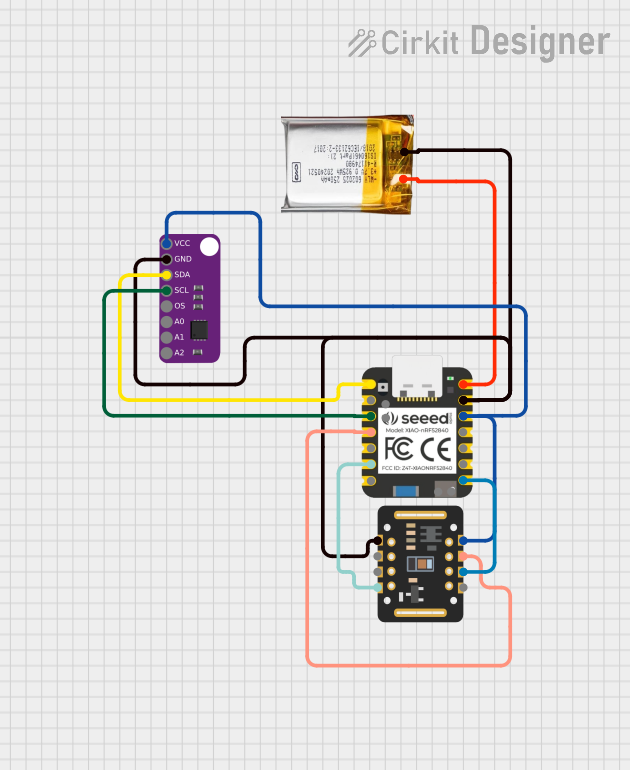
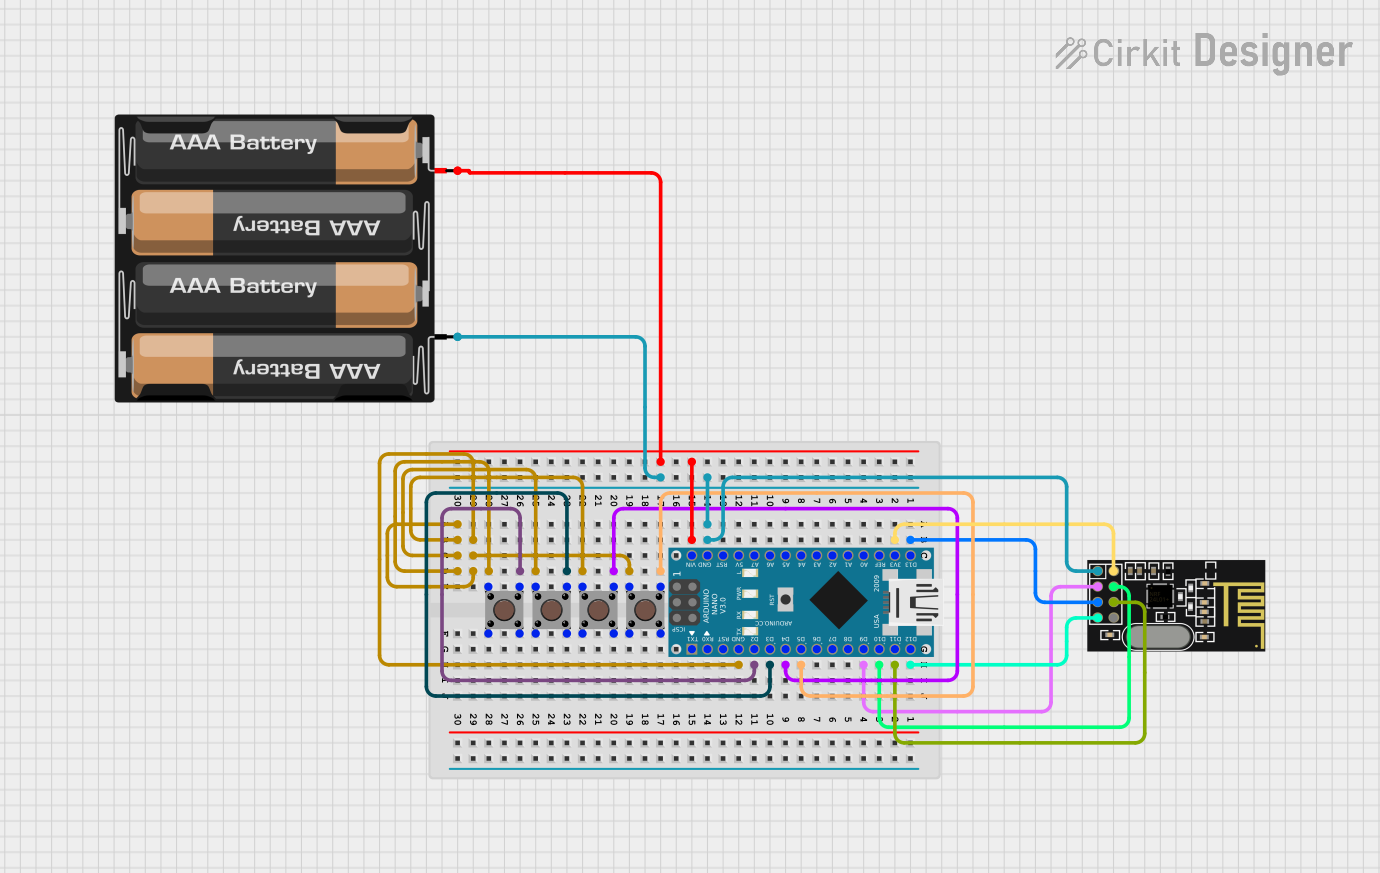
- Connecting Peripherals: Use the GPIO pins to connect sensors, actuators, or other peripherals. The board supports I2C, SPI, UART, and PWM communication protocols.
- Bluetooth Communication: Leverage the nRF5340's Bluetooth 5.4 capabilities to establish BLE connections with other devices.
Important Considerations and Best Practices
- Voltage Levels: Ensure that all connected peripherals operate at 3.3V logic levels to avoid damaging the board.
- Power Consumption: For battery-powered applications, utilize the low-power modes of the nRF5340 to extend battery life.
- Pin Multiplexing: Be mindful of pin multiplexing when configuring GPIO pins for specific functions.
- Firmware Updates: Regularly update the firmware to ensure compatibility with the latest features and bug fixes.
Example Code for Arduino UNO Integration
Below is an example of how to use the Seeed Studio XIAO nRF54L15 with an Arduino IDE to read data from an I2C sensor:
#include <Wire.h> // Include the Wire library for I2C communication

#define SENSOR_ADDRESS 0x68 // Replace with your sensor's I2C address

void setup() {
  Wire.begin(); // Initialize I2C communication
  Serial.begin(9600); // Start serial communication for debugging
  Serial.println("Initializing Seeed Studio XIAO nRF54L15...");
}

void loop() {
  Wire.beginTransmission(SENSOR_ADDRESS); // Start communication with the sensor
  Wire.write(0x00); // Request data from the sensor (register 0x00)
  Wire.endTransmission();

  Wire.requestFrom(SENSOR_ADDRESS, 2); // Request 2 bytes of data
  if (Wire.available() == 2) {
    int data = Wire.read() << 8 | Wire.read(); // Combine the two bytes
    Serial.print("Sensor Data: ");
    Serial.println(data); // Print the sensor data to the serial monitor
  } else {
    Serial.println("Failed to read data from sensor.");
  }

  delay(1000); // Wait for 1 second before the next reading
}
Troubleshooting and FAQs
Common Issues and Solutions
Board Not Detected by Arduino IDE:
- Ensure that the correct board support package (BSP) is installed in the Arduino IDE.
- Verify that the USB-C cable is functional and supports data transfer.
Bluetooth Connection Fails:
- Check that the device you are pairing with supports Bluetooth 5.4.
- Ensure that the Bluetooth stack is properly initialized in your code.
Peripheral Not Responding:
- Double-check the wiring and ensure that the correct pins are used.
- Verify that the peripheral operates at 3.3V logic levels.
High Power Consumption:
- Use the low-power modes of the nRF5340 to reduce power consumption.
- Disconnect unused peripherals to minimize power draw.
FAQs
Q: Can I use the XIAO nRF54L15 with a 5V sensor?
A: No, the XIAO nRF54L15 operates at 3.3V logic levels. Use a level shifter to interface with 5V sensors.
Q: Does the board support over-the-air (OTA) updates?
A: Yes, the nRF5340 SoC supports OTA updates for firmware, making it ideal for IoT applications.
Q: What is the maximum range of Bluetooth communication?
A: The range depends on environmental factors but typically extends up to 100 meters in open spaces.
Q: Can I use the board for audio processing?
A: Yes, the nRF5340 includes a PDM interface for audio input, making it suitable for basic audio processing tasks.