Cirkit Designer Logo
Cirkit Designer
Your all-in-one circuit design IDE
Home / 
Component Documentation

How to Use USBA male 3.0: Examples, Pinouts, and Specs

Image of USBA male 3.0
Cirkit Designer LogoDesign with USBA male 3.0 in Cirkit Designer

Introduction

The USBA Male 3.0 connector is a widely used interface for connecting peripheral devices to a host, such as a computer or a USB hub. It is an upgraded version of the USB 2.0 standard, offering significantly faster data transfer rates of up to 5 Gbps. This connector is backward compatible with USB 2.0 and USB 1.1 devices, making it a versatile choice for a variety of applications.

Explore Projects Built with USBA male 3.0

Use Cirkit Designer to design, explore, and prototype these projects online. Some projects support real-time simulation. Click "Open Project" to start designing instantly!
Battery-Powered UPS System with Waveshare UPS 3S and Solar Charger
Image of Copy of s: A project utilizing USBA male 3.0 in a practical application
This circuit is a power management system that integrates a 12V power supply, a solar charger power bank, and multiple Li-ion batteries to provide a stable power output. The Waveshare UPS 3S manages the input from the power sources and batteries, ensuring continuous power delivery. The MRB045 module is used to interface the solar charger with the rest of the system.
Cirkit Designer LogoOpen Project in Cirkit Designer
Battery-Powered 18650 Li-ion Charger with USB Output and Adjustable Voltage Regulator
Image of Breadboard: A project utilizing USBA male 3.0 in a practical application
This circuit is a battery management and power supply system that uses three 3.7V batteries connected to a 3S 10A Li-ion 18650 Charger Protection Board Module for balanced charging and protection. The system includes a TP4056 Battery Charging Protection Module for additional charging safety, a Step Up Boost Power Converter to regulate and boost the voltage, and a USB regulator to provide a stable 5V output, controlled by a push switch.
Cirkit Designer LogoOpen Project in Cirkit Designer
Battery-Powered UPS with Step-Down Buck Converter and BMS
Image of Mini ups: A project utilizing USBA male 3.0 in a practical application
This circuit is a power management system that steps down a 240V AC input to a lower DC voltage using a buck converter, which then powers a 40W UPS. The UPS is controlled by a rocker switch and is backed up by a battery management system (BMS) connected to three 3.7V batteries in series, ensuring continuous power supply.
Cirkit Designer LogoOpen Project in Cirkit Designer
Battery-Powered Remote-Controlled Dual Motor System with Cytron URC10
Image of URC10 SUMO RC: A project utilizing USBA male 3.0 in a practical application
This circuit is a remote-controlled dual DC motor driver system powered by a 3S LiPo battery. It uses a Cytron URC10 motor driver to control two GM25 DC motors based on signals received from an R6FG receiver, with a rocker switch for power control and a 7-segment panel voltmeter for monitoring the battery voltage.
Cirkit Designer LogoOpen Project in Cirkit Designer

Explore Projects Built with USBA male 3.0

Use Cirkit Designer to design, explore, and prototype these projects online. Some projects support real-time simulation. Click "Open Project" to start designing instantly!
Image of Copy of s: A project utilizing USBA male 3.0 in a practical application
Battery-Powered UPS System with Waveshare UPS 3S and Solar Charger
This circuit is a power management system that integrates a 12V power supply, a solar charger power bank, and multiple Li-ion batteries to provide a stable power output. The Waveshare UPS 3S manages the input from the power sources and batteries, ensuring continuous power delivery. The MRB045 module is used to interface the solar charger with the rest of the system.
Cirkit Designer LogoOpen Project in Cirkit Designer
Image of Breadboard: A project utilizing USBA male 3.0 in a practical application
Battery-Powered 18650 Li-ion Charger with USB Output and Adjustable Voltage Regulator
This circuit is a battery management and power supply system that uses three 3.7V batteries connected to a 3S 10A Li-ion 18650 Charger Protection Board Module for balanced charging and protection. The system includes a TP4056 Battery Charging Protection Module for additional charging safety, a Step Up Boost Power Converter to regulate and boost the voltage, and a USB regulator to provide a stable 5V output, controlled by a push switch.
Cirkit Designer LogoOpen Project in Cirkit Designer
Image of Mini ups: A project utilizing USBA male 3.0 in a practical application
Battery-Powered UPS with Step-Down Buck Converter and BMS
This circuit is a power management system that steps down a 240V AC input to a lower DC voltage using a buck converter, which then powers a 40W UPS. The UPS is controlled by a rocker switch and is backed up by a battery management system (BMS) connected to three 3.7V batteries in series, ensuring continuous power supply.
Cirkit Designer LogoOpen Project in Cirkit Designer
Image of URC10 SUMO RC: A project utilizing USBA male 3.0 in a practical application
Battery-Powered Remote-Controlled Dual Motor System with Cytron URC10
This circuit is a remote-controlled dual DC motor driver system powered by a 3S LiPo battery. It uses a Cytron URC10 motor driver to control two GM25 DC motors based on signals received from an R6FG receiver, with a rocker switch for power control and a 7-segment panel voltmeter for monitoring the battery voltage.
Cirkit Designer LogoOpen Project in Cirkit Designer

Common Applications and Use Cases

  • Connecting external storage devices (e.g., flash drives, external hard drives)
  • Data transfer between devices (e.g., cameras, smartphones, and computers)
  • Power delivery for charging devices
  • Peripheral connections (e.g., keyboards, mice, printers)

Technical Specifications

The USBA Male 3.0 connector is designed to meet the USB 3.0 standard, ensuring high-speed data transfer and reliable performance. Below are the key technical details:

Key Technical Details

  • Data Transfer Rate: Up to 5 Gbps (SuperSpeed)
  • Voltage Rating: 5V DC
  • Current Rating: Up to 900 mA (USB 3.0 standard)
  • Connector Type: USB Type-A Male
  • Backward Compatibility: USB 2.0 and USB 1.1
  • Number of Pins: 9 (4 pins for USB 2.0 compatibility, 5 additional pins for USB 3.0)

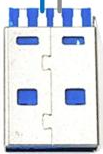
Pin Configuration and Descriptions

The USBA Male 3.0 connector has a total of 9 pins, as shown in the table below:

Pin Number Name Description
1 VBUS Power supply (5V DC)
2 D- Data line (negative) for USB 2.0 communication
3 D+ Data line (positive) for USB 2.0 communication
4 GND Ground
5 StdA_SSRX- SuperSpeed receiver (negative)
6 StdA_SSRX+ SuperSpeed receiver (positive)
7 GND_DRAIN Ground for signal return
8 StdA_SSTX- SuperSpeed transmitter (negative)
9 StdA_SSTX+ SuperSpeed transmitter (positive)

Usage Instructions

How to Use the Component in a Circuit

  1. Identify the Pins: Ensure you correctly identify the pins on the USBA Male 3.0 connector using the pin configuration table above.
  2. Connect to a Host Device: Plug the USBA Male 3.0 connector into a compatible USB port on the host device (e.g., a computer or USB hub).
  3. Connect to a Peripheral Device: Attach the other end of the cable to the peripheral device (e.g., a flash drive or external hard drive).
  4. Power and Data Transfer: The connector will automatically handle power delivery and data transfer based on the USB 3.0 protocol.

Important Considerations and Best Practices

  • Cable Quality: Use high-quality USB 3.0 cables to ensure optimal performance and minimize signal loss.
  • Backward Compatibility: When connecting to a USB 2.0 port, the data transfer rate will be limited to 480 Mbps.
  • Avoid Overloading: Do not exceed the current rating of 900 mA to prevent damage to the connector or host device.
  • Secure Connections: Ensure the connector is firmly inserted into the port to avoid intermittent connections.

Example: Connecting to an Arduino UNO

Although the Arduino UNO uses a USB Type-B connector for programming, you can use a USBA Male 3.0 connector on the host side to connect the Arduino to a computer. Below is an example of Arduino code for serial communication:

// Example Arduino code for serial communication
// This code sends "Hello, World!" to the serial monitor every second.

void setup() {
  Serial.begin(9600); // Initialize serial communication at 9600 baud
}

void loop() {
  Serial.println("Hello, World!"); // Send a message to the serial monitor
  delay(1000); // Wait for 1 second
}

Troubleshooting and FAQs

Common Issues Users Might Face

  1. Connector Not Recognized by Host Device:

    • Cause: Loose connection or damaged pins.
    • Solution: Ensure the connector is securely plugged in and inspect the pins for damage.
  2. Slow Data Transfer Speeds:

    • Cause: Using a USB 2.0 port or low-quality cable.
    • Solution: Use a USB 3.0 port and a certified USB 3.0 cable.
  3. Device Not Powering On:

    • Cause: Insufficient power delivery or faulty cable.
    • Solution: Check the power requirements of the device and use a cable that supports the required current.

Solutions and Tips for Troubleshooting

  • Inspect the Connector: Check for bent or damaged pins and replace the connector if necessary.
  • Test with Another Device: Verify functionality by connecting the USBA Male 3.0 connector to a different host or peripheral device.
  • Update Drivers: Ensure the host device has the latest USB drivers installed for proper compatibility.

By following this documentation, you can effectively use the USBA Male 3.0 connector in your projects and troubleshoot common issues with ease.