How to Use NPK Soil Sensor (mini): Examples, Pinouts, and Specs
Introduction
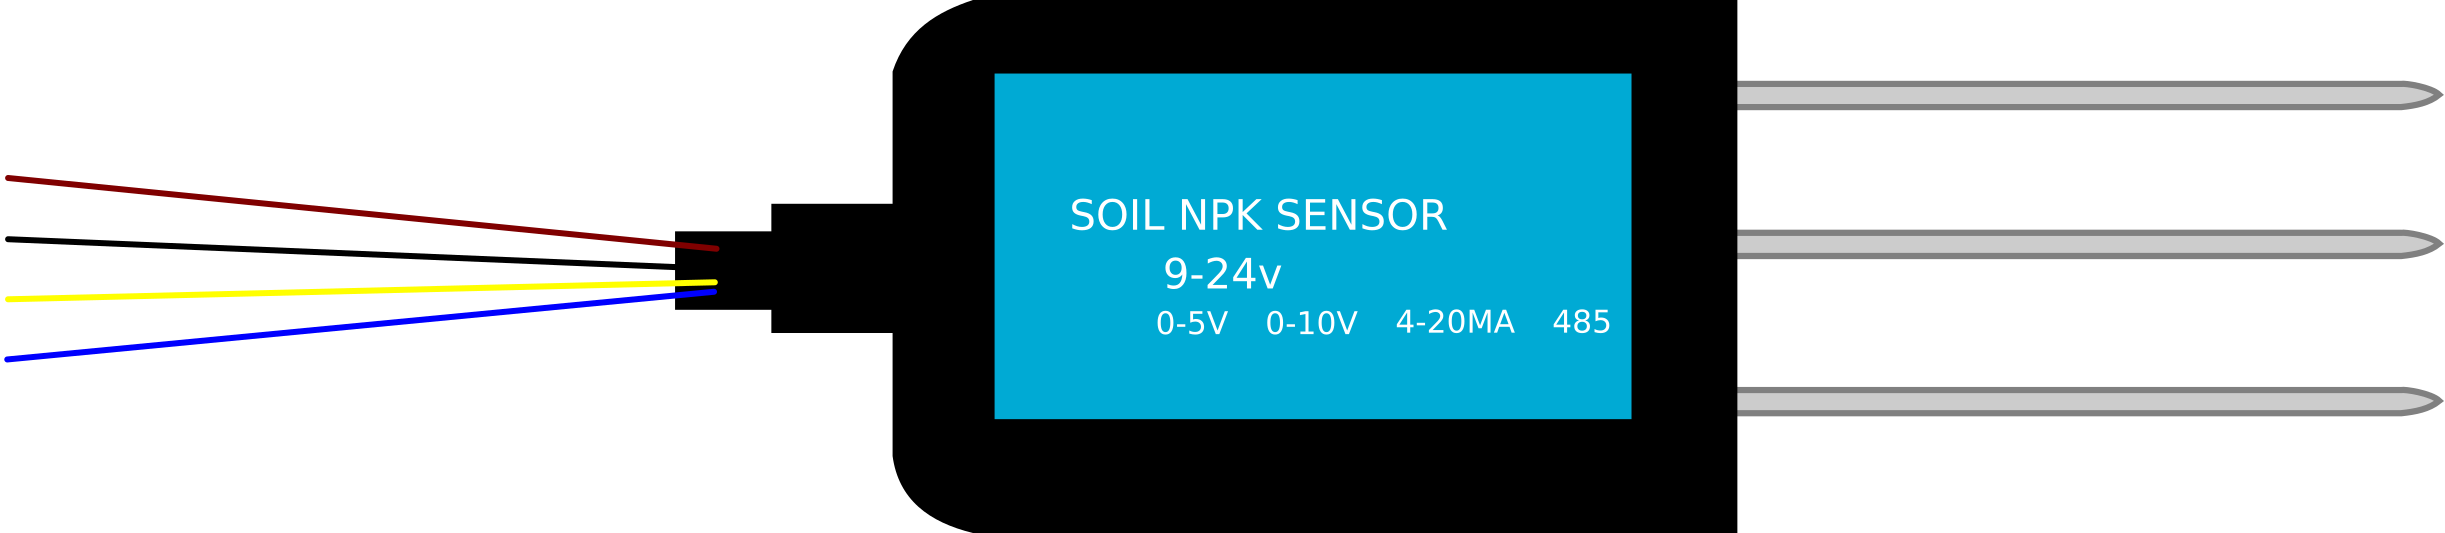
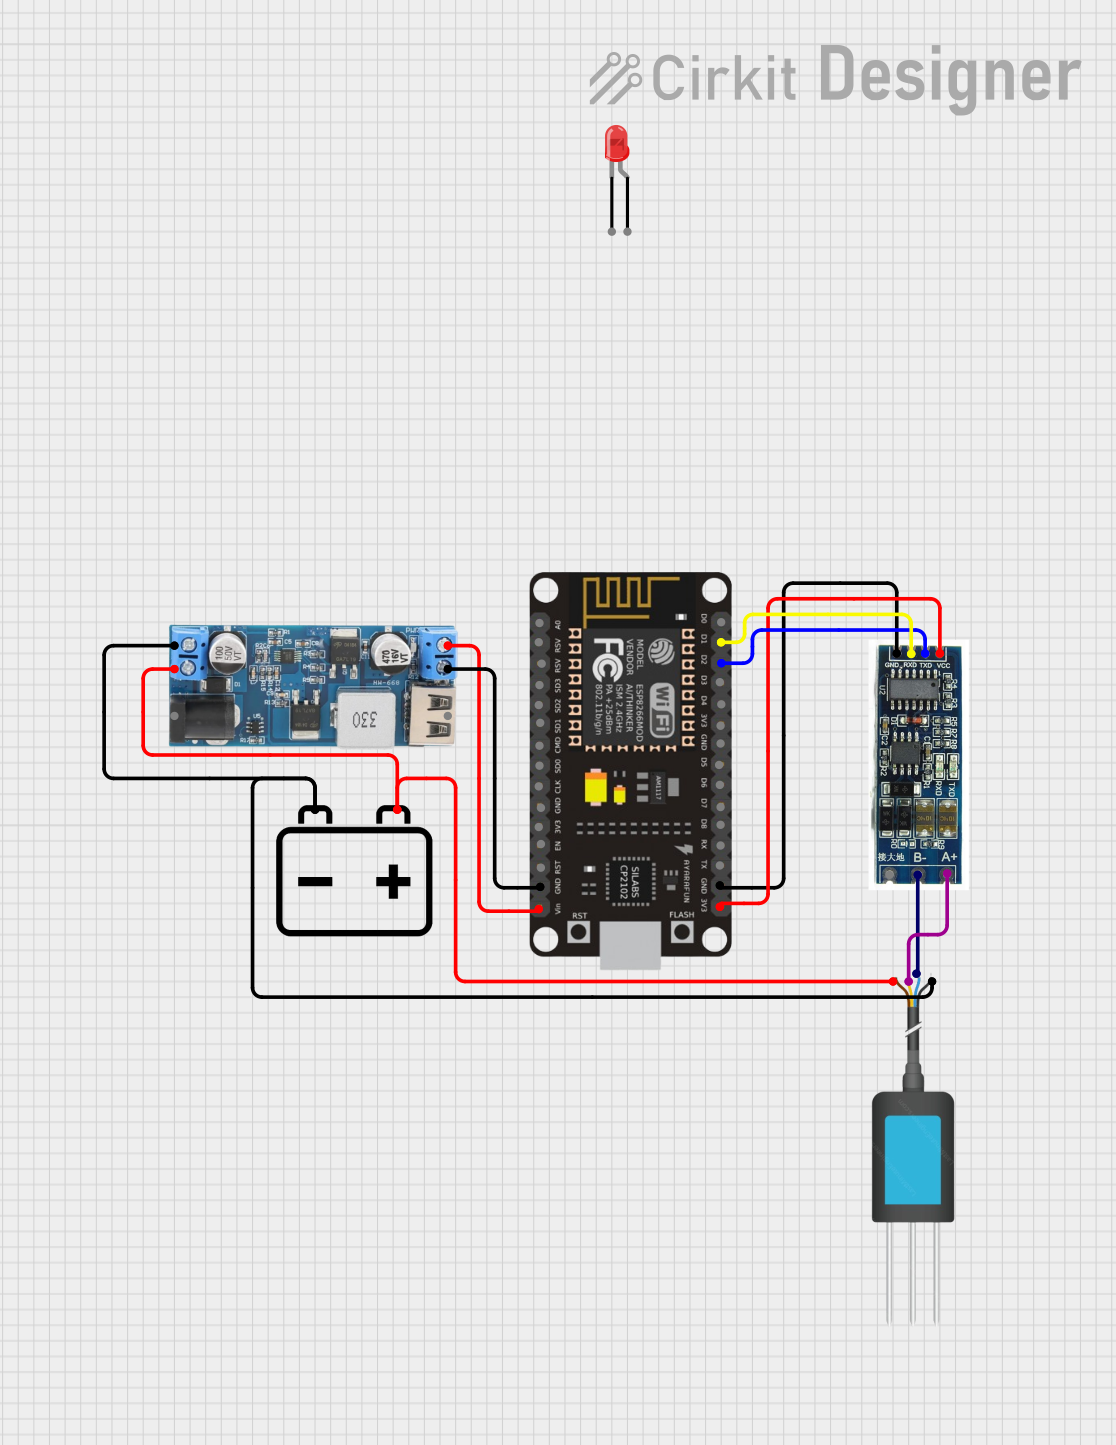
The NPK Soil Sensor (mini) is a compact and efficient sensor designed to measure the levels of nitrogen (N), phosphorus (P), and potassium (K) in the soil. These three macronutrients are vital for plant growth and their balanced presence is crucial for agriculture and gardening. The sensor is commonly used in precision farming, smart gardening systems, and environmental monitoring.
Explore Projects Built with NPK Soil Sensor (mini)
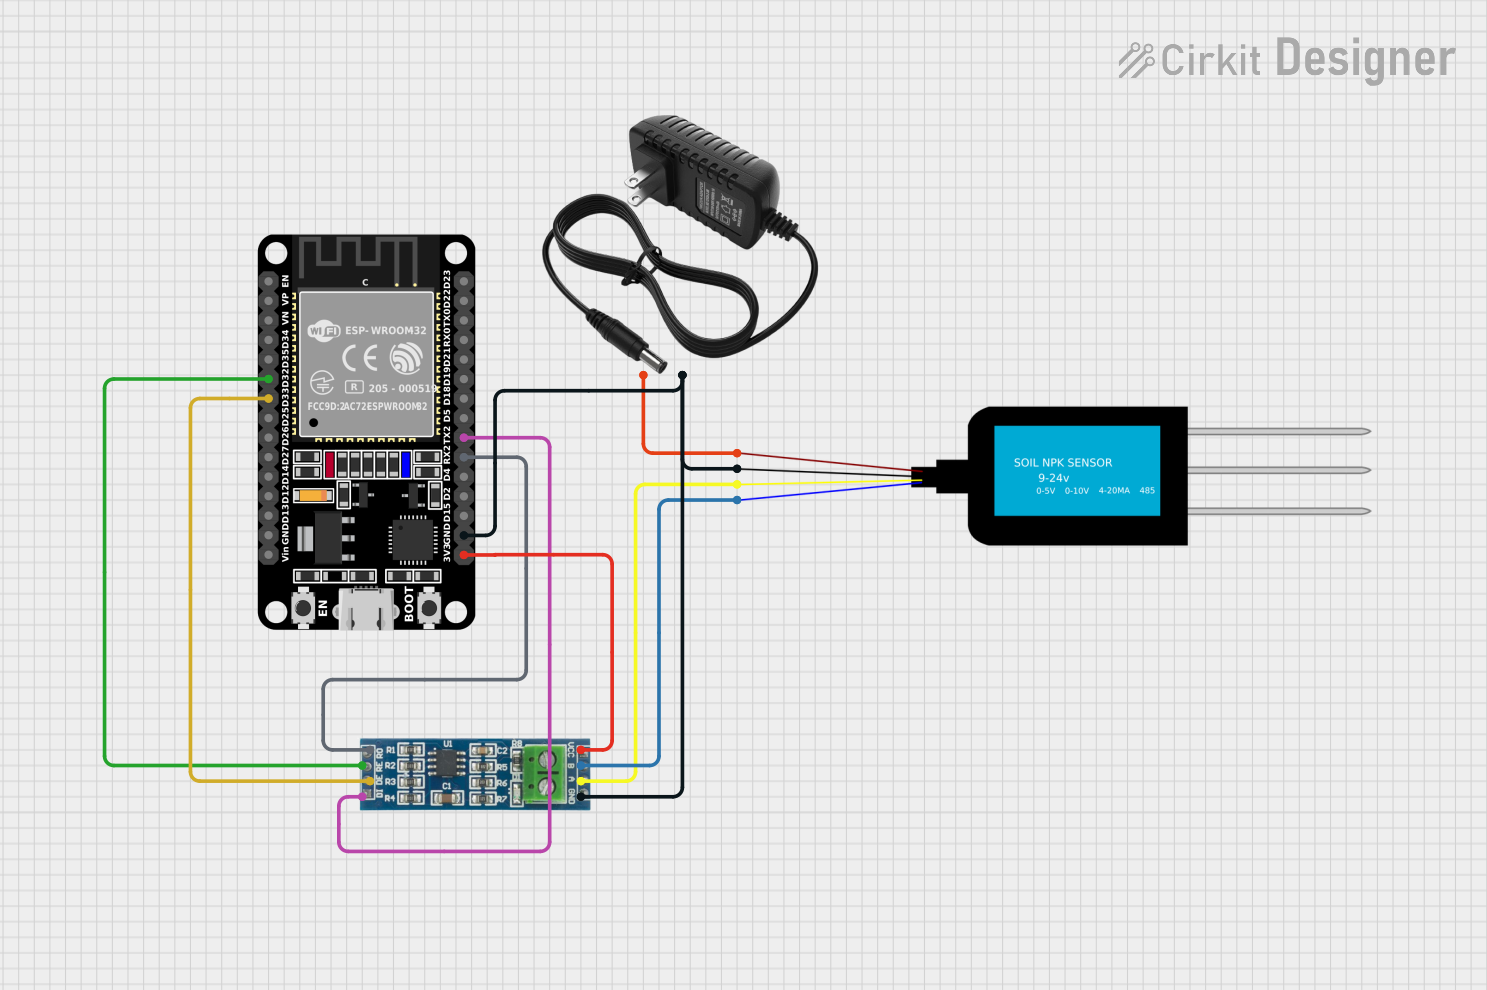
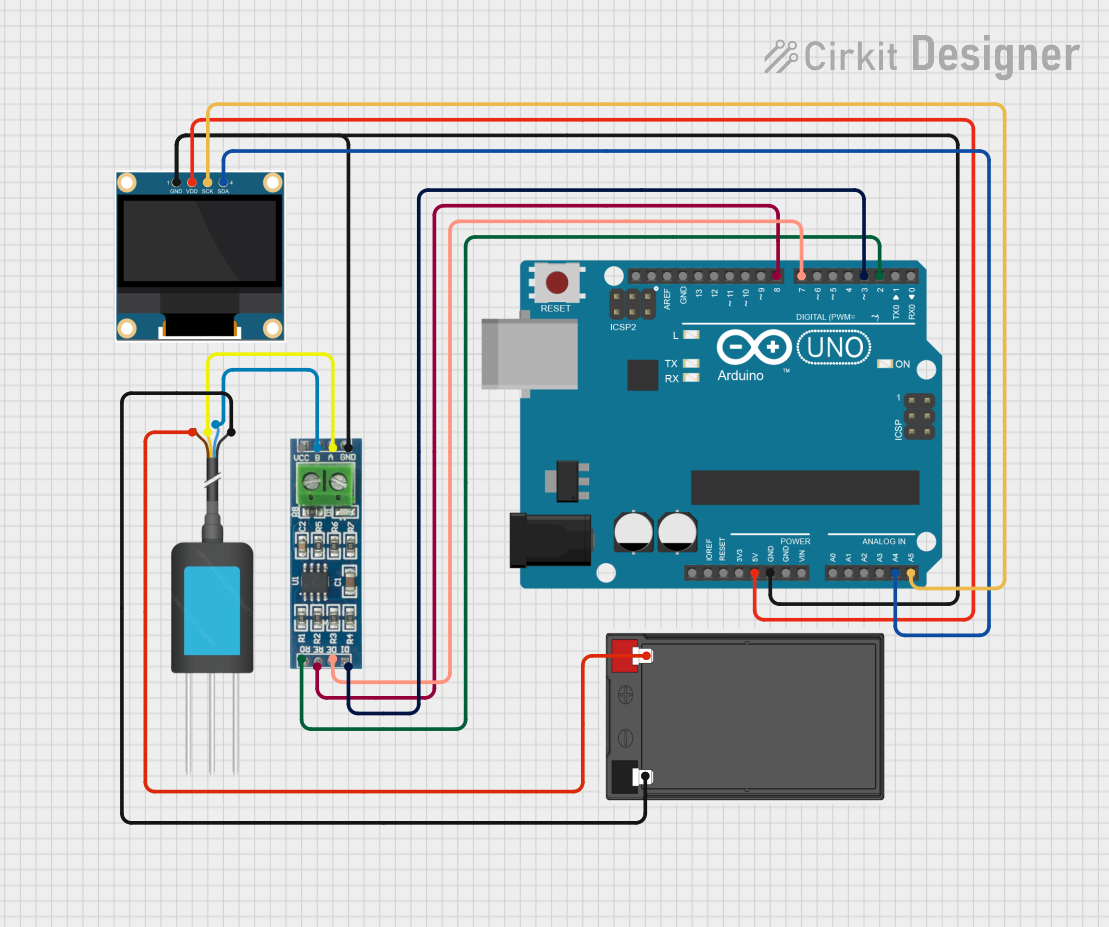
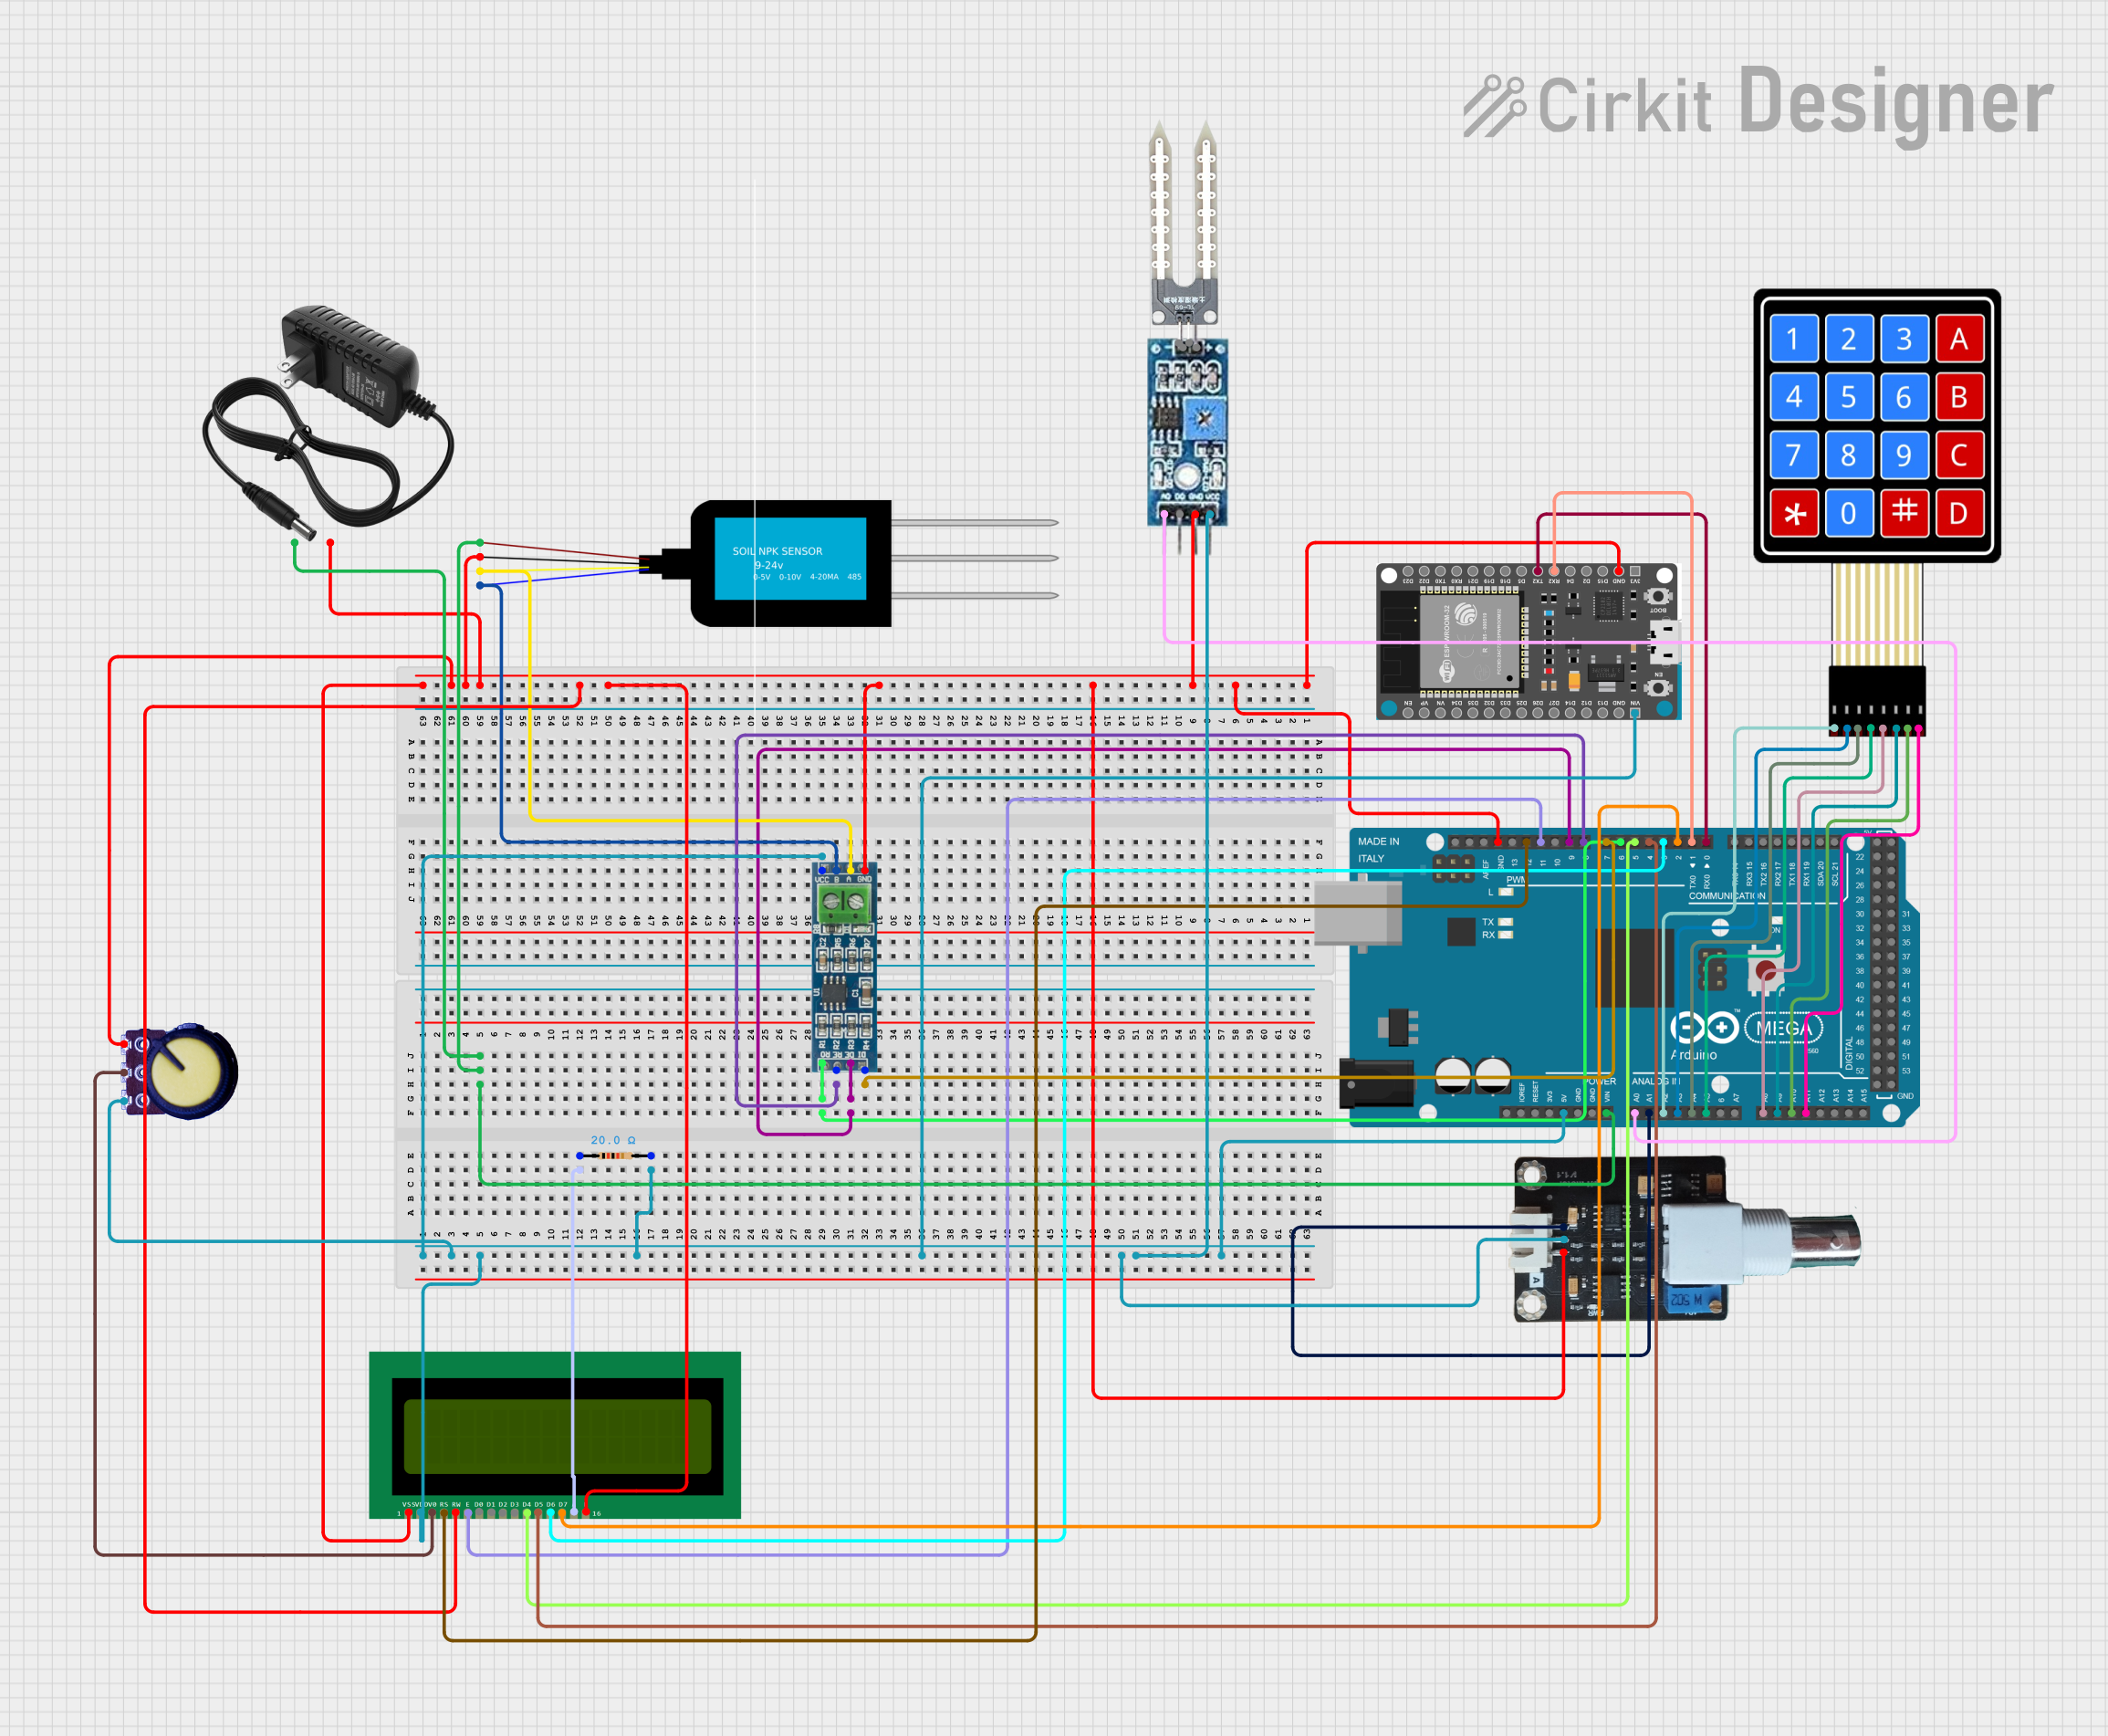
Explore Projects Built with NPK Soil Sensor (mini)
Common Applications and Use Cases
- Precision agriculture for nutrient management
- Garden soil health monitoring
- Research in soil science and plant nutrition
- Environmental impact assessments
Technical Specifications
Key Technical Details
- Voltage: 3.3V to 5V
- Current: 35mA (typical)
- Measurement Range:
- Nitrogen (N): 0 to 1000 mg/kg
- Phosphorus (P): 0 to 500 mg/kg
- Potassium (K): 0 to 1000 mg/kg
- Accuracy: ±10%
- Output: Analog voltage corresponding to NPK values
- Operating Temperature: -10°C to 50°C
Pin Configuration and Descriptions
| Pin Number | Name | Description |
|---|---|---|
| 1 | VCC | Power supply (3.3V to 5V) |
| 2 | GND | Ground |
| 3 | SIG | Analog signal output for NPK measurement |
| 4 | CAL | Calibration pin (typically not used) |
Usage Instructions
How to Use the Component in a Circuit
- Connect the VCC pin to a 3.3V or 5V power supply.
- Connect the GND pin to the ground of the power supply.
- Connect the SIG pin to an analog input pin on your microcontroller (e.g., A0 on an Arduino UNO).
- (Optional) Connect the CAL pin if calibration functionality is required.
Important Considerations and Best Practices
- Ensure that the sensor is properly calibrated before use for accurate readings.
- Avoid exposing the sensor to liquids other than soil moisture to prevent damage.
- Use a stable power supply to minimize noise in the analog signal.
- Implement a moving average filter in your code to smooth out sensor readings.
Example Code for Arduino UNO
// Define the analog input pin where the sensor is connected
const int npkSensorPin = A0;

void setup() {
  // Initialize serial communication at 9600 baud rate
  Serial.begin(9600);
}

void loop() {
  // Read the value from the NPK sensor
  int sensorValue = analogRead(npkSensorPin);

  // Convert the analog reading (which goes from 0 - 1023) to a voltage (0 - 5V)
  float voltage = sensorValue * (5.0 / 1023.0);

  // Print out the voltage
  Serial.print("Sensor Voltage: ");
  Serial.println(voltage);

  // Wait for a second before reading again
  delay(1000);
}
Troubleshooting and FAQs
Common Issues Users Might Face
- Inaccurate Readings: Ensure the sensor is calibrated correctly. Check for any soil contamination or sensor damage.
- No Readings: Verify connections and ensure the power supply is within the specified range.
- Fluctuating Readings: Use a stable power supply and consider implementing software filtering.
Solutions and Tips for Troubleshooting
- Calibration: Follow the manufacturer's instructions for calibration, which may involve using a known soil sample.
- Connection Issues: Double-check all wiring and solder joints for any loose connections or breaks.
- Filtering Noise: Implement a moving average or other digital filtering technique in your code to reduce noise.
FAQs
Q: Can the sensor be left in the soil permanently? A: It is not recommended to leave the sensor in the soil permanently as prolonged exposure to moisture and soil chemicals can degrade the sensor.
Q: How often should the sensor be calibrated? A: Calibration frequency depends on usage, but it is generally recommended to calibrate the sensor before each critical use.
Q: Is the sensor waterproof? A: The sensor is typically resistant to soil moisture but is not designed to be fully submerged in water. Protect the electronic components from water damage.
Q: Can the sensor measure the NPK levels of liquid fertilizers? A: The sensor is designed for soil measurement. Using it with liquid fertilizers may require different calibration and could potentially damage the sensor.