Cirkit Designer
Your all-in-one circuit design IDE
Home /
Component Documentation
How to Use PM2.5: Examples, Pinouts, and Specs
Introduction
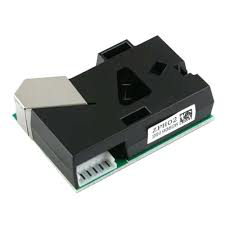
Particulate Matter 2.5 (PM2.5) sensors are electronic devices designed to measure the concentration of fine particulate matter in the air. These sensors are critical for air quality monitoring and are commonly used in environmental monitoring stations, air purifiers, and HVAC systems to detect and control pollution levels.
Explore Projects Built with PM2.5
Arduino-Based Air Quality Monitoring System with Bluetooth Connectivity
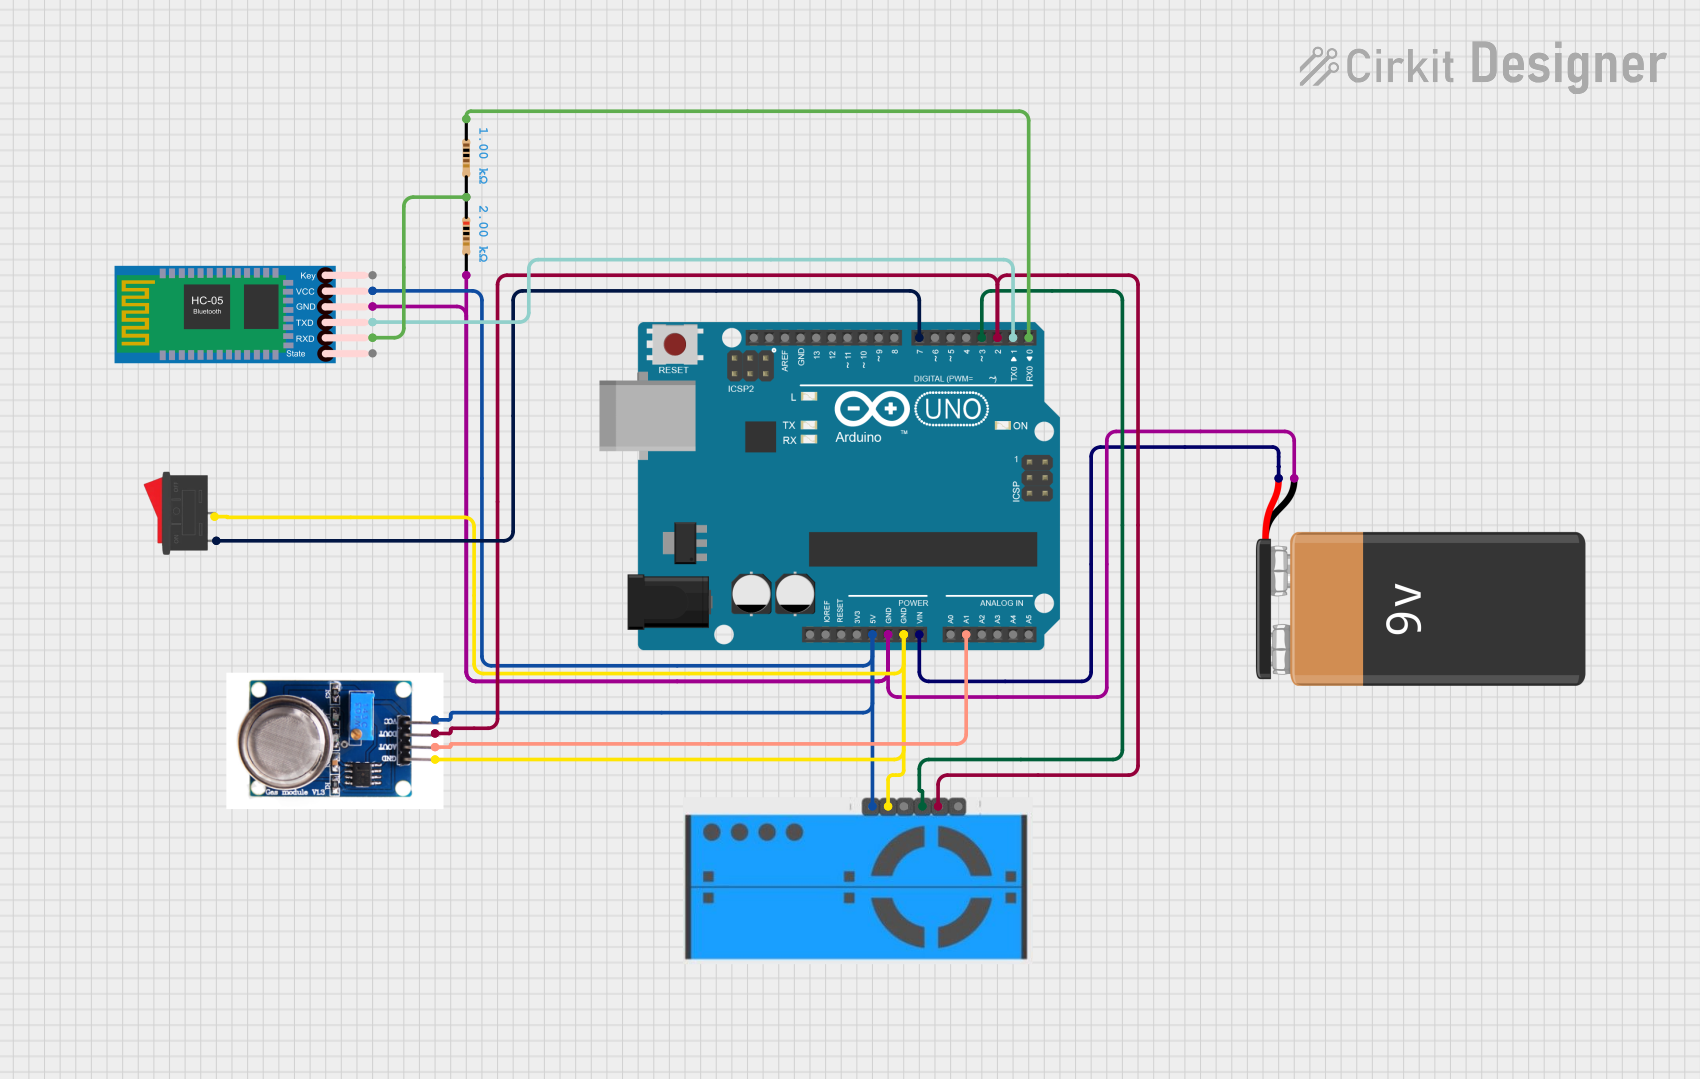
This circuit is an air quality monitoring system that uses an Arduino UNO to collect data from a PM2.5 air quality sensor (PMS5003) and an ozone sensor (MQ131). The collected data is then transmitted via an HC-05 Bluetooth module for remote monitoring, with a rocker switch used to control the power supply.
Arduino UNO and SIM900A Vape Smoke Detector with PM2.5 Sensor

This circuit uses an Arduino UNO to monitor air quality using a PM2.5 Air Quality Sensor (PMS5003) and sends an SMS alert via a SIM900A GSM module when vape smoke is detected. The Arduino reads data from the PM2.5 sensor and, upon detecting a threshold level of particulate matter, triggers the SIM900A to send a notification to a predefined phone number.
Arduino UNO Based PM2.5 Air Quality Monitoring System
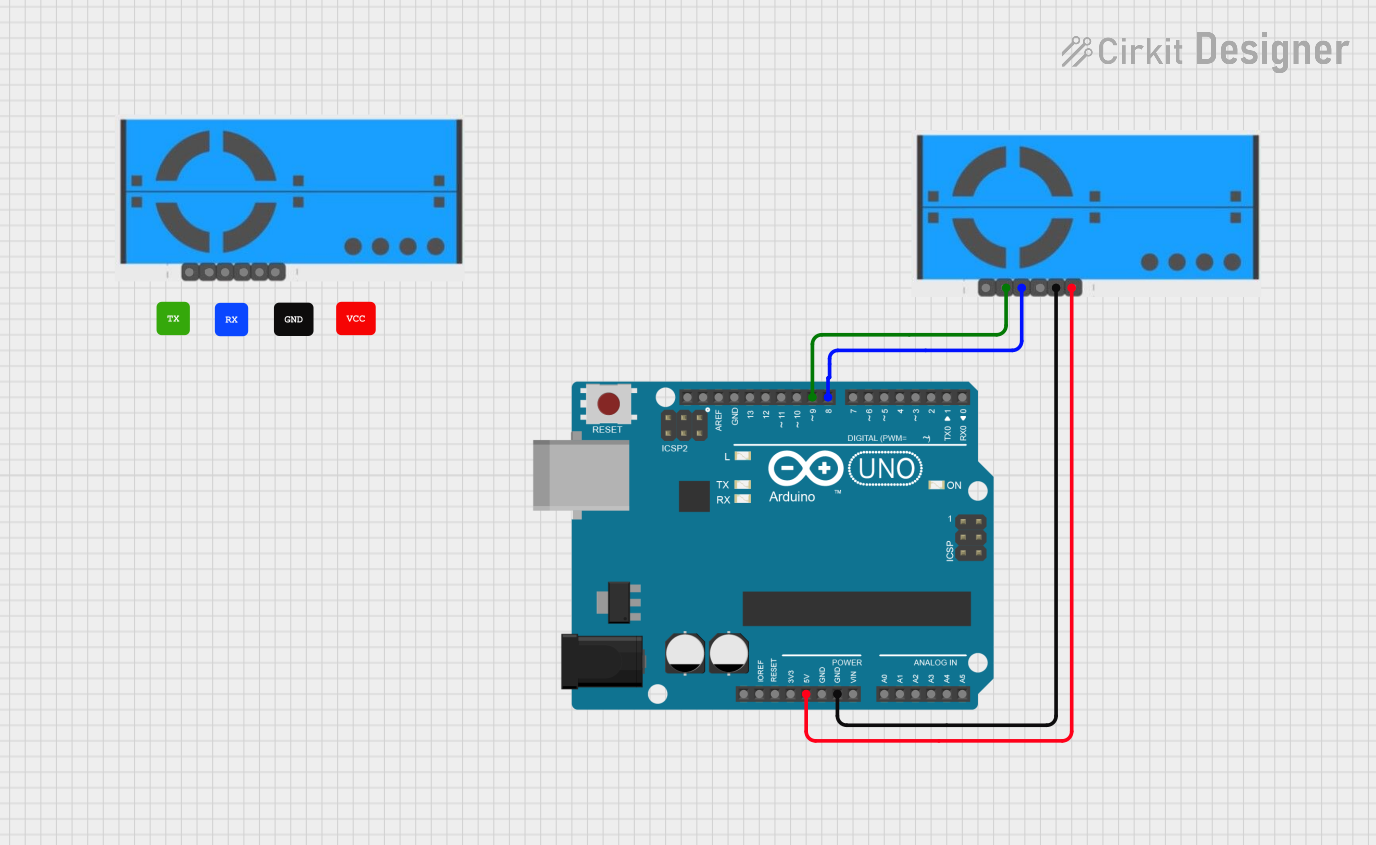
This circuit connects a PM2.5 Air Quality Sensor (PMS5003) to an Arduino UNO for air quality monitoring. The sensor's VCC and GND pins are powered by the Arduino's 5V and GND pins, respectively. The sensor's RX and TX pins are connected to the Arduino's digital pins D8 and D9 for serial communication, allowing the Arduino to read and process the air quality data from the sensor.
Arduino UNO and ESP8266-Based Air Quality Monitoring System with Wi-Fi Connectivity
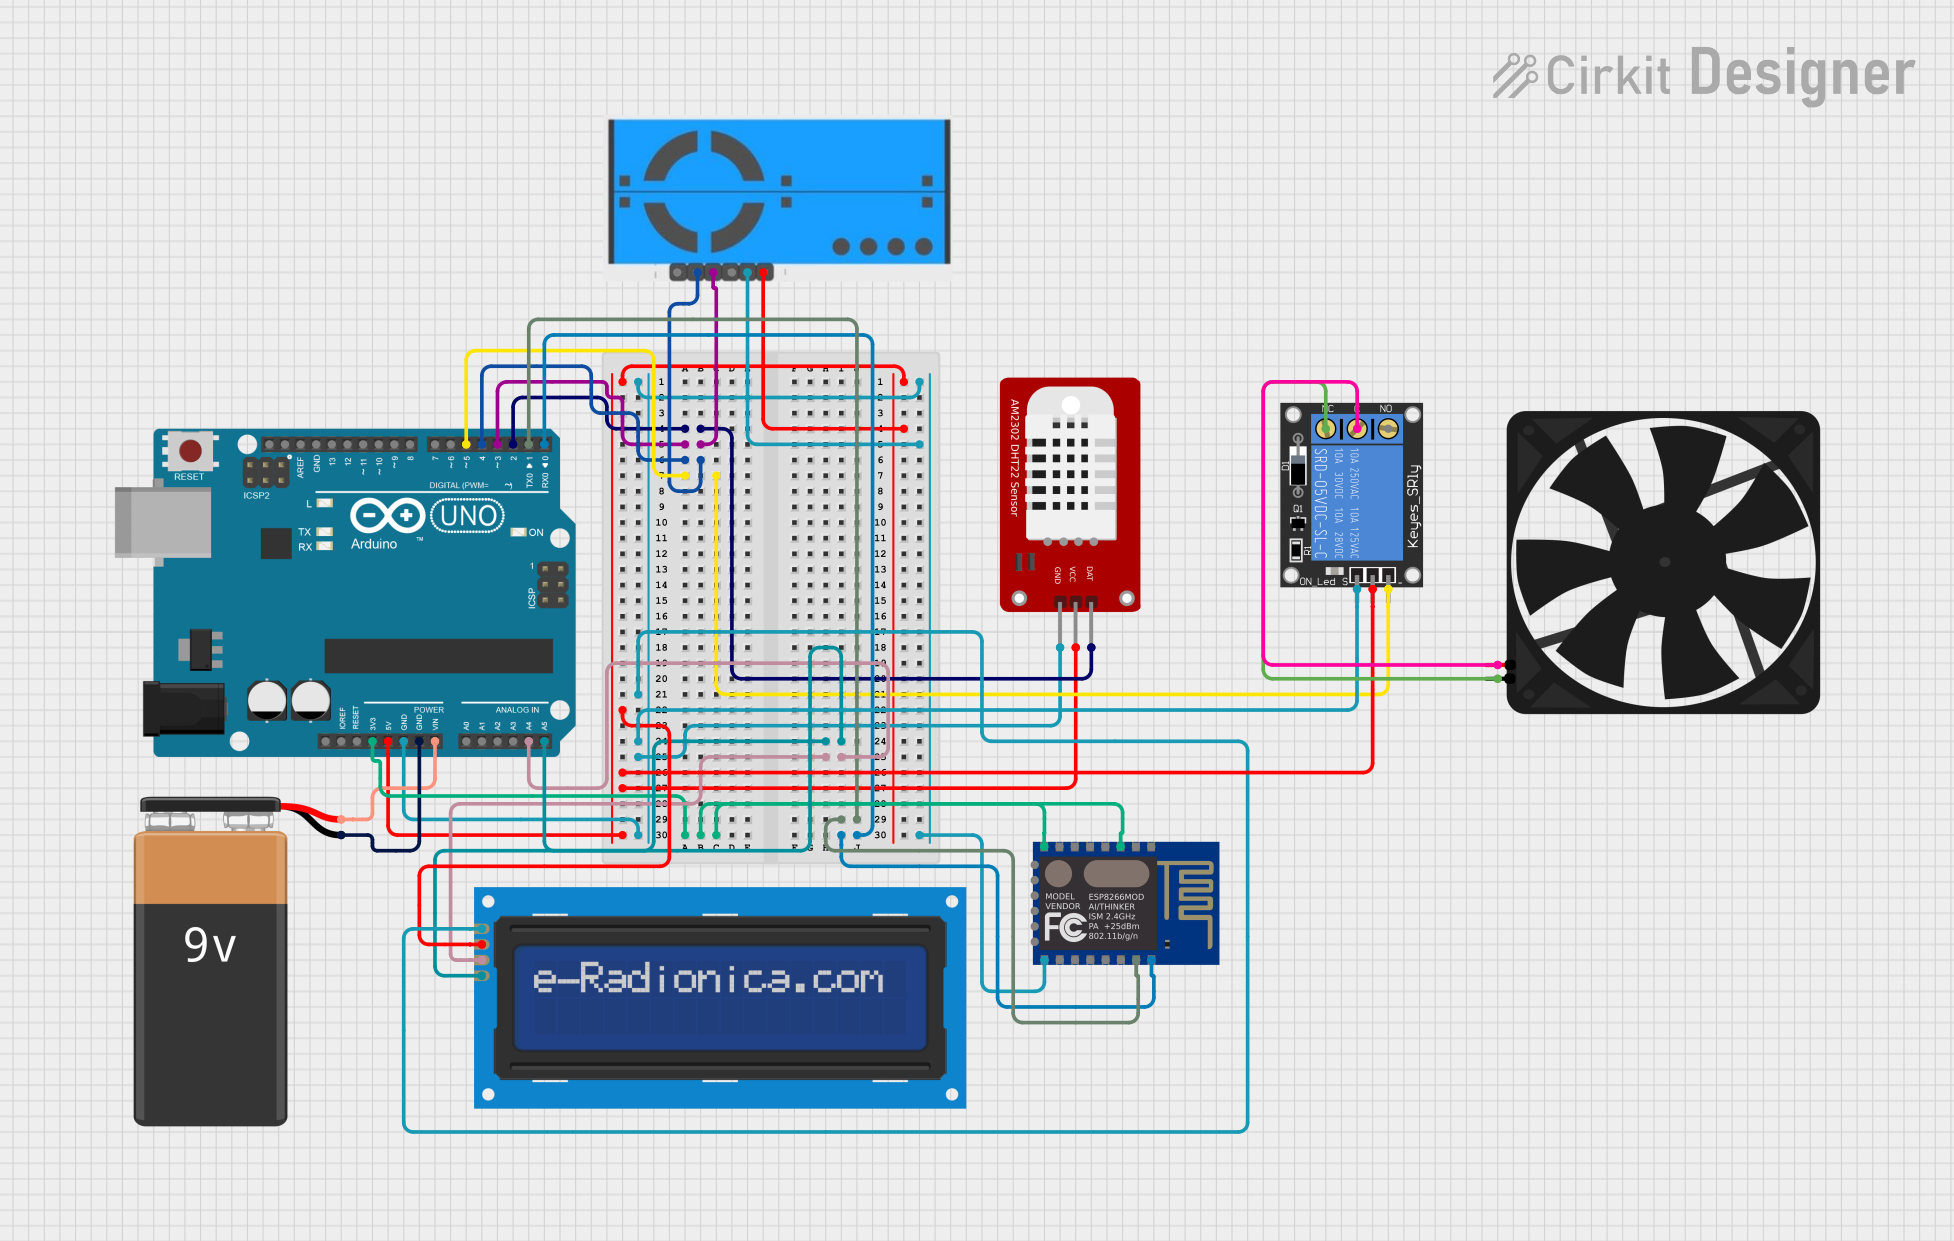
This circuit is an air quality monitoring system that uses an Arduino UNO to interface with a DHT22 temperature and humidity sensor, a PM2.5 air quality sensor, an LCD screen for display, and an ESP8266 WiFi module for connectivity. The system also includes a relay-controlled fan to manage air quality, powered by a 9V battery.
Explore Projects Built with PM2.5
Arduino-Based Air Quality Monitoring System with Bluetooth Connectivity
This circuit is an air quality monitoring system that uses an Arduino UNO to collect data from a PM2.5 air quality sensor (PMS5003) and an ozone sensor (MQ131). The collected data is then transmitted via an HC-05 Bluetooth module for remote monitoring, with a rocker switch used to control the power supply.
Arduino UNO and SIM900A Vape Smoke Detector with PM2.5 Sensor
This circuit uses an Arduino UNO to monitor air quality using a PM2.5 Air Quality Sensor (PMS5003) and sends an SMS alert via a SIM900A GSM module when vape smoke is detected. The Arduino reads data from the PM2.5 sensor and, upon detecting a threshold level of particulate matter, triggers the SIM900A to send a notification to a predefined phone number.
Arduino UNO Based PM2.5 Air Quality Monitoring System
This circuit connects a PM2.5 Air Quality Sensor (PMS5003) to an Arduino UNO for air quality monitoring. The sensor's VCC and GND pins are powered by the Arduino's 5V and GND pins, respectively. The sensor's RX and TX pins are connected to the Arduino's digital pins D8 and D9 for serial communication, allowing the Arduino to read and process the air quality data from the sensor.
Arduino UNO and ESP8266-Based Air Quality Monitoring System with Wi-Fi Connectivity
This circuit is an air quality monitoring system that uses an Arduino UNO to interface with a DHT22 temperature and humidity sensor, a PM2.5 air quality sensor, an LCD screen for display, and an ESP8266 WiFi module for connectivity. The system also includes a relay-controlled fan to manage air quality, powered by a 9V battery.
Common Applications and Use Cases
- Air quality monitoring
- Environmental data collection
- Smart home systems
- Industrial air filtration systems
- Health and safety monitoring in workplaces
Technical Specifications
Key Technical Details
- Measurement Range: Typically 0 to 500 µg/m³
- Operating Voltage: Usually 5V DC
- Output Signal: Analog voltage, PWM, UART digital output (varies by model)
- Response Time: T90 < 1 minute
- Operating Temperature Range: -10°C to +60°C
- Operating Humidity Range: 0 to 95% RH, non-condensing
Pin Configuration and Descriptions
| Pin Number | Pin Name | Description |
|---|---|---|
| 1 | VCC | Power supply (5V DC) |
| 2 | GND | Ground connection |
| 3 | TX | UART transmit (optional, model dependent) |
| 4 | RX | UART receive (optional, model dependent) |
| 5 | RESET | Reset pin (optional, model dependent) |
| 6 | PWM | PWM output (optional, model dependent) |
| 7 | ANALOG | Analog voltage output (optional, model dependent) |
Usage Instructions
How to Use the Component in a Circuit
- Connect the VCC pin to a 5V power supply.
- Connect the GND pin to the ground of the power supply.
- Depending on the output type of the sensor, connect the TX/RX pins to a microcontroller for UART communication, or the PWM/ANALOG pin for pulse width modulation or analog voltage output.
Important Considerations and Best Practices
- Ensure the sensor is placed in an area with unrestricted airflow.
- Avoid exposure to high concentrations of dust or chemicals that may damage the sensor.
- Calibrate the sensor periodically to maintain accuracy.
- Implement proper filtering and averaging techniques to reduce noise in the sensor output.
Troubleshooting and FAQs
Common Issues Users Might Face
- Inaccurate Readings: Ensure the sensor is calibrated correctly and not obstructed by dust or debris.
- No Output Signal: Check the power supply and connections to the sensor. Ensure the correct pins are used for data output.
Solutions and Tips for Troubleshooting
- Regularly clean the sensor's inlet to prevent blockages.
- Verify the power supply is stable and within the specified voltage range.
- If using UART communication, ensure the baud rate and data format match the sensor's specifications.
FAQs
- Q: How often should the PM2.5 sensor be calibrated?
- A: Calibration frequency depends on usage, but typically once every six months is recommended.
- Q: Can the sensor be used outdoors?
- A: Yes, but it should be protected from direct rain and extreme weather conditions.
Example Code for Arduino UNO
// Example code for interfacing a PM2.5 sensor with an Arduino UNO
#include <SoftwareSerial.h>

SoftwareSerial pmSerial(10, 11); // RX, TX

void setup() {
  Serial.begin(9600);
  pmSerial.begin(9600); // Initialize the software serial port
  Serial.println("PM2.5 Sensor reading started");
}

void loop() {
  if (pmSerial.available()) {
    // Read data from the sensor
    int pmValue = pmSerial.read();
    // Output the PM2.5 value
    Serial.print("PM2.5 Concentration: ");
    Serial.print(pmValue);
    Serial.println(" µg/m³");
  }
  delay(1000); // Wait for a second for the next reading
}
Note: The example code provided is a basic illustration for reading data from a PM2.5 sensor with a UART interface. The actual implementation may vary based on the specific sensor model and its communication protocol. Always refer to the sensor's datasheet for precise programming and interfacing instructions.