How to Use Adafruit HDC1008 Temperature Humidity Sensor: Examples, Pinouts, and Specs
Introduction
The Adafruit HDC1008 is a digital sensor that provides precise measurements of temperature and humidity. Utilizing an I2C interface for communication, this sensor is ideal for a wide range of applications, including weather monitoring systems, HVAC (Heating, Ventilation, and Air Conditioning) control, and any project where environmental monitoring is essential.
Explore Projects Built with Adafruit HDC1008 Temperature Humidity Sensor
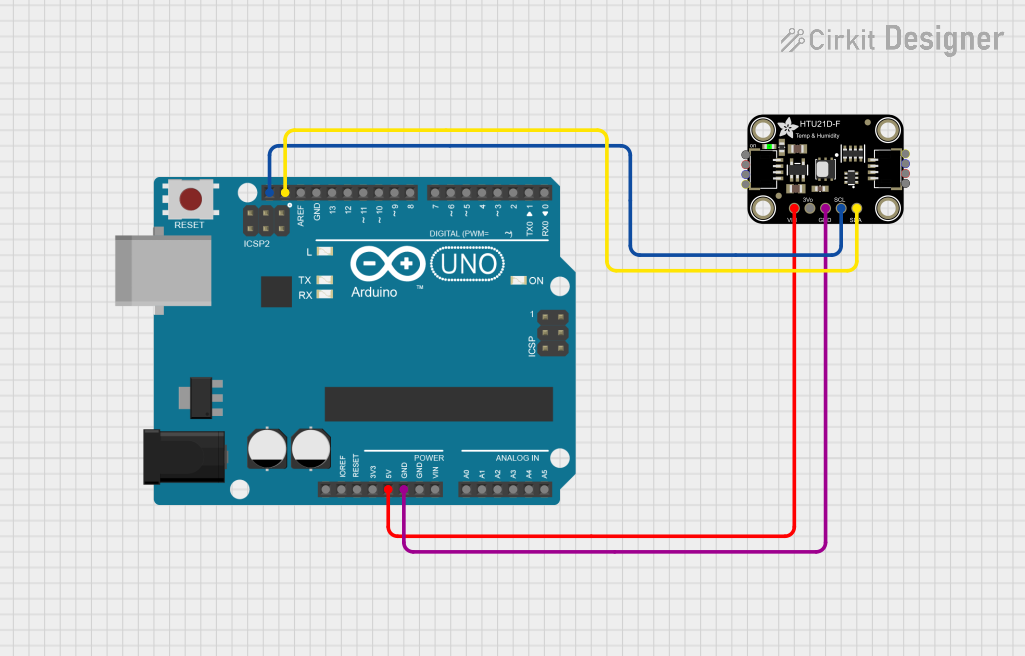
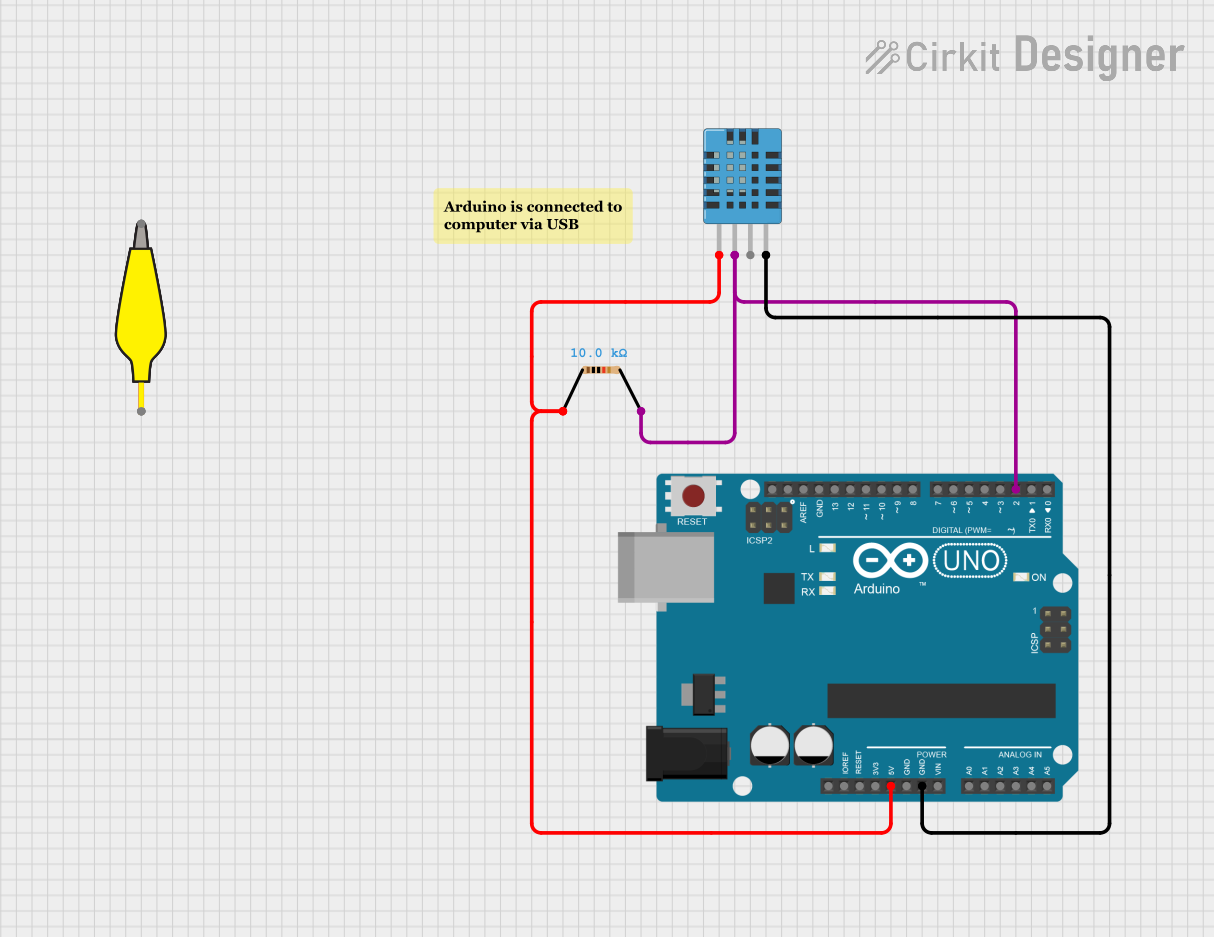
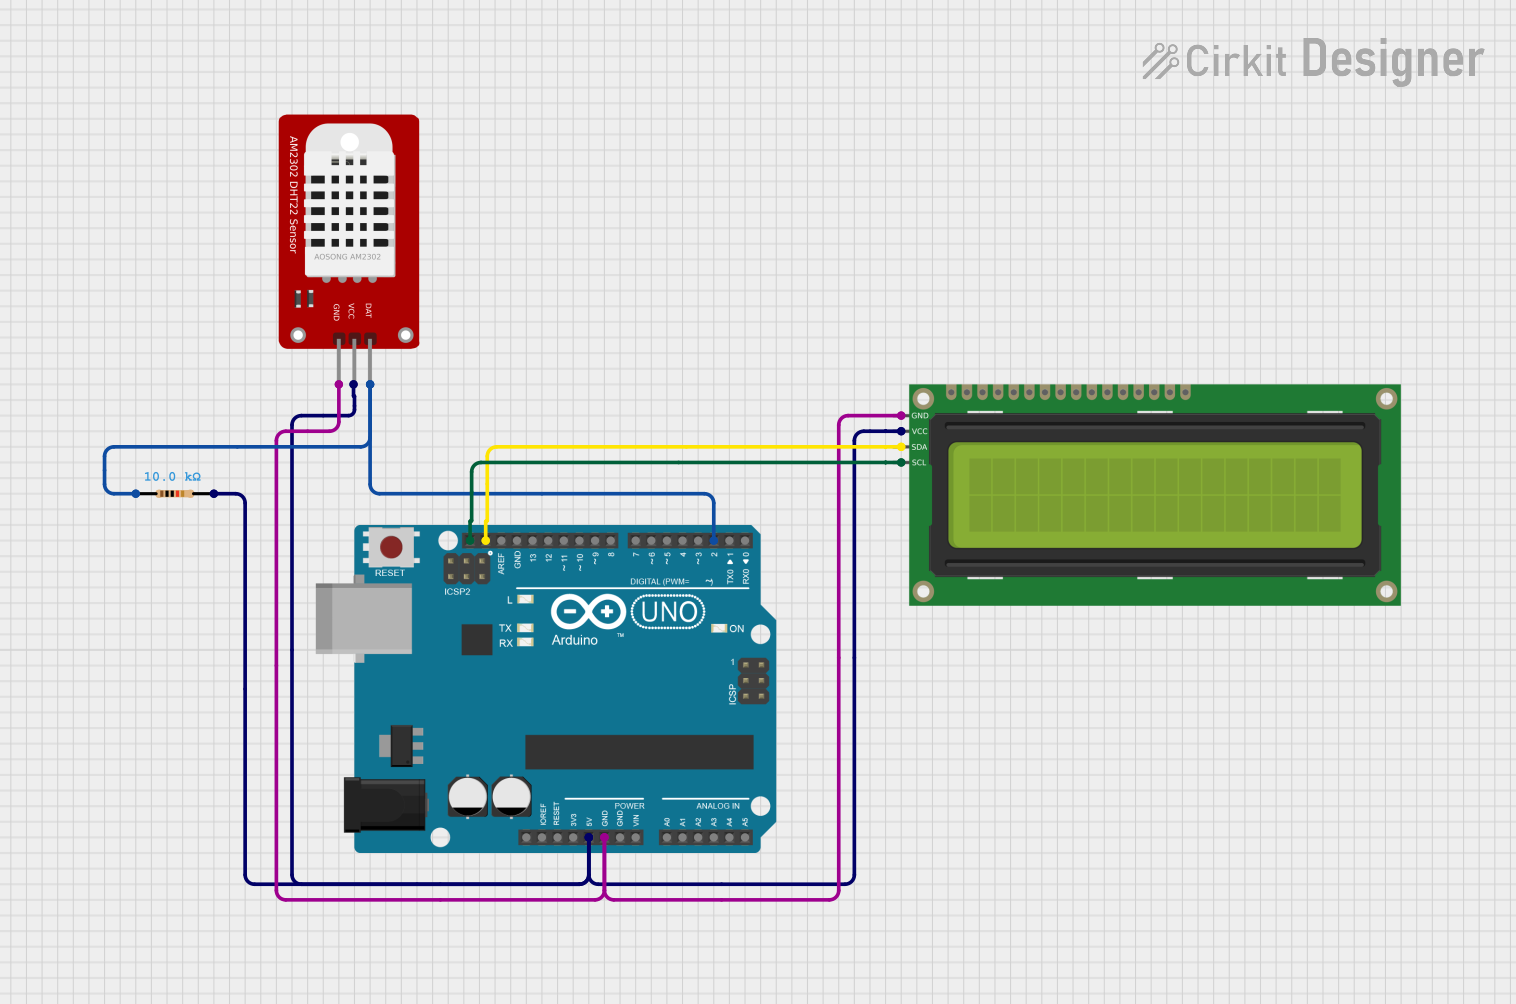

Explore Projects Built with Adafruit HDC1008 Temperature Humidity Sensor
Technical Specifications
Key Technical Details
- Temperature Range: -40°C to +125°C
- Humidity Range: 0-100% RH
- Temperature Accuracy: ±0.2°C (typical)
- Humidity Accuracy: ±2% RH (typical)
- Voltage Supply: 3.3V to 5V
- Interface: I2C
- I2C Address: 0x40 (default)
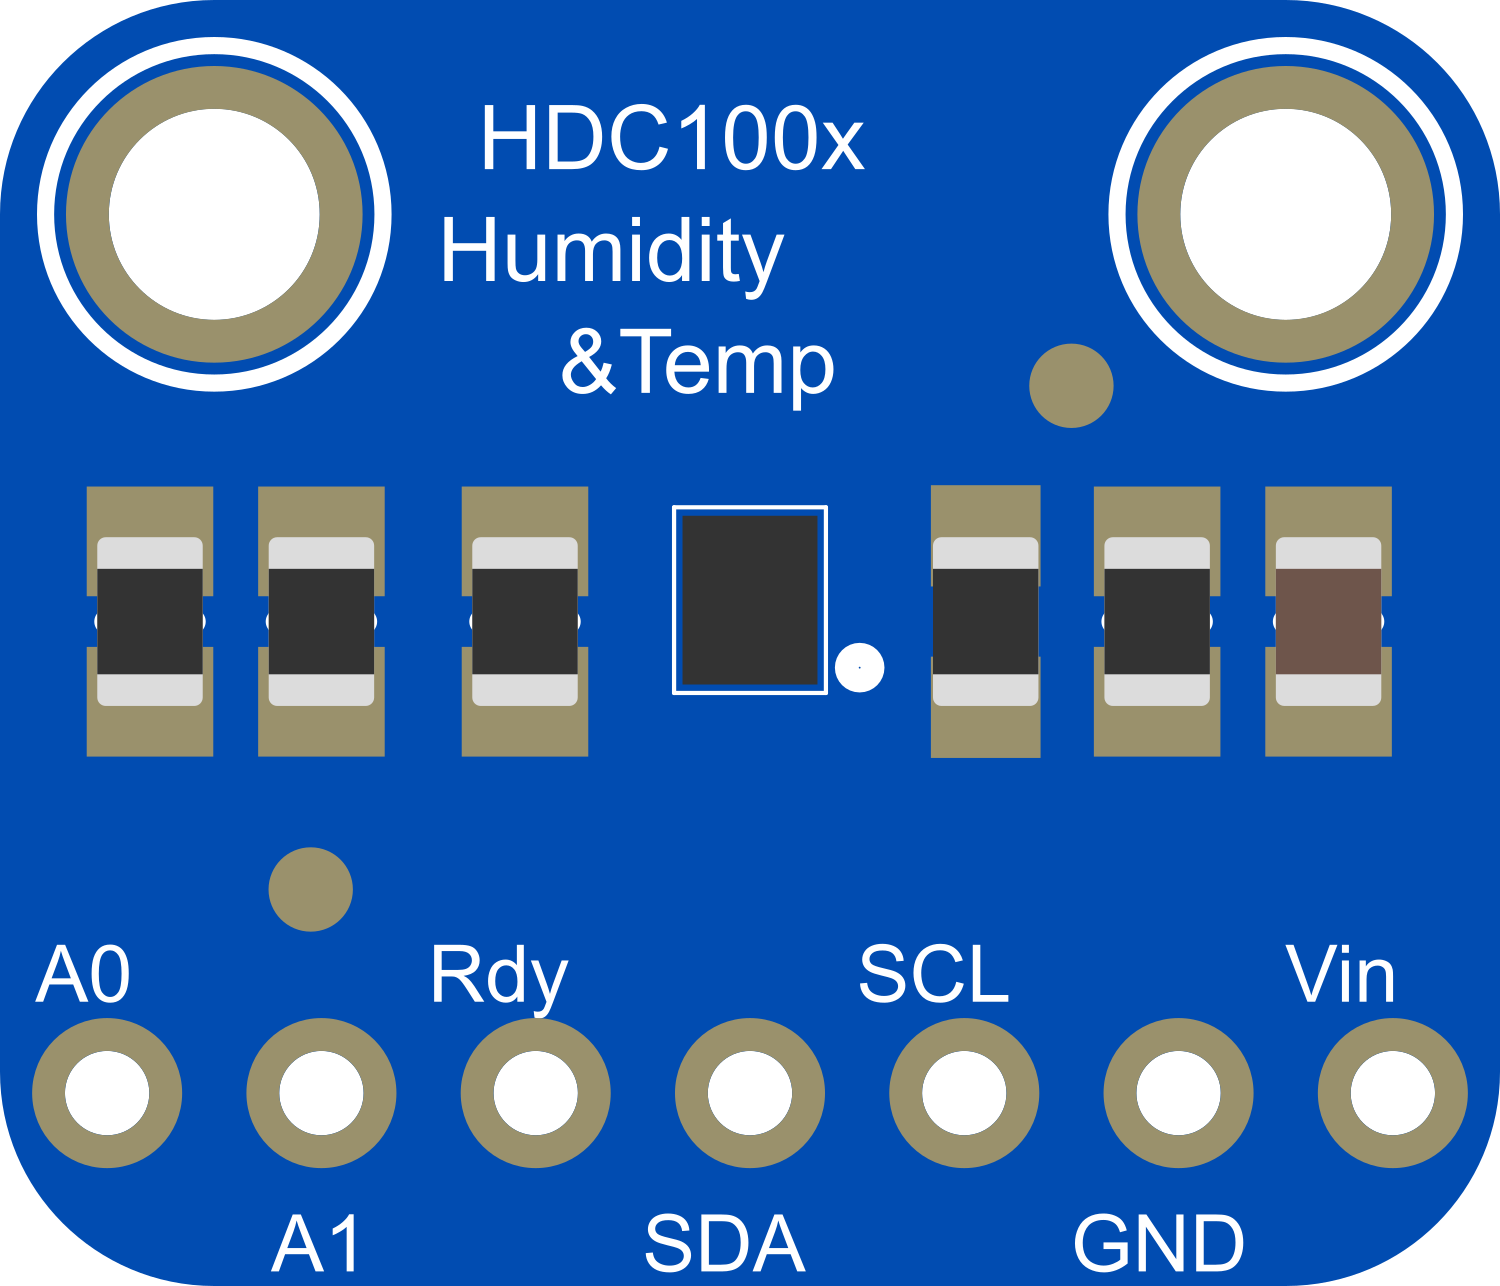
Pin Configuration and Descriptions
| Pin Number | Name | Description |
|---|---|---|
| 1 | VDD | Power supply (3.3V to 5V) |
| 2 | GND | Ground |
| 3 | SDA | I2C Data |
| 4 | SCL | I2C Clock |
| 5 | ADDR | Address pin (connect to GND or VDD) |
| 6 | DRDYn | Data Ready (active low; optional use) |
Usage Instructions
Integration with a Circuit
- Powering the Sensor: Connect the VDD pin to a 3.3V or 5V power supply and the GND pin to ground.
- I2C Communication: Connect the SDA and SCL pins to the I2C data and clock lines on your microcontroller.
- Setting the Address: The ADDR pin can be connected to GND or VDD to set the I2C address to 0x40 or 0x41, respectively.
- Data Ready Pin: The DRDYn pin is optional and can be used to signal when measurement data is ready to be read.
Best Practices
- Ensure that the power supply is stable and within the specified voltage range.
- Use pull-up resistors on the I2C data and clock lines if they are not already provided by the microcontroller.
- Avoid placing the sensor near heat sources or in direct sunlight to prevent inaccurate readings.
- Consider using a filter or enclosure to protect the sensor from dust and moisture, which can affect its performance.
Example Code for Arduino UNO
#include <Wire.h>
#include "Adafruit_HDC1008.h"

Adafruit_HDC1008 hdc = Adafruit_HDC1008();

void setup() {
  Serial.begin(9600);
  if (!hdc.begin()) {
    Serial.println("Couldn't find sensor!");
    while (1);
  }
}

void loop() {
  Serial.print("Temp: ");
  Serial.print(hdc.readTemperature());
  Serial.print("°C, Humidity: ");
  Serial.print(hdc.readHumidity());
  Serial.println("%");

  delay(1000); // Wait for 1 second between measurements
}
Troubleshooting and FAQs
Common Issues
- Sensor Not Detected: Ensure that the wiring is correct and that the sensor is properly powered. Check the I2C address and the pull-up resistors on the I2C lines.
- Inaccurate Readings: Verify that the sensor is not exposed to direct heat sources or sunlight. Check for proper airflow around the sensor.
- No Data on DRDYn: If using the DRDYn pin, ensure it's configured correctly in your code and that the pin is not floating.
FAQs
Q: Can the HDC1008 be used with both 3.3V and 5V systems? A: Yes, the HDC1008 can operate with a supply voltage from 3.3V to 5V.
Q: How can I change the I2C address of the sensor? A: The I2C address can be changed by connecting the ADDR pin to either GND (0x40) or VDD (0x41).
Q: Is calibration required for the HDC1008 sensor? A: The HDC1008 comes factory-calibrated. However, for critical applications, you may perform additional calibration.
Q: What is the maximum I2C bus speed for the HDC1008? A: The HDC1008 supports standard (100kHz) and fast (400kHz) I2C bus speeds.
For further assistance, consult the Adafruit HDC1008 datasheet and your microcontroller's documentation.