Cirkit Designer Logo
Cirkit Designer
Your all-in-one circuit design IDE
Home / 
Component Documentation

How to Use Adafruit SPI Non-Volatile FRAM 8KB: Examples, Pinouts, and Specs

Image of Adafruit SPI Non-Volatile FRAM 8KB
Cirkit Designer LogoDesign with Adafruit SPI Non-Volatile FRAM 8KB in Cirkit Designer

Introduction

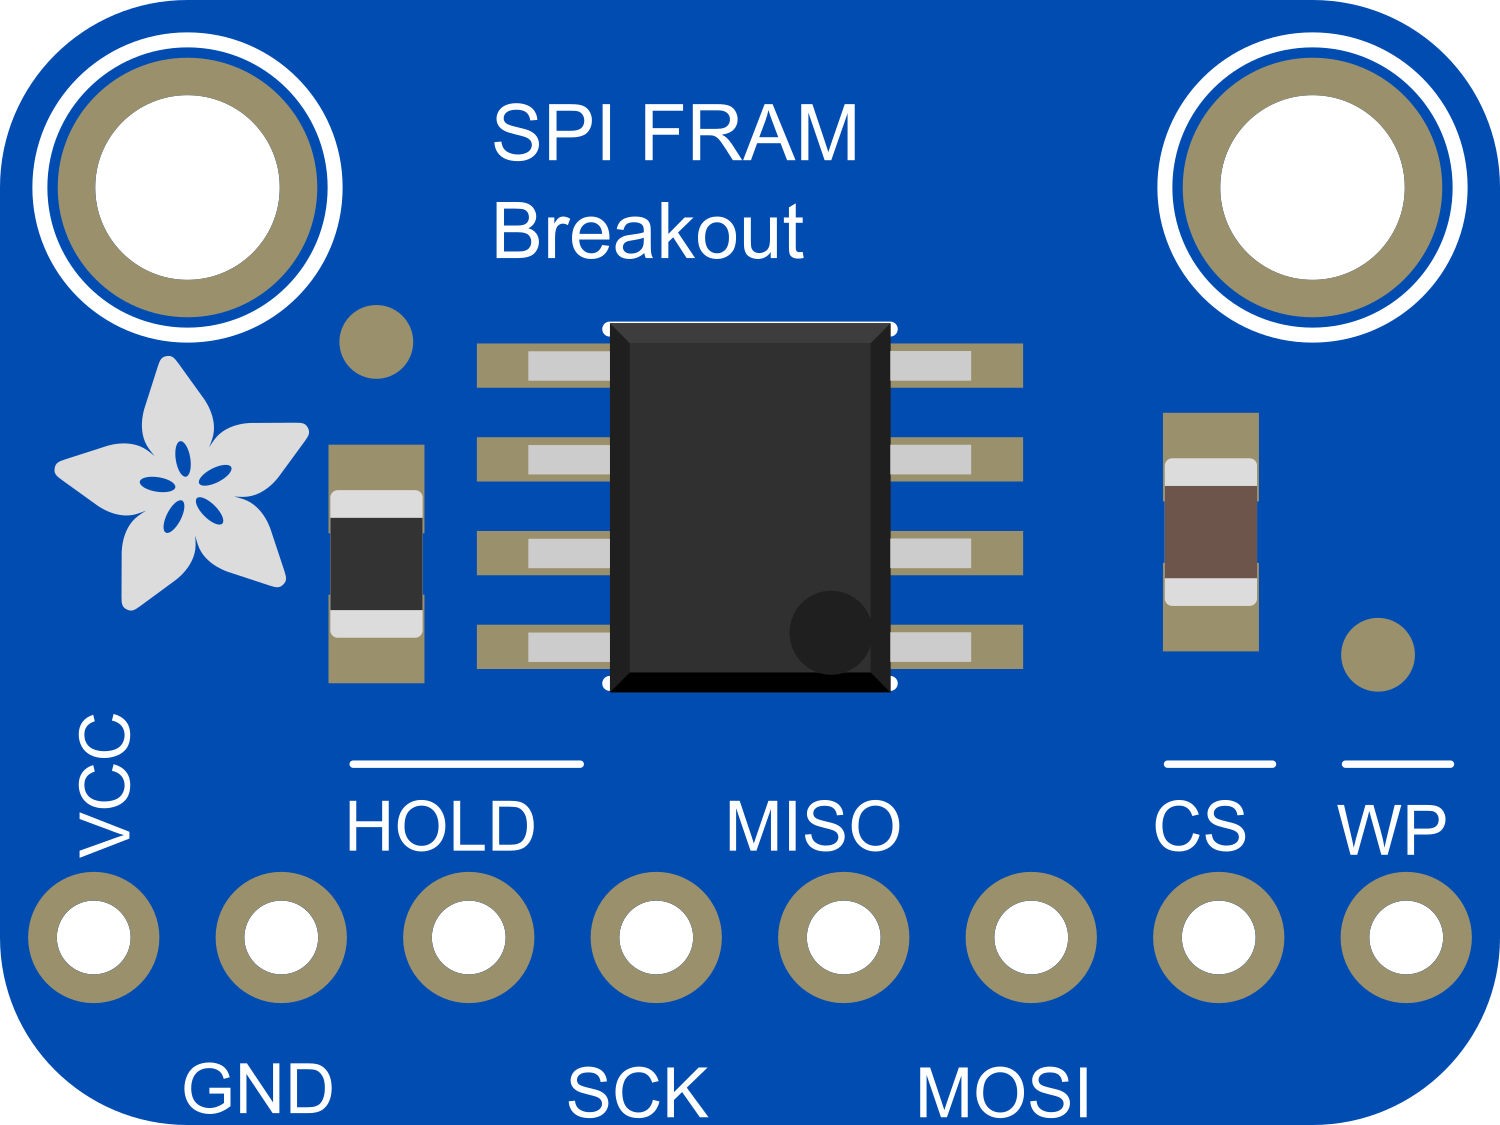
The Adafruit SPI Non-Volatile FRAM 8KB is a high-performance, ferroelectric random access memory (FRAM) module that provides robust, non-volatile data storage. Unlike traditional non-volatile memories like EEPROM or Flash, FRAM offers faster write speeds and a much higher endurance for write cycles. This makes it ideal for applications that require frequent or rapid data logging or updates, such as wear-leveling tasks, data caching, and real-time data collection. The module communicates with microcontrollers via the Serial Peripheral Interface (SPI) protocol.

Explore Projects Built with Adafruit SPI Non-Volatile FRAM 8KB

Use Cirkit Designer to design, explore, and prototype these projects online. Some projects support real-time simulation. Click "Open Project" to start designing instantly!
Arduino Mega 2560-Based Smart Home Control System with LCD Display and Flame Sensor
Image of Copy of schoolproject (1): A project utilizing Adafruit SPI Non-Volatile FRAM 8KB in a practical application
This circuit is a multi-functional embedded system featuring an Arduino Mega 2560 microcontroller that interfaces with a 4x4 membrane keypad, a 20x4 I2C LCD, an 8x8 LED matrix, a DS3231 RTC module, a passive buzzer, and a KY-026 flame sensor. The system is powered by a 5V PSU and is designed to provide real-time clock functionality, user input via the keypad, visual output on the LCD and LED matrix, and flame detection with an audible alert.
Cirkit Designer LogoOpen Project in Cirkit Designer
SparkFun Pro Micro Based Motion Tracking System with BMI160 and EEPROM Data Logging
Image of Basic Arduino Sparkfun Pro Micro + BMI160: A project utilizing Adafruit SPI Non-Volatile FRAM 8KB in a practical application
This circuit is designed for motion sensing and data logging applications. It features a SparkFun Pro Micro microcontroller interfaced with a BMI160 6DOF sensor for motion detection and two 24LC512 EEPROM chips for extended data storage. The microcontroller reads gyroscopic and accelerometer data from the BMI160 sensor, processes it, and stores it in the EEPROM, with power supplied by a Polymer Lithium Ion Battery.
Cirkit Designer LogoOpen Project in Cirkit Designer
ESP32 and ADXL343-Based Battery-Powered Accelerometer with SPI Communication
Image of vibration module: A project utilizing Adafruit SPI Non-Volatile FRAM 8KB in a practical application
This circuit features an ESP32 microcontroller interfaced with an ADXL343 accelerometer via SPI communication, powered by a 12V battery regulated down to 5V and 8V using 7805 and 7808 voltage regulators. The ESP32 reads accelerometer data and outputs it via serial communication, with additional components including a pushbutton and a rocker switch for user input.
Cirkit Designer LogoOpen Project in Cirkit Designer
I2C-Controlled OLED Display with External EEPROM and Interactive Pushbuttons
Image of godmode: A project utilizing Adafruit SPI Non-Volatile FRAM 8KB in a practical application
This is a microcontroller-based interactive device featuring a Wemos D1 Mini, an OLED display, external EEPROM, and an I/O expander. It includes user input buttons and status LEDs, with potential MIDI interface capabilities.
Cirkit Designer LogoOpen Project in Cirkit Designer

Explore Projects Built with Adafruit SPI Non-Volatile FRAM 8KB

Use Cirkit Designer to design, explore, and prototype these projects online. Some projects support real-time simulation. Click "Open Project" to start designing instantly!
Image of Copy of schoolproject (1): A project utilizing Adafruit SPI Non-Volatile FRAM 8KB in a practical application
Arduino Mega 2560-Based Smart Home Control System with LCD Display and Flame Sensor
This circuit is a multi-functional embedded system featuring an Arduino Mega 2560 microcontroller that interfaces with a 4x4 membrane keypad, a 20x4 I2C LCD, an 8x8 LED matrix, a DS3231 RTC module, a passive buzzer, and a KY-026 flame sensor. The system is powered by a 5V PSU and is designed to provide real-time clock functionality, user input via the keypad, visual output on the LCD and LED matrix, and flame detection with an audible alert.
Cirkit Designer LogoOpen Project in Cirkit Designer
Image of Basic Arduino Sparkfun Pro Micro + BMI160: A project utilizing Adafruit SPI Non-Volatile FRAM 8KB in a practical application
SparkFun Pro Micro Based Motion Tracking System with BMI160 and EEPROM Data Logging
This circuit is designed for motion sensing and data logging applications. It features a SparkFun Pro Micro microcontroller interfaced with a BMI160 6DOF sensor for motion detection and two 24LC512 EEPROM chips for extended data storage. The microcontroller reads gyroscopic and accelerometer data from the BMI160 sensor, processes it, and stores it in the EEPROM, with power supplied by a Polymer Lithium Ion Battery.
Cirkit Designer LogoOpen Project in Cirkit Designer
Image of vibration module: A project utilizing Adafruit SPI Non-Volatile FRAM 8KB in a practical application
ESP32 and ADXL343-Based Battery-Powered Accelerometer with SPI Communication
This circuit features an ESP32 microcontroller interfaced with an ADXL343 accelerometer via SPI communication, powered by a 12V battery regulated down to 5V and 8V using 7805 and 7808 voltage regulators. The ESP32 reads accelerometer data and outputs it via serial communication, with additional components including a pushbutton and a rocker switch for user input.
Cirkit Designer LogoOpen Project in Cirkit Designer
Image of godmode: A project utilizing Adafruit SPI Non-Volatile FRAM 8KB in a practical application
I2C-Controlled OLED Display with External EEPROM and Interactive Pushbuttons
This is a microcontroller-based interactive device featuring a Wemos D1 Mini, an OLED display, external EEPROM, and an I/O expander. It includes user input buttons and status LEDs, with potential MIDI interface capabilities.
Cirkit Designer LogoOpen Project in Cirkit Designer

Common Applications and Use Cases

  • Data logging systems
  • Real-time data collection
  • Industrial control systems
  • Gaming and entertainment devices
  • Wearable electronics
  • IoT devices requiring frequent updates

Technical Specifications

Key Technical Details

  • Voltage: 3.3V to 5V logic and power
  • Current: 0.3 mA (typical standby), 3 mA (maximum operating)
  • Power Ratings: 15 mW (maximum operating power)
  • Memory Size: 8 KBytes (64 Kbits)
  • Write Endurance: 10^14 write cycles
  • Data Retention: 10 years
  • Operating Temperature Range: -40°C to +85°C

Pin Configuration and Descriptions

Pin Number Name Description
1 CS Chip Select, active low
2 DI Data In, SPI MOSI (Master Out Slave In)
3 DO Data Out, SPI MISO (Master In Slave Out)
4 SCK Serial Clock, SPI Clock
5 Vcc Power supply (3.3V to 5V)
6 GND Ground

Usage Instructions

How to Use the Component in a Circuit

  1. Powering the FRAM: Connect the Vcc pin to a 3.3V or 5V power supply, and the GND pin to the ground.

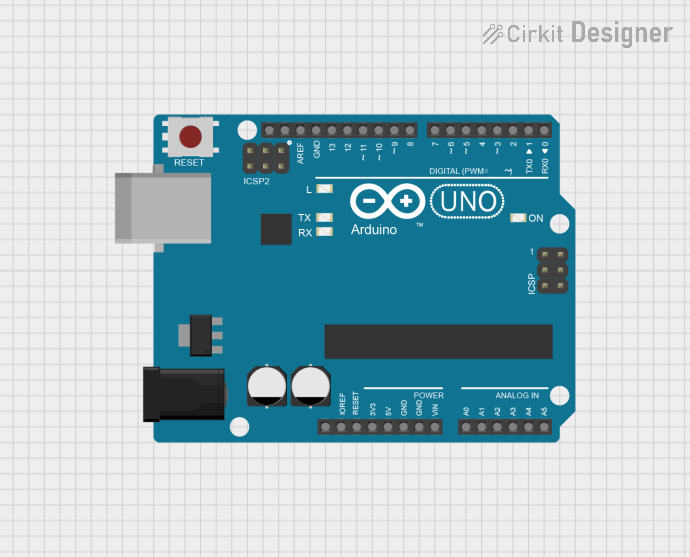
  2. SPI Communication: Connect the CS, DI, DO, and SCK pins to the corresponding SPI pins on your microcontroller. For Arduino UNO, the connections are typically as follows:

    • CS to digital pin 10 (or any other digital pin if you change the pin number in your code)
    • DI (MOSI) to digital pin 11
    • DO (MISO) to digital pin 12
    • SCK to digital pin 13
  3. Library Installation: Install the Adafruit FRAM SPI library via the Arduino Library Manager or download it from the Adafruit GitHub repository.

  4. Initialization: In your code, initialize the FRAM module using the library's functions. Check for successful initialization before proceeding with read/write operations.

Important Considerations and Best Practices

  • Always ensure that the power supply voltage matches the FRAM module's specifications.
  • Use pull-up resistors on the SPI lines if you encounter communication issues.
  • Avoid exposing the FRAM to temperatures outside its operating range.
  • Minimize the length of the SPI connections to reduce potential electromagnetic interference.

Example Code for Arduino UNO

#include <Wire.h>
#include <Adafruit_FRAM_SPI.h>

// Pin definitions
#define CS_PIN 10

// Create an FRAM_SPI instance
Adafruit_FRAM_SPI fram = Adafruit_FRAM_SPI(CS_PIN);

void setup() {
  Serial.begin(9600);
  while (!Serial) {
    ; // Wait for serial port to connect
  }

  // Initialize SPI FRAM
  if (fram.begin()) {
    Serial.println("Found SPI FRAM");
  } else {
    Serial.println("No SPI FRAM found ... check your connections");
    while (1);
  }

  // Write example data to FRAM
  uint8_t testdata = 42;
  fram.writeEnable(true);
  fram.write8(0, testdata);
  fram.writeEnable(false);

  // Read back the data
  uint8_t result = fram.read8(0);
  Serial.print("Read: 0x"); Serial.println(result, HEX);
}

void loop() {
  // Nothing to do here
}

Troubleshooting and FAQs

Common Issues Users Might Face

  • FRAM not detected: Ensure that all SPI connections are secure and correct. Check that the correct CS pin is defined in your code.
  • Incorrect data read/write: Verify that the write enable function is called before writing to the FRAM. Also, ensure that the power supply is stable and within the specified range.
  • Communication errors: If you're experiencing sporadic communication, consider adding pull-up resistors to the SPI lines or shortening the connection wires.

Solutions and Tips for Troubleshooting

  • Double-check wiring against the pin configuration table.
  • Use the example code provided to test basic functionality.
  • Consult the Adafruit FRAM SPI library documentation for advanced functions and troubleshooting tips.

FAQs

Q: Can I use this FRAM with a 5V microcontroller? A: Yes, the Adafruit SPI Non-Volatile FRAM 8KB is 5V tolerant on the SPI pins.

Q: How many write cycles can the FRAM handle? A: The FRAM can handle up to 10^14 write cycles, which is significantly higher than EEPROM or Flash.

Q: Do I need to perform any special operations before powering down the system? A: No, FRAM retains data without any special power-down sequence.

Q: Is it possible to use multiple FRAM modules on the same SPI bus? A: Yes, you can use multiple FRAM modules on the same SPI bus by assigning different CS pins for each module.