How to Use Raspberry Pi Zero: Examples, Pinouts, and Specs
Introduction
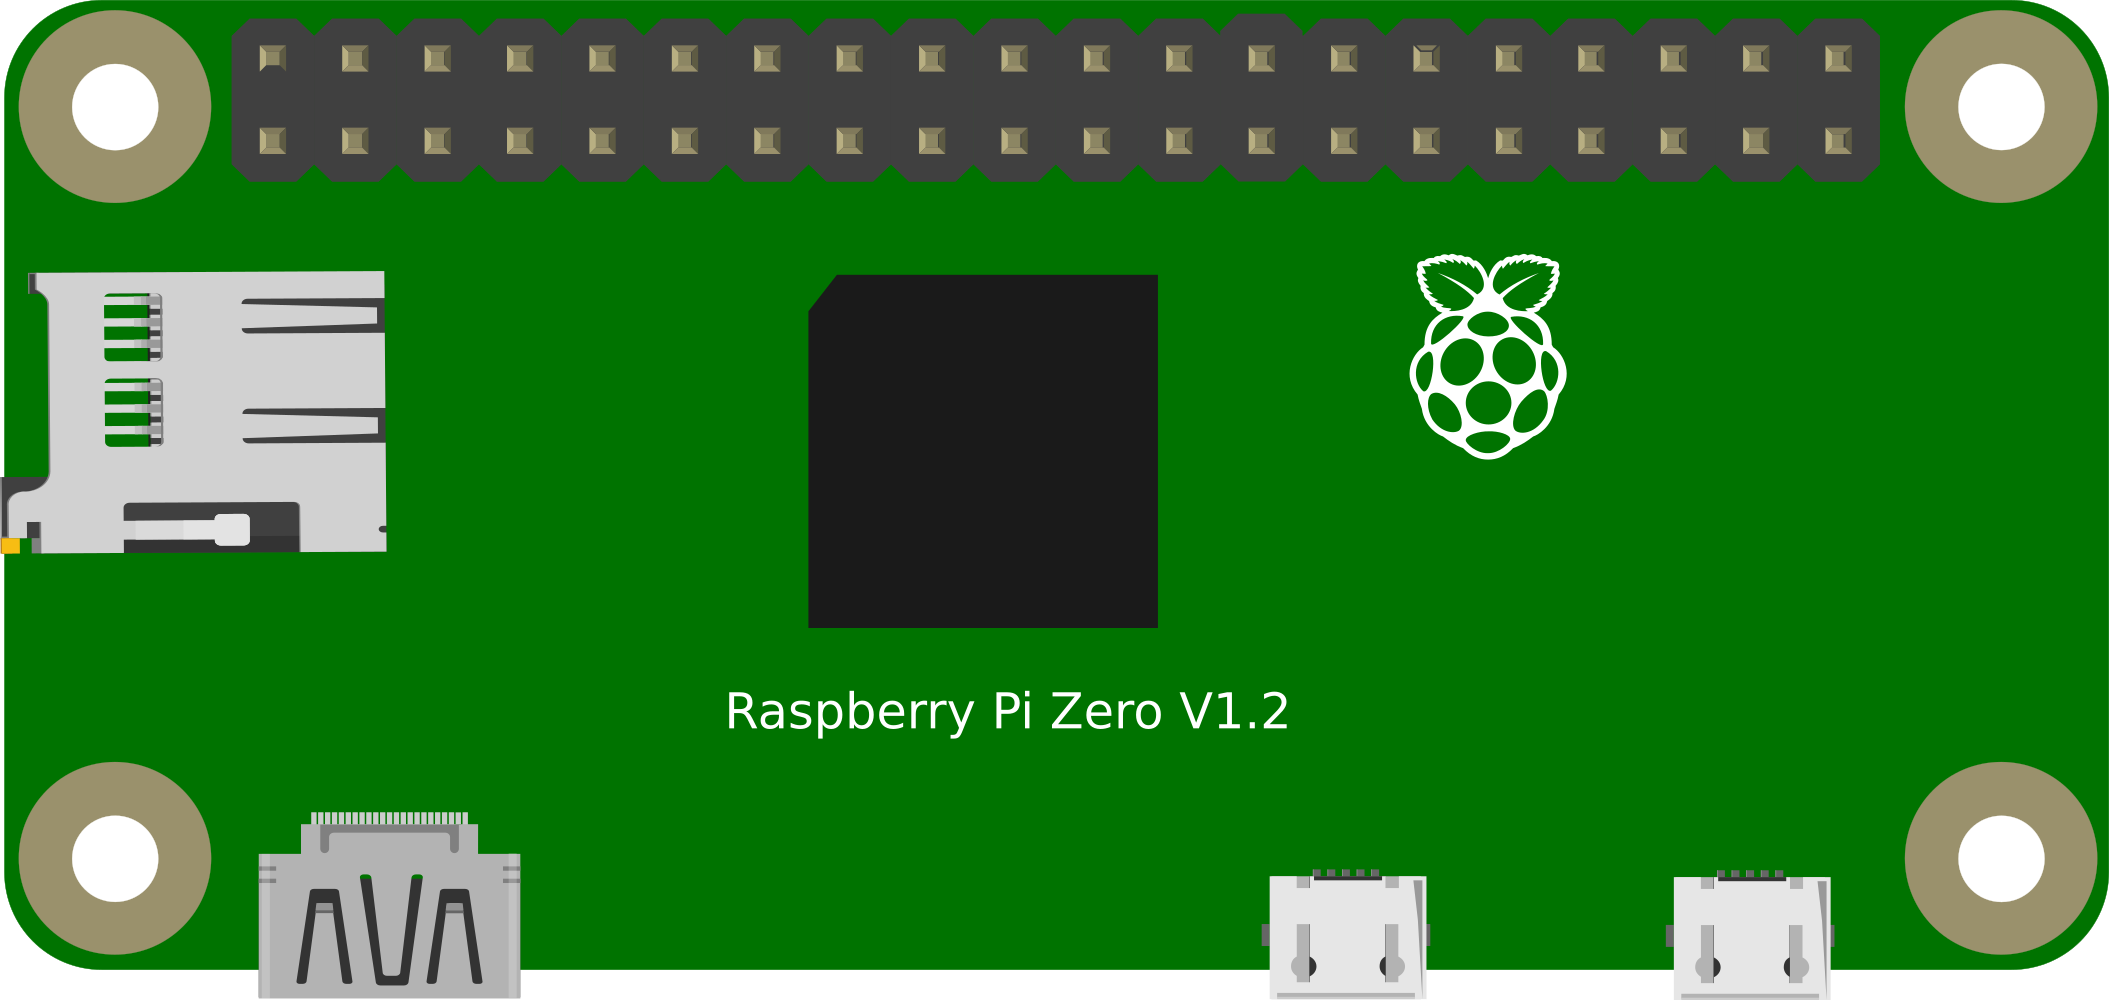
The Raspberry Pi Zero is a small, affordable single-board computer developed by the Raspberry Pi Foundation. It is the smallest form factor of the Raspberry Pi family, known for its compact size and versatility. The Raspberry Pi Zero is suitable for a wide range of projects, including Internet of Things (IoT) applications, automation, DIY electronics, and educational purposes. Its low power consumption and minimal design make it ideal for embedded systems and projects where space is at a premium.
Explore Projects Built with Raspberry Pi Zero
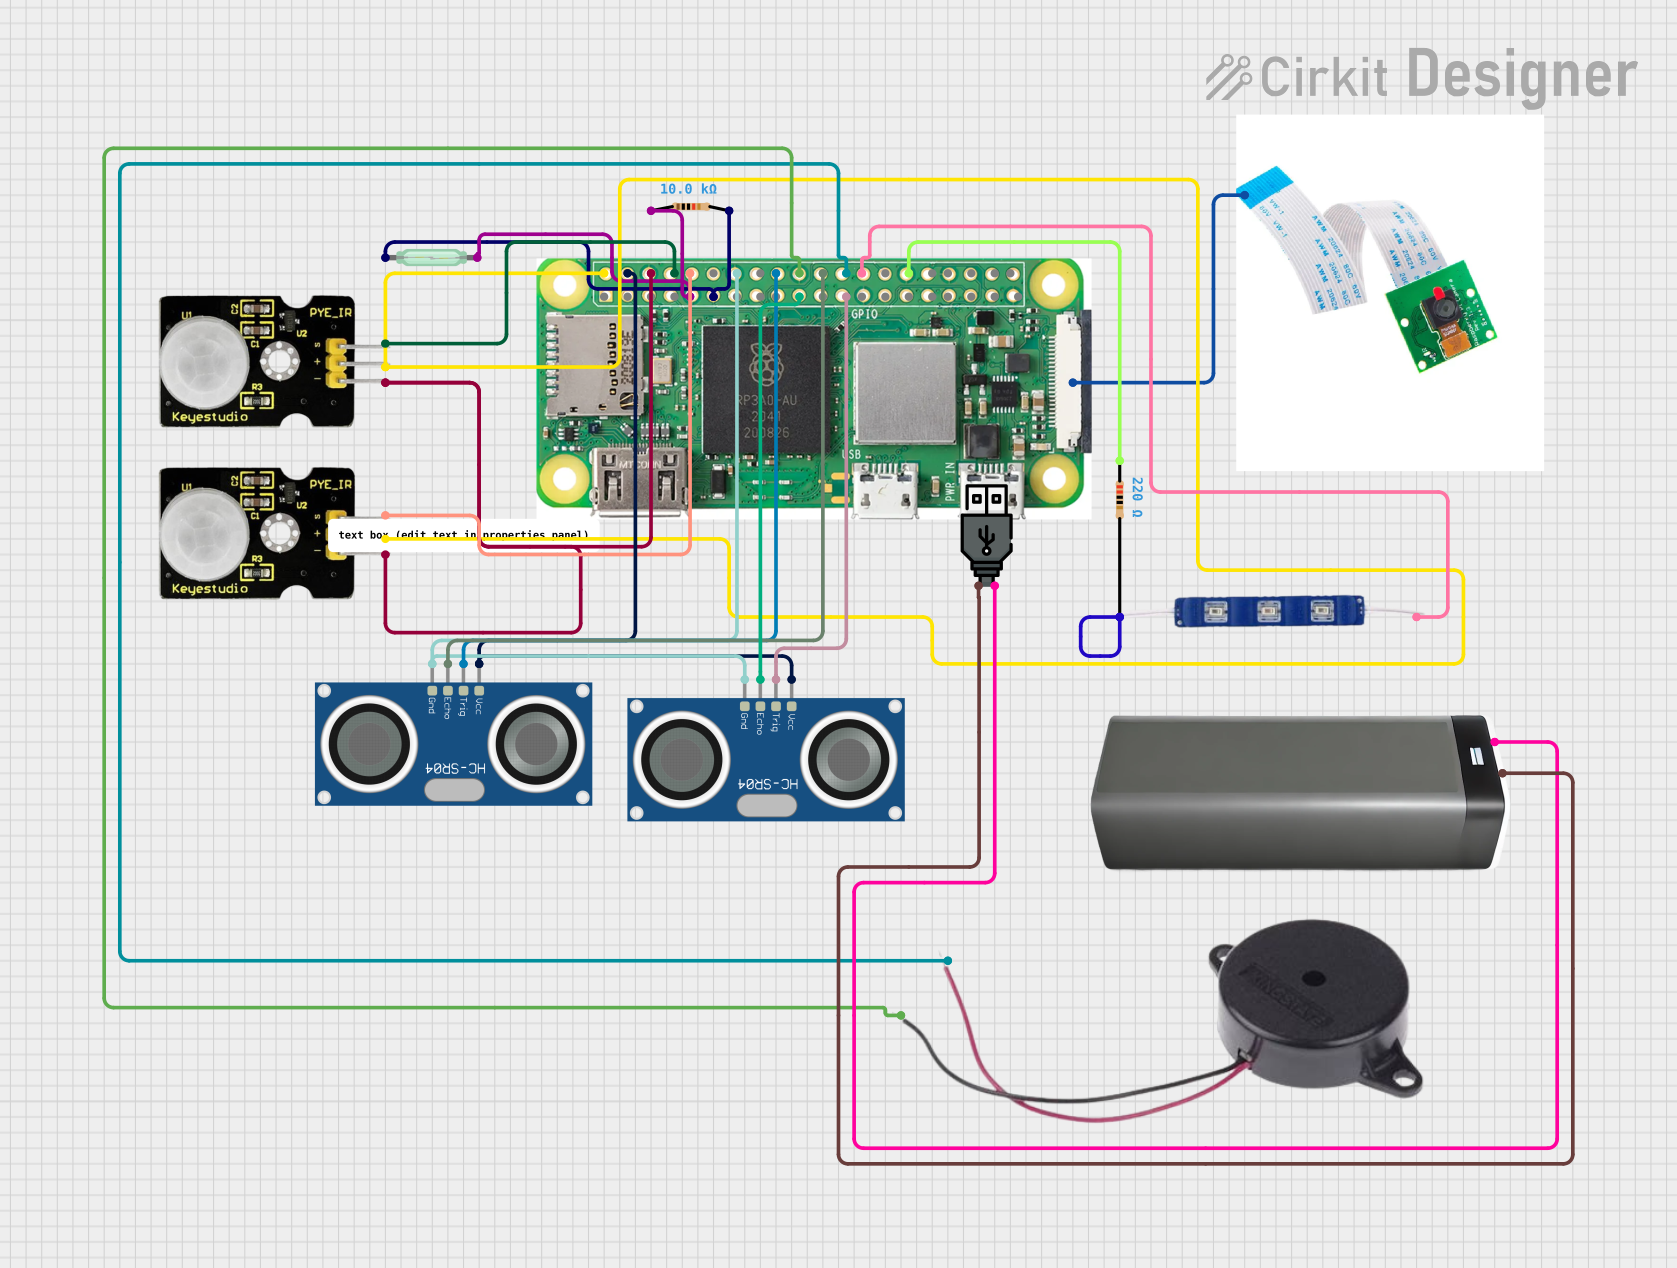


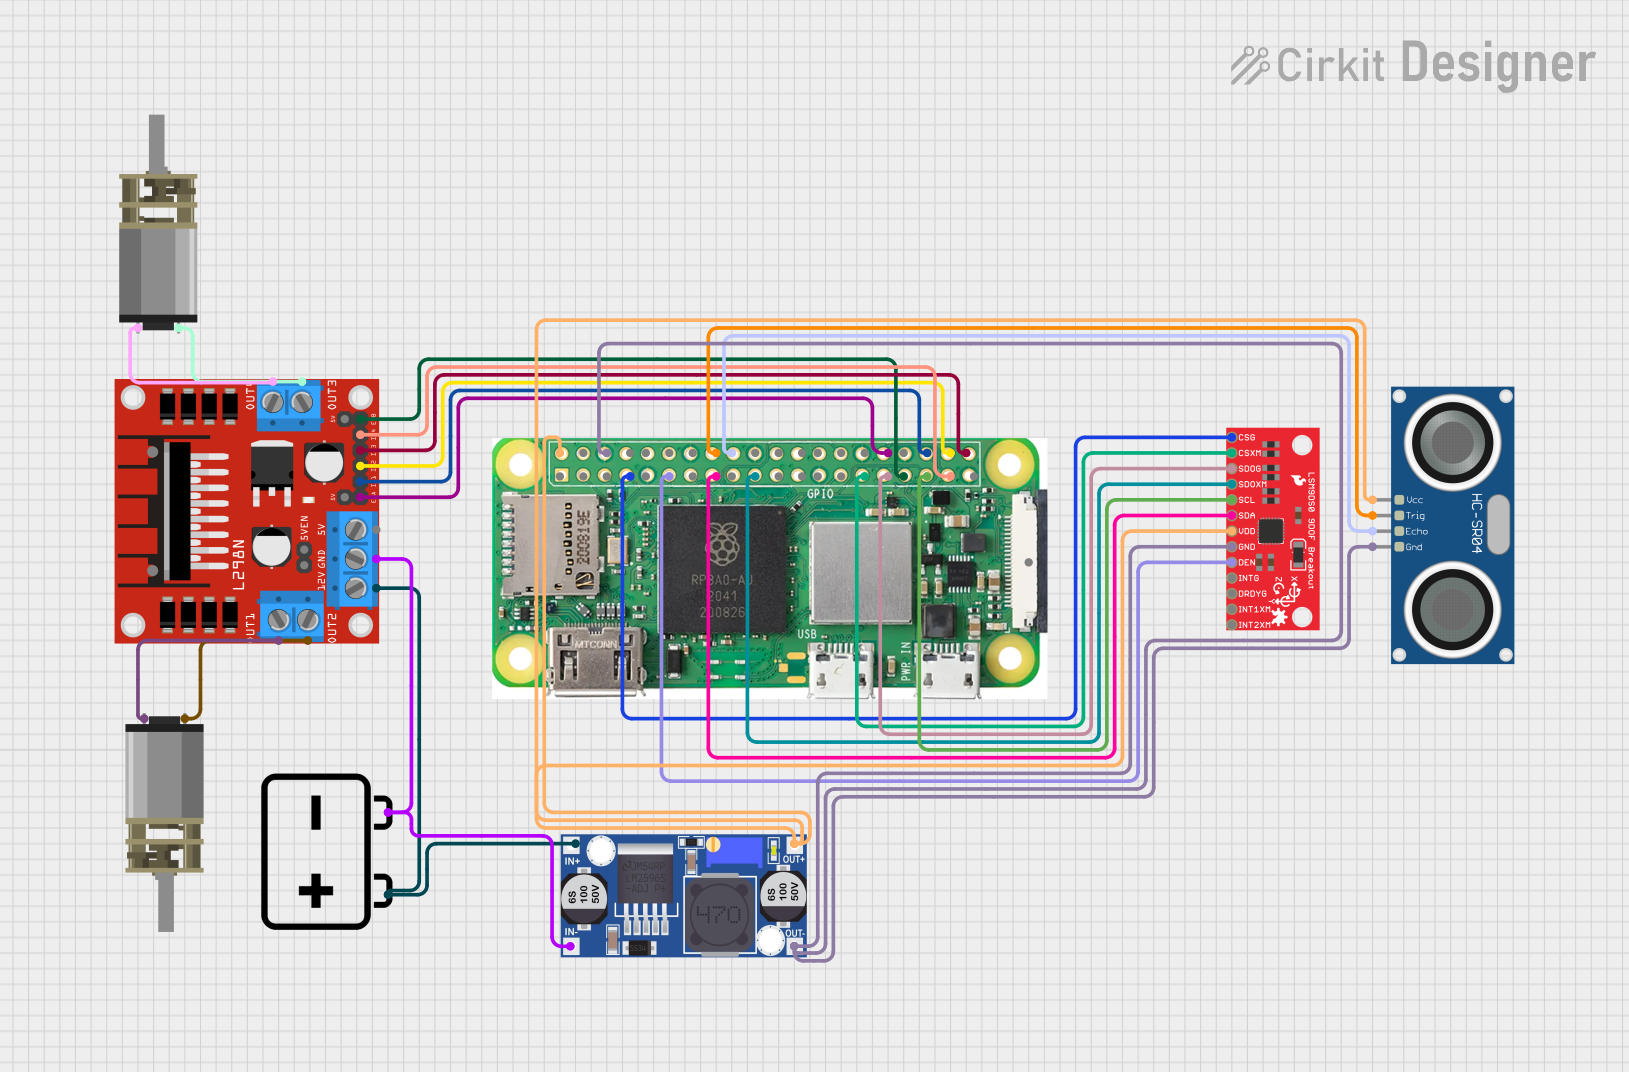
Explore Projects Built with Raspberry Pi Zero
Common Applications and Use Cases
- IoT devices
- Wearable technology
- Prototyping
- Educational tools for learning programming and electronics
- Home automation
- Media centers
- Hobbyist projects
Technical Specifications
Key Technical Details
- Processor: Broadcom BCM2835 (1GHz ARM11 core)
- Memory: 512MB RAM
- Storage: microSD card slot for operating system and data storage
- Power: 5V, supplied via micro USB connector
- Connectivity: Mini HDMI, USB On-The-Go port
- GPIO: 40-pin GPIO header, unpopulated
- Dimensions: 65mm x 30mm x 5mm
Pin Configuration and Descriptions
| Pin Number | Name | Description |
|---|---|---|
| 1 | 3V3 | 3.3V Power Supply |
| 2 | 5V | 5V Power Supply |
| 3 | SDA | I2C Data |
| 4 | 5V | 5V Power Supply |
| 5 | SCL | I2C Clock |
| 6 | GND | Ground |
| ... | ... | ... |
| 39 | GND | Ground |
| 40 | GPIO21 | General Purpose Input/Output |
Note: The above table is a partial representation. The Raspberry Pi Zero has 40 GPIO pins in total.
Usage Instructions
How to Use the Component in a Circuit
- Powering the Pi Zero: Connect a 5V power supply to the PWR IN micro USB port.
- Setting up the SD Card: Flash a compatible operating system (like Raspbian) onto a microSD card and insert it into the slot on the Pi Zero.
- Connecting Peripherals: Connect a mini HDMI cable for video output and a USB OTG cable for connecting USB devices.
- Accessing the GPIO: Solder a 40-pin header to the Pi Zero to utilize the GPIO for electronic projects.
Important Considerations and Best Practices
- Always handle the board with care to avoid static discharge or physical damage.
- Ensure the power supply is adequate and stable (5V, with at least 1-2A recommended).
- Use a quality microSD card to avoid data corruption and ensure good performance.
- Keep the Pi Zero in a case to protect it from short circuits.
- Avoid overclocking unless you have proper heat dissipation measures in place.
Troubleshooting and FAQs
Common Issues Users Might Face
- Pi Zero not booting: Check the power supply and microSD card for issues.
- Overheating: Ensure proper ventilation and consider using heat sinks.
- GPIO not working: Verify the pin connections and ensure the software is configured correctly.
Solutions and Tips for Troubleshooting
- If the Pi Zero does not boot, re-flash the microSD card with the operating system.
- For overheating, reduce CPU load or improve cooling with passive or active solutions.
- For GPIO issues, use the
gpiocommand-line tool to check the status and control pins.
FAQs
Q: Can I use a standard HDMI cable with the Pi Zero? A: No, you need a mini HDMI to standard HDMI cable or an adapter.
Q: Does the Raspberry Pi Zero have Wi-Fi? A: The standard Pi Zero does not have Wi-Fi. The Pi Zero W variant includes Wi-Fi and Bluetooth.
Q: How do I connect to the internet without Wi-Fi? A: You can use a USB Ethernet adapter or share a connection from another computer.
Q: Can I power the Pi Zero from a computer USB port? A: Yes, if the port provides enough power (5V and at least 1A).
Example Code for Raspberry Pi Zero with Arduino UNO
Example Python code for interfacing Raspberry Pi Zero with Arduino UNO
This code assumes you have connected the Pi Zero to the Arduino via serial communication
import serial import time
Initialize serial connection on a specific port at 9600 baud rate
ser = serial.Serial('/dev/ttyAMA0', 9600, timeout=1) ser.flush()
while True: # Send a simple command to the Arduino ser.write(b"Hello Arduino\n") time.sleep(1) # Wait for a second
# Read the response from Arduino
if ser.in_waiting > 0:
    line = ser.readline().decode('utf-8').rstrip()
    print(f"Received: {line}")
*Note: The code provided is for illustrative purposes. Ensure you have configured the serial port on both the Raspberry Pi Zero and the Arduino UNO for proper communication.*