How to Use ATH20+BMP280: Examples, Pinouts, and Specs
Introduction
The ATH20+BMP280 is a combined sensor module that integrates the ATH20 digital temperature and humidity sensor with the BMP280 barometric pressure sensor. This module is designed for applications requiring precise environmental monitoring, such as weather stations, IoT devices, and HVAC systems. The ATH20 provides accurate temperature and humidity readings, while the BMP280 offers high-resolution pressure and altitude measurements.
This versatile module is widely used in projects involving environmental data logging, altitude tracking, and smart home automation.
Explore Projects Built with ATH20+BMP280
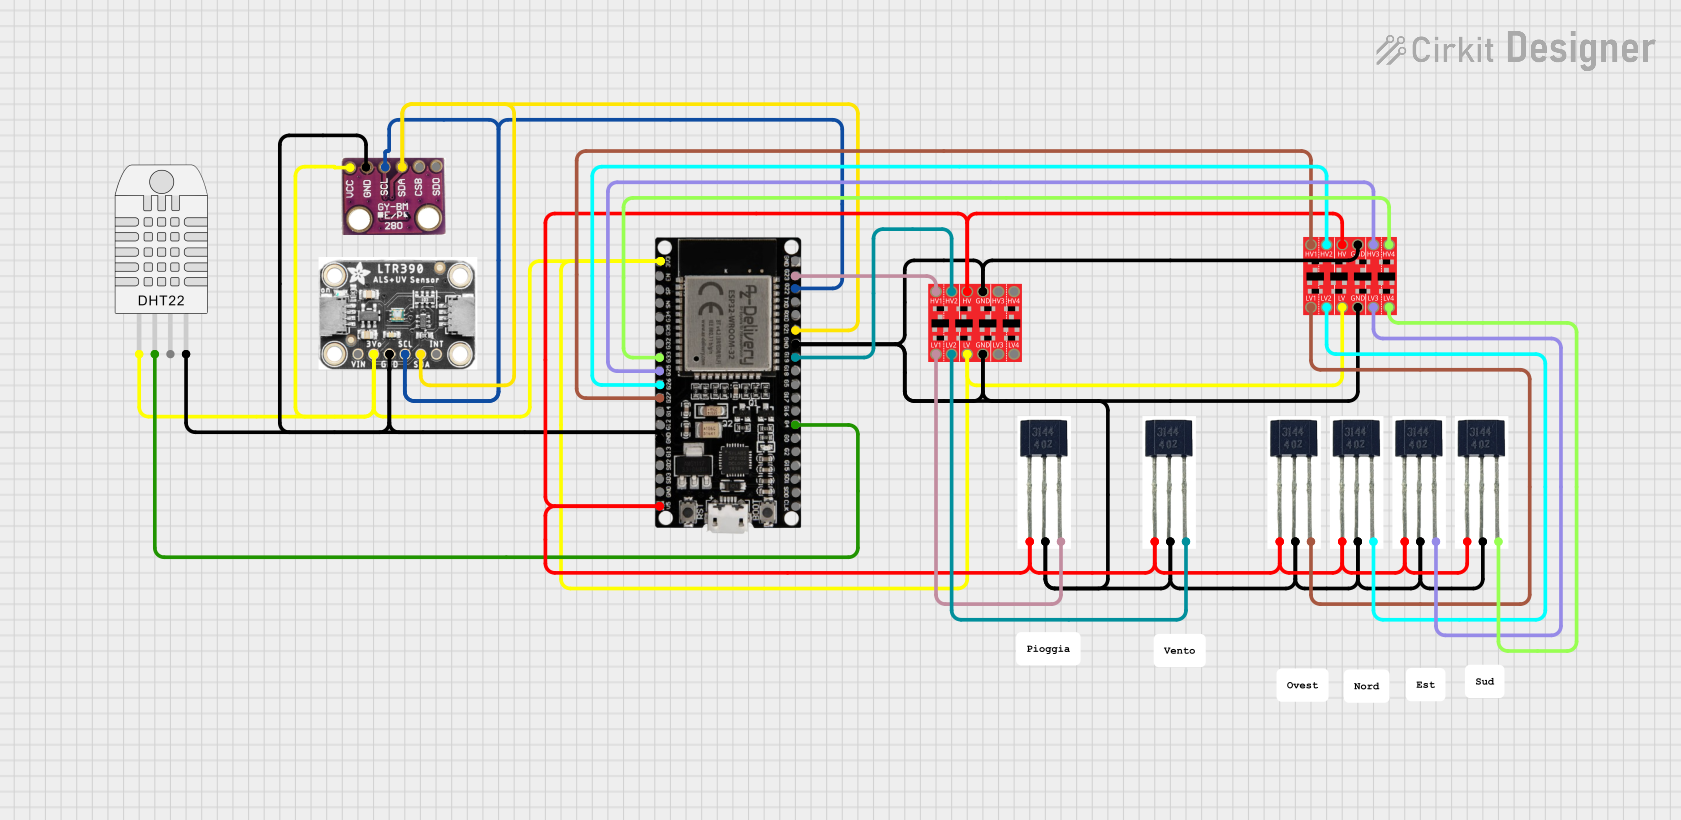
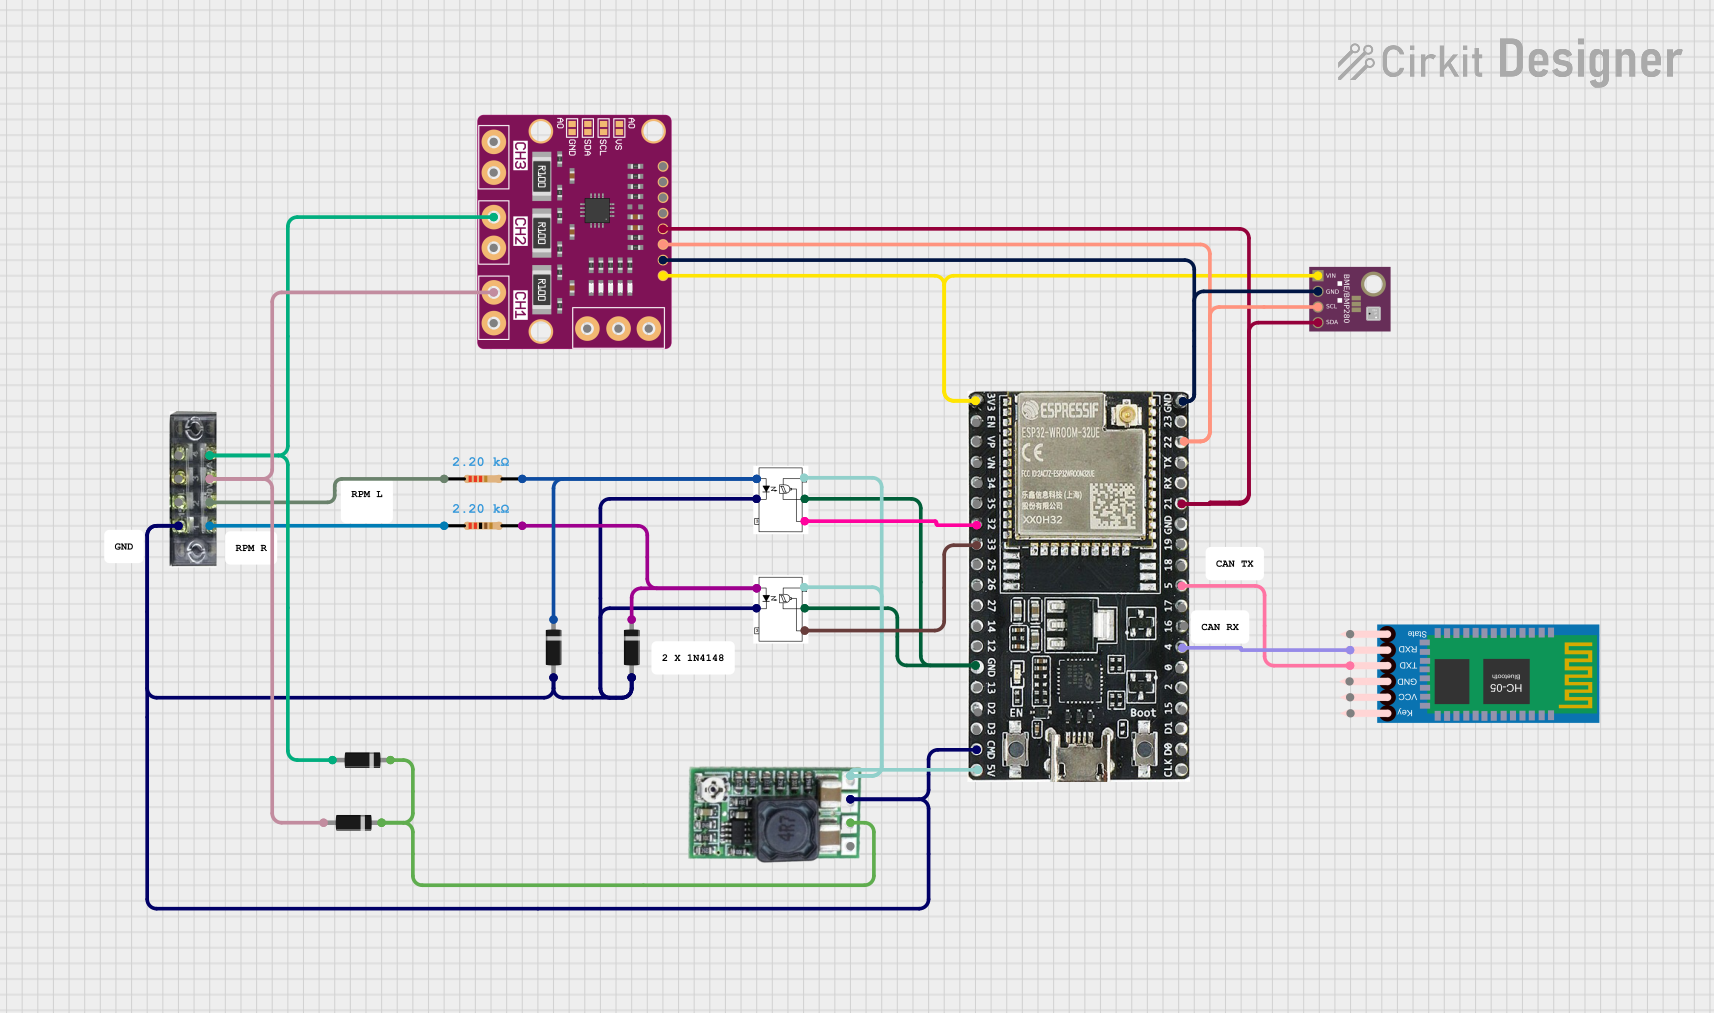
Explore Projects Built with ATH20+BMP280
Technical Specifications
General Specifications
- Operating Voltage: 3.3V to 5V
- Communication Protocol: I2C
- Temperature Range: -40°C to 85°C (ATH20), -40°C to 85°C (BMP280)
- Humidity Range: 0% to 100% RH (ATH20)
- Pressure Range: 300 hPa to 1100 hPa (BMP280)
- Altitude Accuracy: ±1 meter (BMP280)
- Temperature Accuracy: ±0.3°C (ATH20), ±1°C (BMP280)
- Humidity Accuracy: ±2% RH (ATH20)
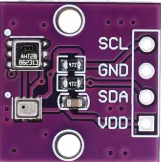
Pin Configuration and Descriptions
The ATH20+BMP280 module typically has a 4-pin interface for I2C communication. Below is the pinout:
| Pin | Name | Description |
|---|---|---|
| 1 | VCC | Power supply (3.3V to 5V) |
| 2 | GND | Ground |
| 3 | SDA | I2C data line |
| 4 | SCL | I2C clock line |
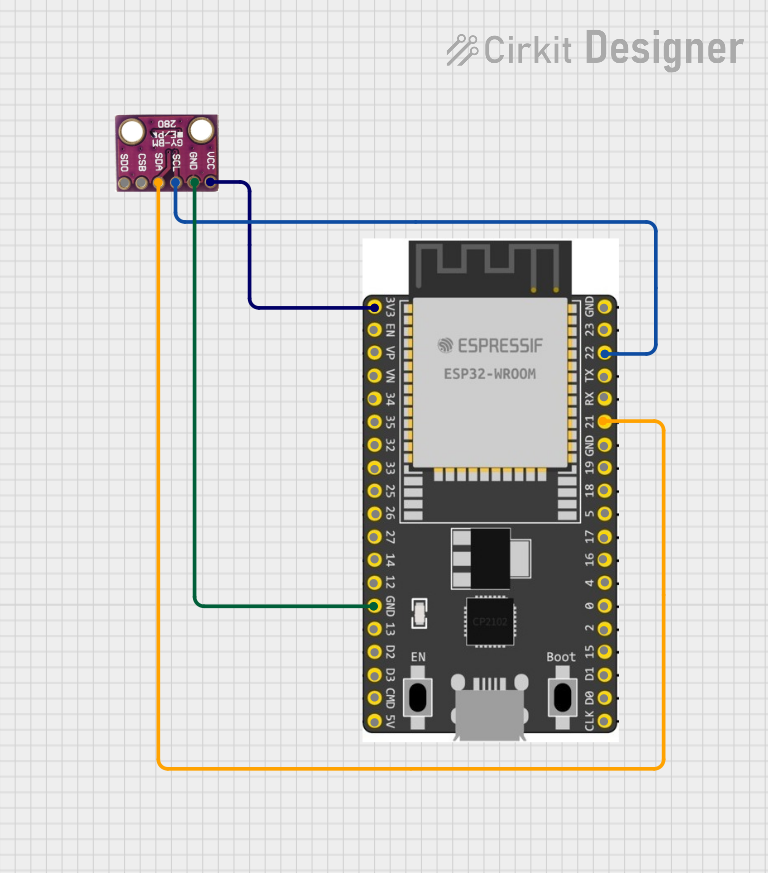
Usage Instructions
How to Use the Component in a Circuit
- Power the Module: Connect the VCC pin to a 3.3V or 5V power source and the GND pin to ground.
- I2C Connection: Connect the SDA and SCL pins to the corresponding I2C pins on your microcontroller. For an Arduino UNO:
- SDA connects to A4.
- SCL connects to A5.
- Pull-Up Resistors: Ensure that the I2C lines (SDA and SCL) have pull-up resistors (typically 4.7kΩ). Some modules include these resistors by default.
Important Considerations and Best Practices
- Power Supply: Ensure a stable power supply to avoid inaccurate readings.
- I2C Address: The default I2C address for the BMP280 is
0x76or0x77, depending on the module configuration. The ATH20 typically uses0x38. - Environmental Placement: Place the sensor in an area with good airflow for accurate readings. Avoid placing it near heat sources or in direct sunlight.
- Library Support: Use libraries like
Adafruit_BMP280andATH20(or compatible libraries) for easy integration with Arduino.
Example Code for Arduino UNO
Below is an example code to read temperature, humidity, and pressure data from the ATH20+BMP280 module:
#include <Wire.h>
#include <Adafruit_Sensor.h>
#include <Adafruit_BMP280.h>
#include <ATH20.h> // Ensure you have a compatible library for ATH20

// Create objects for the sensors
Adafruit_BMP280 bmp; // BMP280 object
ATH20 ath20;         // ATH20 object

void setup() {
  Serial.begin(9600);
  Wire.begin();

  // Initialize BMP280
  if (!bmp.begin(0x76)) { // Check if BMP280 is connected at address 0x76
    Serial.println("Could not find BMP280 sensor!");
    while (1);
  }

  // Initialize ATH20
  if (!ath20.begin()) { // Check if ATH20 is connected
    Serial.println("Could not find ATH20 sensor!");
    while (1);
  }

  Serial.println("ATH20+BMP280 Module Initialized");
}

void loop() {
  // Read data from ATH20
  float temperature = ath20.readTemperature(); // Read temperature in °C
  float humidity = ath20.readHumidity();       // Read relative humidity in %

  // Read data from BMP280
  float pressure = bmp.readPressure() / 100.0F; // Convert pressure to hPa
  float altitude = bmp.readAltitude(1013.25);   // Calculate altitude (sea level pressure = 1013.25 hPa)

  // Print the readings to the Serial Monitor
  Serial.print("Temperature (ATH20): ");
  Serial.print(temperature);
  Serial.println(" °C");

  Serial.print("Humidity (ATH20): ");
  Serial.print(humidity);
  Serial.println(" %");

  Serial.print("Pressure (BMP280): ");
  Serial.print(pressure);
  Serial.println(" hPa");

  Serial.print("Altitude (BMP280): ");
  Serial.print(altitude);
  Serial.println(" m");

  delay(2000); // Wait 2 seconds before the next reading
}
Troubleshooting and FAQs
Common Issues and Solutions
No Data from the Module:
- Ensure the module is powered correctly (check VCC and GND connections).
- Verify the I2C connections (SDA and SCL) and ensure they are not swapped.
- Check the I2C address in the code. Use an I2C scanner sketch to confirm the module's address.
Inaccurate Readings:
- Ensure the sensor is placed in an environment free from obstructions or heat sources.
- Verify that the power supply is stable and within the specified range.
Library Errors:
- Ensure the required libraries (
Adafruit_BMP280andATH20) are installed in your Arduino IDE. - Update the libraries to the latest version if compatibility issues arise.
- Ensure the required libraries (
Altitude Calculation Issues:
- Ensure the correct sea-level pressure value is used in the altitude calculation. The default is 1013.25 hPa, but this may vary based on your location.
FAQs
Q: Can I use this module with a 3.3V microcontroller?
A: Yes, the module supports both 3.3V and 5V logic levels.Q: What is the maximum I2C bus length for this module?
A: The I2C bus length should typically not exceed 1 meter to avoid signal degradation.Q: Can I use this module outdoors?
A: While the module can operate outdoors, it is not waterproof. Use a protective enclosure to shield it from moisture.Q: How do I change the BMP280's I2C address?
A: The I2C address can be changed by modifying the address pin configuration on the module (if supported). Refer to the module's datasheet for details.