How to Use micro sd: Examples, Pinouts, and Specs
Introduction
A micro SD (Secure Digital) card is a small, portable memory card used for storing data in devices such as smartphones, tablets, cameras, and embedded systems. It provides expandable storage and is available in various capacities (ranging from a few megabytes to terabytes) and speed classes to suit different performance requirements. Micro SD cards are widely used in electronics projects for data logging, file storage, and multimedia applications due to their compact size and ease of use.
Explore Projects Built with micro sd
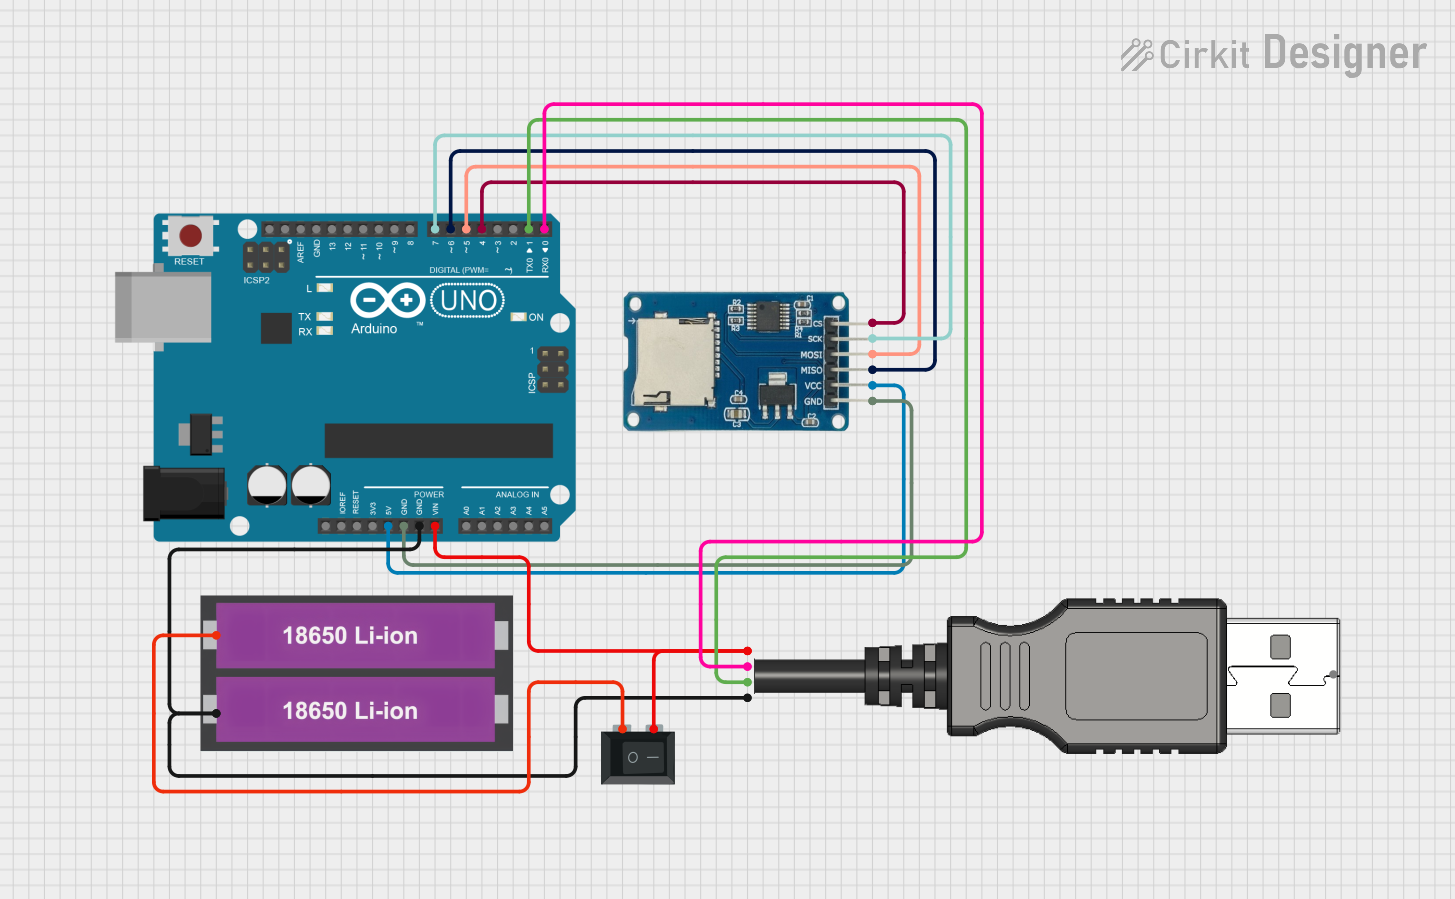
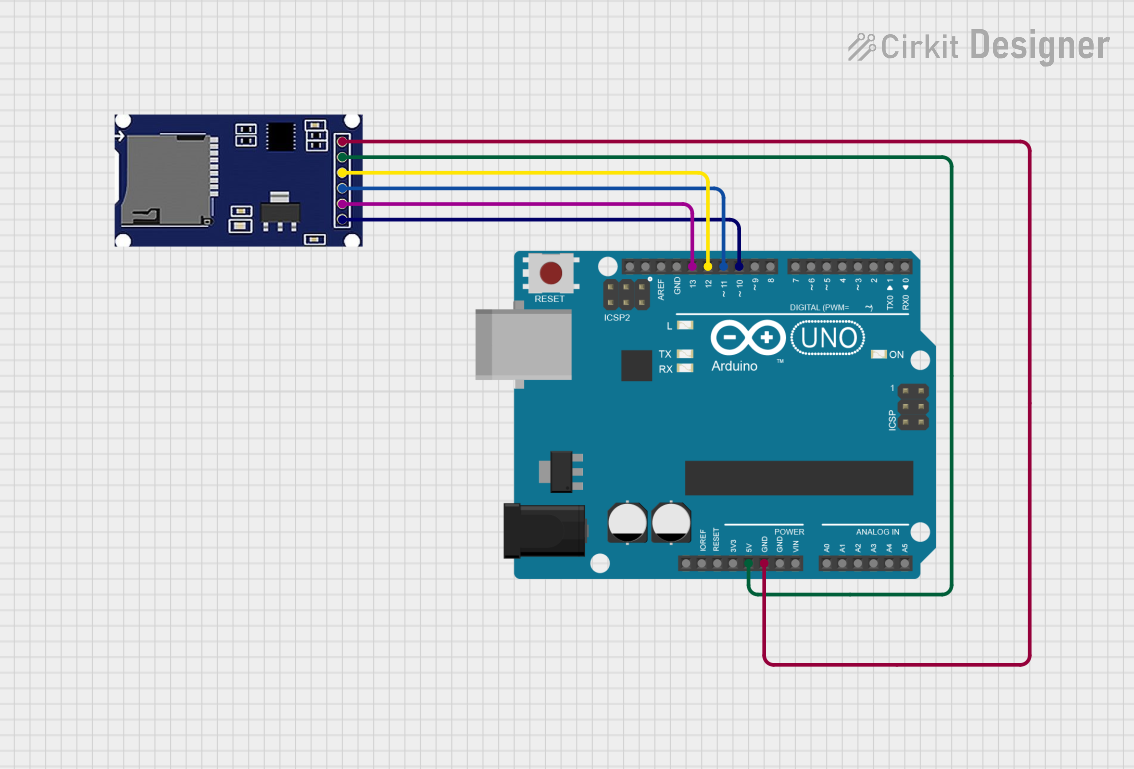

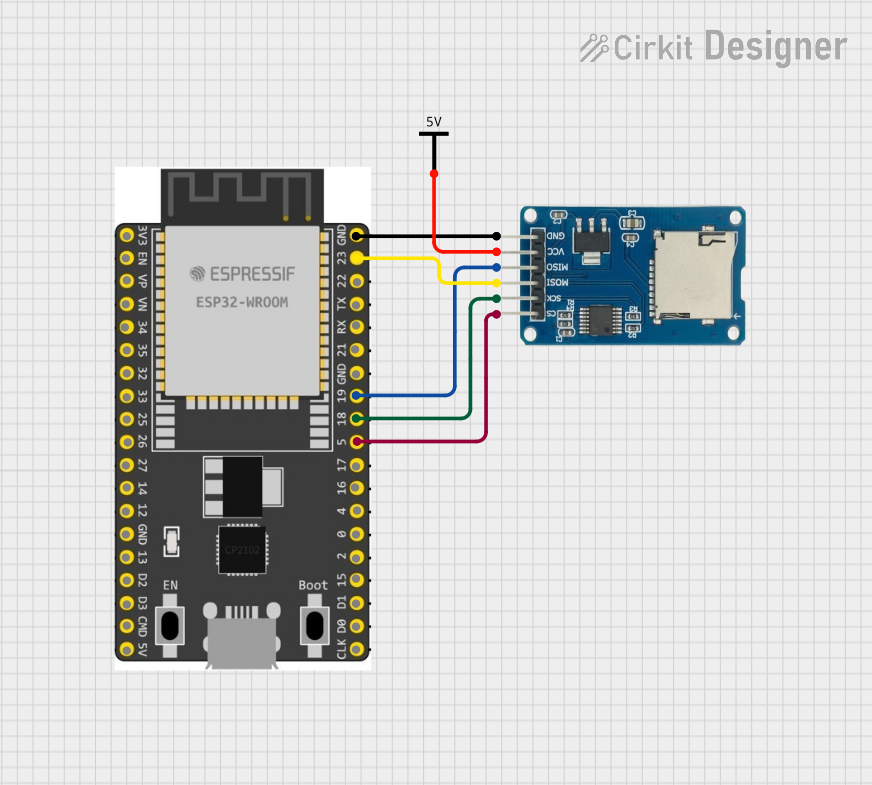
Explore Projects Built with micro sd
Common Applications and Use Cases
- Data logging in IoT devices and embedded systems
- Storing multimedia files (e.g., images, videos, audio)
- Bootable storage for single-board computers (e.g., Raspberry Pi)
- File storage for Arduino and microcontroller-based projects
- Portable storage for consumer electronics
Technical Specifications
Below are the general technical specifications for micro SD cards. Note that specific values may vary depending on the card's manufacturer and model.
Key Technical Details
- Form Factor: Micro SD (15mm x 11mm x 1mm)
- Storage Capacities: 2GB to 2TB (depending on SD, SDHC, SDXC, or SDUC standards)
- Voltage Range: 2.7V to 3.6V
- Speed Classes: Class 2, 4, 6, 10, UHS-I, UHS-II, UHS-III, V30, V60, V90
- Interface: SPI (Serial Peripheral Interface) or SD bus
- File System: FAT16, FAT32, exFAT (depending on capacity)
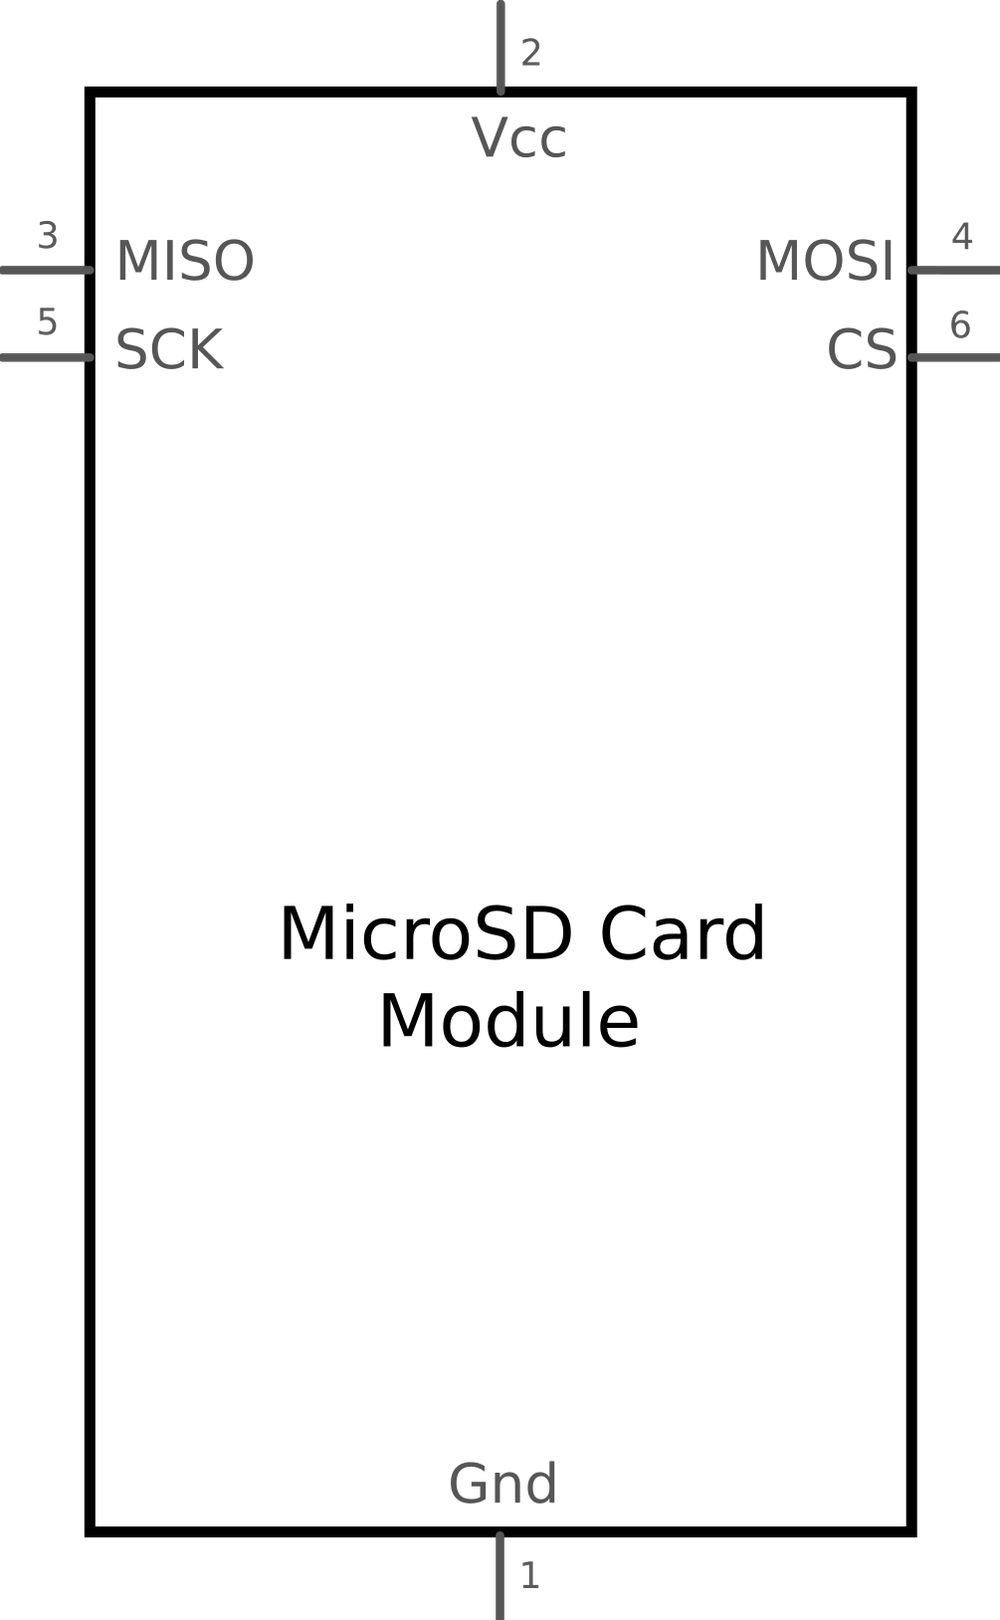
Pin Configuration and Descriptions
Micro SD cards have 8 pins, which are used for communication and power. Below is the pin configuration:
| Pin Number | Name | Description |
|---|---|---|
| 1 | DAT2 | Data Line 2 (Not used in SPI mode) |
| 2 | CD/DAT3 | Card Detect/Data Line 3 |
| 3 | CMD | Command/Response Line |
| 4 | VDD | Power Supply (2.7V to 3.6V) |
| 5 | CLK | Clock Signal |
| 6 | VSS | Ground |
| 7 | DAT0 | Data Line 0 |
| 8 | DAT1 | Data Line 1 (Not used in SPI mode) |
Usage Instructions
How to Use the Micro SD Card in a Circuit
Hardware Setup:
- Use a micro SD card module or adapter to interface the card with your circuit.
- Connect the module to your microcontroller or development board (e.g., Arduino UNO) using the SPI interface.
- Ensure proper power supply (3.3V) to the micro SD card. If using a 5V system, use a level shifter or voltage regulator.
Connections to Arduino UNO: Below is an example of how to connect a micro SD card module to an Arduino UNO:
- CS (Chip Select): Connect to Arduino pin 10
- MOSI (Master Out Slave In): Connect to Arduino pin 11
- MISO (Master In Slave Out): Connect to Arduino pin 12
- SCK (Clock): Connect to Arduino pin 13
- VCC: Connect to 3.3V or 5V (depending on the module)
- GND: Connect to Ground
Software Setup:
- Install the
SDlibrary in the Arduino IDE (pre-installed in most cases). - Format the micro SD card to FAT16 or FAT32 before use.
- Install the
Example Code for Arduino UNO
The following code demonstrates how to initialize a micro SD card and write data to a file:
#include <SPI.h>
#include <SD.h>

// Define the chip select pin for the SD card module
const int chipSelect = 10;

void setup() {
  // Initialize serial communication for debugging
  Serial.begin(9600);
  while (!Serial) {
    ; // Wait for the serial port to connect (for native USB boards)
  }

  Serial.println("Initializing SD card...");

  // Check if the SD card is present and can be initialized
  if (!SD.begin(chipSelect)) {
    Serial.println("Card failed, or not present");
    // Don't proceed if the card is not detected
    return;
  }
  Serial.println("Card initialized successfully.");

  // Open a file for writing
  File dataFile = SD.open("example.txt", FILE_WRITE);

  // Check if the file opened successfully
  if (dataFile) {
    dataFile.println("Hello, Micro SD!");
    dataFile.close(); // Close the file to save changes
    Serial.println("Data written to file.");
  } else {
    Serial.println("Error opening file.");
  }
}

void loop() {
  // Nothing to do here
}
Important Considerations and Best Practices
- Always format the micro SD card to the appropriate file system (FAT16 or FAT32).
- Use a level shifter or voltage regulator if your microcontroller operates at 5V.
- Avoid removing the micro SD card while the circuit is powered to prevent data corruption.
- Handle the micro SD card carefully to avoid physical damage or static discharge.
Troubleshooting and FAQs
Common Issues and Solutions
SD Card Not Detected:
- Ensure proper wiring between the micro SD card module and the microcontroller.
- Verify that the card is formatted to FAT16 or FAT32.
- Check the power supply voltage (should be 3.3V).
File Not Opening or Writing:
- Confirm that the file name follows the 8.3 filename convention (e.g.,
example.txt). - Ensure the SD card is not write-protected.
- Confirm that the file name follows the 8.3 filename convention (e.g.,
Data Corruption:
- Avoid removing the card while data is being written.
- Use a high-quality micro SD card to reduce the risk of errors.
FAQs
Q: Can I use a micro SD card with a 5V microcontroller?
A: Yes, but you must use a level shifter or a micro SD card module with built-in voltage regulation to step down the 5V signals to 3.3V.
Q: What is the maximum capacity supported by the Arduino SD library?
A: The Arduino SD library supports micro SD cards up to 32GB (FAT16 or FAT32). For larger cards, you may need to use third-party libraries.
Q: How do I check if the SD card is working?
A: Use the CardInfo example sketch in the Arduino IDE to test the card's functionality and retrieve its details.
By following this documentation, you can effectively integrate a micro SD card into your projects for reliable data storage and retrieval.