How to Use ESP32 2.8 CYD: Examples, Pinouts, and Specs
Introduction
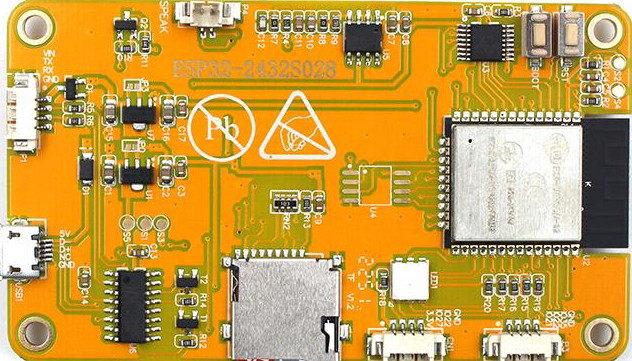
The ESP32 2.8 CYD is a versatile microcontroller module that combines Wi-Fi and Bluetooth connectivity with a 2.8-inch touchscreen display. This component is ideal for Internet of Things (IoT) applications, offering robust processing power and a graphical interface for user interaction. Its compact design and rich feature set make it suitable for a wide range of embedded projects, including smart home devices, industrial automation, and portable monitoring systems.
Explore Projects Built with ESP32 2.8 CYD
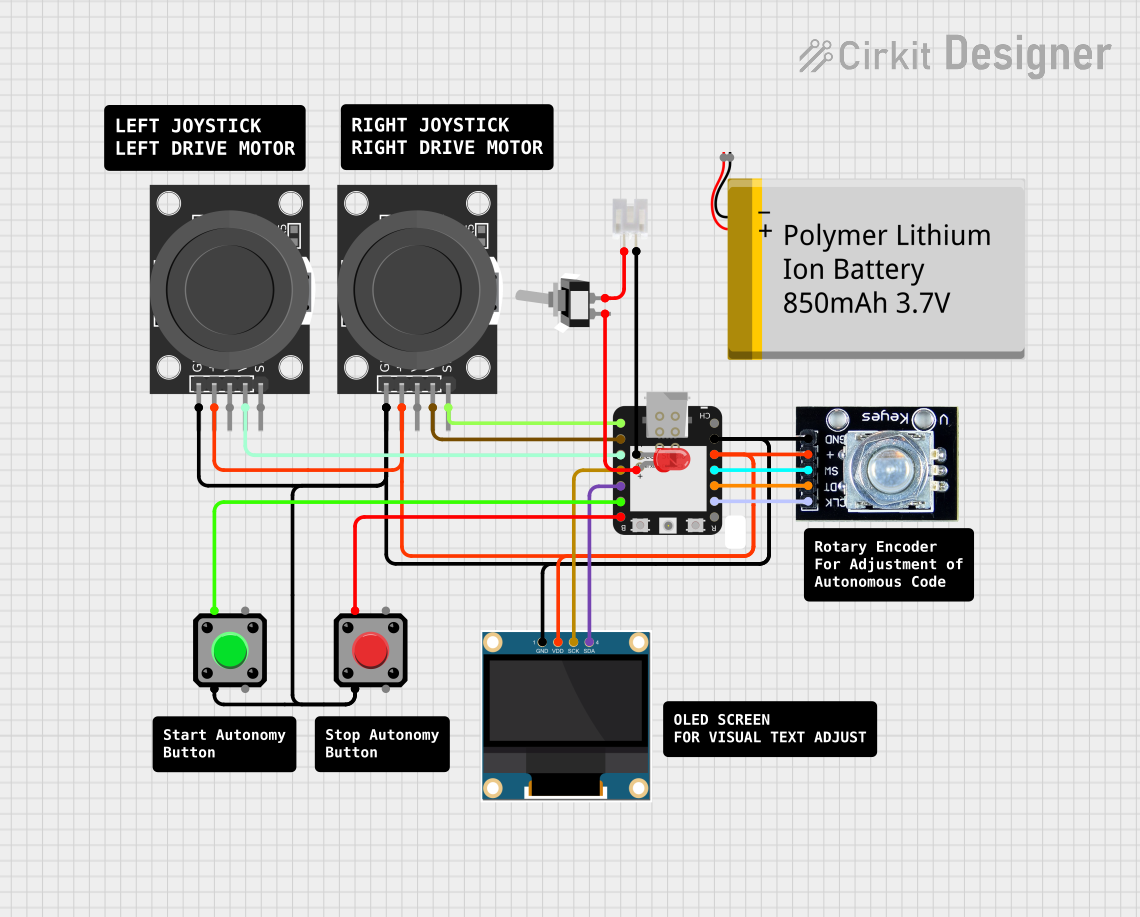

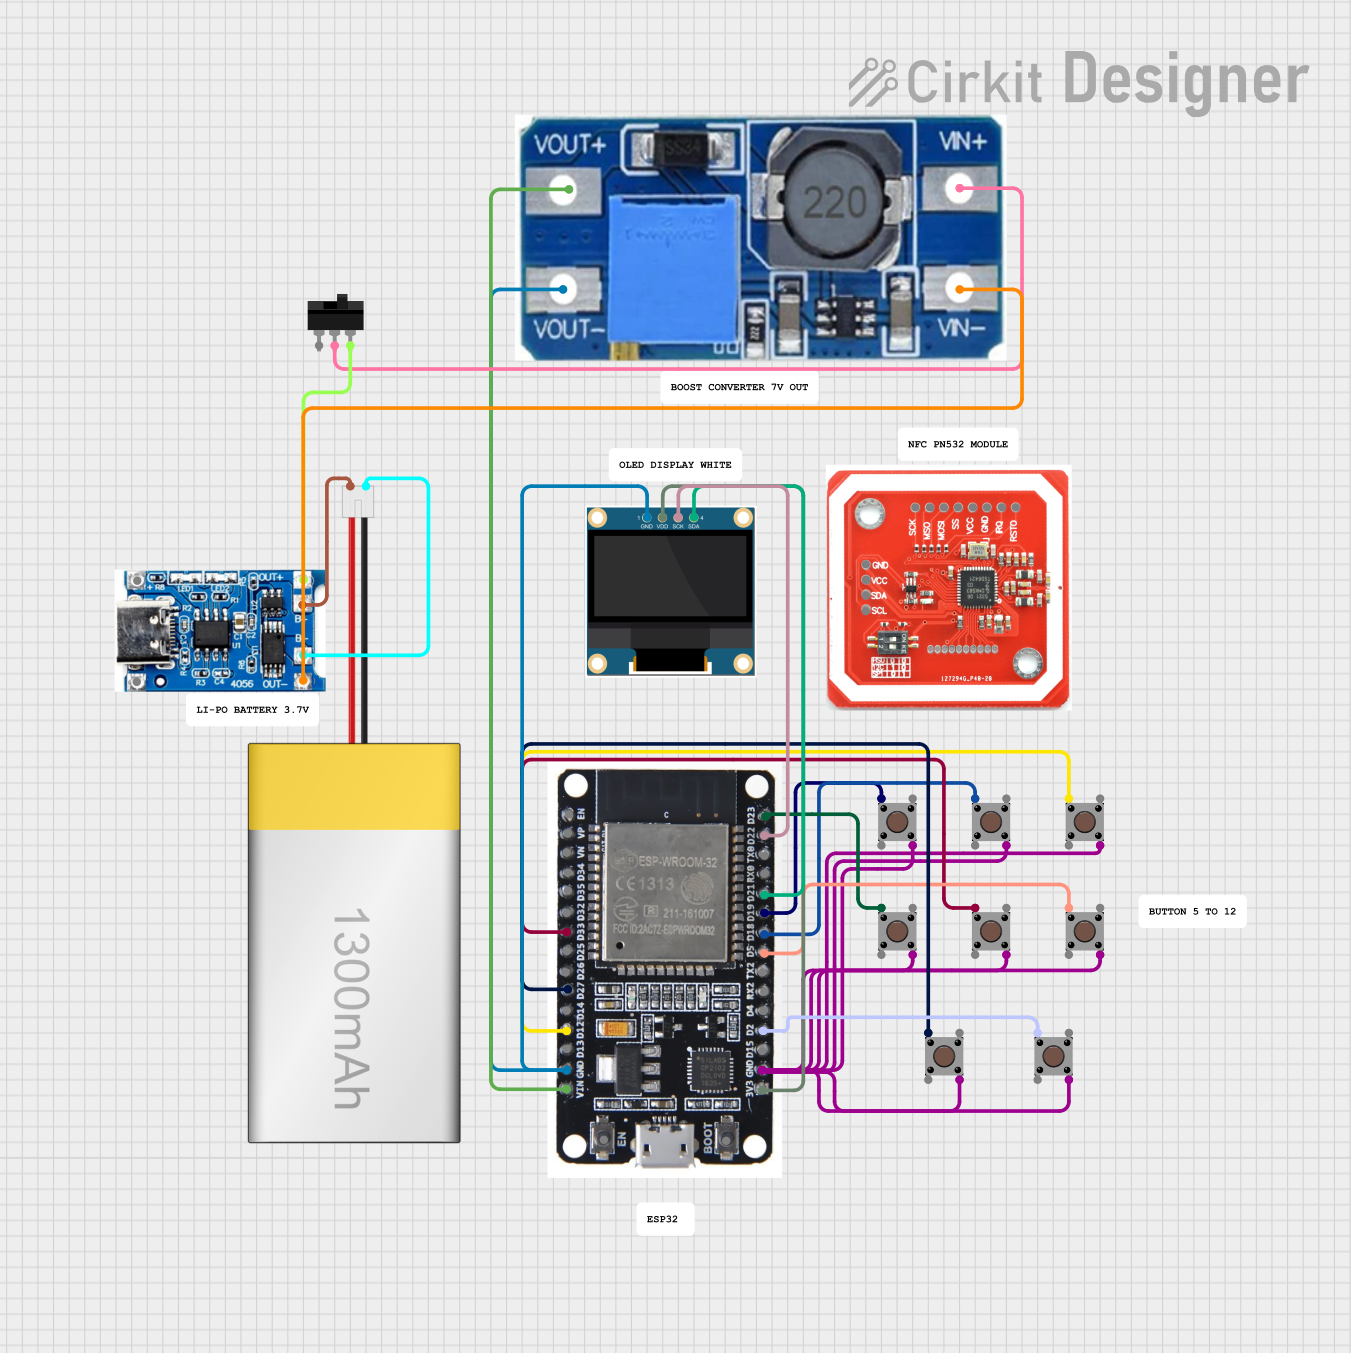
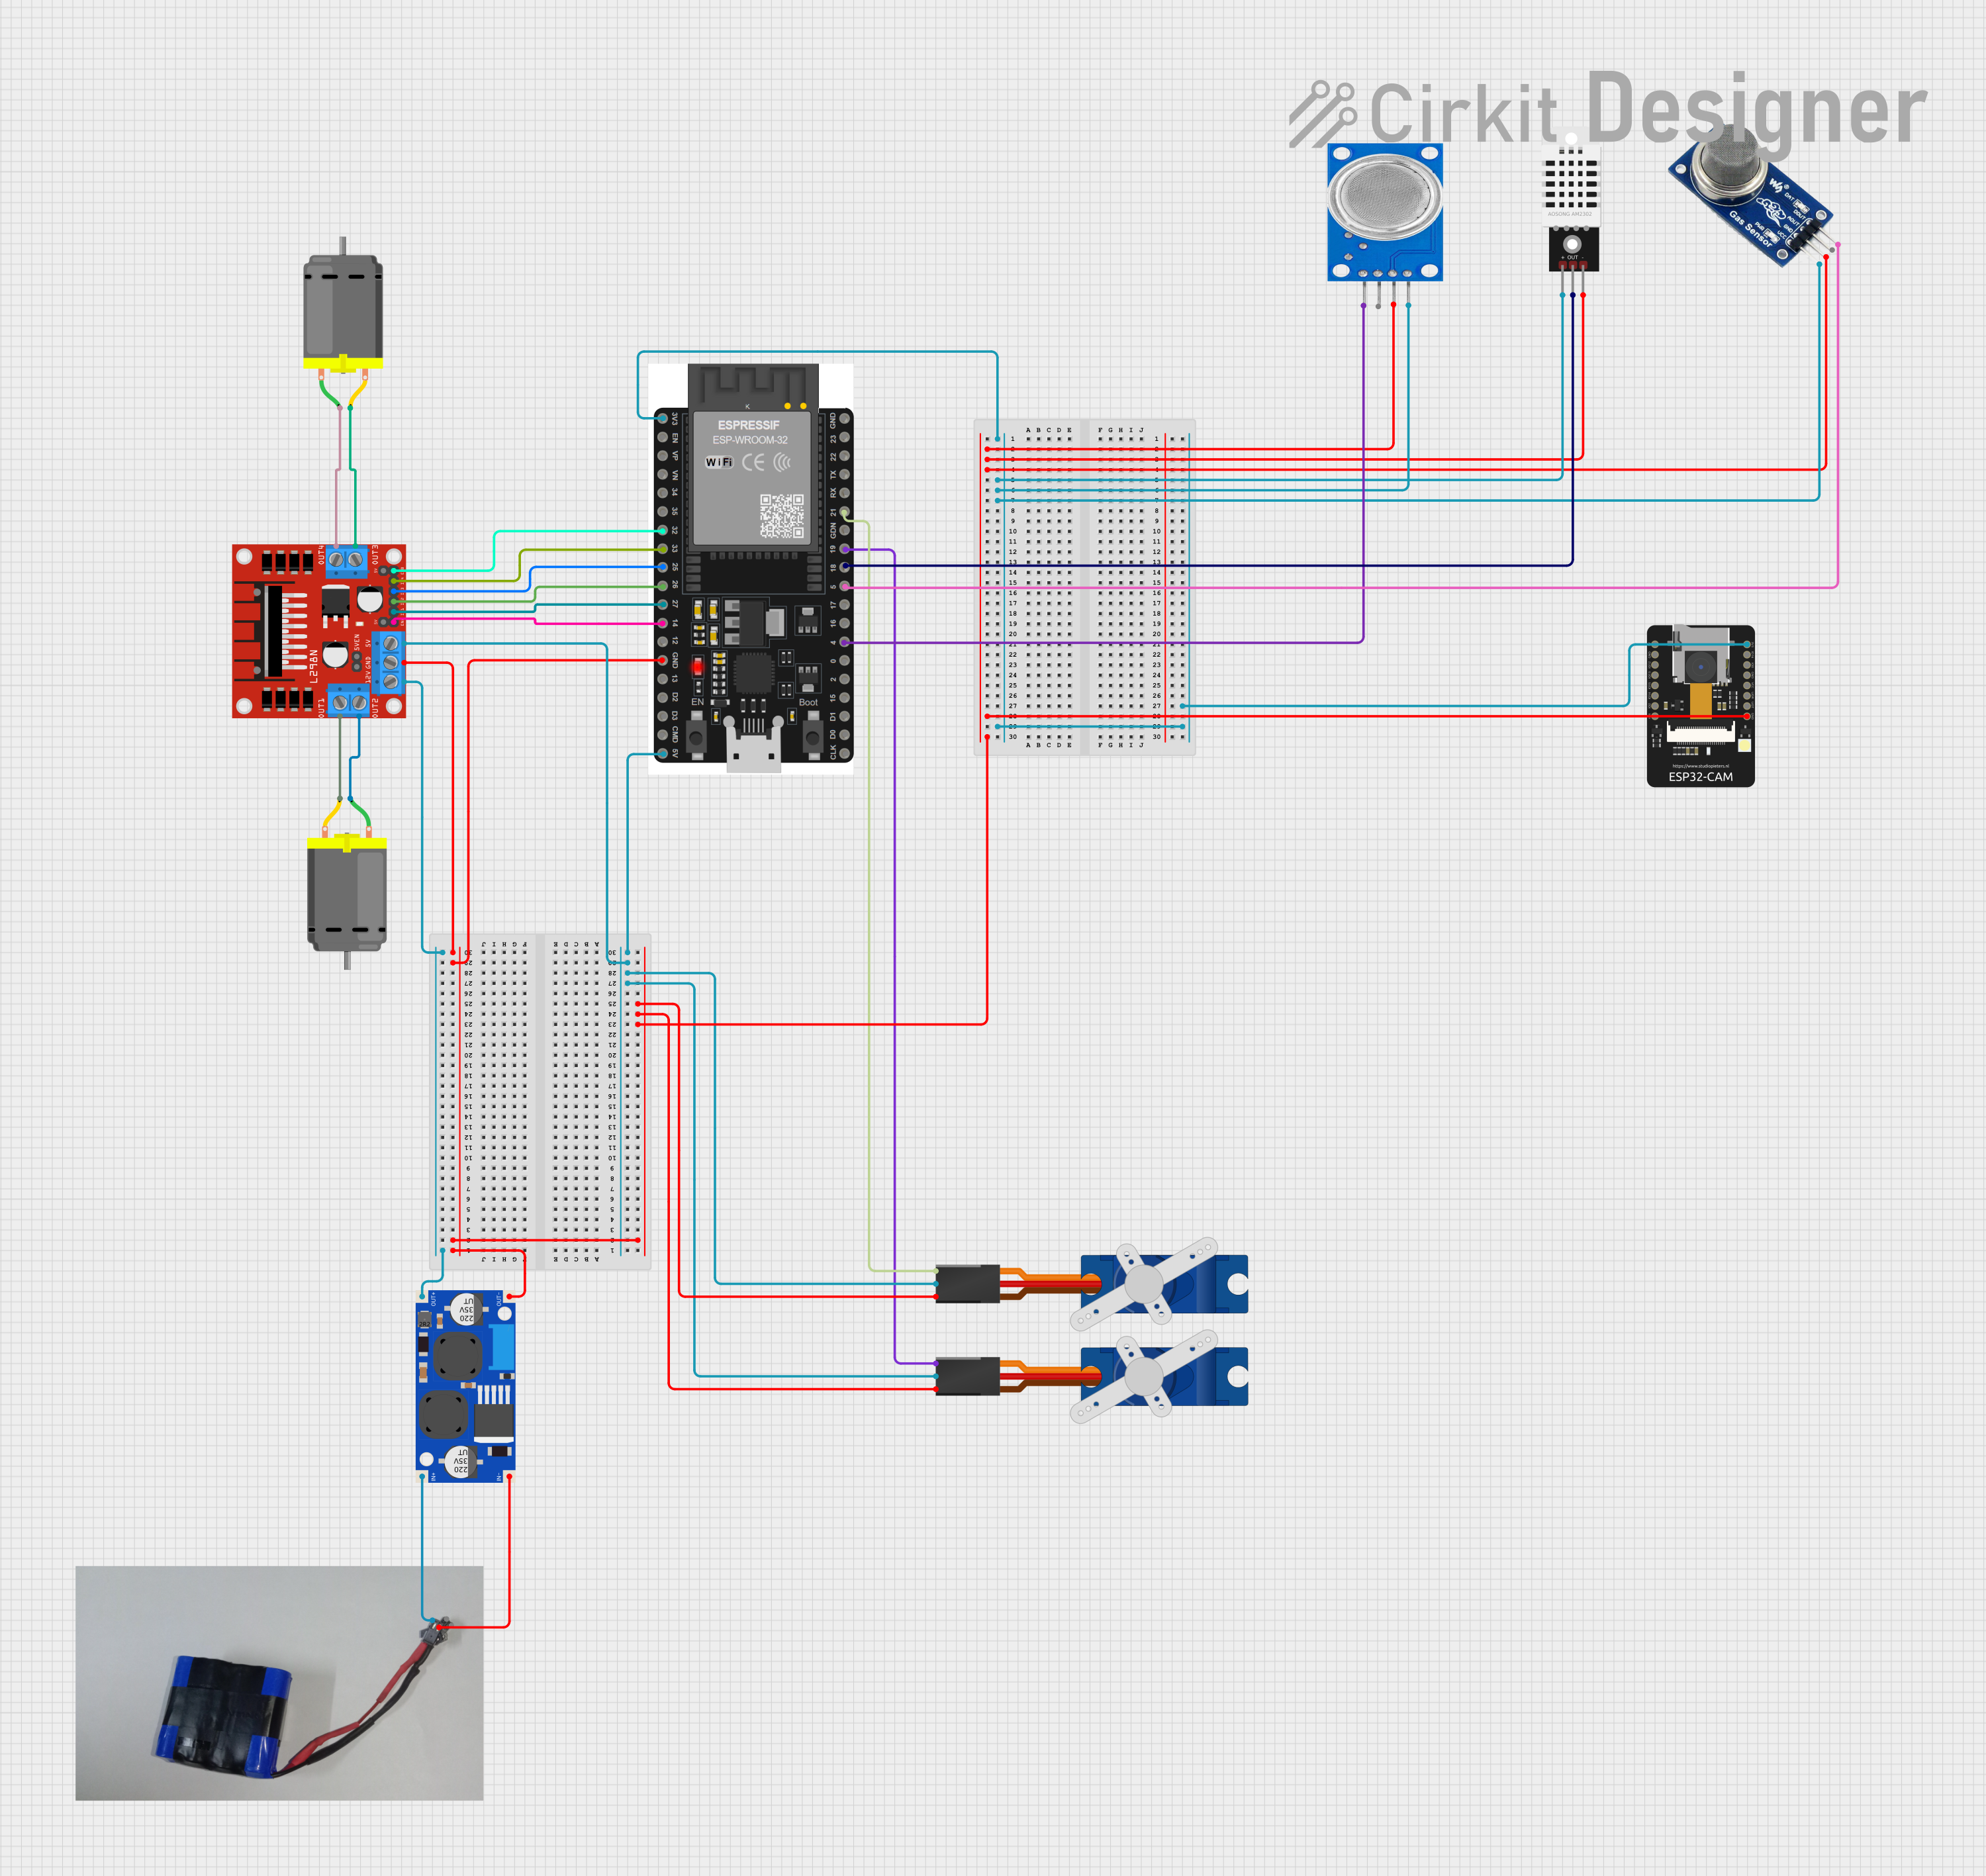
Explore Projects Built with ESP32 2.8 CYD
Common Applications
- Smart home control panels
- IoT-enabled devices with graphical interfaces
- Portable data loggers and monitoring systems
- Industrial automation with user interaction
- Educational projects requiring touchscreen functionality
Technical Specifications
Key Technical Details
| Parameter | Value |
|---|---|
| Microcontroller | ESP32 Dual-Core Processor |
| Display | 2.8-inch TFT LCD Touchscreen |
| Wi-Fi Standard | 802.11 b/g/n |
| Bluetooth Version | Bluetooth 4.2 (BLE + Classic) |
| Operating Voltage | 3.3V |
| Input Voltage Range | 5V (via USB) or 3.3V (via pins) |
| Flash Memory | 4MB |
| SRAM | 520KB |
| GPIO Pins | 30 |
| Communication Interfaces | UART, SPI, I2C, PWM, ADC, DAC |
| Touchscreen Type | Resistive |
| Dimensions | 85mm x 55mm x 12mm |
Pin Configuration and Descriptions
| Pin Number | Pin Name | Description |
|---|---|---|
| 1 | VIN | Power input (5V via USB or external source) |
| 2 | GND | Ground |
| 3 | GPIO0 | General-purpose I/O pin, can be used for input/output |
| 4 | GPIO1 | General-purpose I/O pin, supports UART TX |
| 5 | GPIO2 | General-purpose I/O pin, supports UART RX |
| 6 | GPIO3 | General-purpose I/O pin, supports PWM |
| 7 | SDA | I2C Data Line |
| 8 | SCL | I2C Clock Line |
| 9 | MOSI | SPI Master Out Slave In |
| 10 | MISO | SPI Master In Slave Out |
| 11 | SCK | SPI Clock |
| 12 | A0 | Analog input (ADC) |
| 13 | A1 | Analog input (ADC) |
| 14 | TXD | UART Transmit |
| 15 | RXD | UART Receive |
| 16 | TOUCH_X+ | Touchscreen X-axis positive |
| 17 | TOUCH_X- | Touchscreen X-axis negative |
| 18 | TOUCH_Y+ | Touchscreen Y-axis positive |
| 19 | TOUCH_Y- | Touchscreen Y-axis negative |
Usage Instructions
How to Use the ESP32 2.8 CYD in a Circuit
Powering the Module:
- Connect the VIN pin to a 5V power source or use a USB cable for power.
- Ensure the GND pin is connected to the ground of your circuit.
Connecting the Touchscreen:
- The touchscreen interface uses the
TOUCH_X+,TOUCH_X-,TOUCH_Y+, andTOUCH_Y-pins. - Use a touchscreen controller library (e.g., XPT2046) to read touch inputs.
- The touchscreen interface uses the
Programming the ESP32:
- Use the Arduino IDE or ESP-IDF to program the ESP32.
- Install the necessary libraries for Wi-Fi, Bluetooth, and touchscreen functionality.
Interfacing with Peripherals:
- Use GPIO pins for digital input/output.
- Use the I2C or SPI pins to connect sensors, displays, or other peripherals.
Important Considerations
- Voltage Levels: Ensure all connected peripherals operate at 3.3V logic levels to avoid damaging the ESP32.
- Touchscreen Calibration: Calibrate the touchscreen using a library to ensure accurate touch detection.
- Wi-Fi and Bluetooth Interference: Avoid placing the module near sources of electromagnetic interference to maintain reliable wireless communication.
Example Code for Arduino UNO
Below is an example of how to use the ESP32 2.8 CYD to display text on the touchscreen and connect to Wi-Fi.
#include <WiFi.h>
#include <TFT_eSPI.h> // Library for the TFT display

// Wi-Fi credentials
const char* ssid = "Your_SSID";
const char* password = "Your_PASSWORD";

// Initialize the TFT display
TFT_eSPI tft = TFT_eSPI();

void setup() {
  // Initialize serial communication
  Serial.begin(115200);

  // Initialize the TFT display
  tft.init();
  tft.setRotation(1); // Set display orientation
  tft.fillScreen(TFT_BLACK); // Clear the screen
  tft.setTextColor(TFT_WHITE, TFT_BLACK); // Set text color

  // Display a message
  tft.setCursor(10, 10);
  tft.setTextSize(2);
  tft.println("Connecting to Wi-Fi...");

  // Connect to Wi-Fi
  WiFi.begin(ssid, password);
  while (WiFi.status() != WL_CONNECTED) {
    delay(500);
    Serial.print(".");
  }

  // Display connection status
  tft.fillScreen(TFT_BLACK);
  tft.setCursor(10, 10);
  tft.println("Wi-Fi Connected!");
  tft.setCursor(10, 40);
  tft.println("IP Address:");
  tft.setCursor(10, 70);
  tft.println(WiFi.localIP());
}

void loop() {
  // Add your main code here
}
Troubleshooting and FAQs
Common Issues
The ESP32 does not power on:
- Ensure the VIN pin is connected to a 5V power source or use a USB cable.
- Check for loose connections or damaged wires.
Wi-Fi connection fails:
- Verify the SSID and password are correct.
- Ensure the Wi-Fi network is within range and not overloaded.
Touchscreen is unresponsive:
- Check the connections to the
TOUCH_X+,TOUCH_X-,TOUCH_Y+, andTOUCH_Y-pins. - Ensure the touchscreen library is correctly installed and configured.
- Check the connections to the
Display shows no output:
- Verify the TFT display connections.
- Ensure the correct library (e.g., TFT_eSPI) is being used and configured.
Tips for Troubleshooting
- Use a multimeter to check voltage levels at the VIN and GND pins.
- Test the module with a simple "blink" program to ensure the ESP32 is functioning.
- Refer to the library documentation for additional configuration options.
By following this documentation, you can effectively integrate the ESP32 2.8 CYD into your projects and troubleshoot common issues.