How to Use Adjustable Dual Channel Audio Amplifier: Examples, Pinouts, and Specs
Introduction
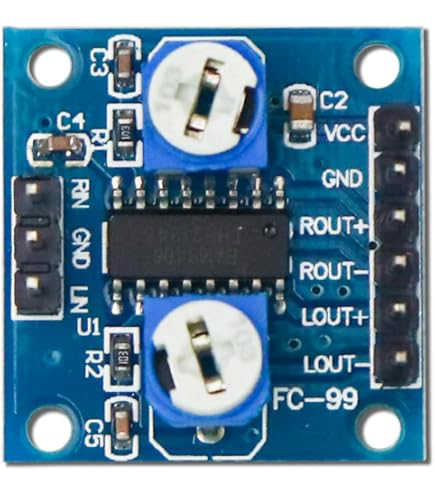
The Adjustable Dual Channel Audio Amplifier (Manufacturer Part ID: CE09453) by Core Electronics is a versatile device designed to amplify audio signals with precision. It features two independent channels, each with adjustable gain, making it ideal for stereo applications. This amplifier is commonly used in audio systems, DIY speaker projects, and headphone amplifiers, where enhanced sound quality and control are essential.
Explore Projects Built with Adjustable Dual Channel Audio Amplifier


Explore Projects Built with Adjustable Dual Channel Audio Amplifier
Common Applications and Use Cases
- Stereo speaker systems
- Headphone amplifiers
- DIY audio projects
- Audio signal processing
- Home theater systems
Technical Specifications
The following table outlines the key technical details of the Adjustable Dual Channel Audio Amplifier:
| Parameter | Specification |
|---|---|
| Supply Voltage | 5V to 15V DC |
| Output Power | Up to 5W per channel (at 8Ω load) |
| Gain Adjustment Range | 0 dB to 20 dB |
| Input Impedance | 10 kΩ |
| Output Impedance | 4Ω to 16Ω |
| Frequency Response | 20 Hz to 20 kHz |
| Total Harmonic Distortion (THD) | < 0.1% |
| Operating Temperature | -20°C to 70°C |
| Dimensions | 50 mm x 30 mm x 15 mm |
Pin Configuration and Descriptions
The amplifier module has the following pin configuration:
| Pin Name | Type | Description |
|---|---|---|
| VCC | Power Input | Connect to the positive terminal of the power supply (5V-15V). |
| GND | Power Ground | Connect to the ground terminal of the power supply. |
| IN1 | Audio Input | Left channel audio input. |
| IN2 | Audio Input | Right channel audio input. |
| OUT1 | Audio Output | Amplified left channel output. |
| OUT2 | Audio Output | Amplified right channel output. |
| GAIN1 | Gain Control | Adjust the gain for the left channel. |
| GAIN2 | Gain Control | Adjust the gain for the right channel. |
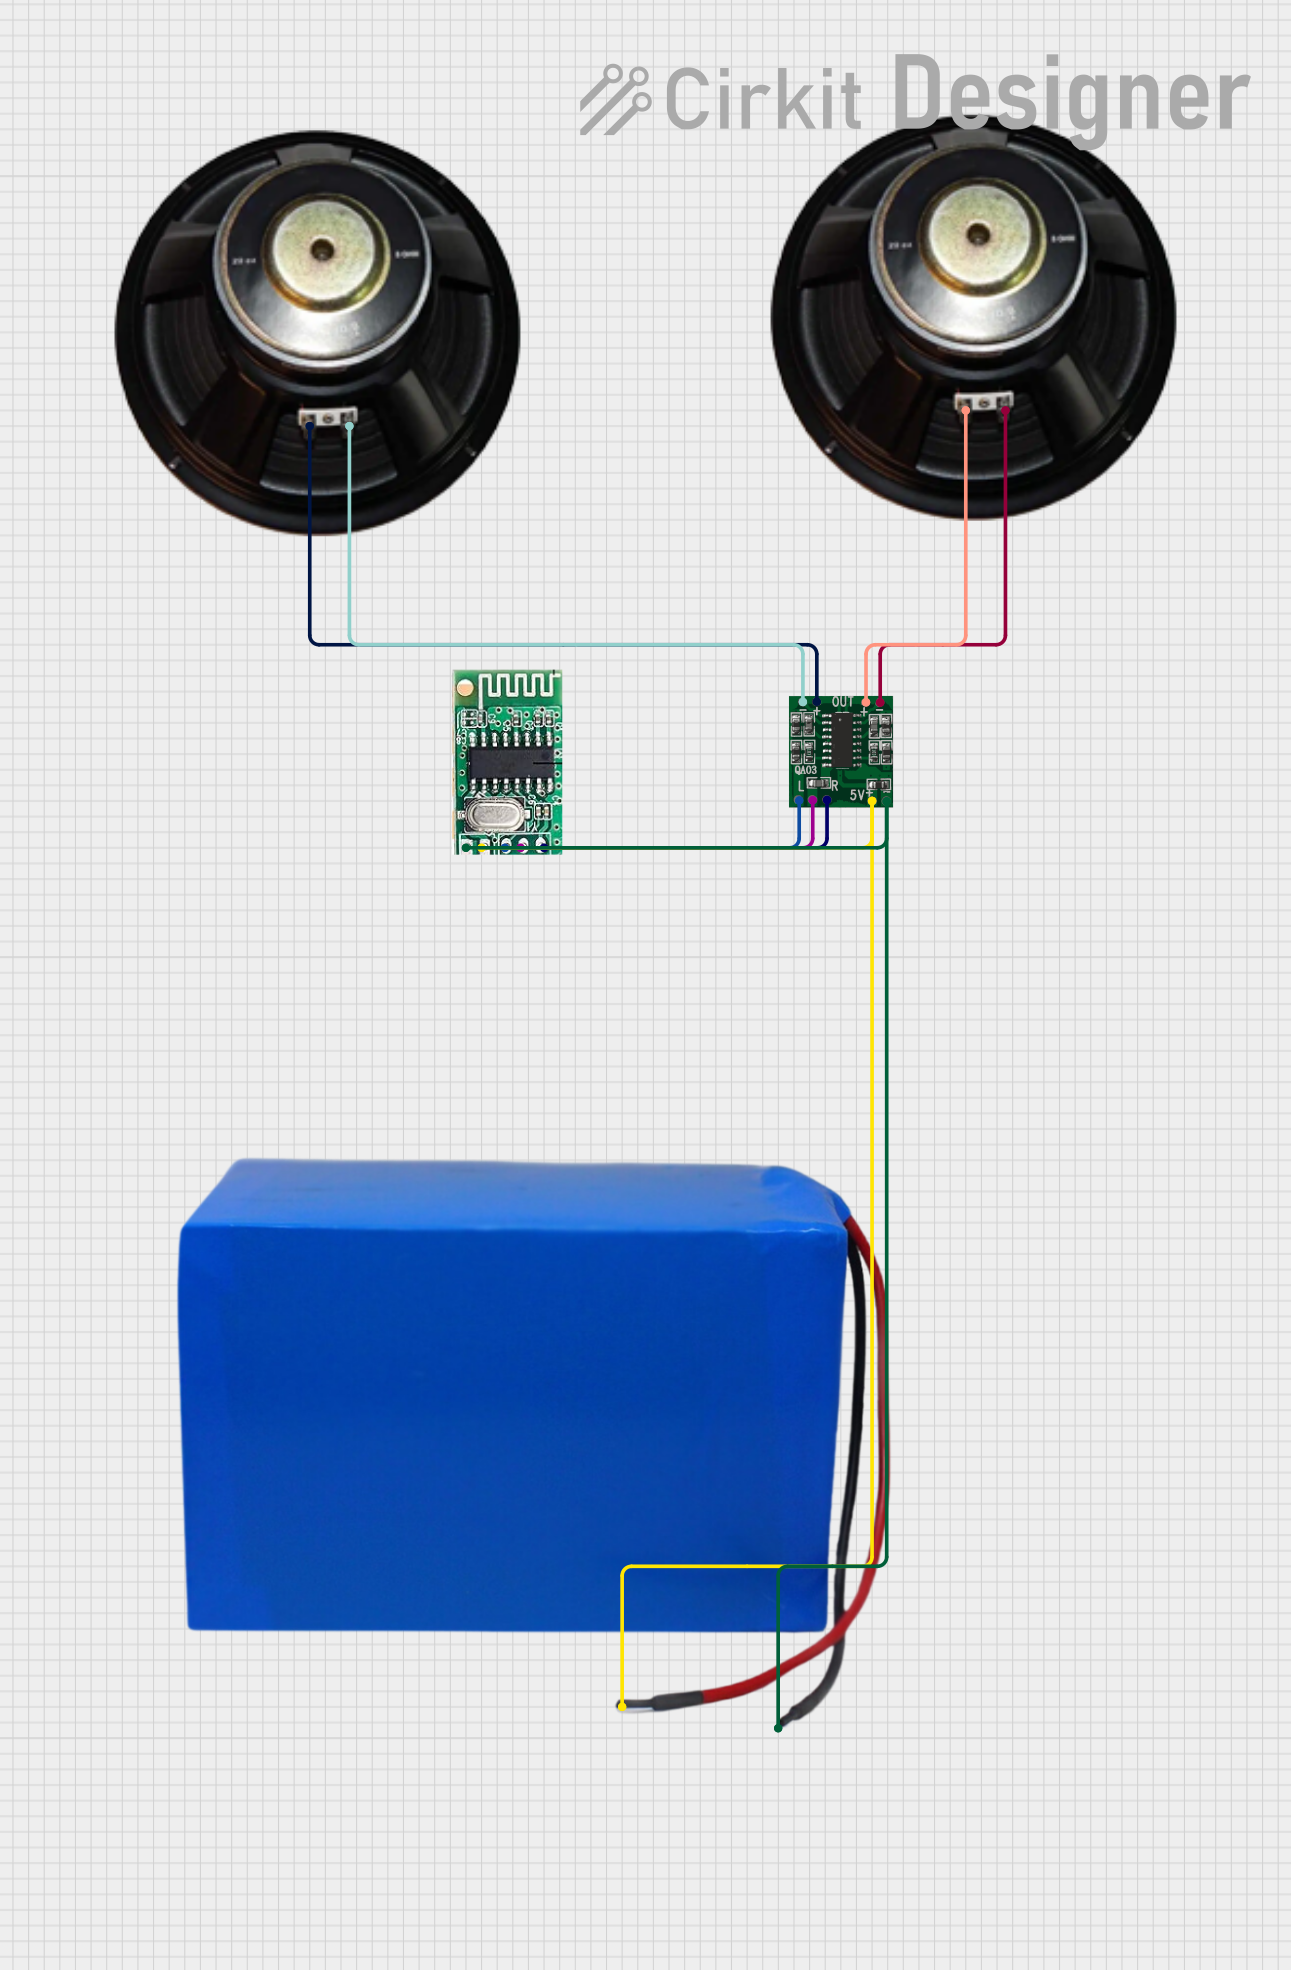
Usage Instructions
How to Use the Component in a Circuit
- Power Supply: Connect the VCC pin to a DC power source (5V to 15V) and the GND pin to the ground.
- Audio Input: Feed the left and right audio signals to the IN1 and IN2 pins, respectively.
- Audio Output: Connect the OUT1 and OUT2 pins to the left and right speakers or headphones.
- Gain Adjustment: Use the GAIN1 and GAIN2 pins to adjust the gain for each channel. This can be done by connecting a potentiometer or a fixed resistor to these pins.
Important Considerations and Best Practices
- Power Supply: Ensure the power supply voltage is within the specified range to avoid damaging the amplifier.
- Heat Dissipation: If operating at high power levels, consider adding a heat sink to prevent overheating.
- Signal Quality: Use shielded cables for audio input to minimize noise and interference.
- Speaker Impedance: Match the speaker impedance (4Ω to 16Ω) to the amplifier's output for optimal performance.
- Gain Settings: Start with a low gain setting and gradually increase it to avoid distortion or damage to the speakers.
Example: Connecting to an Arduino UNO
The Adjustable Dual Channel Audio Amplifier can be used with an Arduino UNO to process audio signals. Below is an example of how to generate a simple audio tone and amplify it using the module:
Circuit Connections
- Connect the VCC and GND pins of the amplifier to the 5V and GND pins of the Arduino.
- Connect the Arduino's PWM output pin (e.g., pin 9) to the IN1 pin of the amplifier.
- Connect a speaker to the OUT1 pin of the amplifier.
- Adjust the GAIN1 pin to set the desired amplification level.
Arduino Code
// Simple Arduino code to generate a tone and amplify it using the audio amplifier
const int audioPin = 9; // PWM pin connected to IN1 of the amplifier

void setup() {
  pinMode(audioPin, OUTPUT); // Set the audio pin as an output
}

void loop() {
  // Generate a 1 kHz square wave tone
  tone(audioPin, 1000); // Play a 1 kHz tone on the audio pin
  delay(1000);          // Play the tone for 1 second
  noTone(audioPin);     // Stop the tone
  delay(1000);          // Wait for 1 second before repeating
}
Troubleshooting and FAQs
Common Issues and Solutions
No Sound Output:
- Ensure the power supply is connected and within the specified voltage range.
- Verify that the audio input signal is present and properly connected.
- Check the speaker connections and ensure they match the amplifier's output impedance.
Distorted Sound:
- Reduce the gain setting to avoid overdriving the amplifier.
- Ensure the input signal is not too high or clipped.
- Verify that the speaker impedance is within the specified range (4Ω to 16Ω).
Overheating:
- Check if the amplifier is operating at high power levels for extended periods.
- Add a heat sink or improve ventilation to dissipate heat.
Noise or Interference:
- Use shielded cables for audio input to minimize noise.
- Ensure the power supply is stable and free from electrical noise.
FAQs
Q1: Can I use this amplifier with a 3.3V power supply?
A1: No, the minimum supply voltage is 5V. Using a lower voltage may result in improper operation or no output.
Q2: How do I adjust the gain for each channel?
A2: Connect a potentiometer or a fixed resistor to the GAIN1 and GAIN2 pins. Adjust the resistance to set the desired gain level.
Q3: Can I use this amplifier for mono audio applications?
A3: Yes, you can use only one channel (e.g., IN1 and OUT1) for mono audio. Leave the unused channel unconnected.
Q4: What is the maximum speaker power this amplifier can drive?
A4: The amplifier can deliver up to 5W per channel when driving an 8Ω speaker.
By following this documentation, you can effectively integrate the Adjustable Dual Channel Audio Amplifier into your audio projects and achieve high-quality sound amplification.