How to Use NO TOUCH BUTTON: Examples, Pinouts, and Specs
Introduction
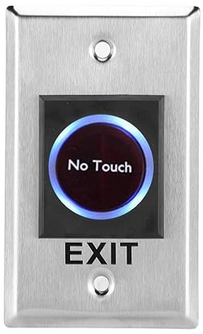
The NO TOUCH BUTTON (Manufacturer: BOXTEL, Part ID: NO TOUCH) is a type of switch that can be activated without physical contact. It typically uses infrared or capacitive sensing technology to detect the presence of a hand or object. This component is ideal for applications where hygiene is a concern, such as in medical facilities, public restrooms, and other environments where minimizing physical contact is crucial.
Explore Projects Built with NO TOUCH BUTTON
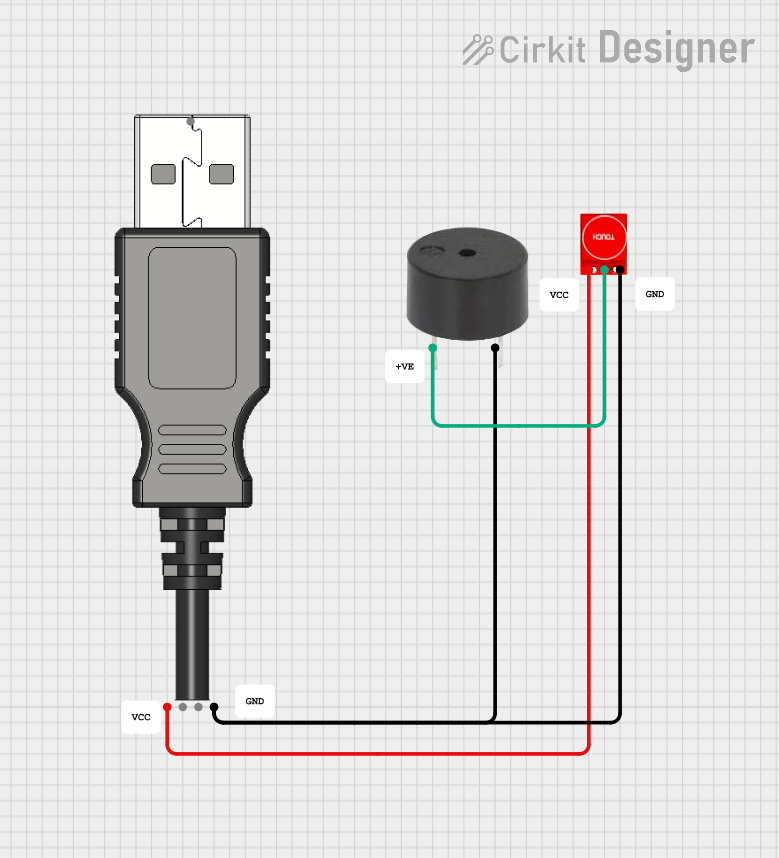

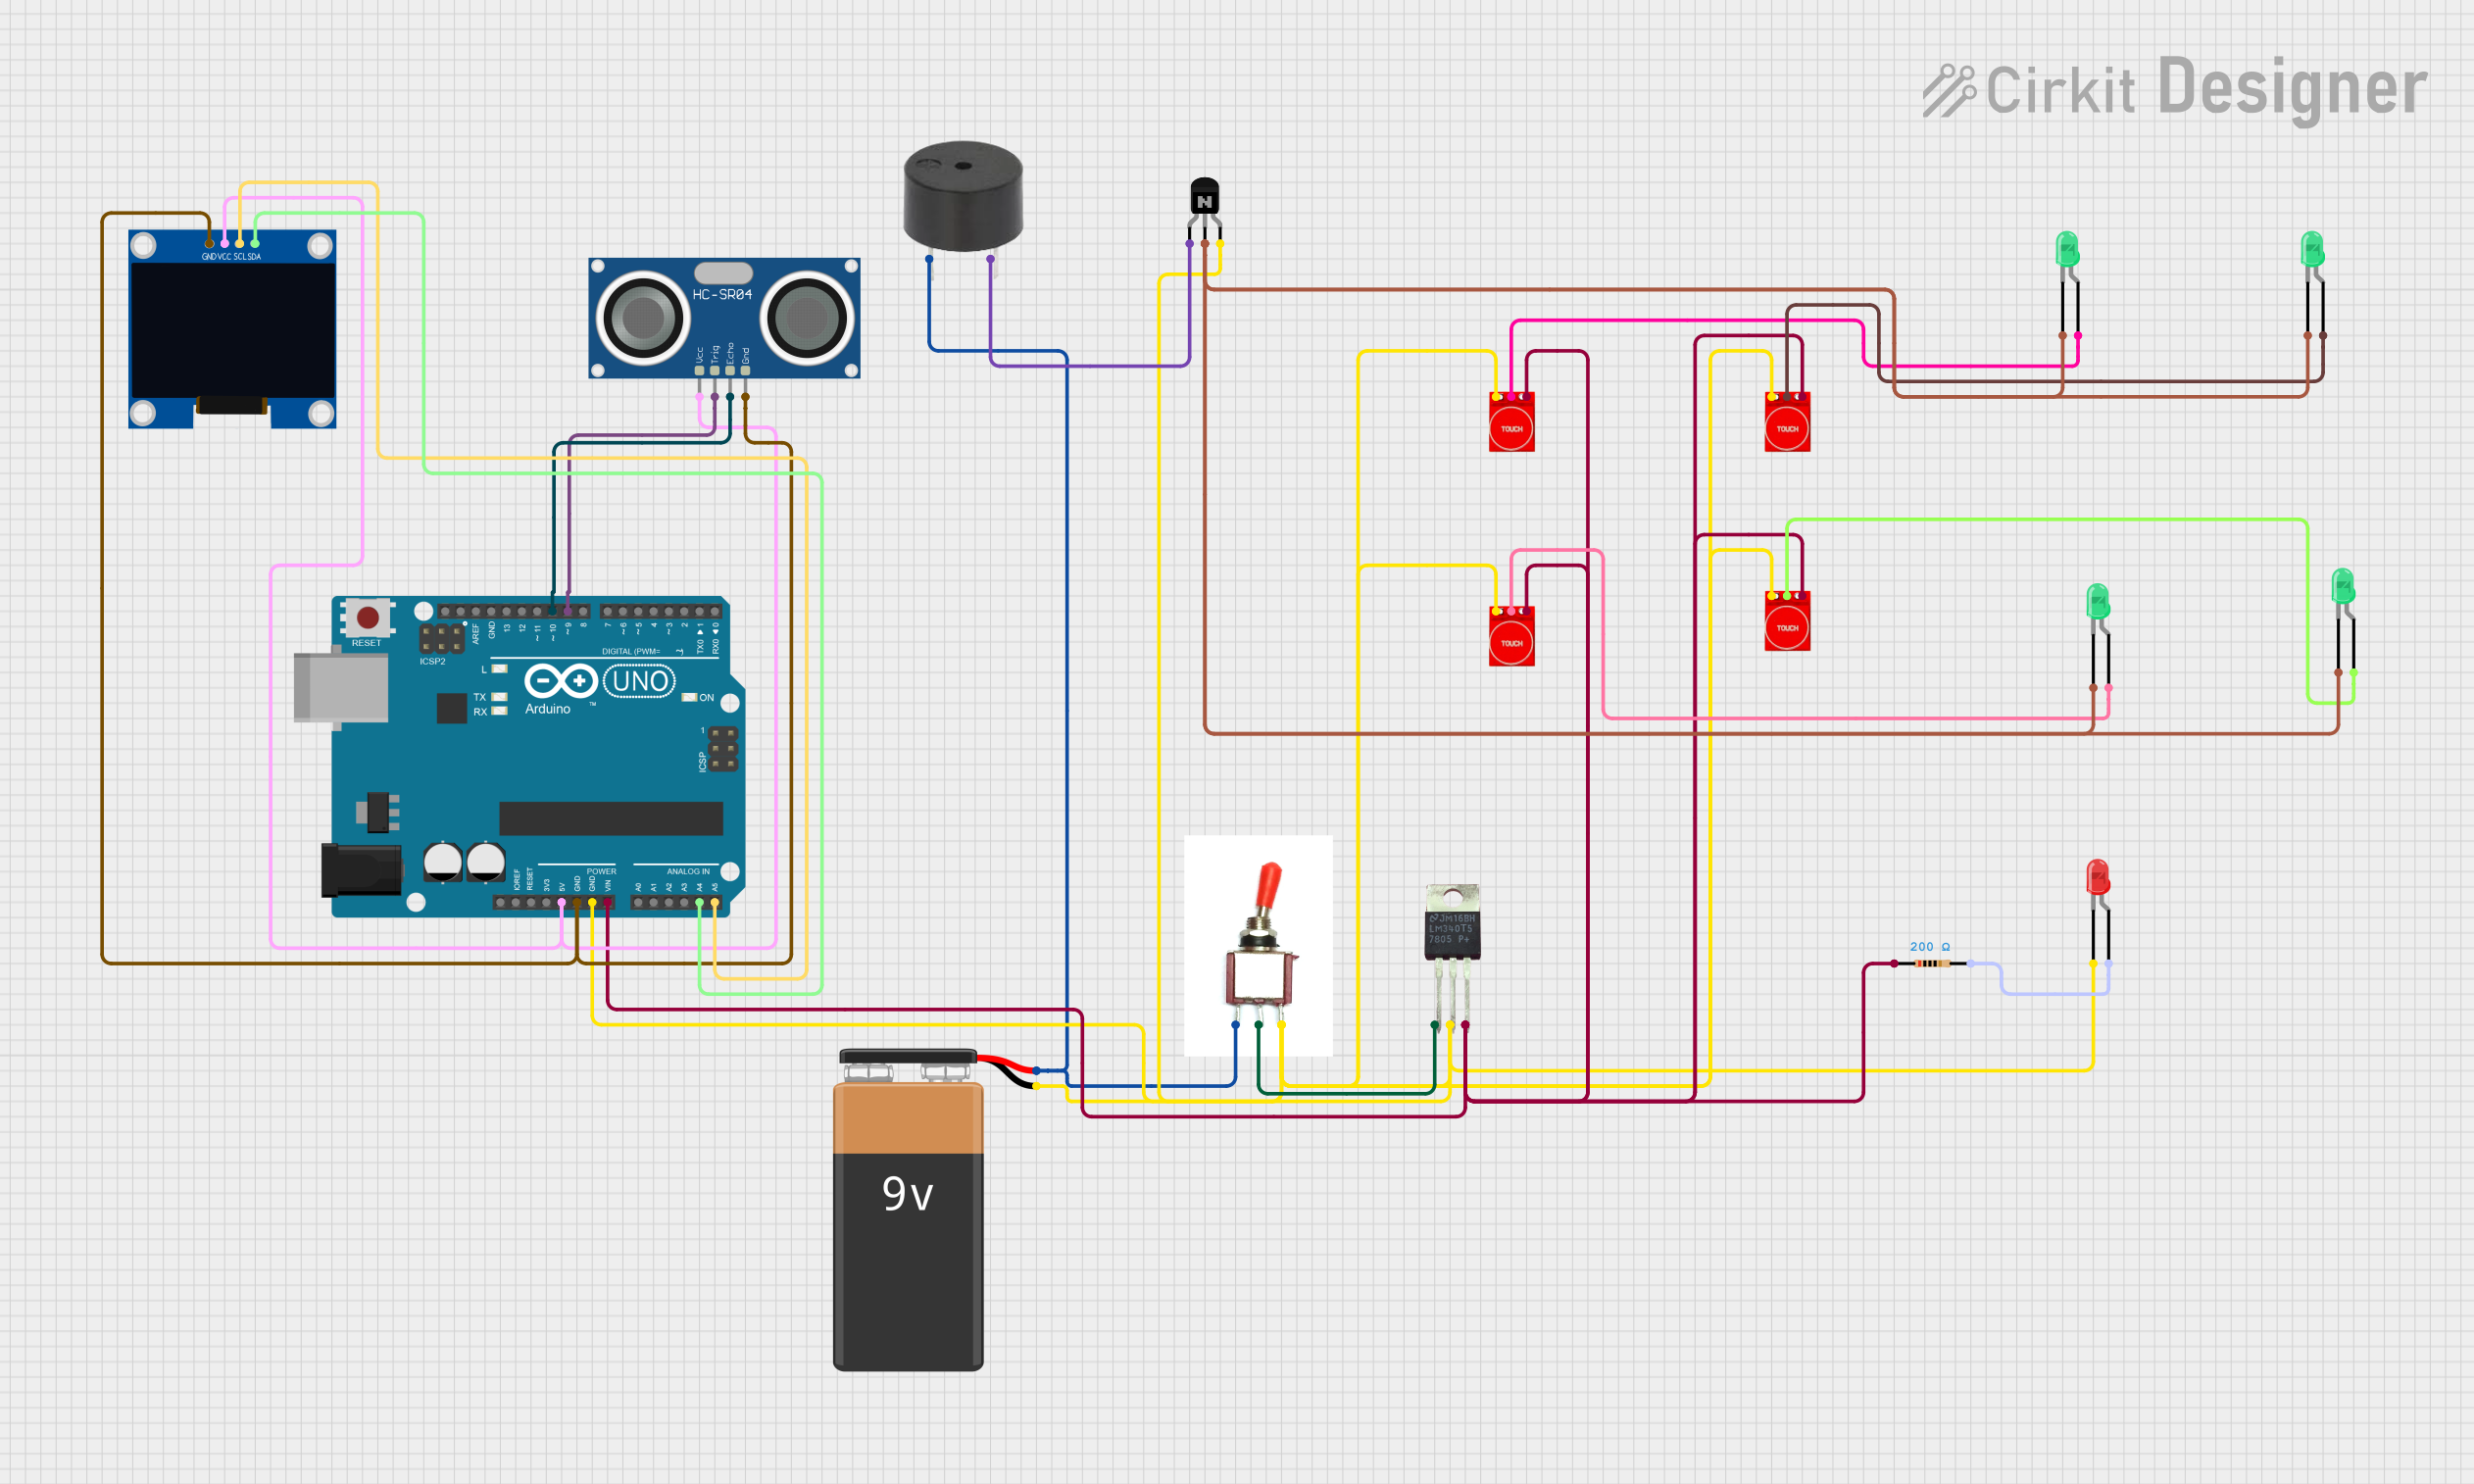

Explore Projects Built with NO TOUCH BUTTON
Technical Specifications
Key Technical Details
| Parameter | Value |
|---|---|
| Operating Voltage | 5V DC |
| Operating Current | ≤ 30mA |
| Sensing Distance | 3-15 cm (adjustable) |
| Output Type | Digital (High/Low) |
| Response Time | ≤ 0.5 seconds |
| Operating Temperature | -20°C to 70°C |
| Dimensions | 28mm x 28mm x 10mm |
Pin Configuration and Descriptions
| Pin Number | Pin Name | Description |
|---|---|---|
| 1 | VCC | Power supply (5V DC) |
| 2 | GND | Ground |
| 3 | OUT | Digital output signal (High/Low) |
| 4 | ADJ | Sensing distance adjustment (optional) |
Usage Instructions
How to Use the Component in a Circuit
- Power Supply: Connect the VCC pin to a 5V DC power supply and the GND pin to the ground.
- Output Signal: Connect the OUT pin to a digital input pin on your microcontroller (e.g., Arduino UNO).
- Sensing Distance Adjustment: If your application requires adjusting the sensing distance, use the ADJ pin. This can be done by connecting a potentiometer or using a fixed resistor.
Example Circuit Diagram
+5V (Arduino) ----> VCC (NO TOUCH BUTTON)
GND (Arduino) ----> GND (NO TOUCH BUTTON)
Digital Pin (Arduino) ----> OUT (NO TOUCH BUTTON)
Important Considerations and Best Practices
- Power Supply: Ensure a stable 5V DC power supply to avoid erratic behavior.
- Interference: Avoid placing the NO TOUCH BUTTON near strong electromagnetic fields or reflective surfaces, as this may affect its performance.
- Mounting: Install the button in a location where it is easily accessible but protected from direct exposure to water or other contaminants.
Arduino UNO Example Code
/*
  NO TOUCH BUTTON Example Code
  This code demonstrates how to use the NO TOUCH BUTTON with an Arduino UNO.
  The button's output is read and used to control an LED.
*/

const int buttonPin = 2; // Pin connected to the OUT pin of NO TOUCH BUTTON
const int ledPin = 13;   // Pin connected to the onboard LED

void setup() {
  pinMode(buttonPin, INPUT); // Set button pin as input
  pinMode(ledPin, OUTPUT);   // Set LED pin as output
  Serial.begin(9600);        // Initialize serial communication
}

void loop() {
  int buttonState = digitalRead(buttonPin); // Read the button state

  if (buttonState == HIGH) {
    digitalWrite(ledPin, HIGH); // Turn on the LED
    Serial.println("Button Activated");
  } else {
    digitalWrite(ledPin, LOW);  // Turn off the LED
  }

  delay(100); // Small delay to debounce the button
}
Troubleshooting and FAQs
Common Issues Users Might Face
Button Not Responding:
- Solution: Check the power supply connections and ensure the VCC and GND pins are correctly connected.
- Tip: Verify that the sensing distance is within the specified range (3-15 cm).
False Triggers:
- Solution: Ensure there are no reflective surfaces or strong electromagnetic fields near the button.
- Tip: Adjust the sensing distance using the ADJ pin if necessary.
Intermittent Operation:
- Solution: Check for loose connections or unstable power supply.
- Tip: Use a decoupling capacitor (e.g., 0.1µF) across the VCC and GND pins to filter out noise.
FAQs
Q: Can the NO TOUCH BUTTON be used outdoors?
- A: While the button can operate in a wide temperature range, it is not waterproof. It should be protected from direct exposure to water.
Q: How do I adjust the sensing distance?
- A: The sensing distance can be adjusted using the ADJ pin. Connect a potentiometer or a fixed resistor to fine-tune the distance.
Q: What is the maximum sensing distance?
- A: The maximum sensing distance is 15 cm, but it can be adjusted to as low as 3 cm.
By following this documentation, users can effectively integrate and troubleshoot the NO TOUCH BUTTON in their projects, ensuring reliable and hygienic operation.