How to Use lcd 1602 i2c module: Examples, Pinouts, and Specs
Introduction
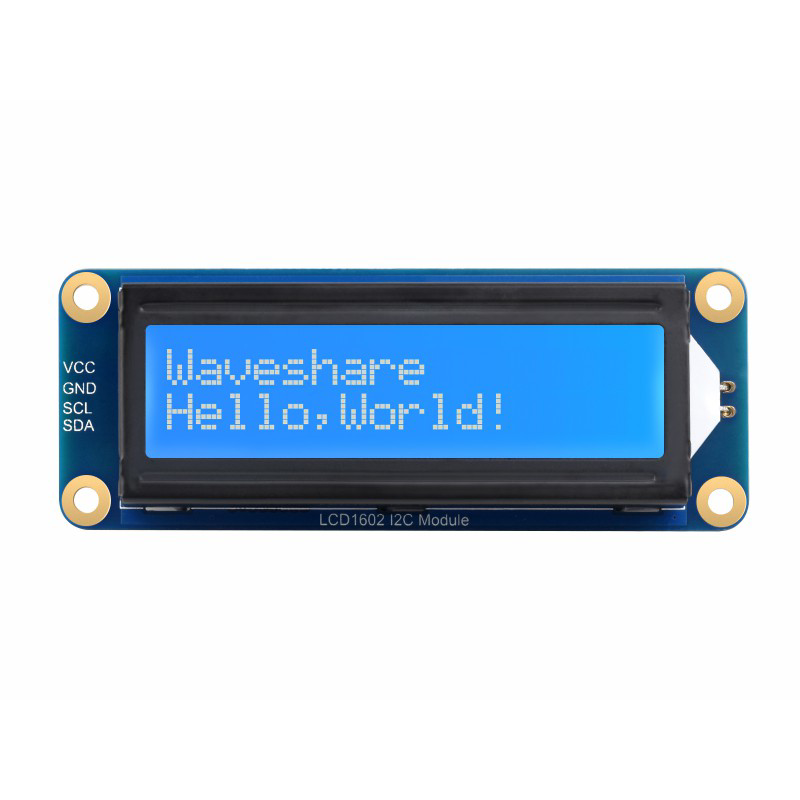
The LCD 1602 I2C Module (Manufacturer: Abra, Part ID: WAVE-23991) is a 16x2 character LCD display module designed for easy integration with microcontrollers. It features an I2C (Inter-Integrated Circuit) interface, which significantly reduces the number of pins required for communication compared to traditional parallel LCD modules. This makes it an excellent choice for projects where pin availability is limited or wiring simplicity is desired.
Explore Projects Built with lcd 1602 i2c module

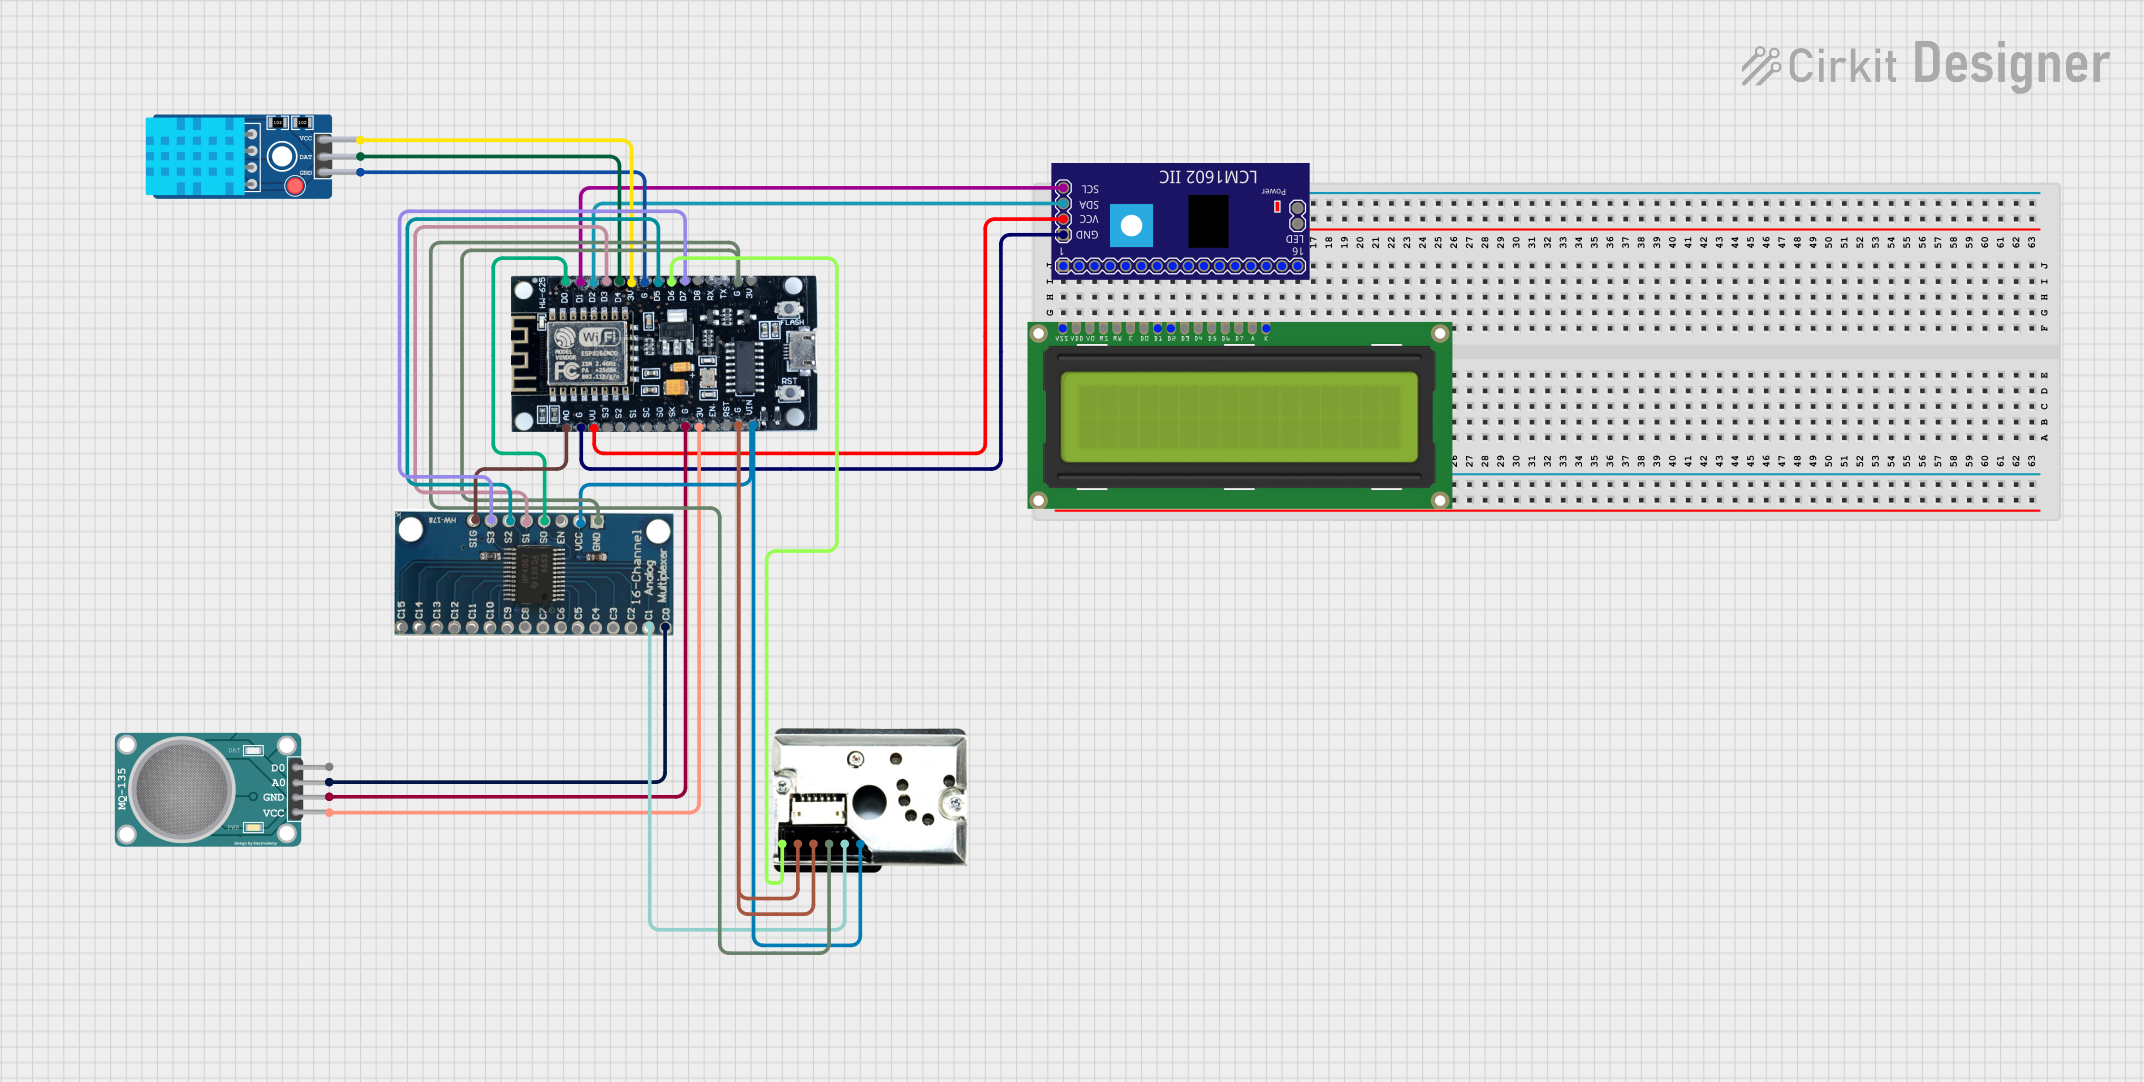

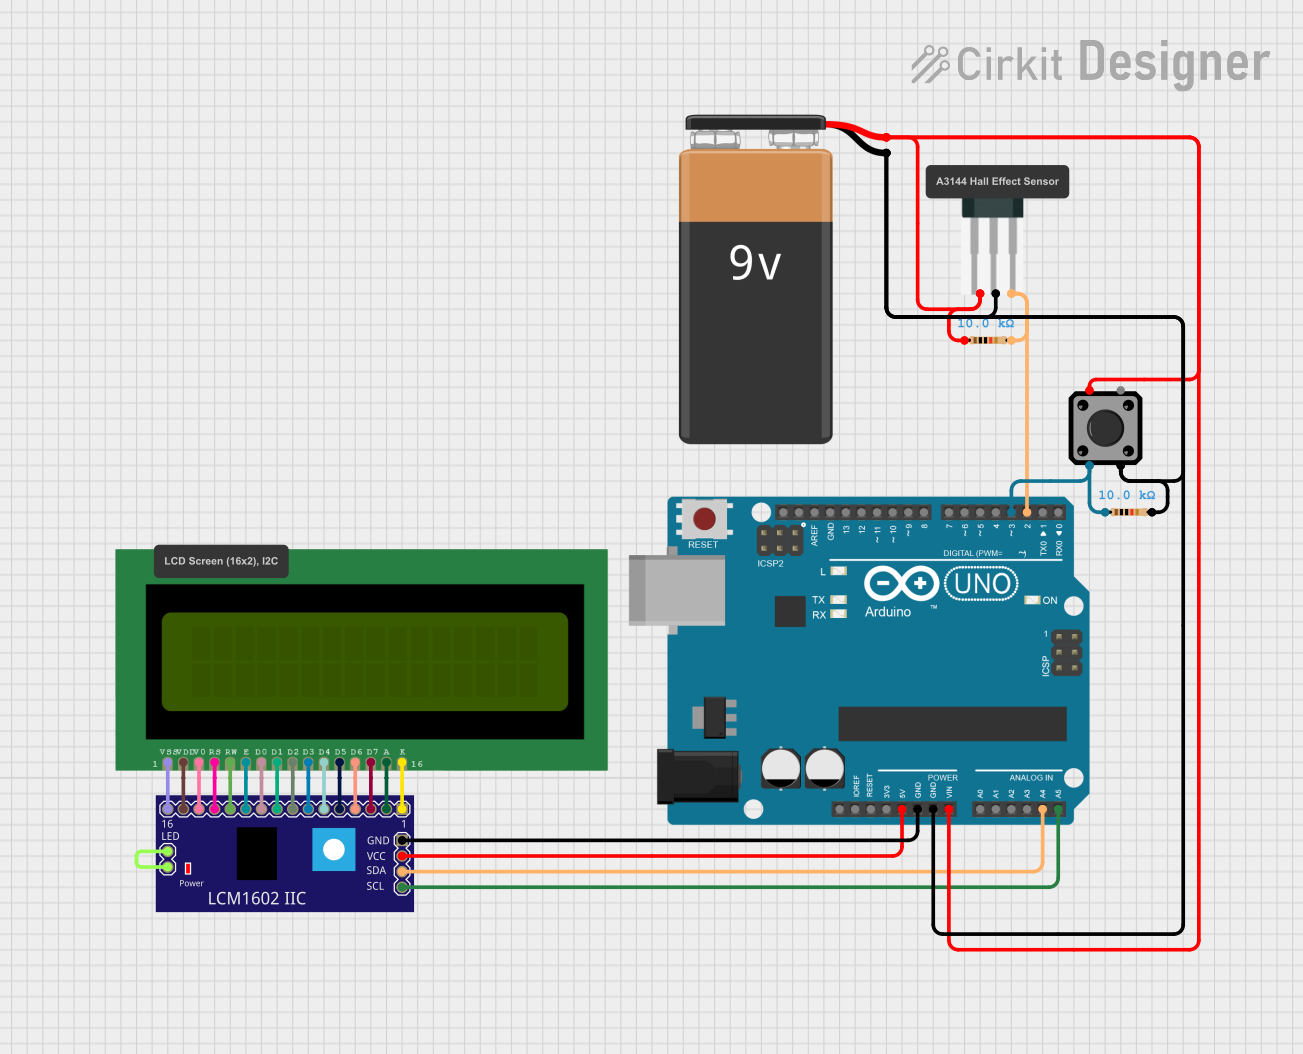
Explore Projects Built with lcd 1602 i2c module
Common Applications and Use Cases
- Displaying sensor data in real-time
- User interfaces for embedded systems
- Menu-driven control systems
- Educational and prototyping projects
- IoT devices requiring visual feedback
Technical Specifications
The following table outlines the key technical details of the LCD 1602 I2C Module:
| Parameter | Specification |
|---|---|
| Manufacturer | Abra |
| Part ID | WAVE-23991 |
| Display Type | 16x2 character LCD |
| Interface | I2C (Inter-Integrated Circuit) |
| Operating Voltage | 5V DC |
| Backlight | LED (controllable via software) |
| Contrast Adjustment | Potentiometer on the module |
| I2C Address (Default) | 0x27 (adjustable via solder pads) |
| Dimensions | 80mm x 36mm x 12mm |
| Operating Temperature | -20°C to 70°C |
Pin Configuration and Descriptions
The LCD 1602 I2C Module has a 4-pin header for I2C communication. The pinout is as follows:
| Pin | Name | Description |
|---|---|---|
| 1 | GND | Ground (0V) |
| 2 | VCC | Power supply (5V DC) |
| 3 | SDA | Serial Data Line for I2C communication |
| 4 | SCL | Serial Clock Line for I2C communication |
Usage Instructions
Connecting the LCD 1602 I2C Module
- Power Supply: Connect the
VCCpin to the 5V pin of your microcontroller and theGNDpin to the ground. - I2C Communication: Connect the
SDApin to the SDA pin of your microcontroller and theSCLpin to the SCL pin.- For Arduino UNO,
SDAis on A4 andSCLis on A5.
- For Arduino UNO,
- Adjust Contrast: Use the onboard potentiometer to adjust the display contrast.
Example Code for Arduino UNO
Below is an example of how to use the LCD 1602 I2C Module with an Arduino UNO. This code requires the LiquidCrystal_I2C library, which can be installed via the Arduino Library Manager.
#include <Wire.h>
#include <LiquidCrystal_I2C.h>

// Initialize the LCD with I2C address 0x27 and 16x2 dimensions
LiquidCrystal_I2C lcd(0x27, 16, 2);

void setup() {
  lcd.begin(); // Initialize the LCD
  lcd.backlight(); // Turn on the backlight
  lcd.setCursor(0, 0); // Set cursor to the first row, first column
  lcd.print("Hello, World!"); // Print a message on the first row
  lcd.setCursor(0, 1); // Set cursor to the second row, first column
  lcd.print("LCD 1602 I2C"); // Print a message on the second row
}

void loop() {
  // No actions in the loop for this example
}
Important Considerations and Best Practices
- I2C Address: Ensure the I2C address of the module matches the address in your code. The default is
0x27, but it can be changed by modifying the solder pads on the module. - Power Supply: Always use a stable 5V power source to avoid flickering or malfunctioning of the display.
- Backlight Control: Use the
lcd.backlight()andlcd.noBacklight()functions to control the backlight programmatically. - Contrast Adjustment: If the text is not visible, adjust the contrast using the onboard potentiometer.
Troubleshooting and FAQs
Common Issues
No Display Output
- Cause: Incorrect wiring or power supply.
- Solution: Double-check the connections and ensure the module is powered with 5V.
Flickering or Unstable Display
- Cause: Insufficient power supply or loose connections.
- Solution: Use a stable power source and ensure all connections are secure.
Text Not Visible
- Cause: Incorrect contrast setting.
- Solution: Adjust the contrast using the potentiometer on the module.
I2C Communication Failure
- Cause: Incorrect I2C address or wiring.
- Solution: Verify the I2C address in the code and ensure
SDAandSCLare connected to the correct pins.
FAQs
Q: Can I use this module with a 3.3V microcontroller?
A: The module is designed for 5V operation. If using a 3.3V microcontroller, a logic level shifter is recommended for the I2C lines.
Q: How do I change the I2C address?
A: The I2C address can be changed by modifying the solder pads on the back of the module. Refer to the module's datasheet for details.
Q: Is the backlight always on?
A: No, the backlight can be controlled programmatically using the lcd.backlight() and lcd.noBacklight() functions.
Q: Can I display custom characters?
A: Yes, the module supports custom characters. Use the createChar() function in the LiquidCrystal_I2C library to define and display custom characters.
This concludes the documentation for the LCD 1602 I2C Module. For further assistance, refer to the manufacturer's datasheet or support resources.