How to Use Fingerprint Sensor: Examples, Pinouts, and Specs
Introduction
The fingerprint sensor is a biometric device designed to capture and analyze the unique patterns of a person's fingerprint. It is widely used for identification and authentication purposes, offering a secure and reliable method for access control and personal identification. This component is commonly found in applications such as security systems, attendance tracking, mobile devices, and embedded systems.
Explore Projects Built with Fingerprint Sensor


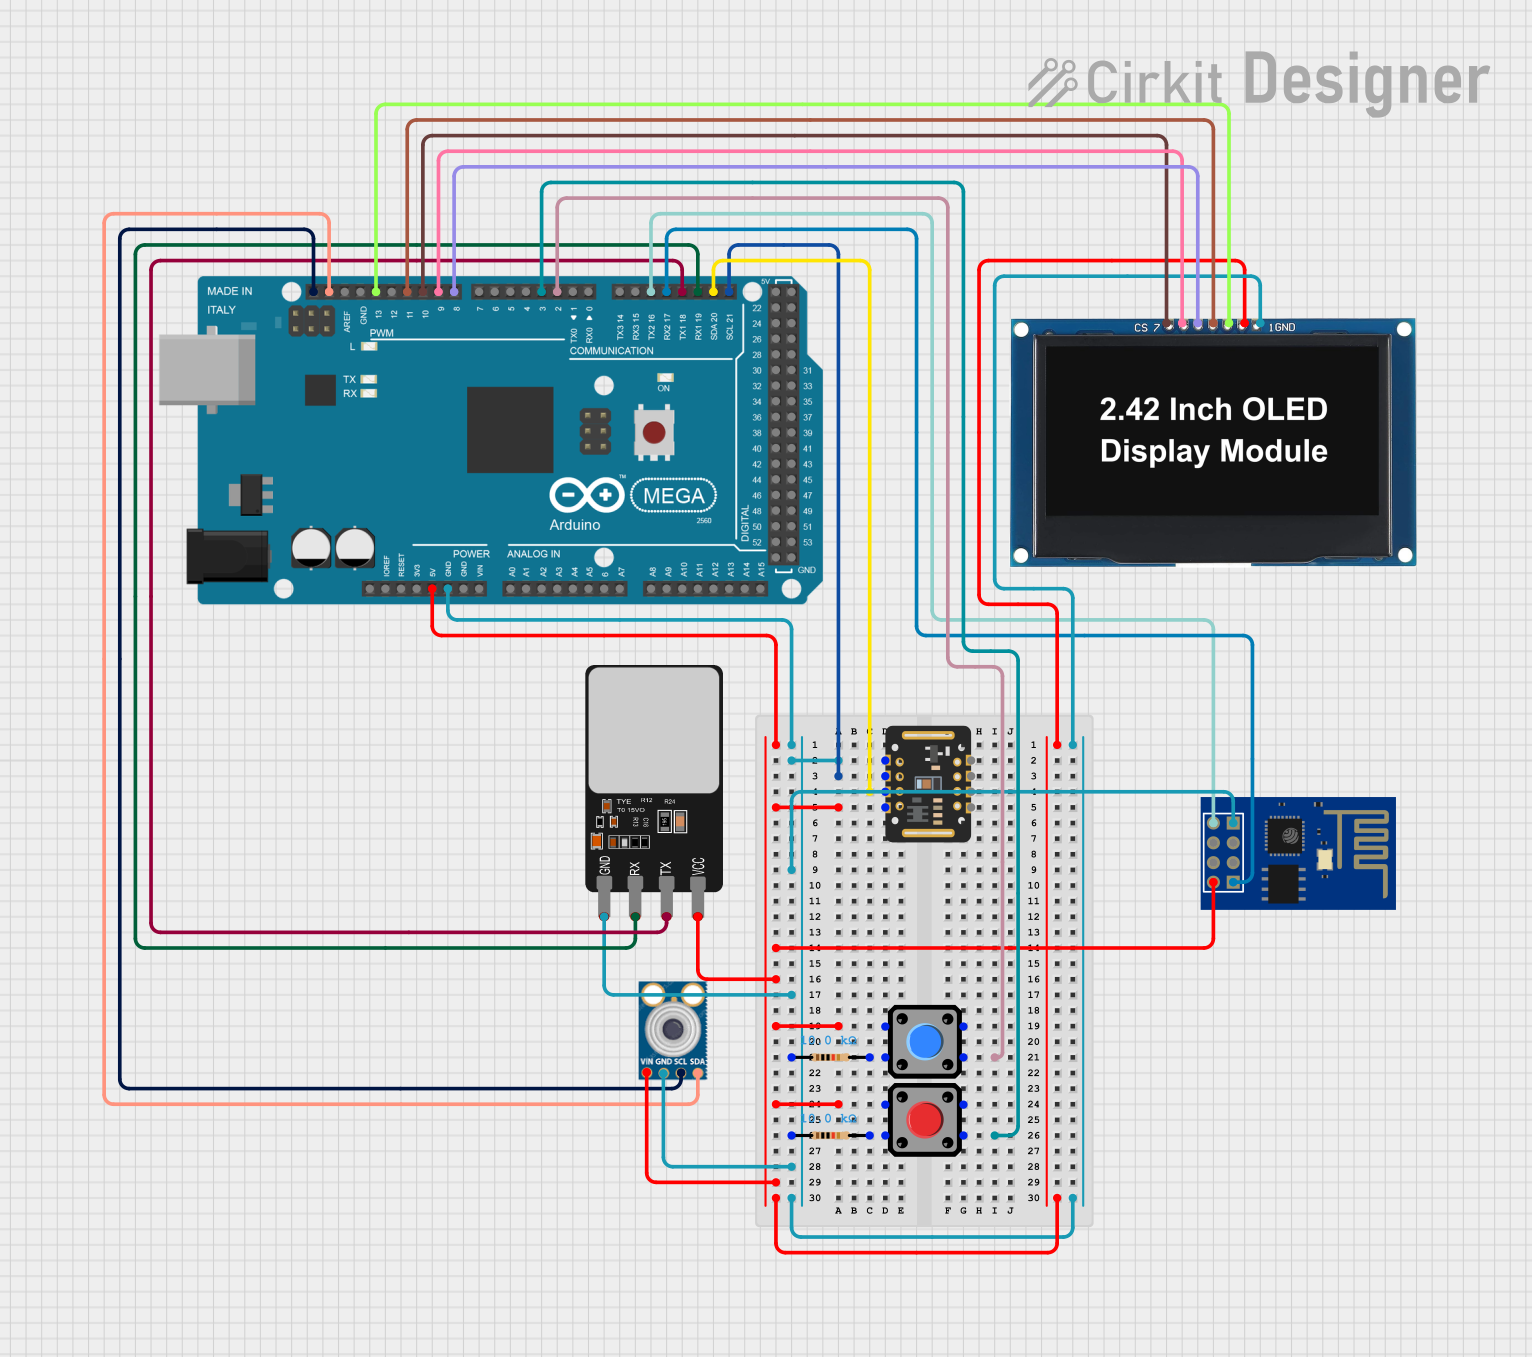
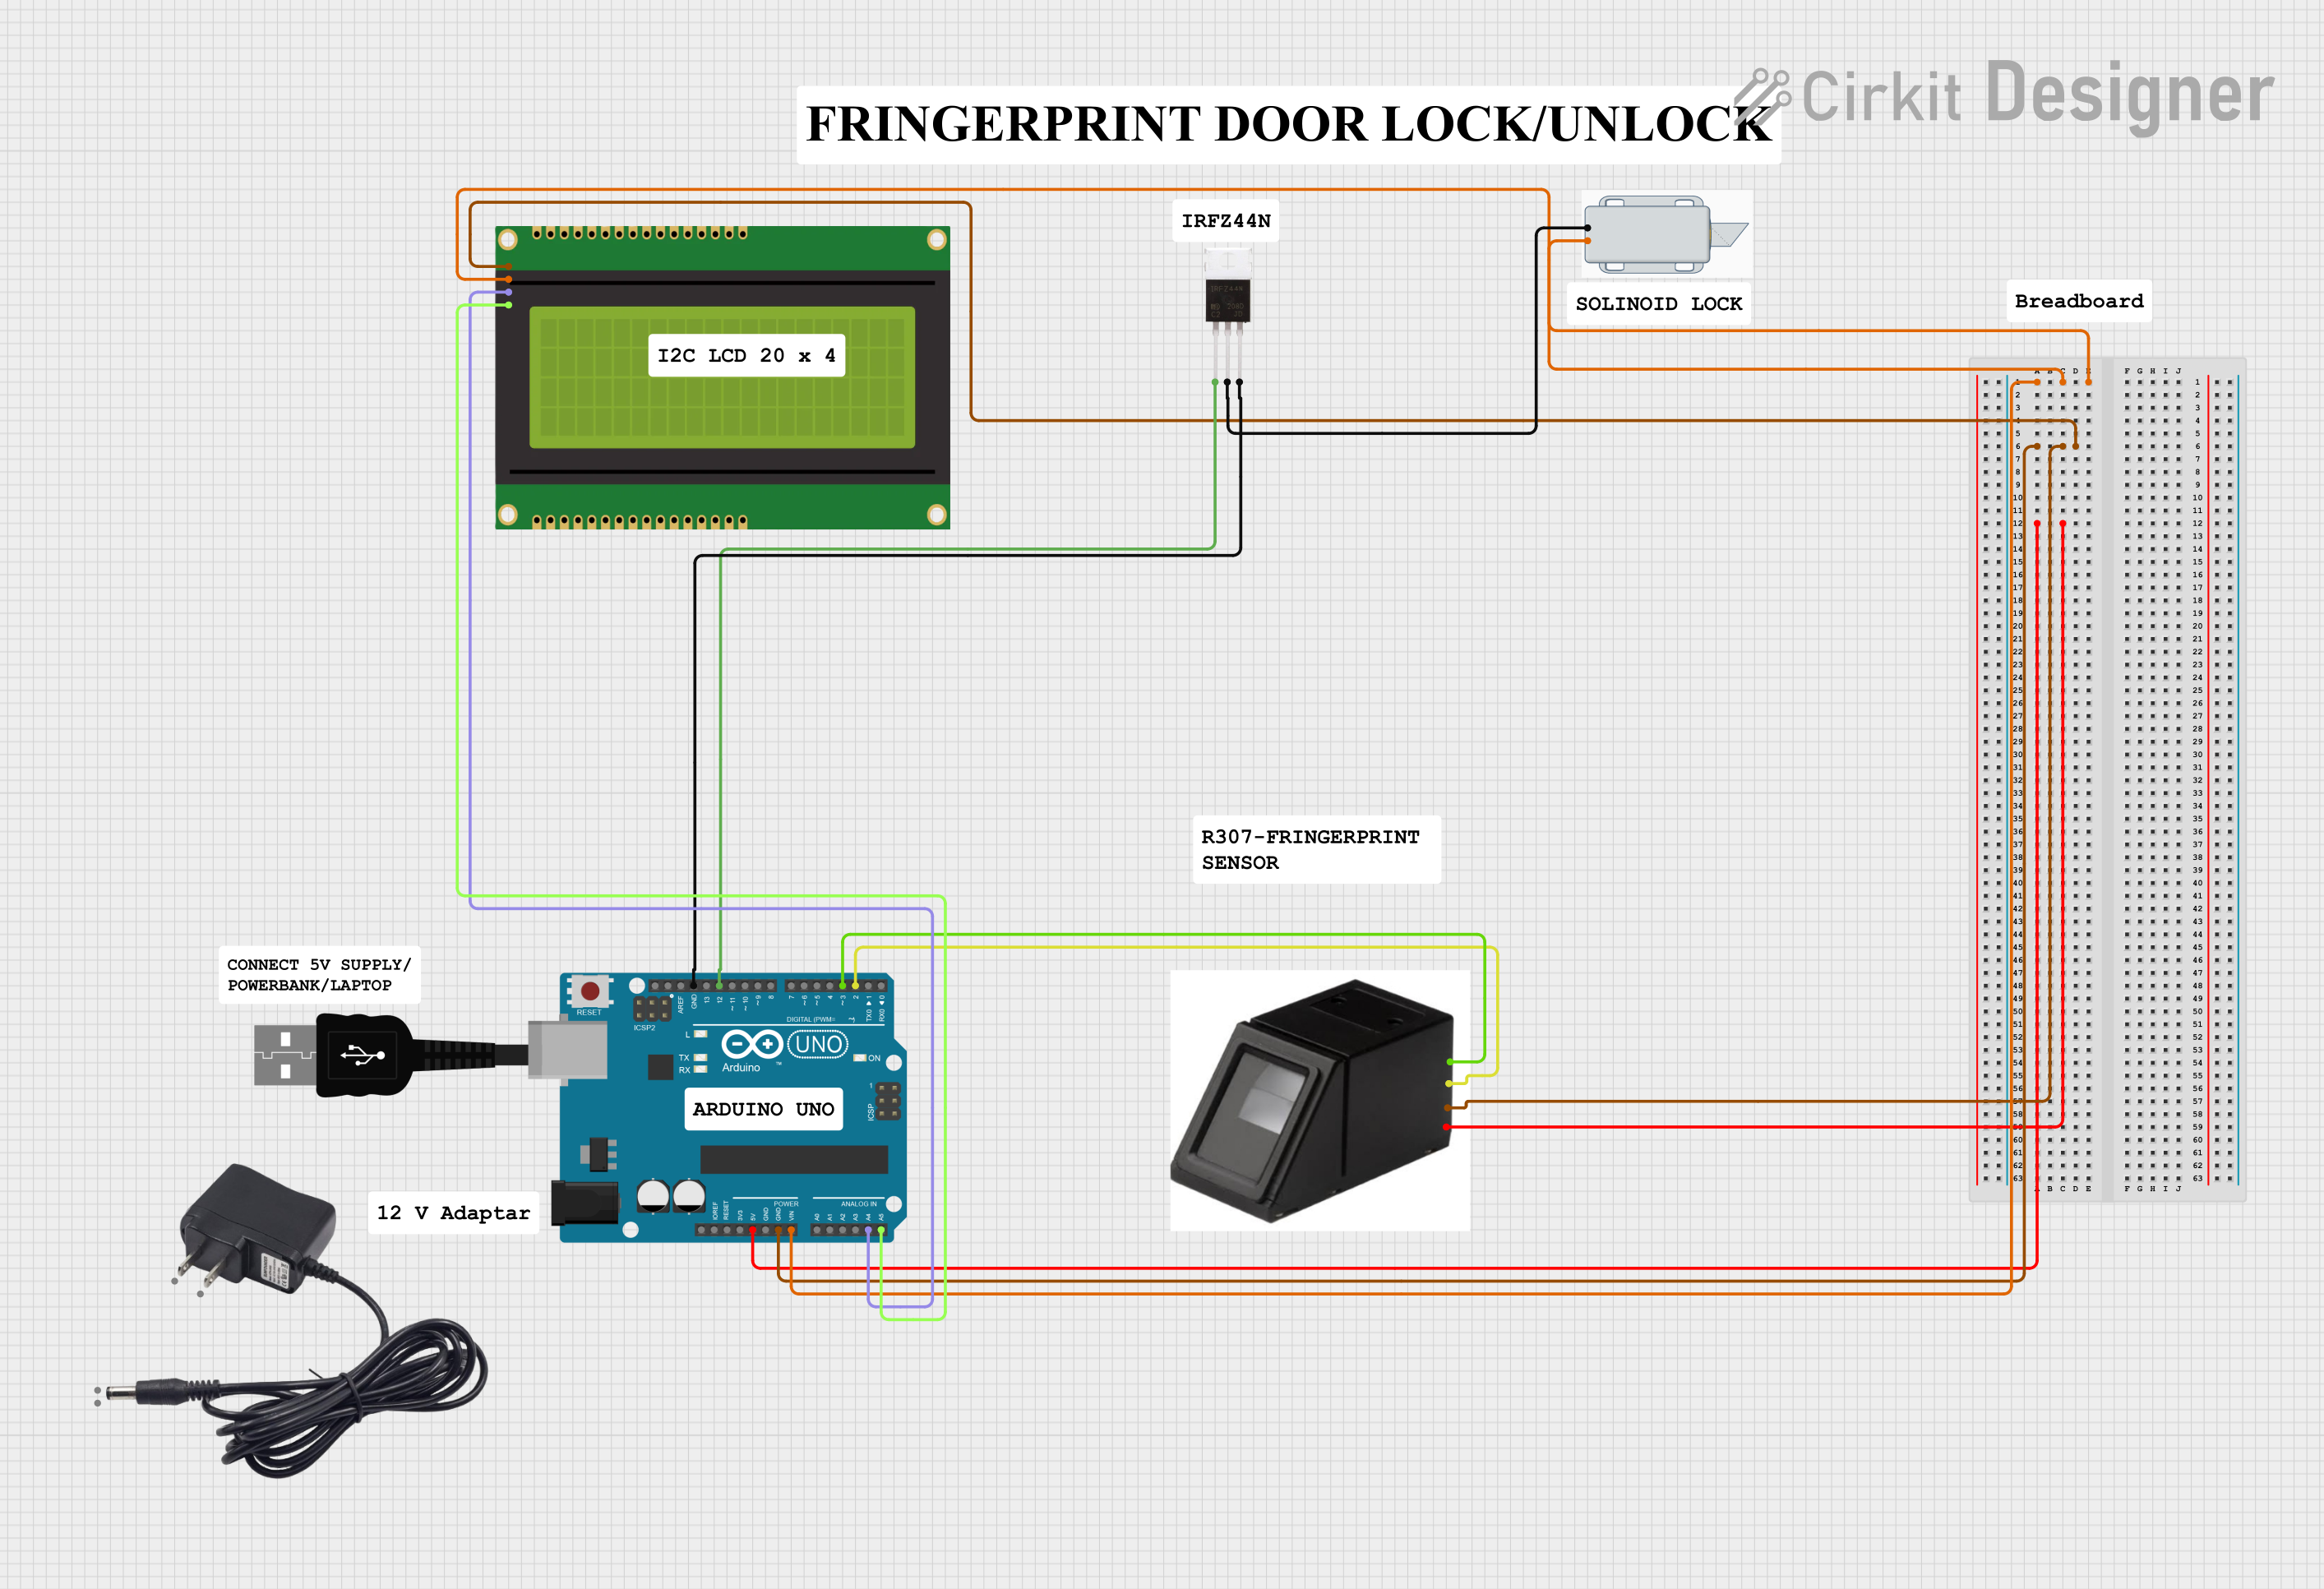
Explore Projects Built with Fingerprint Sensor
Common Applications and Use Cases
- Access Control Systems: Used in door locks, safes, and secure areas.
- Time and Attendance Systems: Tracks employee attendance in workplaces.
- Mobile Devices: Provides secure unlocking and authentication for smartphones and tablets.
- Embedded Systems: Integrated into microcontroller-based projects for enhanced security.
- Banking and Payment Systems: Ensures secure transactions and identity verification.
Technical Specifications
Below are the key technical details of a typical fingerprint sensor module:
| Parameter | Specification |
|---|---|
| Operating Voltage | 3.3V to 6V |
| Operating Current | 50mA (typical), 80mA (peak) |
| Interface Protocol | UART (TTL) |
| Baud Rate | Configurable (default: 9600 bps) |
| Fingerprint Capacity | 200 to 1000 templates (varies by model) |
| Image Resolution | 500 DPI |
| Scanning Time | < 1 second |
| Working Temperature | -20°C to 50°C |
| Dimensions | Varies by model (e.g., 56mm x 20mm x 21.5mm) |
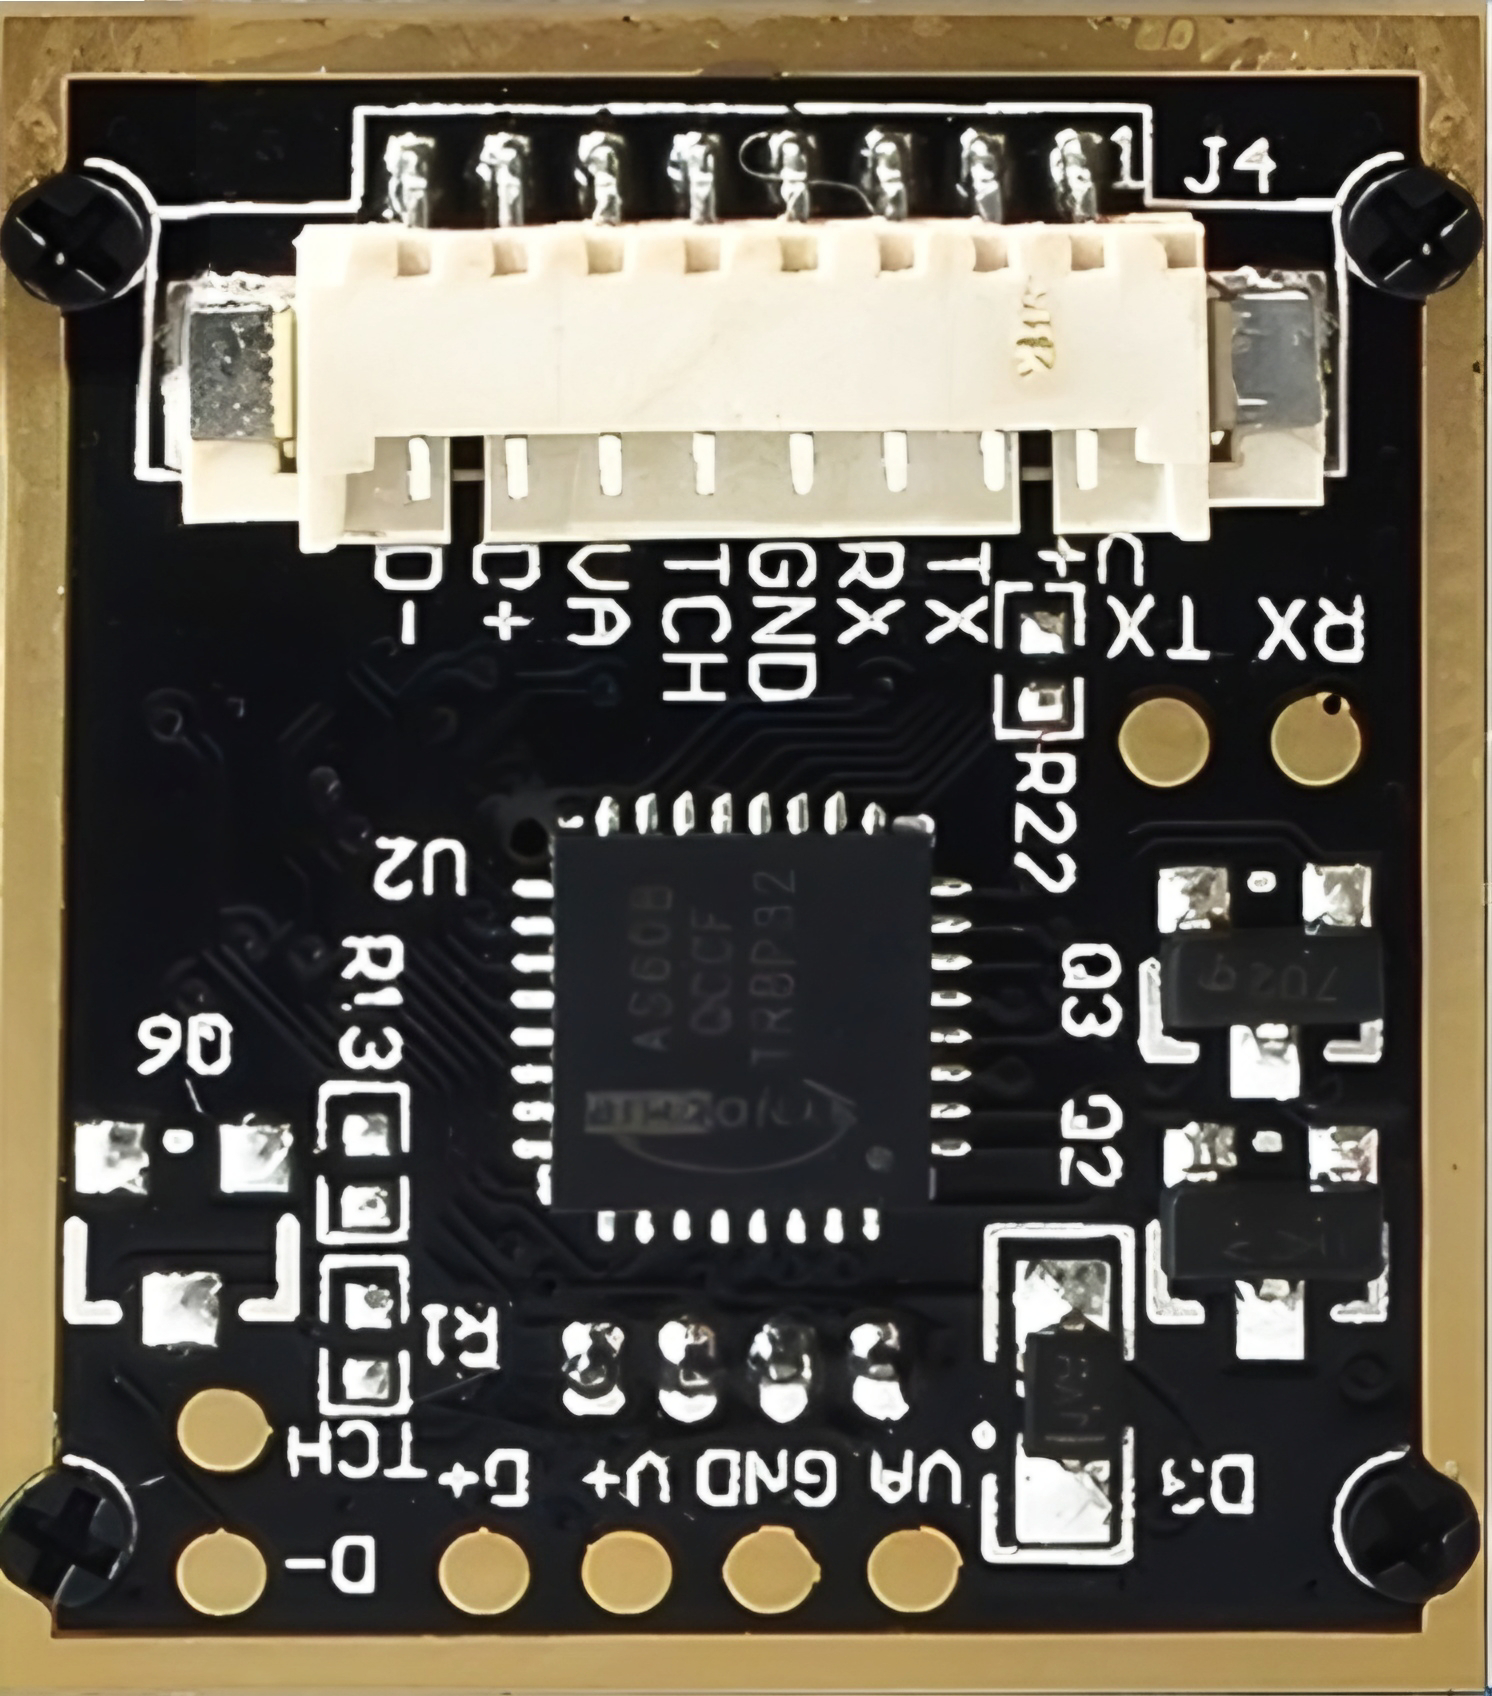
Pin Configuration and Descriptions
The fingerprint sensor typically has a 4-pin interface. Below is the pinout description:
| Pin | Name | Description |
|---|---|---|
| 1 | VCC | Power supply input (3.3V to 6V) |
| 2 | GND | Ground connection |
| 3 | TX | Transmit data (UART output) |
| 4 | RX | Receive data (UART input) |
Usage Instructions
How to Use the Component in a Circuit
- Power the Sensor: Connect the VCC pin to a 3.3V or 5V power source and the GND pin to the ground.
- Connect to a Microcontroller: Use the TX and RX pins to interface with a microcontroller (e.g., Arduino UNO) via UART communication. Ensure proper voltage levels for UART signals.
- Enroll Fingerprints: Use the provided library or commands to enroll fingerprints into the sensor's memory.
- Authenticate Fingerprints: Capture and compare fingerprints against the stored templates for authentication.
Important Considerations and Best Practices
- Power Supply: Ensure a stable power supply to avoid malfunctions during operation.
- UART Communication: Match the baud rate of the sensor with the microcontroller for proper communication.
- Placement: Keep the sensor clean and free from dust or smudges for accurate readings.
- Library Support: Use a compatible library (e.g., Adafruit Fingerprint Sensor Library) for easier integration with microcontrollers like Arduino.
Example: Connecting to an Arduino UNO
Below is an example of how to use the fingerprint sensor with an Arduino UNO:
Circuit Connections
- VCC: Connect to the 5V pin on the Arduino.
- GND: Connect to the GND pin on the Arduino.
- TX: Connect to pin 2 (Arduino RX via SoftwareSerial).
- RX: Connect to pin 3 (Arduino TX via SoftwareSerial).
Arduino Code Example
#include <Adafruit_Fingerprint.h>
#include <SoftwareSerial.h>

// Define the software serial pins for the fingerprint sensor
SoftwareSerial mySerial(2, 3); // RX, TX

// Initialize the fingerprint sensor
Adafruit_Fingerprint finger(&mySerial);

void setup() {
  Serial.begin(9600); // Start serial communication with the PC
  while (!Serial);    // Wait for the serial monitor to open
  delay(100);

  Serial.println("Initializing fingerprint sensor...");
  mySerial.begin(57600); // Start communication with the sensor
  if (finger.begin()) {
    Serial.println("Fingerprint sensor initialized successfully!");
  } else {
    Serial.println("Failed to initialize fingerprint sensor. Check connections.");
    while (1); // Halt the program
  }

  // Set the sensor to default baud rate
  finger.setPassword(0x00000000); // Default password
}

void loop() {
  Serial.println("Place your finger on the sensor...");
  int result = finger.getImage(); // Capture fingerprint image

  if (result == FINGERPRINT_OK) {
    Serial.println("Fingerprint image captured successfully!");
    result = finger.image2Tz(); // Convert image to template
    if (result == FINGERPRINT_OK) {
      Serial.println("Fingerprint template created!");
      // Add further processing here (e.g., matching or enrolling)
    } else {
      Serial.println("Failed to create template. Try again.");
    }
  } else {
    Serial.println("Failed to capture fingerprint. Ensure proper placement.");
  }

  delay(2000); // Wait before the next attempt
}
Troubleshooting and FAQs
Common Issues and Solutions
Sensor Not Initializing
- Cause: Incorrect wiring or baud rate mismatch.
- Solution: Double-check the connections and ensure the baud rate matches the sensor's default setting.
Fingerprint Not Detected
- Cause: Finger not placed properly or sensor surface is dirty.
- Solution: Clean the sensor surface and ensure the finger is placed flat and firmly.
Authentication Fails
- Cause: Fingerprint not enrolled or poor-quality image.
- Solution: Re-enroll the fingerprint with proper placement and ensure the sensor is clean.
Communication Errors
- Cause: Voltage level mismatch or loose connections.
- Solution: Use a level shifter if required and secure all connections.
FAQs
Q: Can the sensor store multiple fingerprints?
- A: Yes, most sensors can store between 200 and 1000 fingerprints, depending on the model.
Q: Can I use this sensor with a Raspberry Pi?
- A: Yes, the sensor can be used with a Raspberry Pi via UART or USB-to-serial adapters.
Q: How do I clean the sensor?
- A: Use a soft, lint-free cloth slightly dampened with water or isopropyl alcohol. Avoid abrasive materials.
Q: What happens if the sensor is exposed to high temperatures?
- A: Operating outside the specified temperature range (-20°C to 50°C) may damage the sensor or reduce its accuracy.