Cirkit Designer Logo
Cirkit Designer
Your all-in-one circuit design IDE
Home / 
Component Documentation

How to Use Water Level Sensor: Examples, Pinouts, and Specs

Image of Water Level Sensor
Cirkit Designer LogoDesign with Water Level Sensor in Cirkit Designer

Introduction

The Water Level Sensor is a device designed to detect and measure the level of water in a tank, reservoir, or other liquid-containing systems. It is commonly used in automation systems to control water pumps, prevent overflow, and monitor water levels in real-time. This sensor is ideal for applications such as home automation, agricultural irrigation systems, industrial water management, and smart appliances.

Explore Projects Built with Water Level Sensor

Use Cirkit Designer to design, explore, and prototype these projects online. Some projects support real-time simulation. Click "Open Project" to start designing instantly!
ESP32-S3 Based Water Level and Temperature Monitoring System with WiFi Connectivity
Image of Monitoraggio livello acqua: A project utilizing Water Level Sensor in a practical application
This circuit is designed to monitor the water level and temperature in a tank using an ESP32-S3 microcontroller. It employs a JSN-SR04T ultrasonic sensor to measure water level and a DS18B20 temperature sensor to monitor water temperature, with a 4.7k Ohm resistor for the DS18B20's signal line pull-up. The measured data is displayed on an I2C LCD and can be transmitted to a web service via WiFi.
Cirkit Designer LogoOpen Project in Cirkit Designer
Arduino-Controlled Ultrasonic Water Level Monitoring and Pump Management System
Image of auto water: A project utilizing Water Level Sensor in a practical application
This circuit is designed to monitor water levels using an HC-SR04 Ultrasonic Sensor and display the information on a 20x4 LCD with I2C interface, controlled by an Arduino UNO. When the water level falls below a predefined threshold, the Arduino activates a relay module, which in turn powers a mini diaphragm water pump to refill the tank. The system aims to maintain water levels within set boundaries, automating the process of water level management.
Cirkit Designer LogoOpen Project in Cirkit Designer
Arduino-Controlled Ultrasonic Water Level Indicator with LCD Display and Relay Switching
Image of water: A project utilizing Water Level Sensor in a practical application
This circuit is designed to monitor water levels using an HC-SR04 Ultrasonic Sensor and display the information on an LCD I2C Display. An Arduino UNO controls the sensor to measure distance, calculates the water level as a percentage, and toggles a relay to control a pump based on the water level and manual input from a pushbutton. The system allows for manual override of the pump operation and stores the set water level threshold in EEPROM for persistent control across power cycles.
Cirkit Designer LogoOpen Project in Cirkit Designer
Arduino UNO Bluetooth-Controlled Ultrasonic Water Level Detector
Image of Smartshoes: A project utilizing Water Level Sensor in a practical application
This circuit is designed to measure water levels and communicate the data wirelessly via Bluetooth. It uses an Arduino UNO as the main controller, interfaced with a water level sensor and an HC-SR04 ultrasonic sensor for level detection. The system is powered by a 9V battery through a rocker switch and can transmit sensor readings to a Bluetooth-connected device.
Cirkit Designer LogoOpen Project in Cirkit Designer

Explore Projects Built with Water Level Sensor

Use Cirkit Designer to design, explore, and prototype these projects online. Some projects support real-time simulation. Click "Open Project" to start designing instantly!
Image of Monitoraggio livello acqua: A project utilizing Water Level Sensor in a practical application
ESP32-S3 Based Water Level and Temperature Monitoring System with WiFi Connectivity
This circuit is designed to monitor the water level and temperature in a tank using an ESP32-S3 microcontroller. It employs a JSN-SR04T ultrasonic sensor to measure water level and a DS18B20 temperature sensor to monitor water temperature, with a 4.7k Ohm resistor for the DS18B20's signal line pull-up. The measured data is displayed on an I2C LCD and can be transmitted to a web service via WiFi.
Cirkit Designer LogoOpen Project in Cirkit Designer
Image of auto water: A project utilizing Water Level Sensor in a practical application
Arduino-Controlled Ultrasonic Water Level Monitoring and Pump Management System
This circuit is designed to monitor water levels using an HC-SR04 Ultrasonic Sensor and display the information on a 20x4 LCD with I2C interface, controlled by an Arduino UNO. When the water level falls below a predefined threshold, the Arduino activates a relay module, which in turn powers a mini diaphragm water pump to refill the tank. The system aims to maintain water levels within set boundaries, automating the process of water level management.
Cirkit Designer LogoOpen Project in Cirkit Designer
Image of water: A project utilizing Water Level Sensor in a practical application
Arduino-Controlled Ultrasonic Water Level Indicator with LCD Display and Relay Switching
This circuit is designed to monitor water levels using an HC-SR04 Ultrasonic Sensor and display the information on an LCD I2C Display. An Arduino UNO controls the sensor to measure distance, calculates the water level as a percentage, and toggles a relay to control a pump based on the water level and manual input from a pushbutton. The system allows for manual override of the pump operation and stores the set water level threshold in EEPROM for persistent control across power cycles.
Cirkit Designer LogoOpen Project in Cirkit Designer
Image of Smartshoes: A project utilizing Water Level Sensor in a practical application
Arduino UNO Bluetooth-Controlled Ultrasonic Water Level Detector
This circuit is designed to measure water levels and communicate the data wirelessly via Bluetooth. It uses an Arduino UNO as the main controller, interfaced with a water level sensor and an HC-SR04 ultrasonic sensor for level detection. The system is powered by a 9V battery through a rocker switch and can transmit sensor readings to a Bluetooth-connected device.
Cirkit Designer LogoOpen Project in Cirkit Designer

Technical Specifications

  • Operating Voltage: 3.3V to 5V DC
  • Output Type: Analog and Digital
  • Current Consumption: < 20mA
  • Detection Range: 0 to 100% water level (depending on sensor size)
  • Interface: 3-pin connection (VCC, GND, Signal)
  • Material: Corrosion-resistant PCB for water contact

Pin Configuration and Descriptions

Pin Name Description
VCC Power supply pin. Connect to 3.3V or 5V DC.
GND Ground pin. Connect to the ground of the power supply.
Signal Output pin. Provides an analog voltage proportional to the water level.

Usage Instructions

How to Use the Water Level Sensor in a Circuit

  1. Wiring the Sensor:

    • Connect the VCC pin of the sensor to the 5V pin of your microcontroller or power source.
    • Connect the GND pin to the ground of your circuit.
    • Connect the Signal pin to an analog input pin of your microcontroller (e.g., A0 on an Arduino UNO).
  2. Reading the Output:

    • The sensor outputs an analog voltage that corresponds to the water level. A higher water level results in a higher voltage output.
    • If the sensor includes a digital output (via an onboard comparator), you can adjust the sensitivity using the potentiometer on the sensor module.
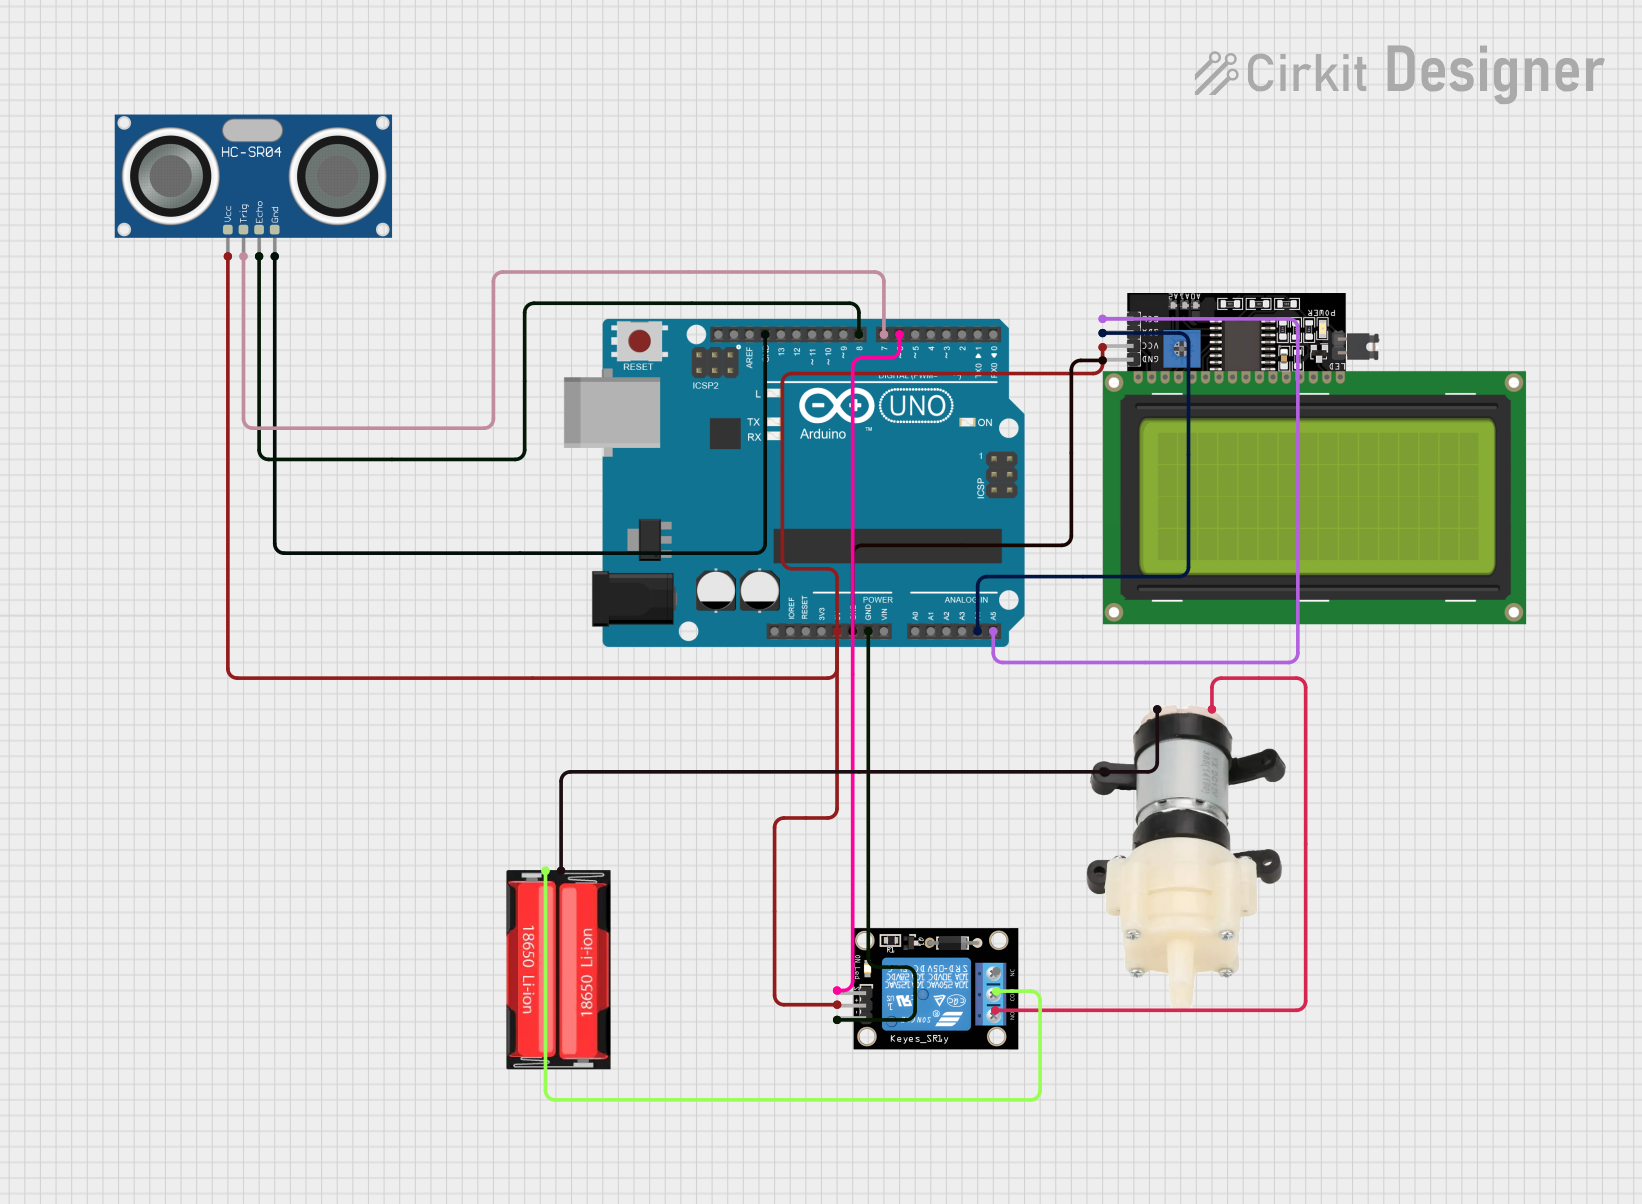
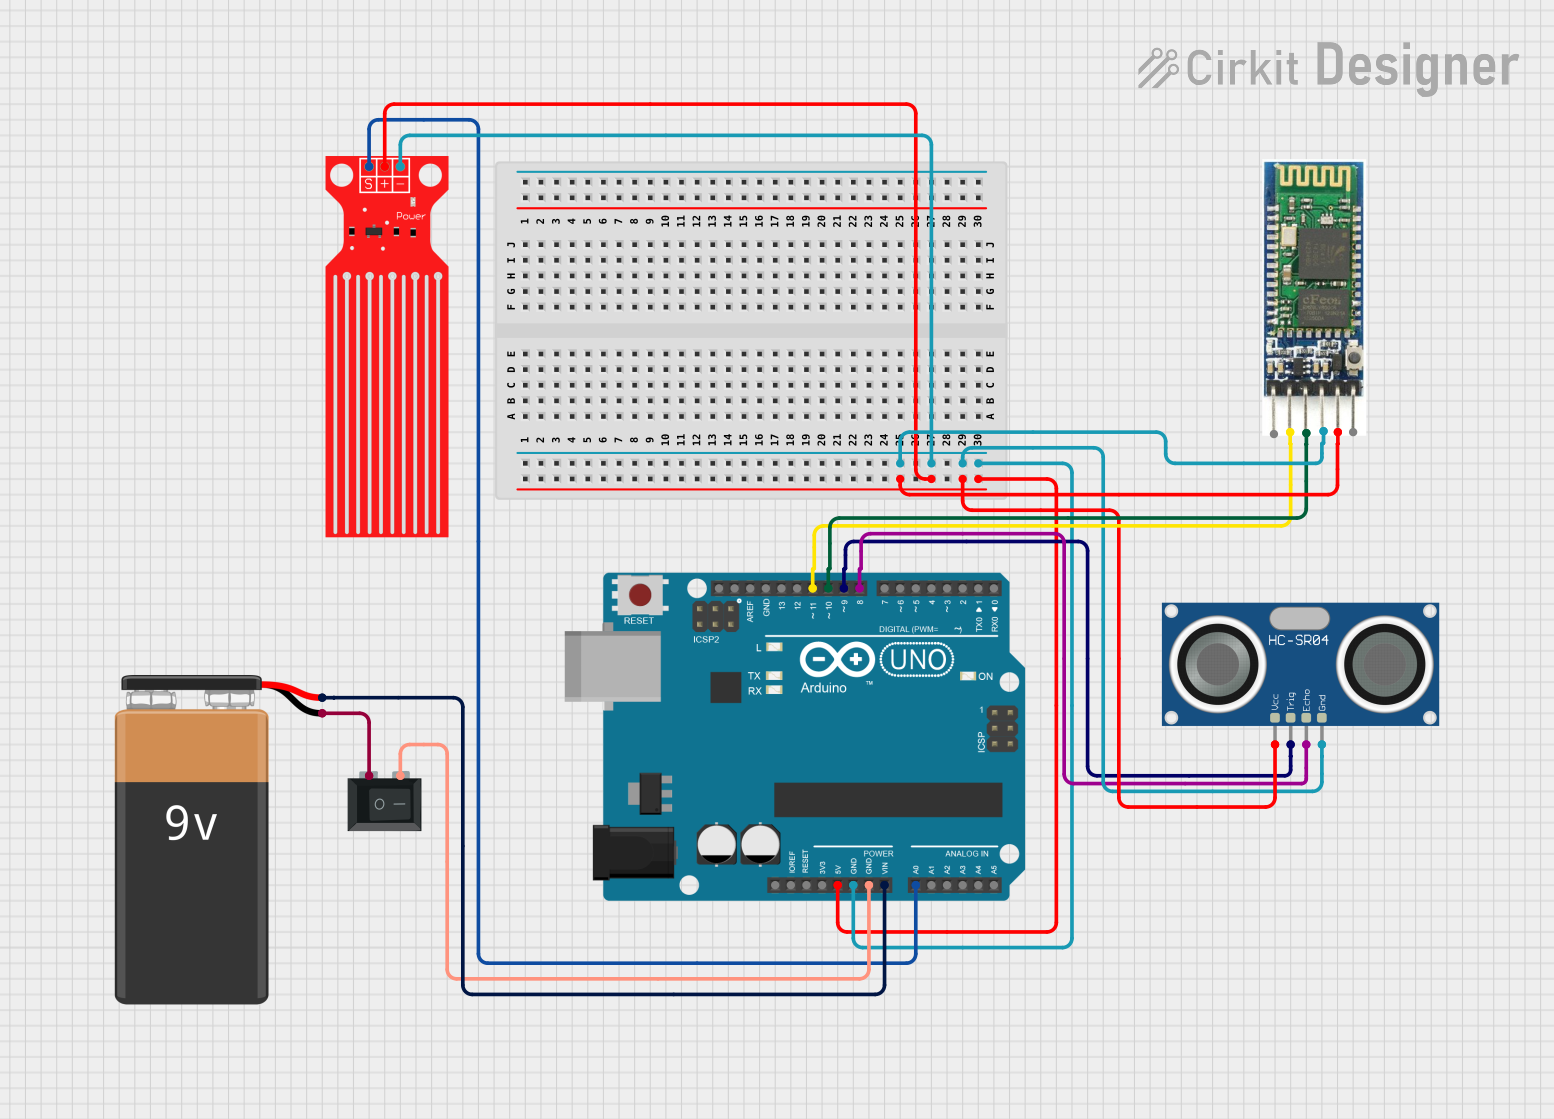
  3. Example Circuit:

    • Place the sensor in the water tank or reservoir, ensuring the sensing area is submerged.
    • Use jumper wires to connect the sensor to your microcontroller.

Important Considerations and Best Practices

  • Ensure the sensor is securely mounted to avoid movement or disconnection during operation.
  • Avoid exposing the sensor to corrosive liquids or extreme temperatures, as this may damage the PCB.
  • If using the sensor in a high-moisture environment, consider sealing the connections to prevent short circuits.
  • Regularly clean the sensor to remove any debris or mineral buildup that may affect accuracy.

Example Code for Arduino UNO

// Water Level Sensor Example Code for Arduino UNO
// This code reads the analog output of the water level sensor and displays
// the water level percentage on the Serial Monitor.

const int sensorPin = A0; // Connect the Signal pin of the sensor to A0
int sensorValue = 0;      // Variable to store the sensor reading
float waterLevel = 0.0;   // Variable to store the water level percentage

void setup() {
  Serial.begin(9600); // Initialize Serial communication at 9600 baud
}

void loop() {
  sensorValue = analogRead(sensorPin); // Read the analog value from the sensor
  // Map the sensor value (0-1023) to a percentage (0-100%)
  waterLevel = map(sensorValue, 0, 1023, 0, 100);

  // Print the water level percentage to the Serial Monitor
  Serial.print("Water Level: ");
  Serial.print(waterLevel);
  Serial.println("%");

  delay(1000); // Wait for 1 second before the next reading
}

Troubleshooting and FAQs

Common Issues and Solutions

  1. No Output or Incorrect Readings:

    • Cause: Loose or incorrect wiring.
    • Solution: Double-check all connections, ensuring the VCC, GND, and Signal pins are properly connected.
  2. Fluctuating or Unstable Readings:

    • Cause: Electrical noise or poor contact with water.
    • Solution: Use a capacitor (e.g., 0.1µF) between the Signal pin and GND to filter noise. Ensure the sensor is fully submerged in water.
  3. Sensor Not Responding:

    • Cause: Damaged sensor or incorrect power supply.
    • Solution: Verify the power supply voltage and inspect the sensor for physical damage.

FAQs

  • Q: Can this sensor detect liquids other than water?
    A: Yes, but the sensor is optimized for water. Performance may vary with other liquids.

  • Q: How do I increase the accuracy of the sensor?
    A: Ensure the sensor is clean and free of debris. Use an averaging algorithm in your code to smooth out readings.

  • Q: Is the sensor waterproof?
    A: The sensing area is water-resistant, but the connections and PCB should not be submerged. Use waterproofing measures if necessary.

This documentation provides a comprehensive guide to using the Water Level Sensor effectively in your projects.