Cirkit Designer
Your all-in-one circuit design IDE
Home /
Component Documentation
How to Use co: Examples, Pinouts, and Specs
Introduction
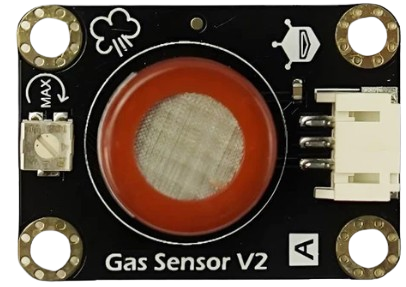
- A CO (Carbon Monoxide) sensor is an electronic device designed to detect the presence of carbon monoxide gas in the environment. Carbon monoxide is a colorless, odorless, and toxic gas, making its detection critical for safety in various applications.
- Common applications include:
- Home and industrial safety systems to detect CO leaks.
- Combustion analysis in engines and furnaces.
- Air quality monitoring in confined spaces.
- Integration with IoT systems for smart environmental monitoring.
Explore Projects Built with co
ESP32-Based CO Sensor with OLED Display
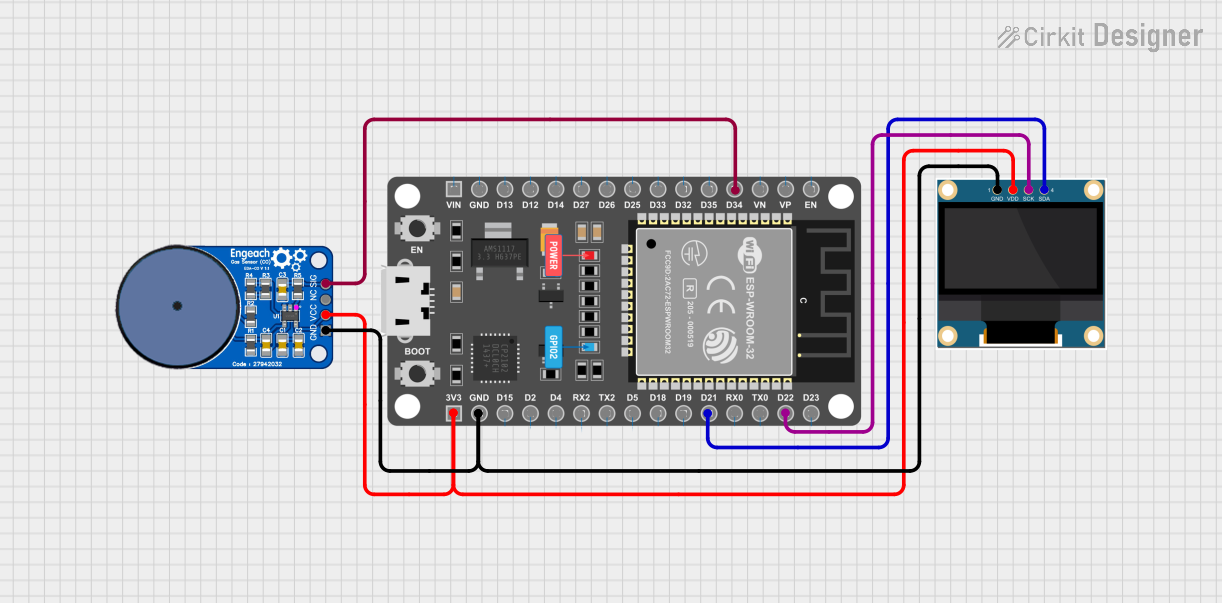
This circuit features an ESP32 microcontroller interfaced with a 0.96" OLED display and an ME2-CO carbon monoxide sensor. The ESP32 reads data from the CO sensor and displays the information on the OLED screen, providing a compact solution for monitoring CO levels.
Arduino and ESP8266 Based Health Monitoring System with Remote Data Logging
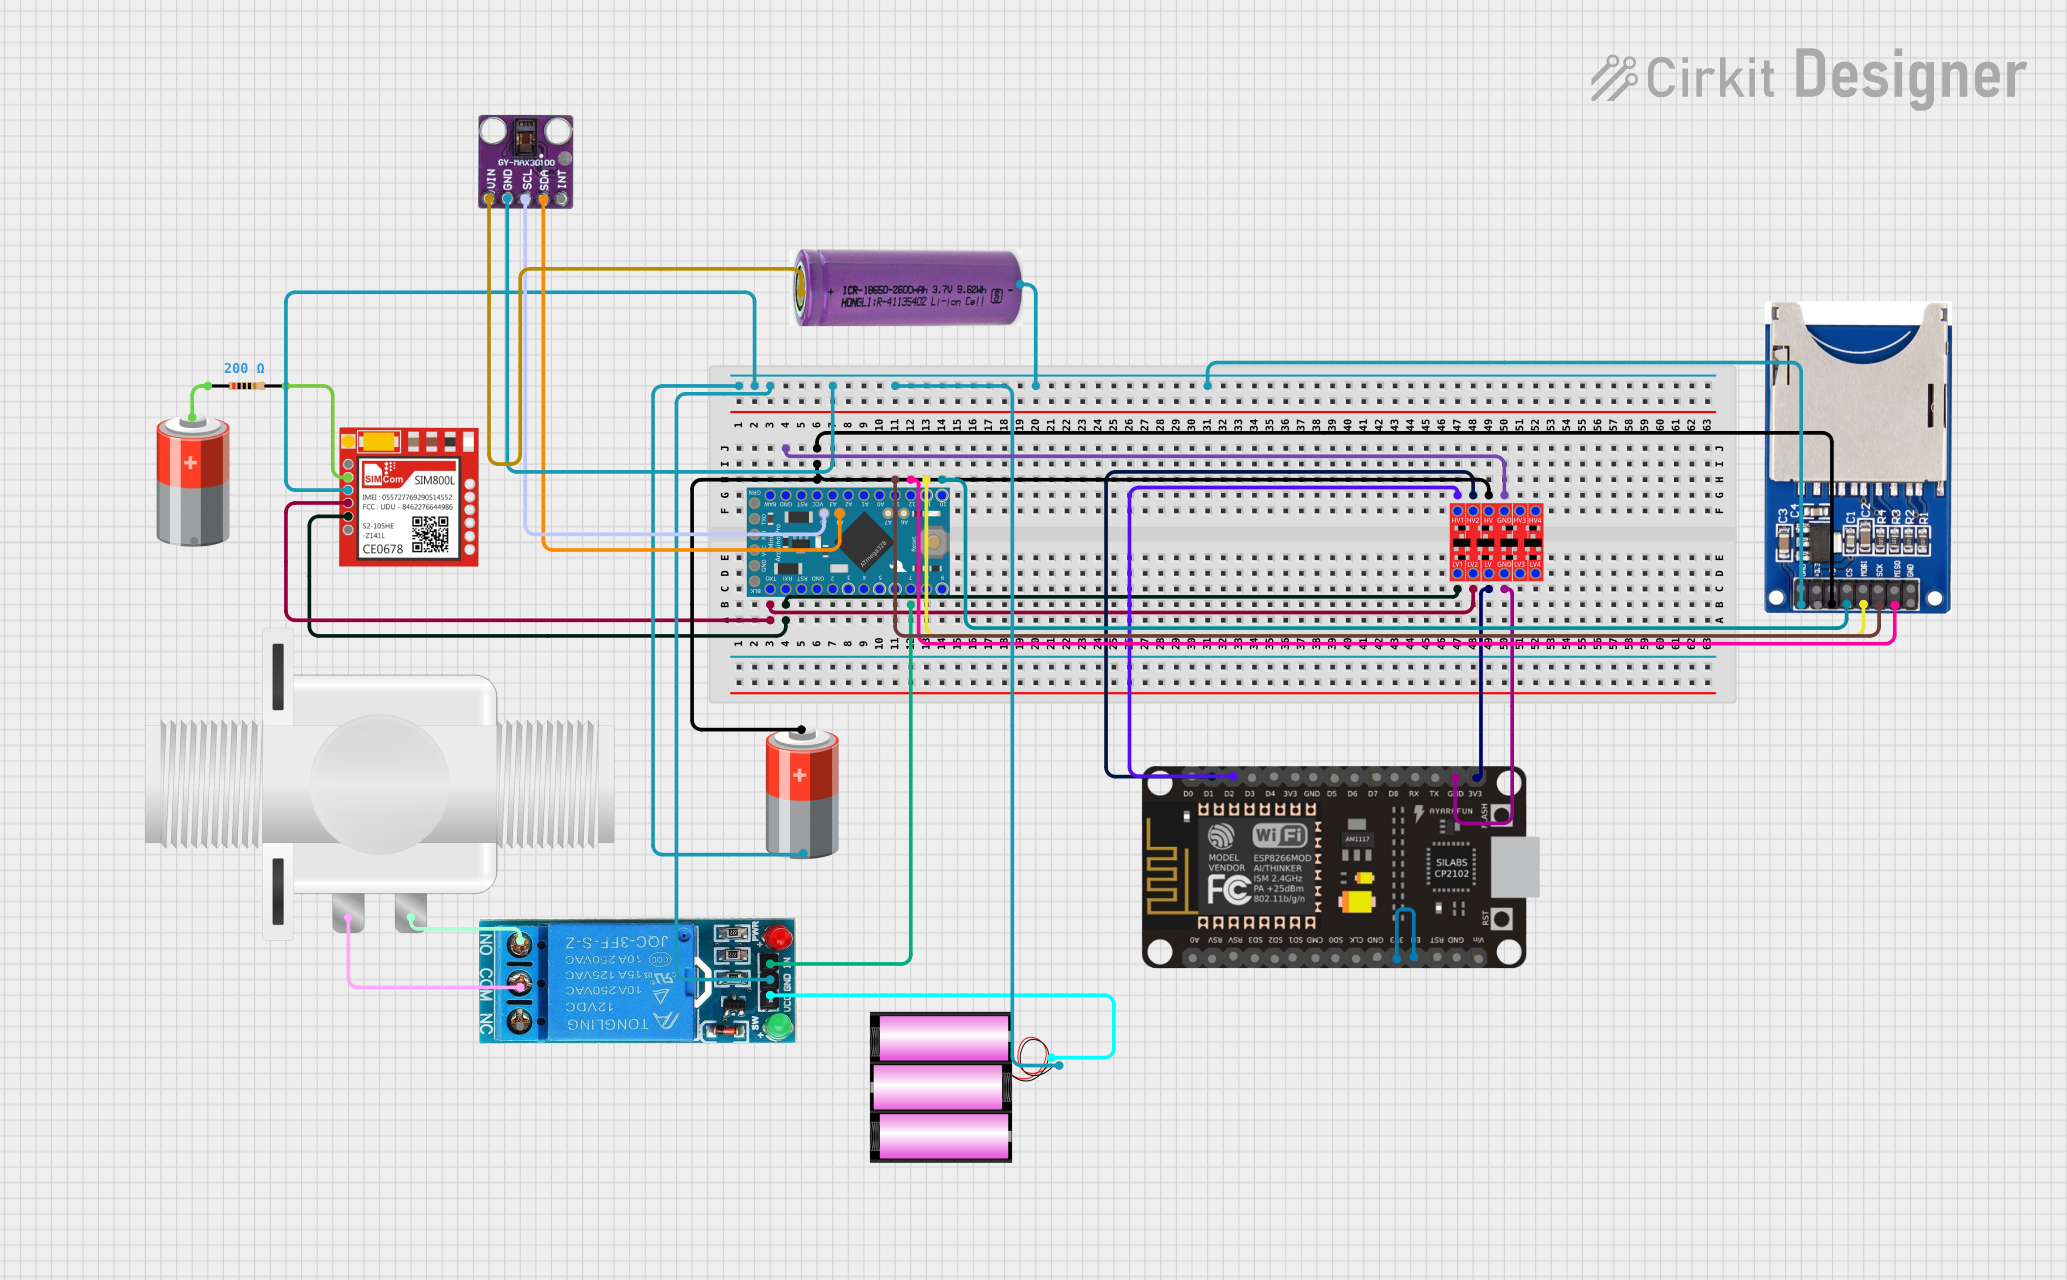
This circuit features an Arduino Pro Mini interfaced with a MAX30100 sensor for biometric tracking, an ESP8266 NodeMCU for WiFi connectivity, and a SIM800L module for GSM communication. It includes an SD card reader for data logging, a relay to control a solenoid valve, and a logic level converter to interface 3.3V and 5V components. The circuit is likely designed for remote health monitoring with the capability to log data, control a valve for fluid regulation, and communicate over the internet or GSM network.
Arduino UNO Based Air Quality and Fire Detection System with RGB Indicator and Alarm
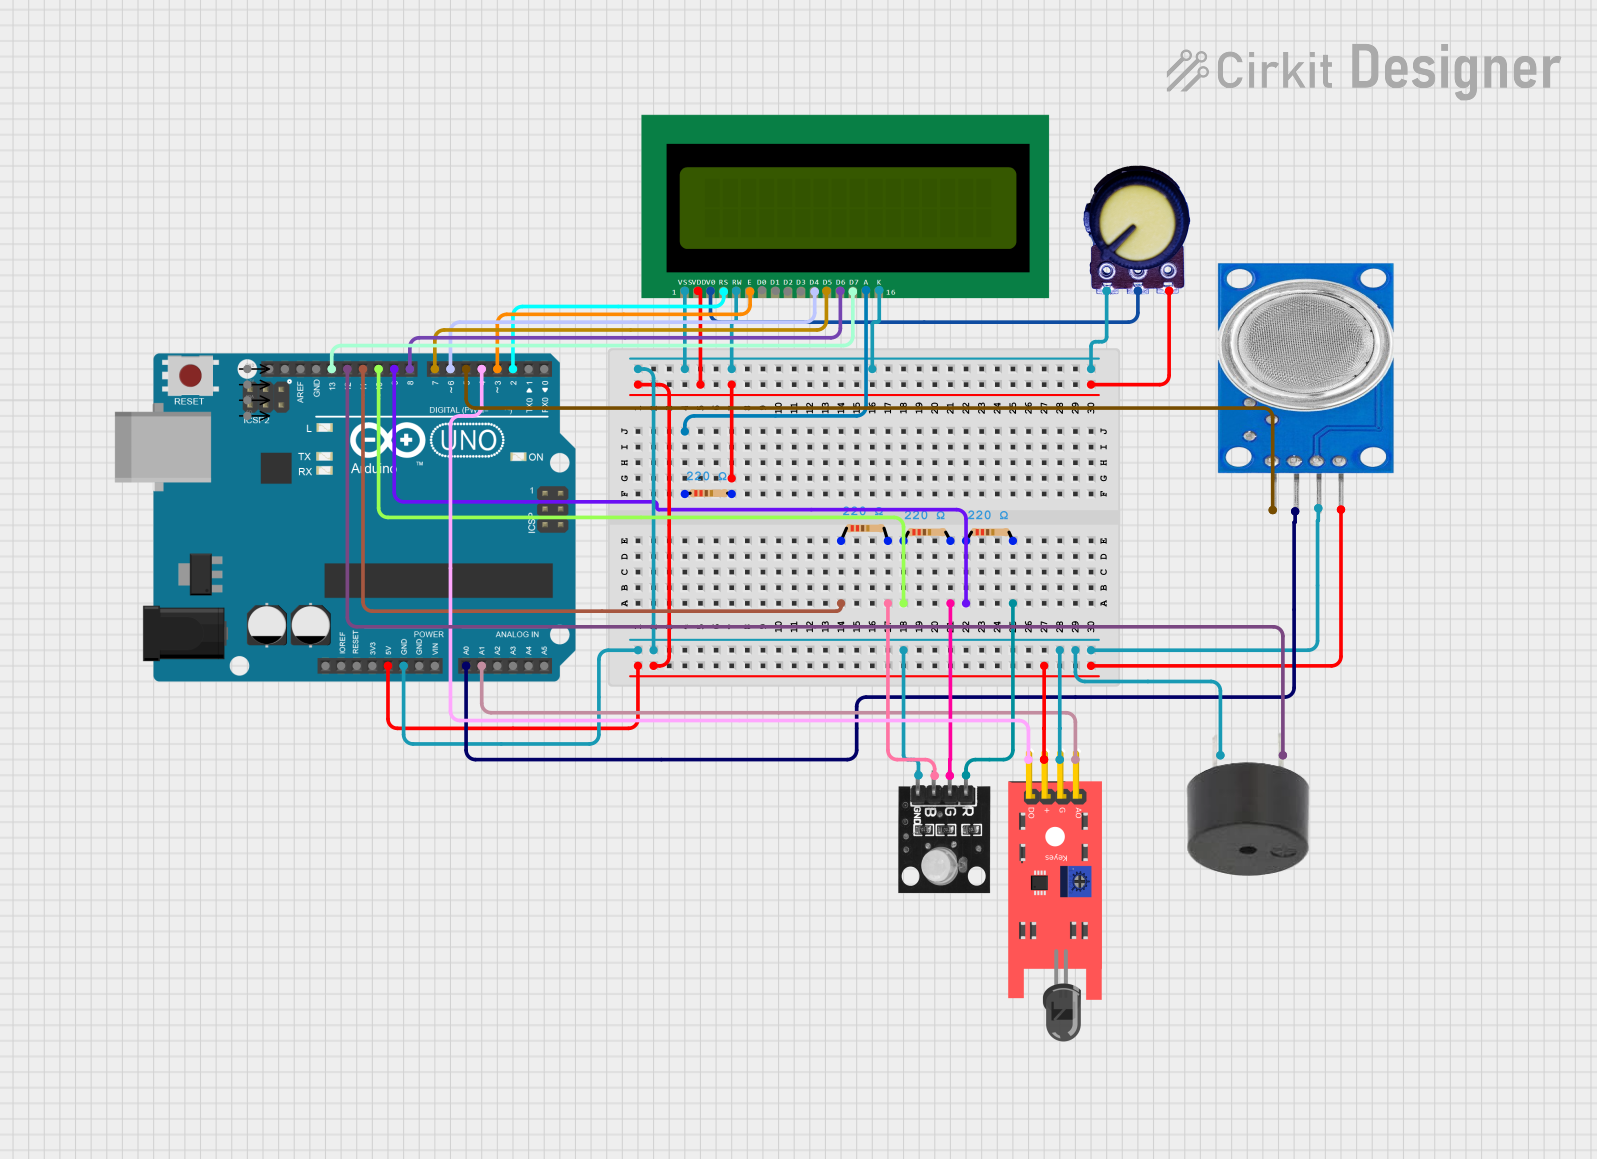
This circuit features an Arduino UNO microcontroller interfaced with an MQ135 gas sensor for CO2 detection, a KY-026 flame sensor for fire detection, a buzzer for alarms, and an RGB LED to visually indicate CO2 levels. A 16x2 LCD displays CO2 concentration and fire alerts, while potentiometers control LCD contrast. The embedded code manages sensor readings, activates the buzzer based on predefined thresholds, and adjusts the RGB LED color in response to CO2 levels.
Arduino and ESP32-CAM Based Temperature Monitoring and Timekeeping System
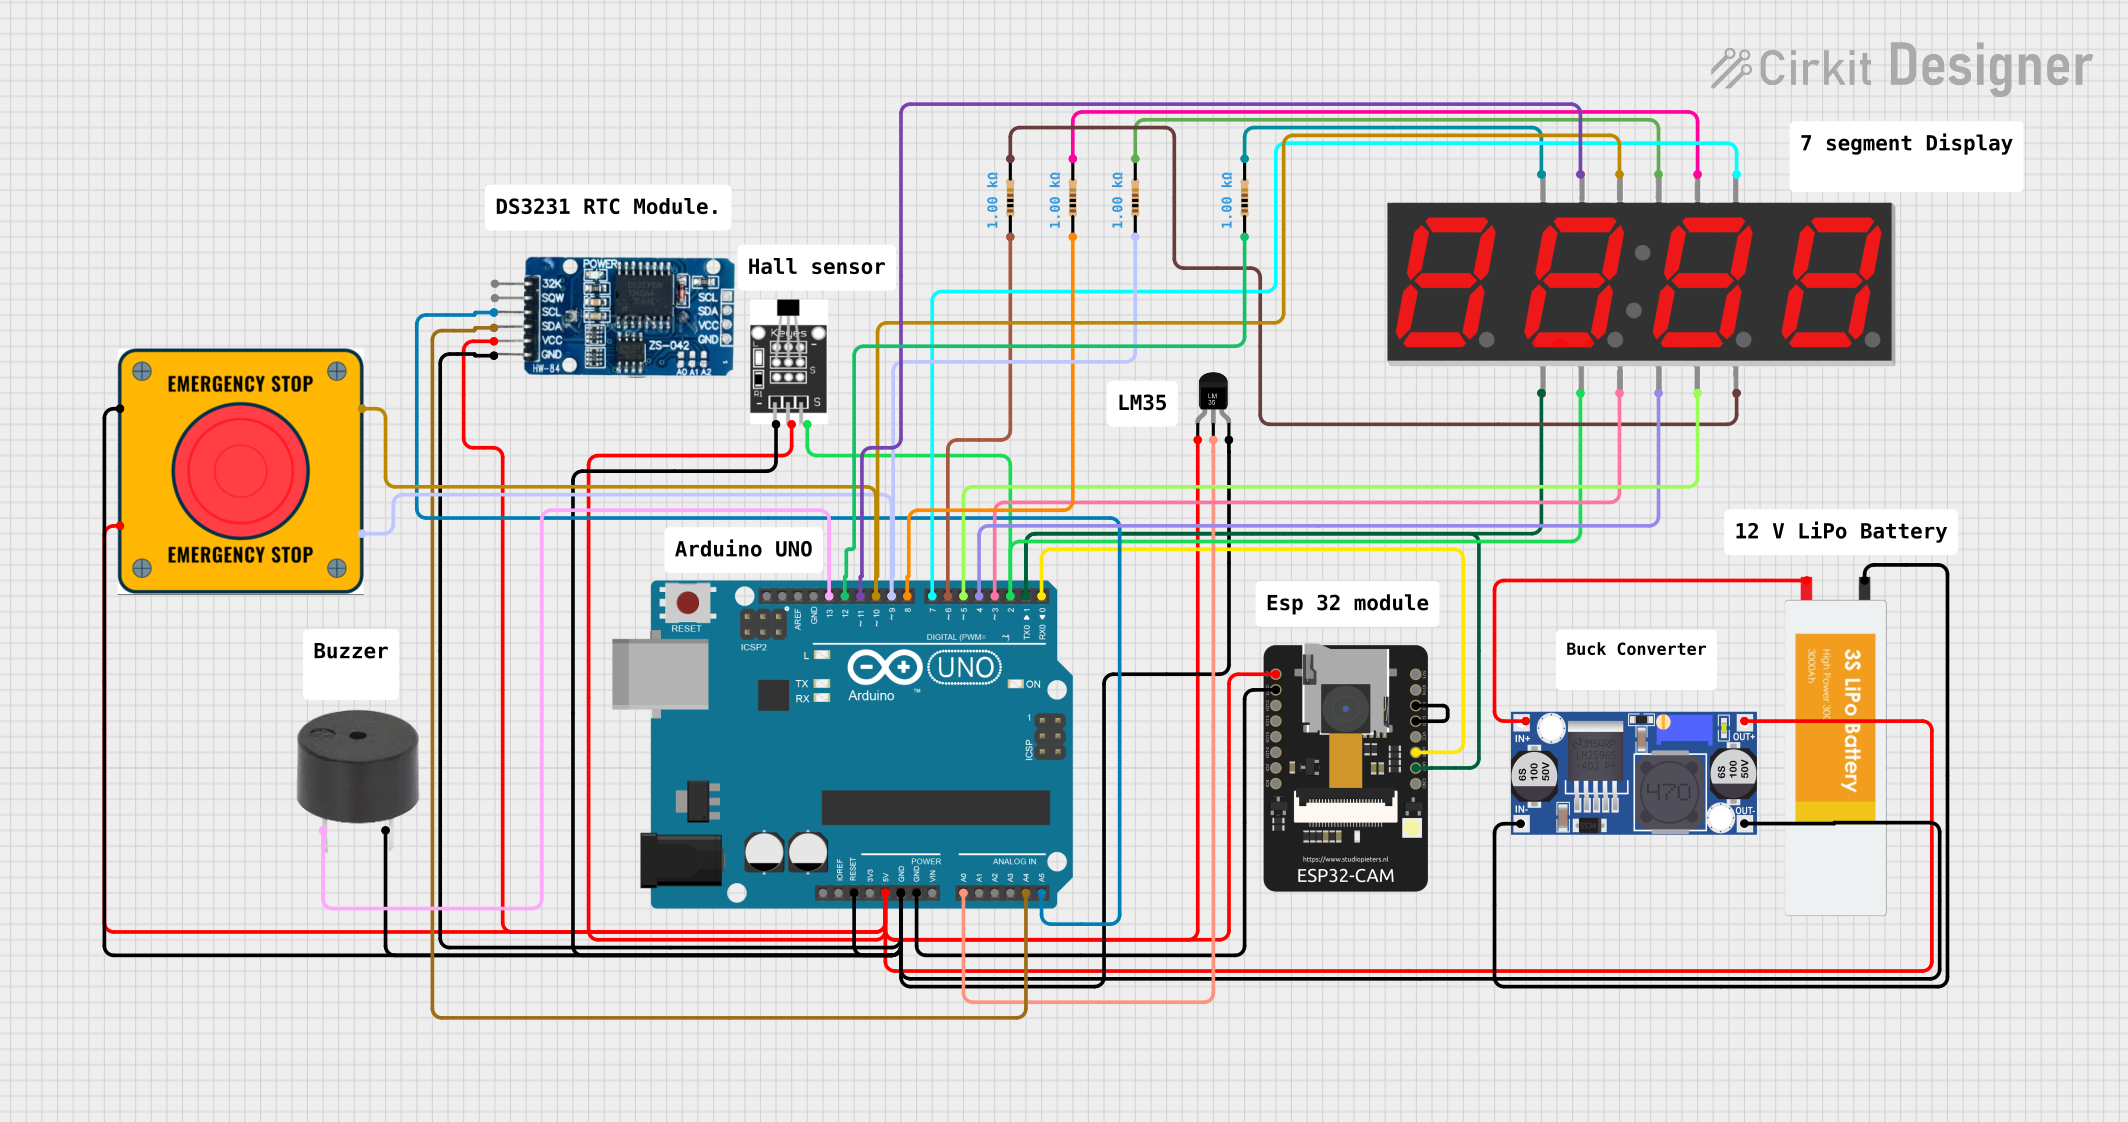
This is a multi-functional embedded system featuring temperature monitoring, timekeeping, visual display, potential Wi-Fi/camera capabilities, magnetic field detection, and power management with emergency stop functionality. It is designed around an Arduino UNO and an ESP32-CAM, with a buck converter for power regulation from a LiPo battery.
Explore Projects Built with co
ESP32-Based CO Sensor with OLED Display
This circuit features an ESP32 microcontroller interfaced with a 0.96" OLED display and an ME2-CO carbon monoxide sensor. The ESP32 reads data from the CO sensor and displays the information on the OLED screen, providing a compact solution for monitoring CO levels.
Arduino and ESP8266 Based Health Monitoring System with Remote Data Logging
This circuit features an Arduino Pro Mini interfaced with a MAX30100 sensor for biometric tracking, an ESP8266 NodeMCU for WiFi connectivity, and a SIM800L module for GSM communication. It includes an SD card reader for data logging, a relay to control a solenoid valve, and a logic level converter to interface 3.3V and 5V components. The circuit is likely designed for remote health monitoring with the capability to log data, control a valve for fluid regulation, and communicate over the internet or GSM network.
Arduino UNO Based Air Quality and Fire Detection System with RGB Indicator and Alarm
This circuit features an Arduino UNO microcontroller interfaced with an MQ135 gas sensor for CO2 detection, a KY-026 flame sensor for fire detection, a buzzer for alarms, and an RGB LED to visually indicate CO2 levels. A 16x2 LCD displays CO2 concentration and fire alerts, while potentiometers control LCD contrast. The embedded code manages sensor readings, activates the buzzer based on predefined thresholds, and adjusts the RGB LED color in response to CO2 levels.
Arduino and ESP32-CAM Based Temperature Monitoring and Timekeeping System
This is a multi-functional embedded system featuring temperature monitoring, timekeeping, visual display, potential Wi-Fi/camera capabilities, magnetic field detection, and power management with emergency stop functionality. It is designed around an Arduino UNO and an ESP32-CAM, with a buck converter for power regulation from a LiPo battery.
Technical Specifications
- Sensor Type: Electrochemical or semiconductor-based (varies by model).
- Operating Voltage: Typically 3.3V to 5V DC.
- Detection Range: 0–1000 ppm (parts per million) of CO.
- Accuracy: ±5% of the measured value.
- Response Time: <30 seconds.
- Operating Temperature: -10°C to 50°C.
- Humidity Range: 15% to 90% RH (non-condensing).
- Output Signal: Analog voltage or digital signal (depending on the sensor model).
Pin Configuration and Descriptions
Below is a typical pinout for a CO sensor module (e.g., MQ-7 or similar):
| Pin Name | Description |
|---|---|
| VCC | Power supply pin. Connect to 3.3V or 5V DC, depending on the sensor's requirements. |
| GND | Ground pin. Connect to the ground of the power supply. |
| AOUT | Analog output pin. Provides a voltage proportional to the CO concentration. |
| DOUT | Digital output pin. Outputs HIGH or LOW based on a preset threshold. |
Note: Always refer to the datasheet of your specific CO sensor model for exact pin configurations and specifications.
Usage Instructions
Wiring the Sensor:
- Connect the VCC pin to a 3.3V or 5V power source.
- Connect the GND pin to the ground of your circuit.
- If using the analog output, connect the AOUT pin to an analog input pin on your microcontroller.
- If using the digital output, connect the DOUT pin to a digital input pin on your microcontroller.
Calibrating the Sensor:
- Allow the sensor to preheat for 24–48 hours (for some models) before first use.
- Use a potentiometer (if available on the module) to adjust the threshold for the digital output.
Reading CO Levels with Arduino UNO: Below is an example code snippet for interfacing an MQ-7 CO sensor with an Arduino UNO:
const int analogPin = A0; // Analog pin connected to AOUT const int digitalPin = 2; // Digital pin connected to DOUT int analogValue = 0; // Variable to store analog reading void setup() { Serial.begin(9600); // Initialize serial communication pinMode(digitalPin, INPUT); // Set digital pin as input } void loop() { // Read the analog value from the sensor analogValue = analogRead(analogPin); // Print the analog value to the Serial Monitor Serial.print("Analog Value: "); Serial.println(analogValue); // Check the digital output status if (digitalRead(digitalPin) == HIGH) { Serial.println("CO Level HIGH - Above Threshold!"); } else { Serial.println("CO Level LOW - Below Threshold."); } delay(1000); // Wait for 1 second before the next reading }Note: The analog value will vary based on the CO concentration. Refer to the sensor's datasheet for the conversion formula to ppm.
Best Practices:
- Place the sensor in a well-ventilated area for accurate readings.
- Avoid exposing the sensor to high humidity or corrosive gases, as this may damage it.
- Periodically recalibrate the sensor to maintain accuracy.
Troubleshooting and FAQs
Common Issues
No Output or Incorrect Readings:
- Solution: Ensure the sensor is properly powered and connected. Check for loose wires or incorrect pin connections.
- Solution: Allow the sensor to preheat for the recommended duration before use.
Fluctuating Analog Values:
- Solution: Use a capacitor across the power supply pins to reduce noise.
- Solution: Ensure the sensor is not exposed to sudden temperature or humidity changes.
Digital Output Always HIGH or LOW:
- Solution: Adjust the potentiometer on the module to set an appropriate threshold.
- Solution: Verify that the CO concentration is within the sensor's detection range.
FAQs
Q: Can this sensor detect other gases?
- A: Some CO sensors (e.g., MQ-7) may respond to other gases like hydrogen or methane, but they are optimized for CO detection. Refer to the datasheet for cross-sensitivity details.
Q: How often should I calibrate the sensor?
- A: Calibration frequency depends on usage and environmental conditions. For critical applications, recalibrate every 6–12 months.
Q: Can I use this sensor outdoors?
- A: Most CO sensors are designed for indoor use. Outdoor use may require additional protection against moisture and temperature extremes.
Q: What is the lifespan of a CO sensor?
- A: The typical lifespan is 2–5 years, depending on the sensor type and operating conditions. Check the manufacturer's specifications for details.