How to Use MicroSD Card Socket: Examples, Pinouts, and Specs
Introduction
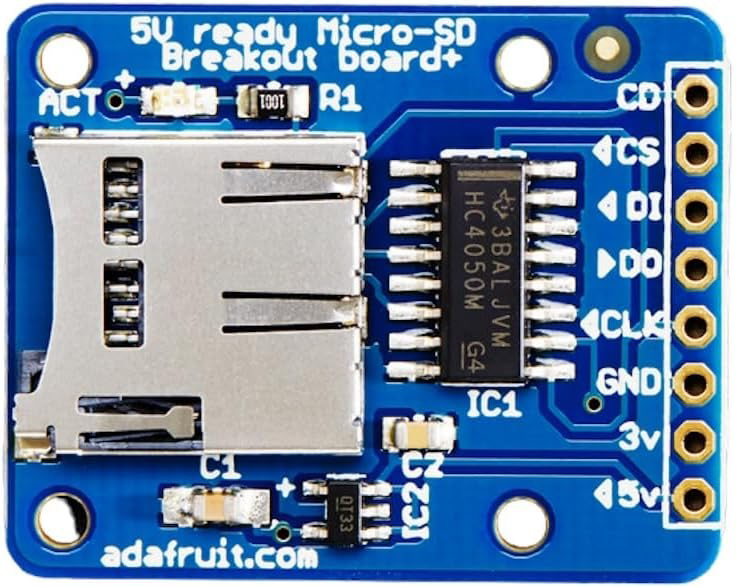
The Adafruit ADA254 is a MicroSD card socket designed to provide an easy and reliable connection interface for MicroSD memory cards. These sockets are commonly used in portable electronic devices such as smartphones, digital cameras, GPS units, and development boards like the Arduino UNO. They are ideal for applications that require data logging, file storage, or the transfer of data between devices.
Explore Projects Built with MicroSD Card Socket
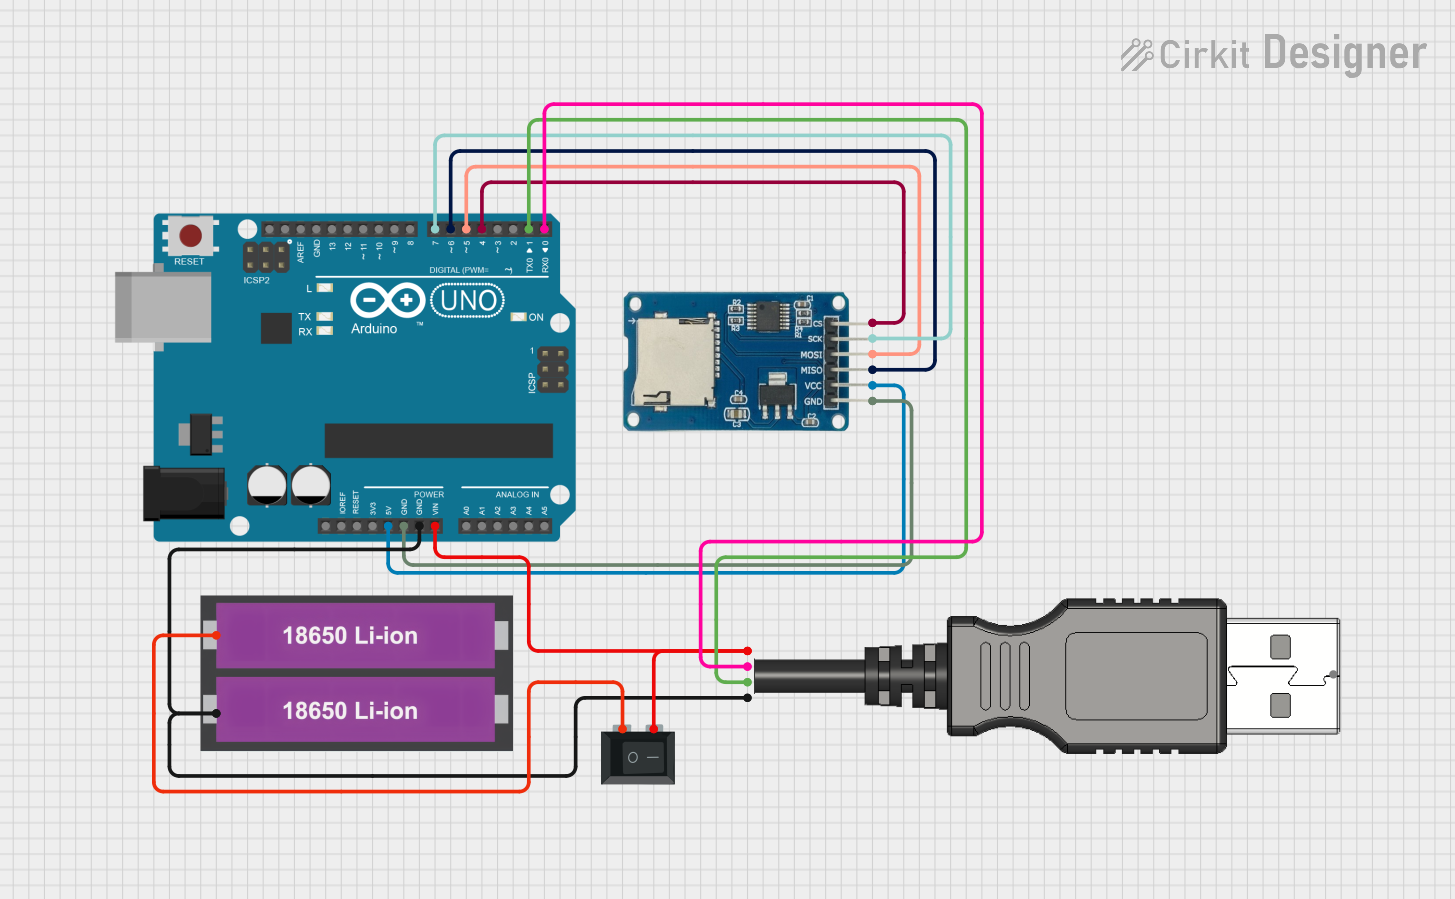
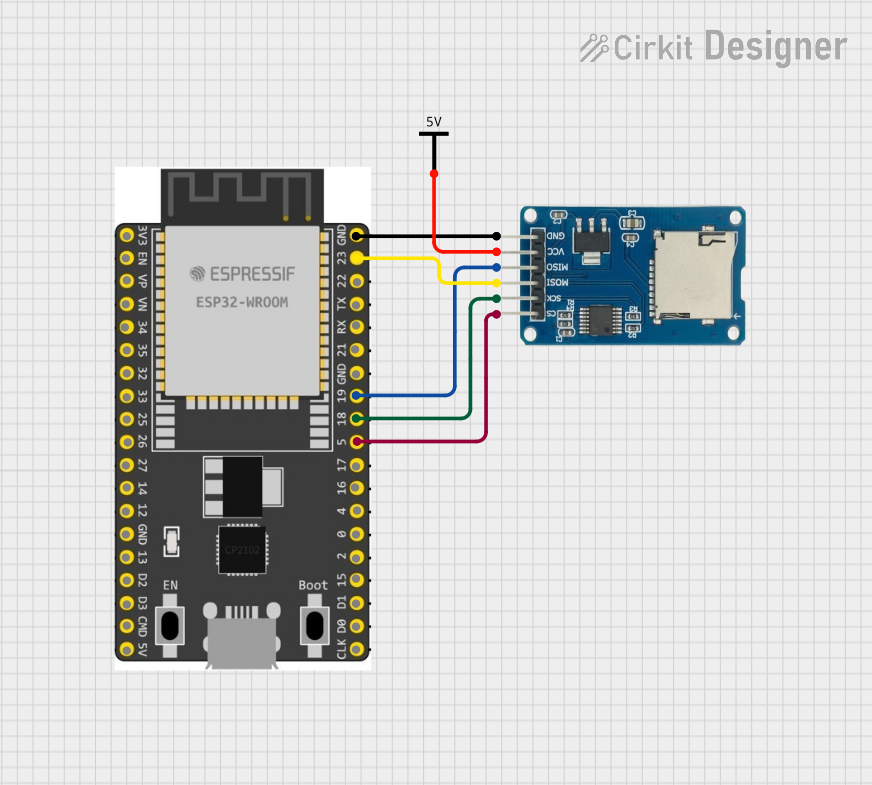

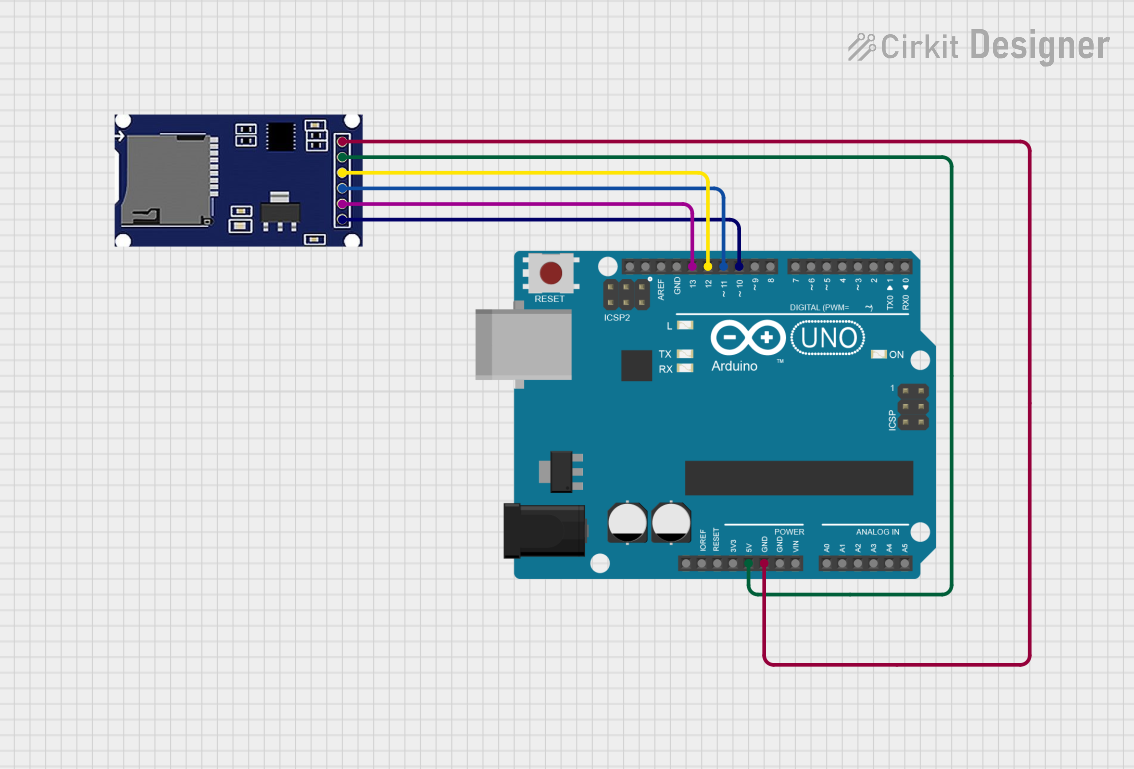
Explore Projects Built with MicroSD Card Socket
Technical Specifications
Key Technical Details
- Voltage Rating: 3.3V to 5V (logic level conversion may be required for 5V systems)
- Current Rating: Depends on the MicroSD card used (typically in the range of 100 mA during write operations)
- Interface: SPI (Serial Peripheral Interface)
- Card Format: MicroSD, MicroSDHC (High Capacity), MicroSDXC (eXtended Capacity) up to the supported size by the standard
- Dimensions: Typically small footprint, exact dimensions available on the manufacturer's datasheet
Pin Configuration and Descriptions
| Pin Number | Name | Description |
|---|---|---|
| 1 | CS | Chip Select, active low |
| 2 | DI | Data In (MOSI - Master Out Slave In) |
| 3 | VCC | Power supply (3.3V typically) |
| 4 | SCK | Serial Clock |
| 5 | DO | Data Out (MISO - Master In Slave Out) |
| 6 | GND | Ground |
| 7 | CD | Card Detect (optional, not present on all sockets) |
Usage Instructions
Integration into a Circuit
- Power Connections: Connect VCC to a 3.3V power supply and GND to the ground of your system.
- Data Connections: Interface the socket with a microcontroller or processor using the SPI bus. Connect the DI, DO, and SCK pins to the corresponding SPI pins on your microcontroller.
- Chip Select (CS): Connect the CS pin to a digital I/O pin on your microcontroller. This pin will be used to select the MicroSD card socket when communicating over the SPI bus.
- Card Detect (CD): If available, the CD pin can be connected to a digital I/O pin to detect the presence of a card in the socket.
Best Practices
- Use a level shifter if your microcontroller operates at 5V to avoid damaging the MicroSD card.
- Ensure that the SPI bus speed does not exceed the maximum speed supported by the MicroSD card.
- Format the MicroSD card to the appropriate file system (usually FAT32) before use.
- Implement proper error handling in your code to manage read/write errors.
Example Code for Arduino UNO
#include <SPI.h>
#include <SD.h>

// Pin configuration
const int chipSelect = 10; // CS pin connected to digital pin 10

void setup() {
  Serial.begin(9600);
  while (!Serial) {
    ; // Wait for serial port to connect.
  }

  Serial.print("Initializing SD card...");

  // Make sure that the default chip select pin is set to output, even if not used.
  pinMode(SS, OUTPUT);

  // See if the card is present and can be initialized:
  if (!SD.begin(chipSelect)) {
    Serial.println("Card failed, or not present");
    // Don't do anything more:
    return;
  }
  Serial.println("Card initialized.");
}

void loop() {
  // Write and read from the card here
}
Troubleshooting and FAQs
Common Issues
- Card not recognized: Ensure the card is inserted correctly and the pins are properly connected.
- Read/Write errors: Check the file system format of the MicroSD card and ensure it is compatible with the SD library.
- Intermittent connection: Inspect the socket for any physical damage or debris that may hinder the connection.
Solutions and Tips
- Power Supply: Use a stable 3.3V power supply to avoid power-related issues.
- Level Shifting: Always use a level shifter when interfacing with a 5V system.
- SPI Settings: Double-check the SPI settings in your code, including clock polarity and phase.
FAQs
Q: Can I use this socket with a 5V Arduino? A: Yes, but you must use a level shifter to convert the 5V signals to 3.3V to avoid damaging the MicroSD card.
Q: What is the maximum size of MicroSD card supported? A: The socket supports MicroSD, MicroSDHC, and MicroSDXC cards. The maximum supported size depends on the SD library and the file system used.
Q: How do I detect if a card is inserted? A: If the socket has a CD (Card Detect) pin, you can use it to detect the presence of a card. Otherwise, you can attempt to initialize the card with the SD library and check for errors.
Q: Can I hot-swap the MicroSD card while the system is powered? A: Hot-swapping is not recommended as it can cause data corruption. Always power down the system before inserting or removing the card.