
How to Use Adafruit MLX90640 Thermal Camera: Examples, Pinouts, and Specs
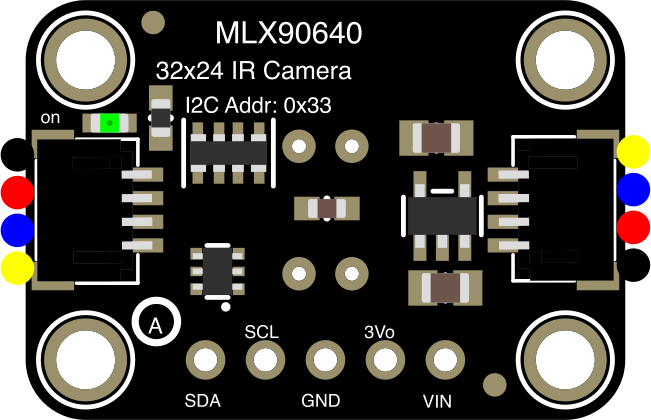
 Design with Adafruit MLX90640 Thermal Camera in Cirkit Designer
Introduction
The Adafruit MLX90640 Thermal Camera (Part ID: 4407) is a high-resolution thermal imaging sensor designed to detect temperature variations across a wide field of view. This compact and powerful sensor provides real-time thermal data, making it ideal for applications such as temperature monitoring, surveillance, robotics, and scientific research. With its ability to measure temperatures without physical contact, the MLX90640 is a versatile tool for both hobbyists and professionals.
Explore Projects Built with Adafruit MLX90640 Thermal Camera
 Open Project in Cirkit Designer
 Open Project in Cirkit Designer
 Open Project in Cirkit Designer
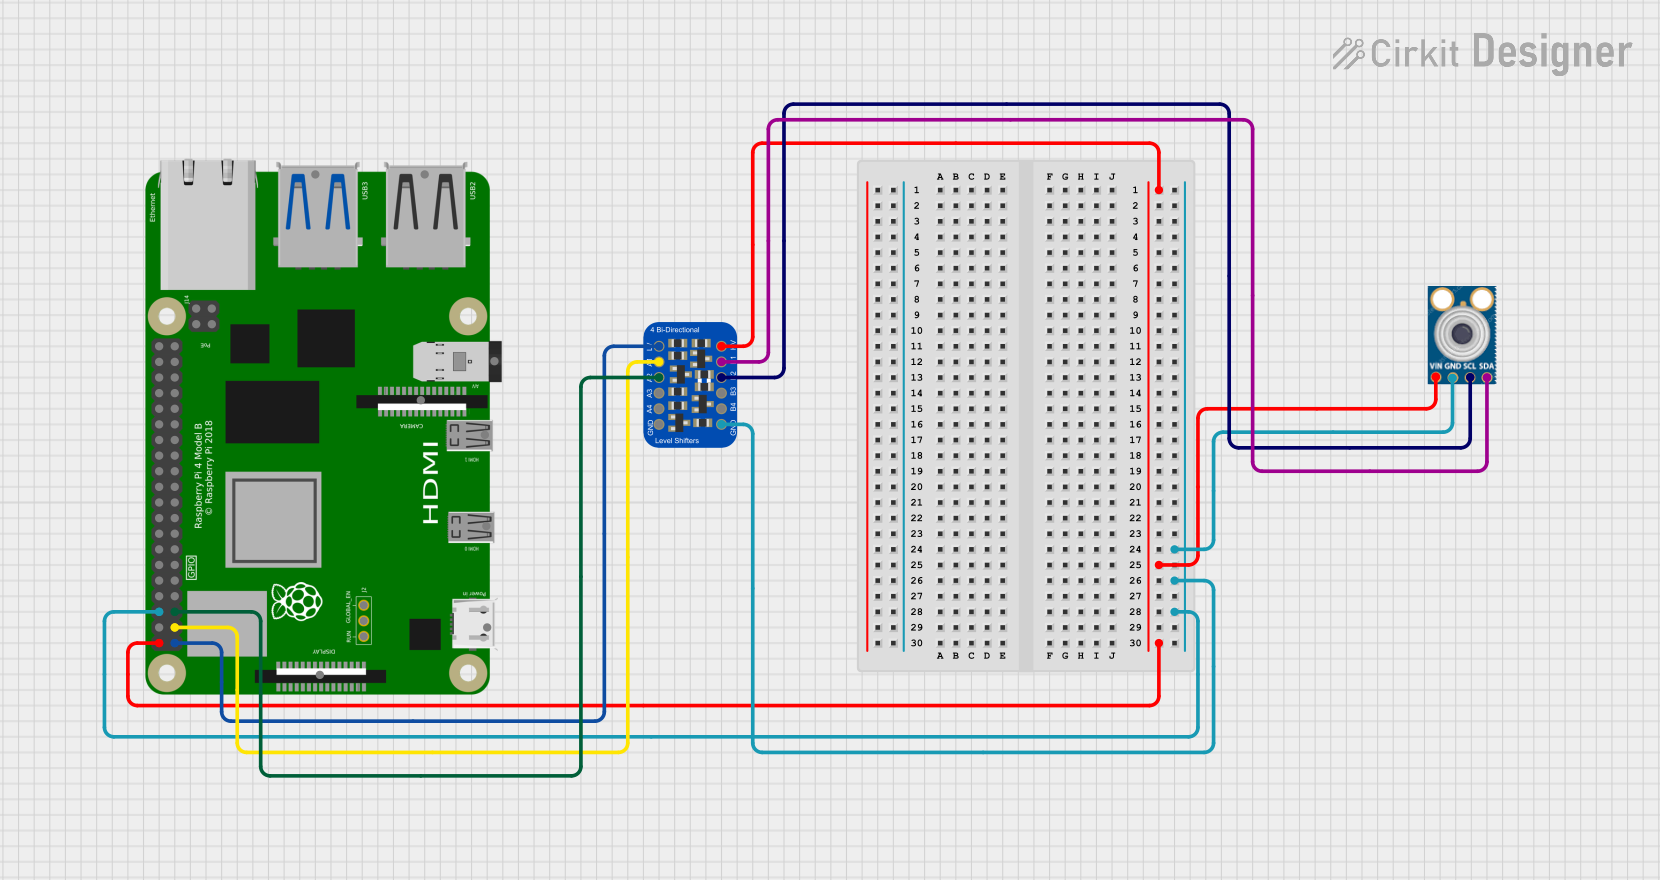 Open Project in Cirkit Designer
Explore Projects Built with Adafruit MLX90640 Thermal Camera
Open Project in Cirkit DesignerOpen Project in Cirkit DesignerOpen Project in Cirkit DesignerOpen Project in Cirkit DesignerCommon Applications
- Temperature Monitoring: Detecting heat sources and temperature changes in industrial or home environments.
- Surveillance: Identifying heat signatures for security and monitoring purposes.
- Robotics: Enabling robots to perceive thermal data for navigation or object detection.
- Scientific Research: Collecting thermal data for experiments and analysis.
- Healthcare: Non-contact temperature measurement for medical diagnostics.
Technical Specifications
The Adafruit MLX90640 Thermal Camera is based on the MLX90640 sensor, which features a 32x24 pixel array for thermal imaging. Below are the key technical details:
Key Specifications
| Parameter | Value |
|---|---|
| Sensor Resolution | 32x24 pixels |
| Field of View (FoV) | 55°x35° (Wide Angle) |
| Temperature Range | -40°C to 300°C (-40°F to 572°F) |
| Accuracy | ±1°C (typical, depending on conditions) |
| Refresh Rate | 0.5 Hz to 64 Hz (configurable) |
| Interface | I2C |
| Operating Voltage | 3.3V to 5V |
| Current Consumption | ~23mA |
| Dimensions | 25mm x 17mm x 2mm |
Pin Configuration
The Adafruit MLX90640 Thermal Camera breakout board has the following pin layout:
| Pin Name | Description |
|---|---|
| VIN | Power input (3.3V to 5V) |
| GND | Ground |
| SCL | I2C Clock Line |
| SDA | I2C Data Line |
| INT | Interrupt pin (optional, not required for basic use) |
Usage Instructions
Connecting the MLX90640 to an Arduino UNO
To use the Adafruit MLX90640 Thermal Camera with an Arduino UNO, follow these steps:
Wiring:
- Connect the
VINpin of the MLX90640 to the5Vpin on the Arduino. - Connect the
GNDpin of the MLX90640 to theGNDpin on the Arduino. - Connect the
SCLpin of the MLX90640 to theA5pin on the Arduino (I2C clock line). - Connect the
SDApin of the MLX90640 to theA4pin on the Arduino (I2C data line).
- Connect the
Install Required Libraries:
- Download and install the Adafruit MLX90640 library from the Arduino Library Manager.
- Also, install the Adafruit BusIO library, which is a dependency.
Upload Example Code: Use the following example code to read thermal data from the MLX90640:
#include <Adafruit_MLX90640.h>

Adafruit_MLX90640 mlx;

float frame[32 * 24]; // Array to store thermal data

void setup() {
  Serial.begin(115200);
  while (!Serial); // Wait for Serial Monitor to open

  if (!mlx.begin()) {
    Serial.println("Failed to find MLX90640 sensor!");
    while (1);
  }

  Serial.println("MLX90640 initialized.");
  mlx.setMode(MLX90640_CHESS); // Set to chess mode for better performance
  mlx.setRefreshRate(MLX90640_8_HZ); // Set refresh rate to 8Hz
}

void loop() {
  if (mlx.getFrame(frame)) {
    Serial.println("Thermal data:");
    for (int i = 0; i < 32 * 24; i++) {
      Serial.print(frame[i], 2); // Print temperature values
      Serial.print(" ");
      if ((i + 1) % 32 == 0) Serial.println(); // New line after each row
    }
    delay(125); // Delay to match refresh rate
  } else {
    Serial.println("Failed to read frame.");
  }
}
View Data:
- Open the Serial Monitor in the Arduino IDE.
- Set the baud rate to
115200. - Observe the thermal data being printed as a grid of temperature values.
Important Considerations
- Power Supply: Ensure the MLX90640 is powered with a stable voltage between 3.3V and 5V.
- I2C Address: The default I2C address of the MLX90640 is
0x33. If you have multiple I2C devices, ensure there are no address conflicts. - Refresh Rate: Higher refresh rates provide smoother data but increase power consumption.
- Field of View: The sensor has a wide field of view (55°x35°). Ensure it is positioned correctly to capture the desired area.
Troubleshooting and FAQs
Common Issues
"Failed to find MLX90640 sensor!" error:
- Ensure the wiring is correct and the sensor is properly connected.
- Verify that the I2C address matches the default (
0x33) or the configured address.
No data or incorrect readings:
- Check the power supply voltage and ensure it is within the specified range.
- Verify that the I2C clock speed is set to 400kHz in your Arduino settings.
Thermal data appears noisy or inaccurate:
- Ensure the sensor is not exposed to direct sunlight or reflective surfaces.
- Allow the sensor to stabilize for a few seconds after powering on.
FAQs
Q: Can the MLX90640 detect objects through glass?
A: No, the MLX90640 cannot detect thermal signatures through glass, as glass blocks infrared radiation.
Q: What is the maximum distance for accurate temperature readings?
A: The MLX90640 can detect temperature variations at distances of several meters, but accuracy decreases with distance.
Q: Can I use the MLX90640 with a Raspberry Pi?
A: Yes, the MLX90640 is compatible with Raspberry Pi. Adafruit provides Python libraries for easy integration.
Q: How do I change the I2C address of the MLX90640?
A: The I2C address is fixed at 0x33 and cannot be changed. Use an I2C multiplexer if multiple devices with the same address are needed.
By following this documentation, you can effectively integrate and utilize the Adafruit MLX90640 Thermal Camera in your projects.