How to Use soil sensor : Examples, Pinouts, and Specs
Introduction
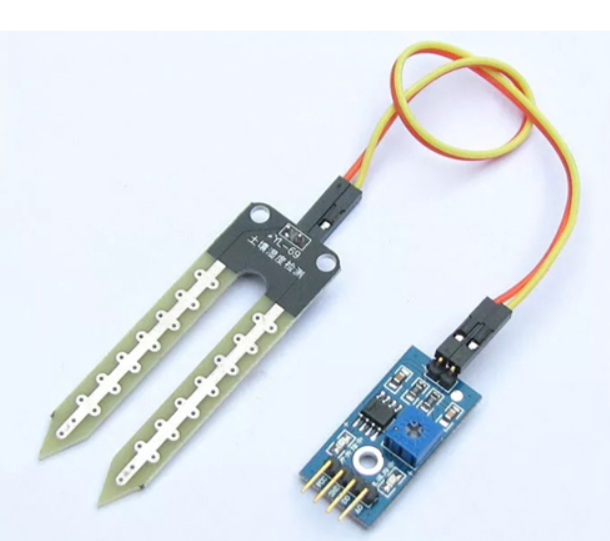
The Micron YL-69 Soil Sensor is a device designed to measure the moisture level in soil. It is commonly used in agricultural and gardening applications to ensure optimal watering. By providing real-time data on soil moisture, the YL-69 helps in maintaining the health of plants and optimizing water usage.
Explore Projects Built with soil sensor
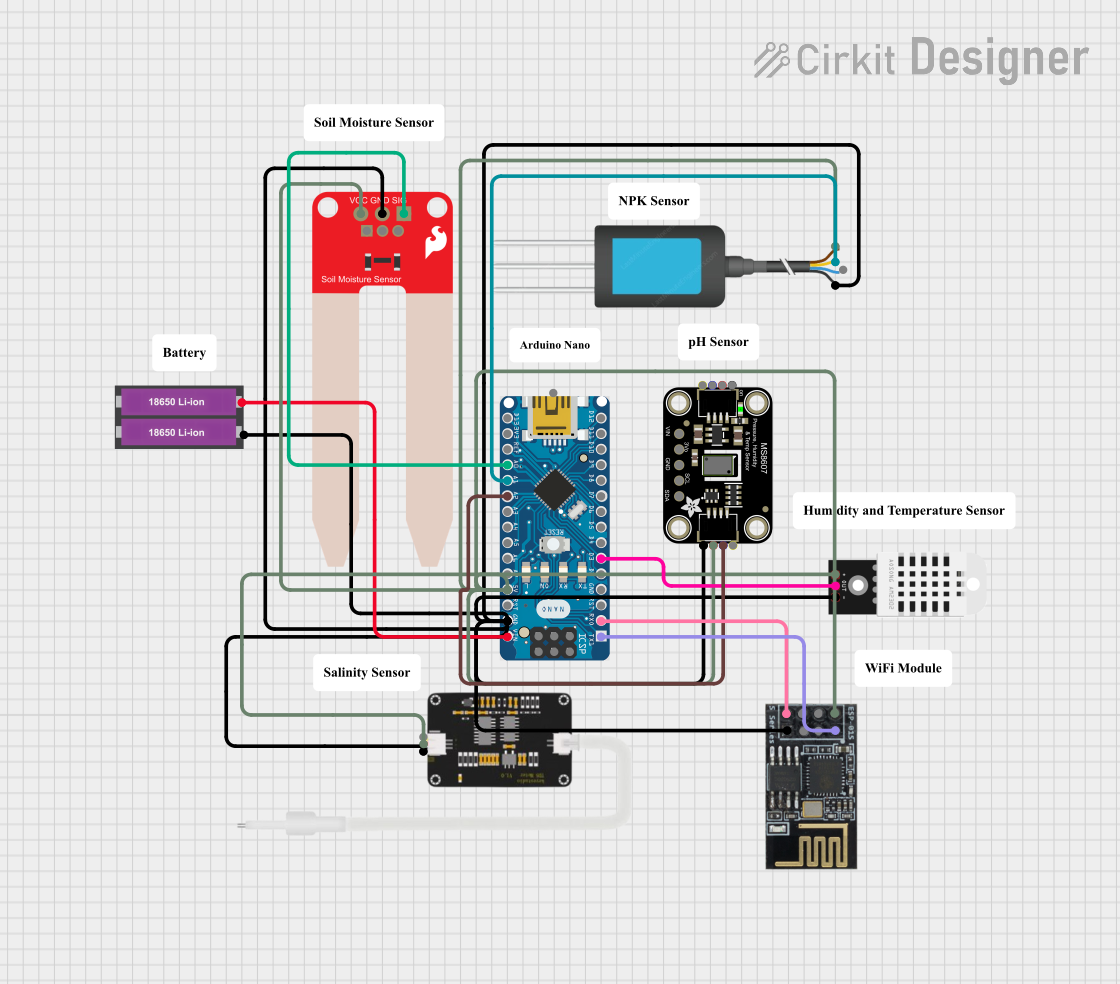
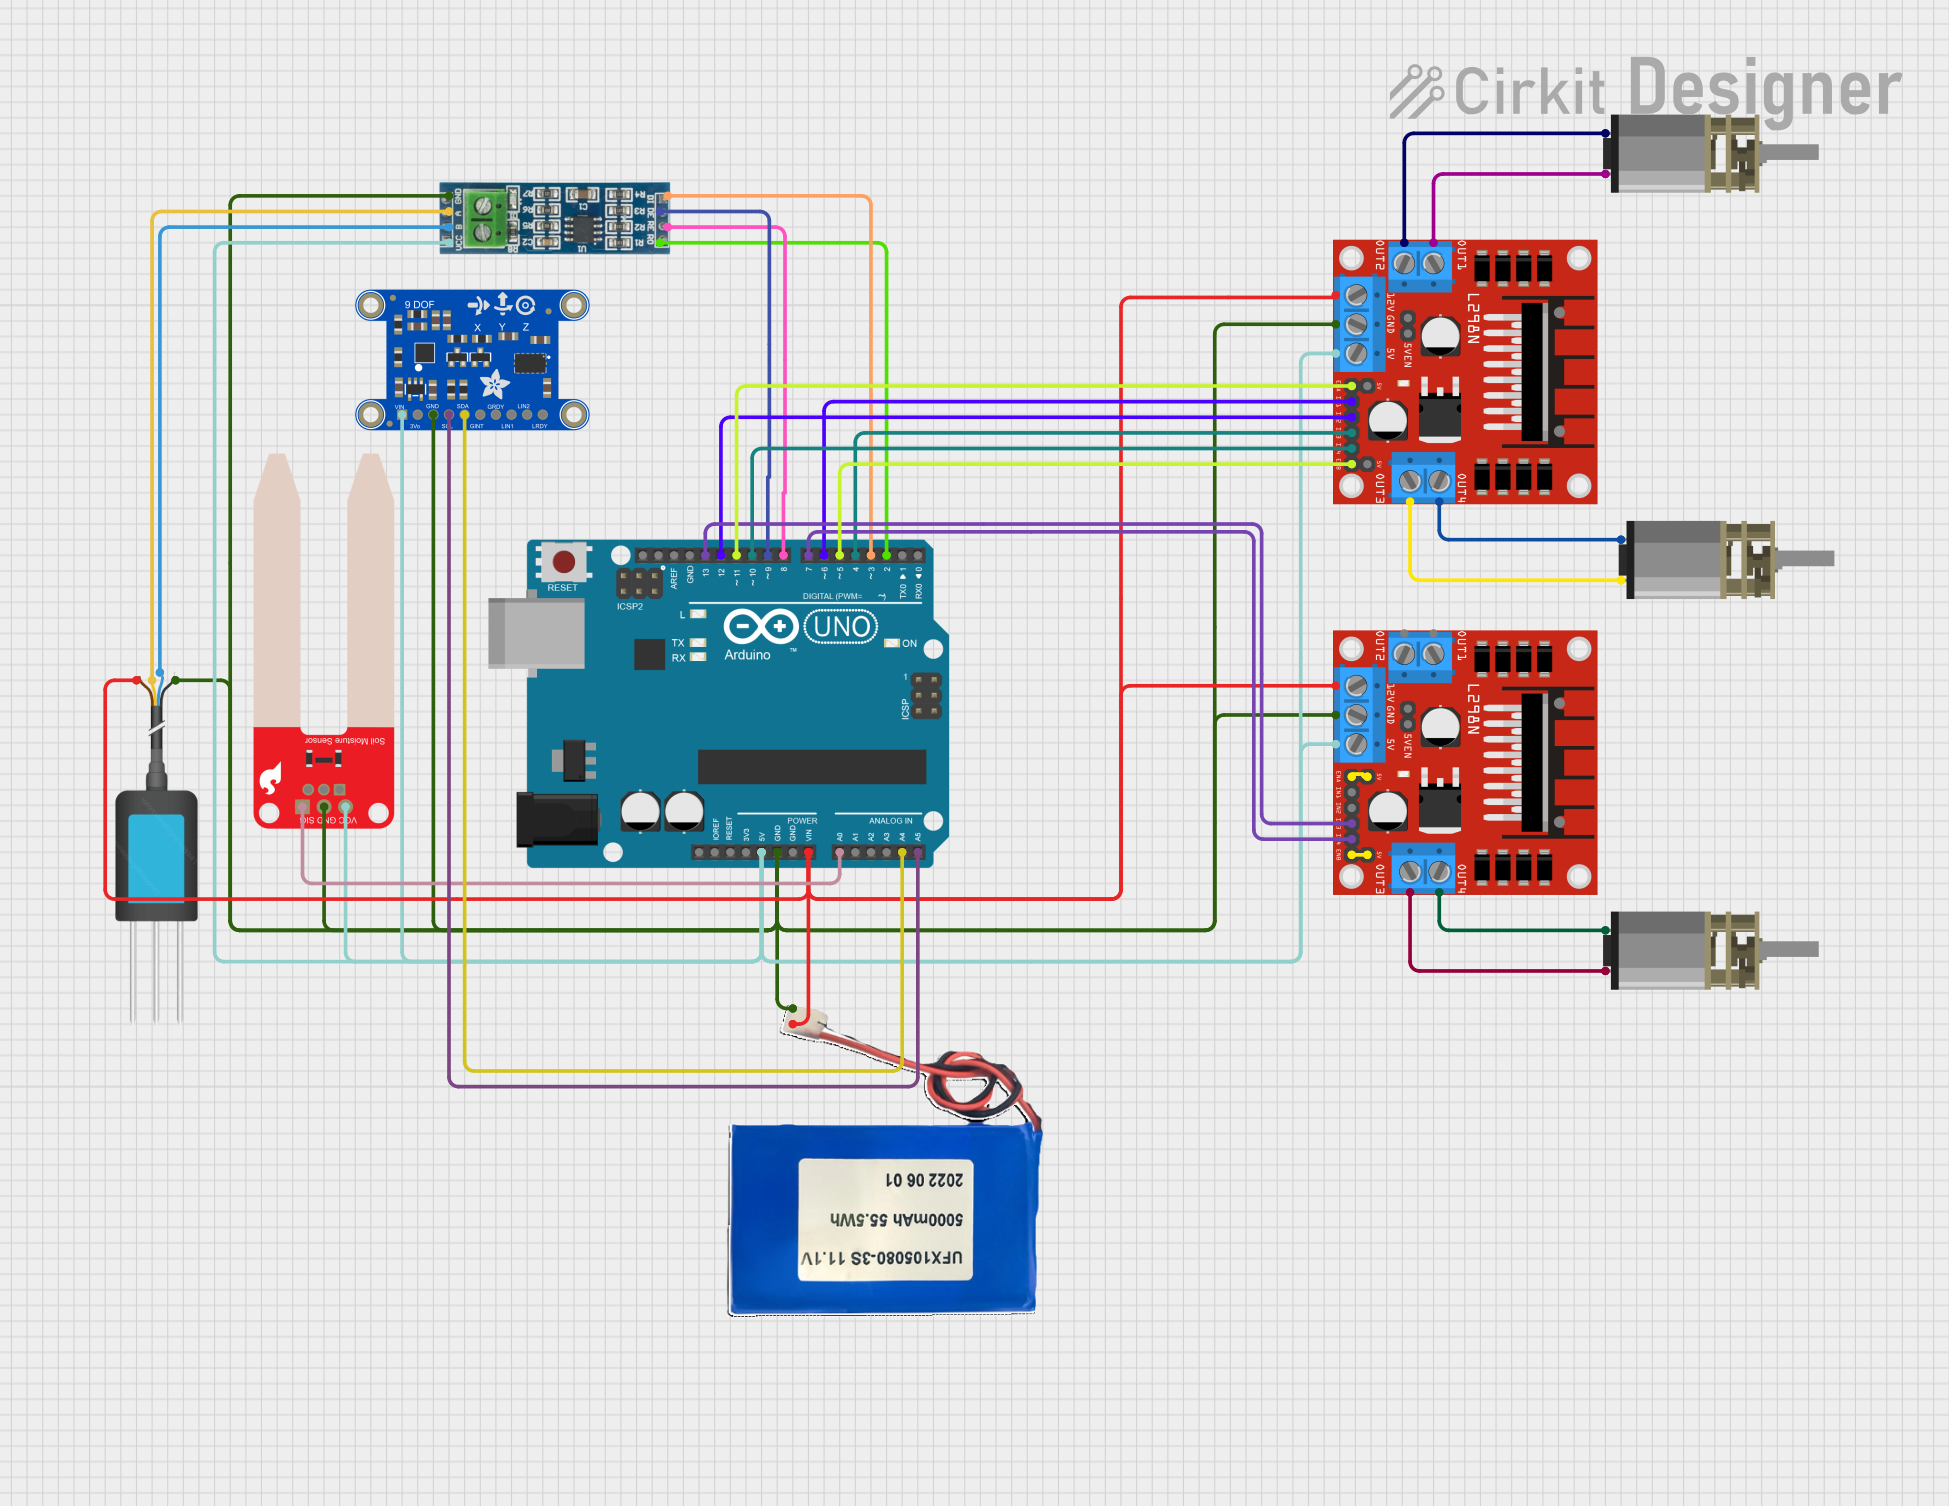
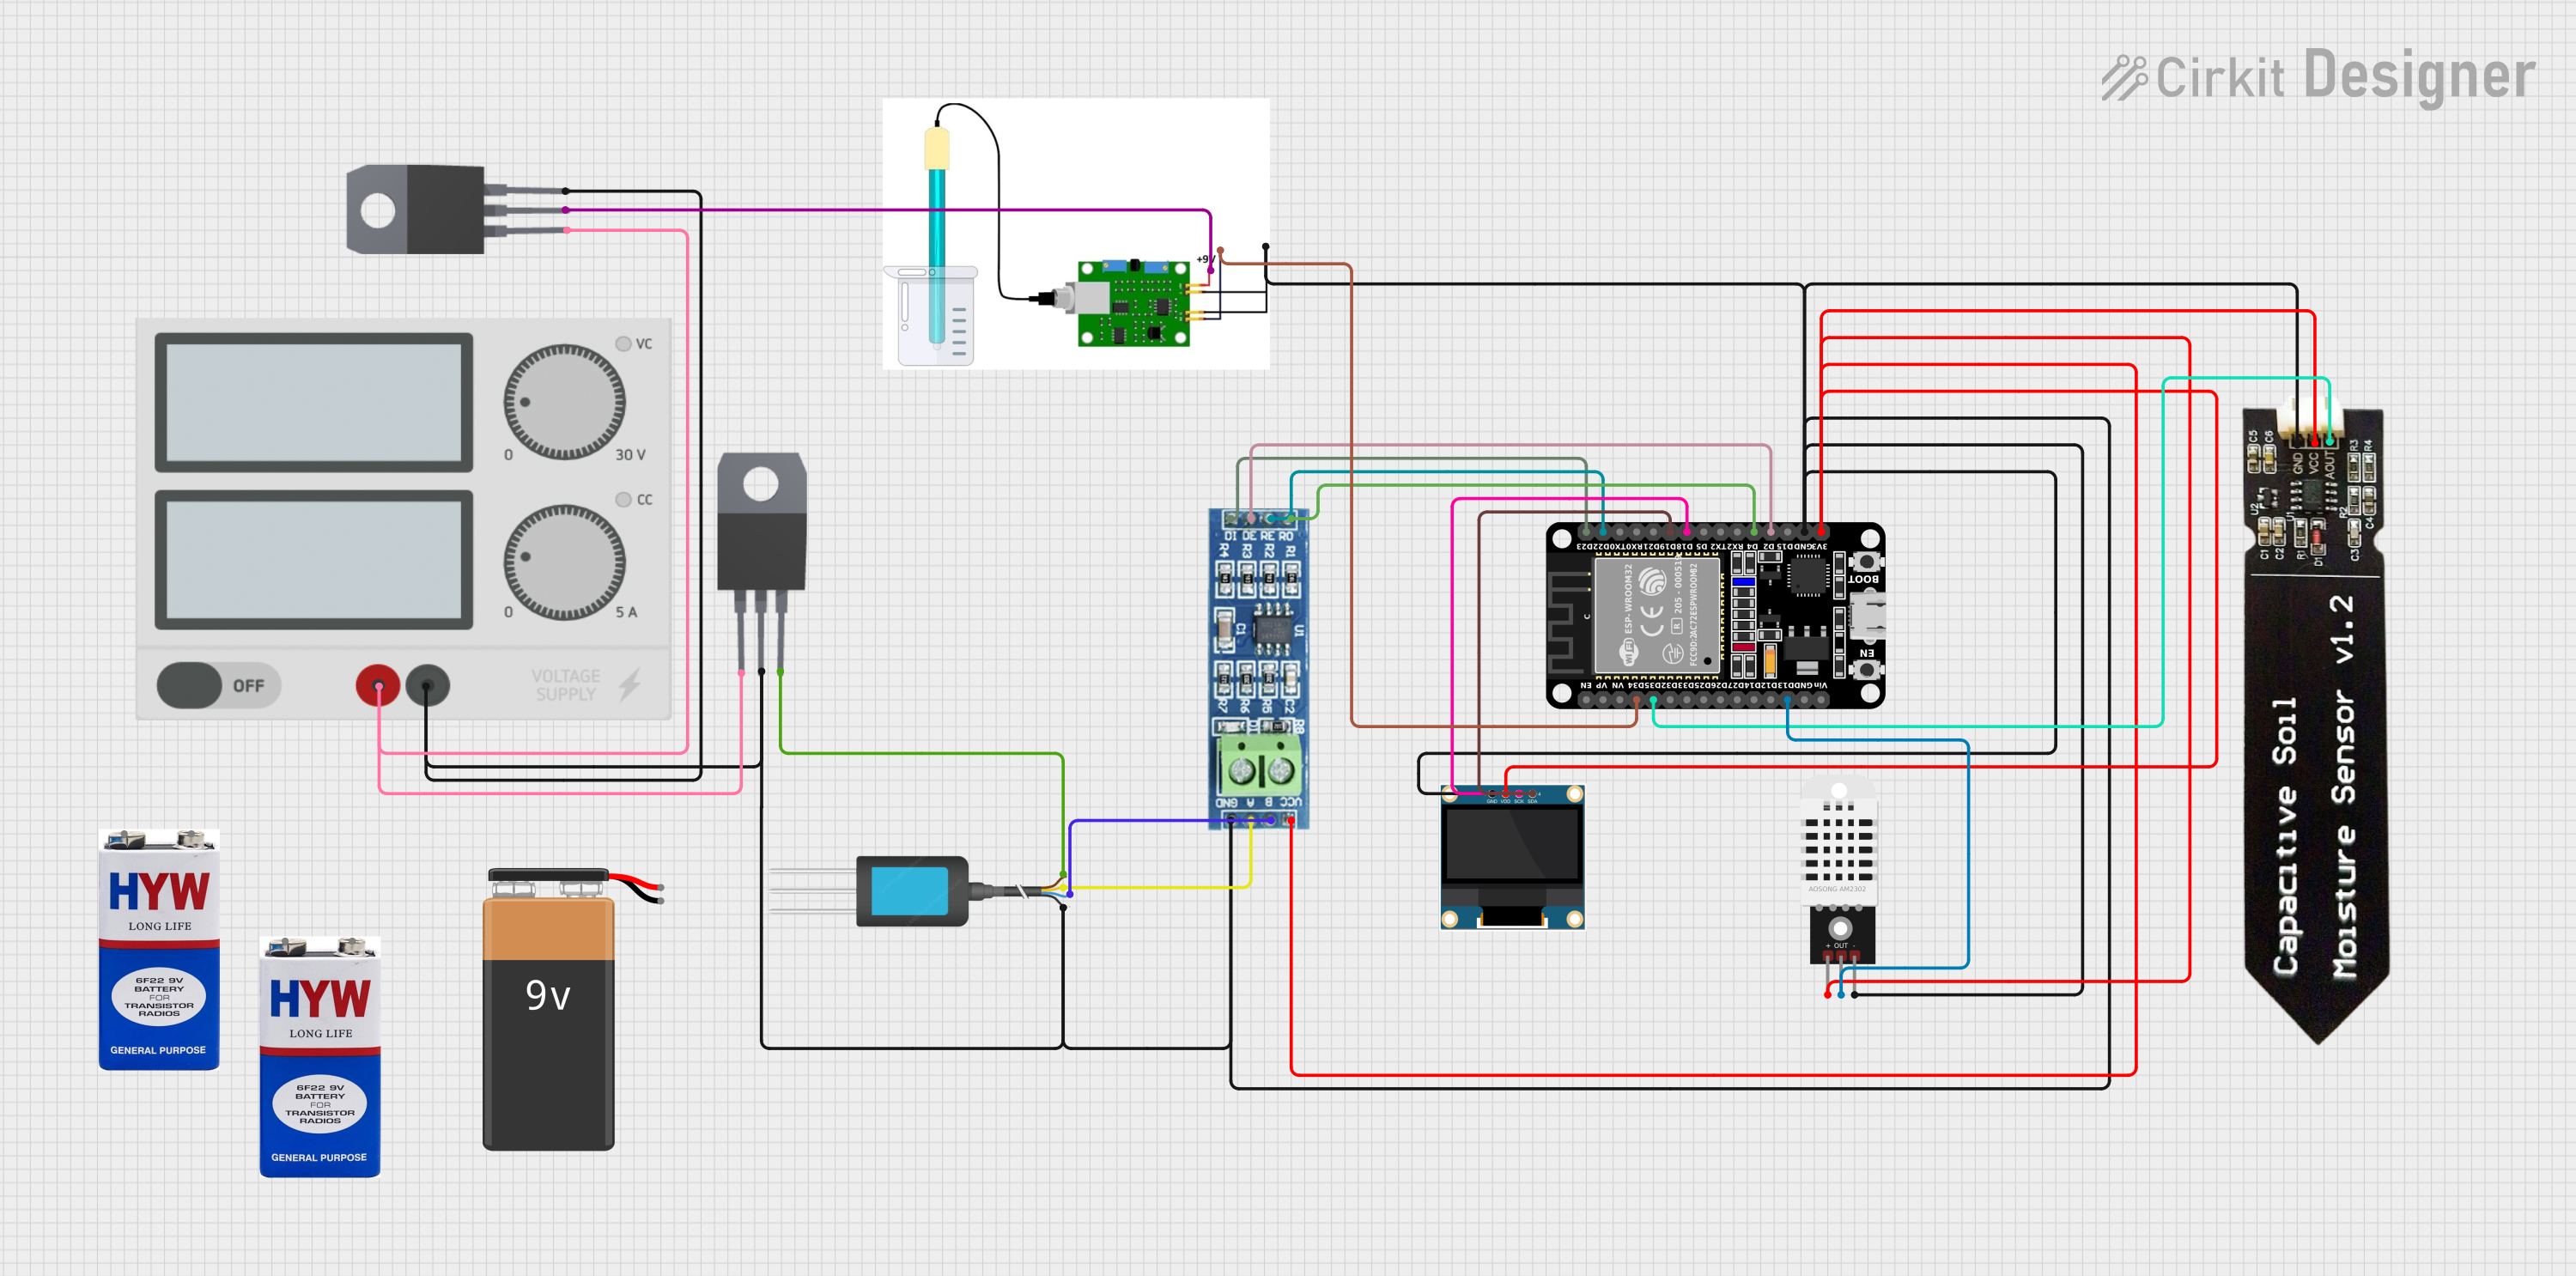
Explore Projects Built with soil sensor
Technical Specifications
Key Technical Details
| Parameter | Value |
|---|---|
| Operating Voltage | 3.3V - 5V |
| Output Voltage | 0V - 4.2V (analog) |
| Current Consumption | < 20mA |
| Interface | Analog |
| Operating Temperature | -40°C to 85°C |
| Dimensions | 60mm x 20mm x 5mm |
Pin Configuration and Descriptions
| Pin Number | Pin Name | Description |
|---|---|---|
| 1 | VCC | Power supply (3.3V - 5V) |
| 2 | GND | Ground |
| 3 | AOUT | Analog output (voltage proportional to soil moisture) |
Usage Instructions
How to Use the Component in a Circuit
- Power Supply: Connect the VCC pin to a 3.3V or 5V power supply.
- Ground: Connect the GND pin to the ground of the power supply.
- Analog Output: Connect the AOUT pin to an analog input pin on a microcontroller (e.g., Arduino UNO).
Example Circuit Diagram
  Arduino UNO
  +---------+
  |         |
  |   A0    |<------ AOUT (YL-69)
  |         |
  |   5V    |<------ VCC (YL-69)
  |         |
  |   GND   |<------ GND (YL-69)
  +---------+
Important Considerations and Best Practices
- Calibration: Calibrate the sensor for your specific soil type to get accurate readings.
- Placement: Insert the sensor into the soil at the root level of the plants for best results.
- Protection: Protect the sensor from prolonged exposure to water to prevent corrosion.
Sample Arduino Code
// Include necessary libraries
void setup() {
  Serial.begin(9600); // Initialize serial communication at 9600 baud rate
  pinMode(A0, INPUT); // Set A0 as an input pin
}

void loop() {
  int sensorValue = analogRead(A0); // Read the analog value from the sensor
  float voltage = sensorValue * (5.0 / 1023.0); // Convert the analog value to voltage
  Serial.print("Soil Moisture Voltage: ");
  Serial.println(voltage); // Print the voltage to the serial monitor
  delay(1000); // Wait for 1 second before taking another reading
}
Troubleshooting and FAQs
Common Issues Users Might Face
- Inaccurate Readings: The sensor may give inaccurate readings if not calibrated properly.
- Corrosion: Prolonged exposure to water can cause the sensor to corrode, affecting its performance.
- No Output: If there is no output, check the connections and ensure the sensor is powered correctly.
Solutions and Tips for Troubleshooting
- Calibration: Use a known moisture level to calibrate the sensor. Adjust the readings in your code accordingly.
- Corrosion Prevention: Use a protective coating on the sensor probes to prevent corrosion.
- Connection Check: Ensure all connections are secure and the power supply is stable.
FAQs
Q: Can the YL-69 be used with other microcontrollers? A: Yes, the YL-69 can be used with any microcontroller that has an analog input pin.
Q: How deep should the sensor be placed in the soil? A: The sensor should be placed at the root level of the plants for accurate moisture readings.
Q: How often should the sensor be calibrated? A: Calibration frequency depends on the soil type and environmental conditions. Regular calibration is recommended for best results.
This documentation provides a comprehensive guide to using the Micron YL-69 Soil Sensor. Whether you are a beginner or an experienced user, following these instructions will help you effectively measure soil moisture and optimize your watering practices.