Cirkit Designer Logo
Cirkit Designer
Your all-in-one circuit design IDE
Home / 
Component Documentation

How to Use float sensor: Examples, Pinouts, and Specs

Image of float sensor
Cirkit Designer LogoDesign with float sensor in Cirkit Designer

Introduction

A float sensor, manufactured by R.M ENTERPRISE with part ID SENSOR, is a device designed to detect the level of liquid within a tank or container. It operates using a buoyant float that moves with the liquid level, triggering a switch or sending a signal when a specific level is reached. This simple yet effective mechanism makes float sensors highly reliable for liquid level monitoring.

Explore Projects Built with float sensor

Use Cirkit Designer to design, explore, and prototype these projects online. Some projects support real-time simulation. Click "Open Project" to start designing instantly!
Arduino-Powered GSM Water Quality Monitoring and Pump Control System
Image of Hydroponics System Schematic Wiring Diagram: A project utilizing float sensor in a practical application
This is a sensor and control system with remote communication capabilities. It monitors temperature, pH levels, and water levels, and controls a water pump based on the float switch status. Data can be accessed and the system can be controlled remotely via Bluetooth and GSM modules connected to two Arduino UNO microcontrollers.
Cirkit Designer LogoOpen Project in Cirkit Designer
ESP32-Based Force Measurement System with LSM303AGR Sensor
Image of final circuit diagram: A project utilizing float sensor in a practical application
This circuit features an Adafruit HUZZAH32 ESP32 Feather microcontroller connected to an Adafruit LSM303AGR sensor via I2C communication lines (SCL and SDA), a force sensing resistor (FSR) interfaced through an analog input with a pull-up resistor, and powered by a 3xAA battery pack. The LSM303AGR sensor provides acceleration and magnetic field measurements, while the FSR detects applied force. The ESP32 processes these inputs and can be programmed to respond to sensor data for applications such as motion tracking and force measurement.
Cirkit Designer LogoOpen Project in Cirkit Designer
Arduino UNO-Based Environmental Monitoring System with WiFi and GSM Communication
Image of gass leackage: A project utilizing float sensor in a practical application
This is a multi-functional sensor and actuator system with wireless and GSM capabilities, built around an Arduino UNO. It includes environmental sensing, data display, and controlled actuation, suitable for applications like a smart environmental monitoring system with remote notifications.
Cirkit Designer LogoOpen Project in Cirkit Designer
Arduino Mega 2560-Based Sensor Data Logger with ESP32-CAM and LCD Interface
Image of DA_Schema: A project utilizing float sensor in a practical application
This is a multifunctional sensor system with visual feedback and control interfaces. It utilizes an Arduino Mega 2560 to process data from an accelerometer, ultrasonic sensor, and camera module, and displays information on an LCD screen. User inputs can be provided through toggle and DIP switches, while LEDs indicate system status.
Cirkit Designer LogoOpen Project in Cirkit Designer

Explore Projects Built with float sensor

Use Cirkit Designer to design, explore, and prototype these projects online. Some projects support real-time simulation. Click "Open Project" to start designing instantly!
Image of Hydroponics System Schematic Wiring Diagram: A project utilizing float sensor in a practical application
Arduino-Powered GSM Water Quality Monitoring and Pump Control System
This is a sensor and control system with remote communication capabilities. It monitors temperature, pH levels, and water levels, and controls a water pump based on the float switch status. Data can be accessed and the system can be controlled remotely via Bluetooth and GSM modules connected to two Arduino UNO microcontrollers.
Cirkit Designer LogoOpen Project in Cirkit Designer
Image of final circuit diagram: A project utilizing float sensor in a practical application
ESP32-Based Force Measurement System with LSM303AGR Sensor
This circuit features an Adafruit HUZZAH32 ESP32 Feather microcontroller connected to an Adafruit LSM303AGR sensor via I2C communication lines (SCL and SDA), a force sensing resistor (FSR) interfaced through an analog input with a pull-up resistor, and powered by a 3xAA battery pack. The LSM303AGR sensor provides acceleration and magnetic field measurements, while the FSR detects applied force. The ESP32 processes these inputs and can be programmed to respond to sensor data for applications such as motion tracking and force measurement.
Cirkit Designer LogoOpen Project in Cirkit Designer
Image of gass leackage: A project utilizing float sensor in a practical application
Arduino UNO-Based Environmental Monitoring System with WiFi and GSM Communication
This is a multi-functional sensor and actuator system with wireless and GSM capabilities, built around an Arduino UNO. It includes environmental sensing, data display, and controlled actuation, suitable for applications like a smart environmental monitoring system with remote notifications.
Cirkit Designer LogoOpen Project in Cirkit Designer
Image of DA_Schema: A project utilizing float sensor in a practical application
Arduino Mega 2560-Based Sensor Data Logger with ESP32-CAM and LCD Interface
This is a multifunctional sensor system with visual feedback and control interfaces. It utilizes an Arduino Mega 2560 to process data from an accelerometer, ultrasonic sensor, and camera module, and displays information on an LCD screen. User inputs can be provided through toggle and DIP switches, while LEDs indicate system status.
Cirkit Designer LogoOpen Project in Cirkit Designer

Common Applications and Use Cases

  • Water level monitoring in tanks and reservoirs
  • Industrial liquid level control systems
  • Automotive fuel tank level detection
  • Home appliances such as washing machines and dishwashers
  • Agricultural irrigation systems

Technical Specifications

The following table outlines the key technical details of the R.M ENTERPRISE float sensor:

Parameter Specification
Operating Voltage 5V to 24V DC
Maximum Current Rating 500mA
Contact Type Normally Open (NO) or Normally Closed (NC)
Material Polypropylene (PP)
Operating Temperature -10°C to 85°C
Float Movement Range 10mm to 50mm
Cable Length 1 meter
Mounting Type Vertical or Horizontal

Pin Configuration and Descriptions

The float sensor typically has two wires for connection. The table below describes the wiring:

Wire Color Description
Red Positive terminal (VCC)
Black Signal output or ground (GND)

Usage Instructions

How to Use the Float Sensor in a Circuit

  1. Wiring the Sensor:

    • Connect the red wire to the positive terminal of the power supply (5V to 24V DC).
    • Connect the black wire to the input pin of a microcontroller or to ground, depending on the circuit design.
    • If using with a microcontroller, ensure a pull-up resistor is used if required.
  2. Circuit Design:

    • The float sensor acts as a switch. When the float rises or falls to the set level, the internal contact changes state (NO to NC or vice versa).
    • Use the sensor output to trigger an action, such as turning on a pump or sending a signal to a monitoring system.
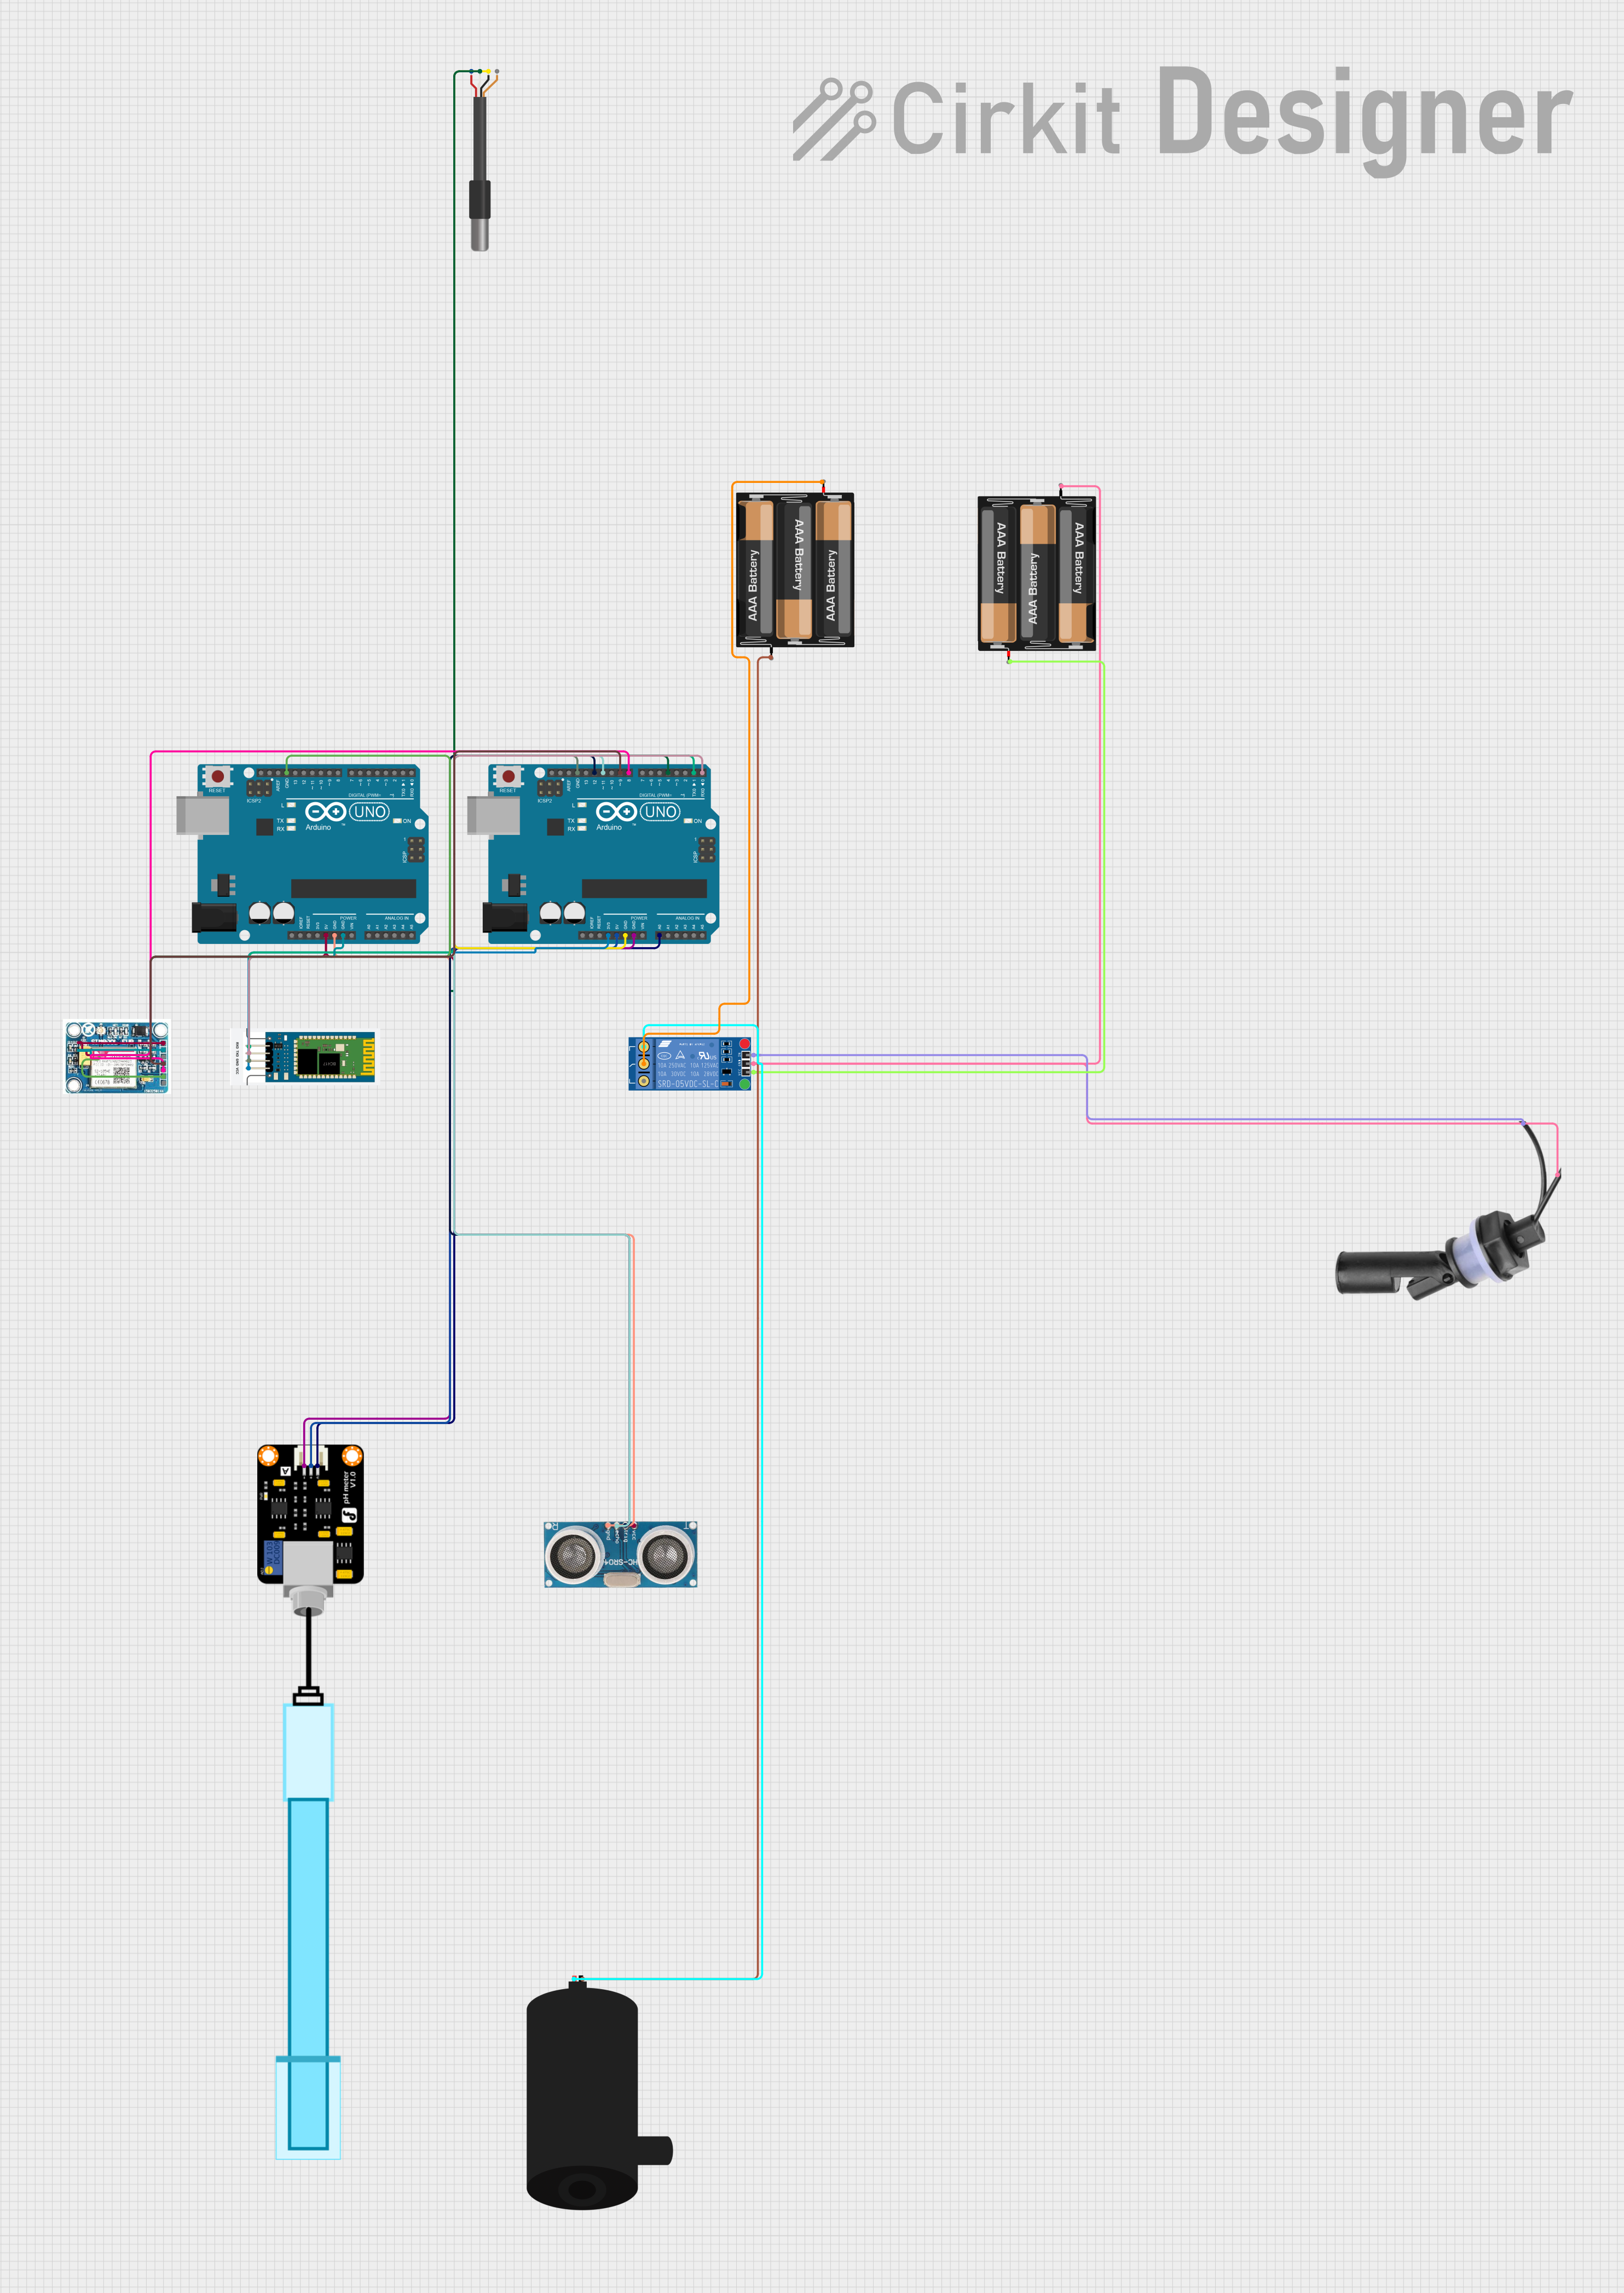
  3. Example Circuit:

    • Connect the sensor to an Arduino UNO as follows:
      • Red wire to 5V pin on the Arduino.
      • Black wire to a digital input pin (e.g., D2) on the Arduino.

Arduino Code Example

Below is an example code to read the float sensor's state using an Arduino UNO:

// Float Sensor Example Code
// This code reads the state of the float sensor and prints it to the Serial Monitor.

const int floatSensorPin = 2; // Connect the black wire to digital pin 2
int sensorState = 0;         // Variable to store the sensor state

void setup() {
  pinMode(floatSensorPin, INPUT); // Set the float sensor pin as input
  Serial.begin(9600);            // Initialize serial communication
}

void loop() {
  sensorState = digitalRead(floatSensorPin); // Read the sensor state

  if (sensorState == HIGH) {
    // If the sensor is HIGH, the float is at the trigger level
    Serial.println("Liquid level reached!");
  } else {
    // If the sensor is LOW, the float is below the trigger level
    Serial.println("Liquid level below threshold.");
  }

  delay(500); // Wait for 500ms before reading again
}

Important Considerations and Best Practices

  • Ensure the sensor is mounted securely in the correct orientation (vertical or horizontal) as per the application.
  • Avoid exposing the sensor to temperatures or chemicals beyond its specified limits.
  • Use proper waterproofing techniques for wiring connections in wet environments.
  • Test the sensor's functionality before integrating it into critical systems.

Troubleshooting and FAQs

Common Issues and Solutions

  1. Sensor Not Responding:

    • Cause: Loose or incorrect wiring.
    • Solution: Double-check all connections and ensure proper polarity.
  2. False Triggering:

    • Cause: Electrical noise or unstable power supply.
    • Solution: Use a capacitor across the power supply terminals to filter noise.
  3. Sensor Stuck in One State:

    • Cause: Float mechanism obstructed by debris or dirt.
    • Solution: Clean the sensor and ensure the float moves freely.
  4. No Output Signal:

    • Cause: Damaged sensor or incorrect voltage.
    • Solution: Verify the operating voltage and replace the sensor if necessary.

FAQs

Q1: Can the float sensor be used with liquids other than water?
A1: Yes, the float sensor can be used with various non-corrosive liquids. However, ensure the liquid is compatible with the sensor's material (polypropylene).

Q2: How do I switch between Normally Open (NO) and Normally Closed (NC) modes?
A2: Some float sensors allow switching between NO and NC by inverting the mounting orientation. Refer to the manufacturer's instructions for details.

Q3: Can the sensor be used in high-pressure environments?
A3: The float sensor is not designed for high-pressure applications. Use a sensor rated for high pressure if required.

Q4: Is the sensor suitable for outdoor use?
A4: The sensor can be used outdoors if proper waterproofing and protection from extreme conditions are ensured.