How to Use Phase Lock Loop: Examples, Pinouts, and Specs

Introduction
The CD74HC4046AE is a high-speed silicon-gate CMOS Phase Lock Loop (PLL) component manufactured by Texas Instruments. It is designed to achieve phase lock of an input signal within a specific frequency range. This component is widely used in communication systems, data synchronization, frequency synthesis, and modulation/demodulation applications.
Explore Projects Built with Phase Lock Loop
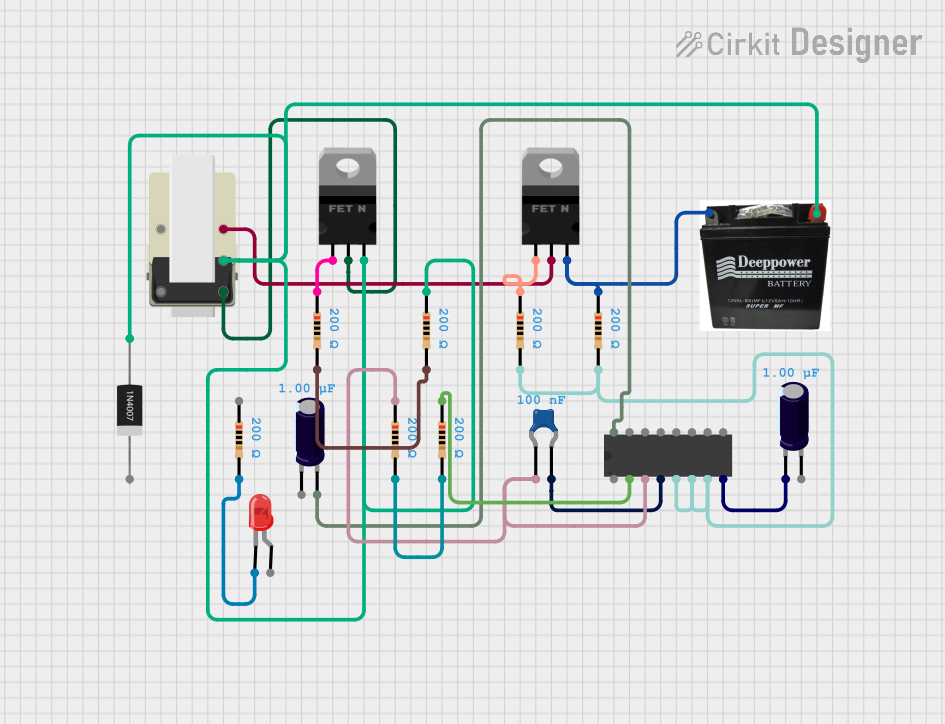
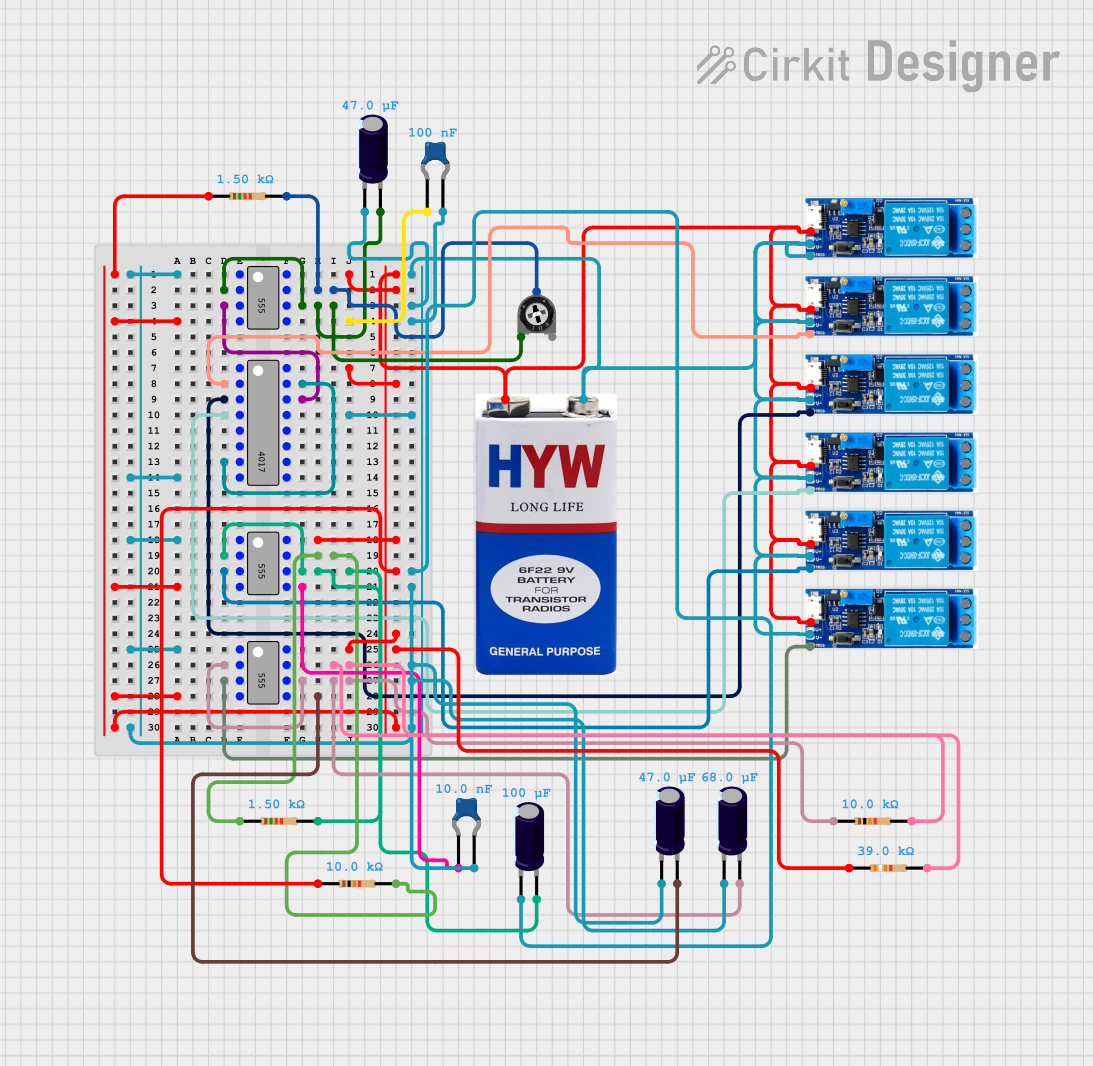
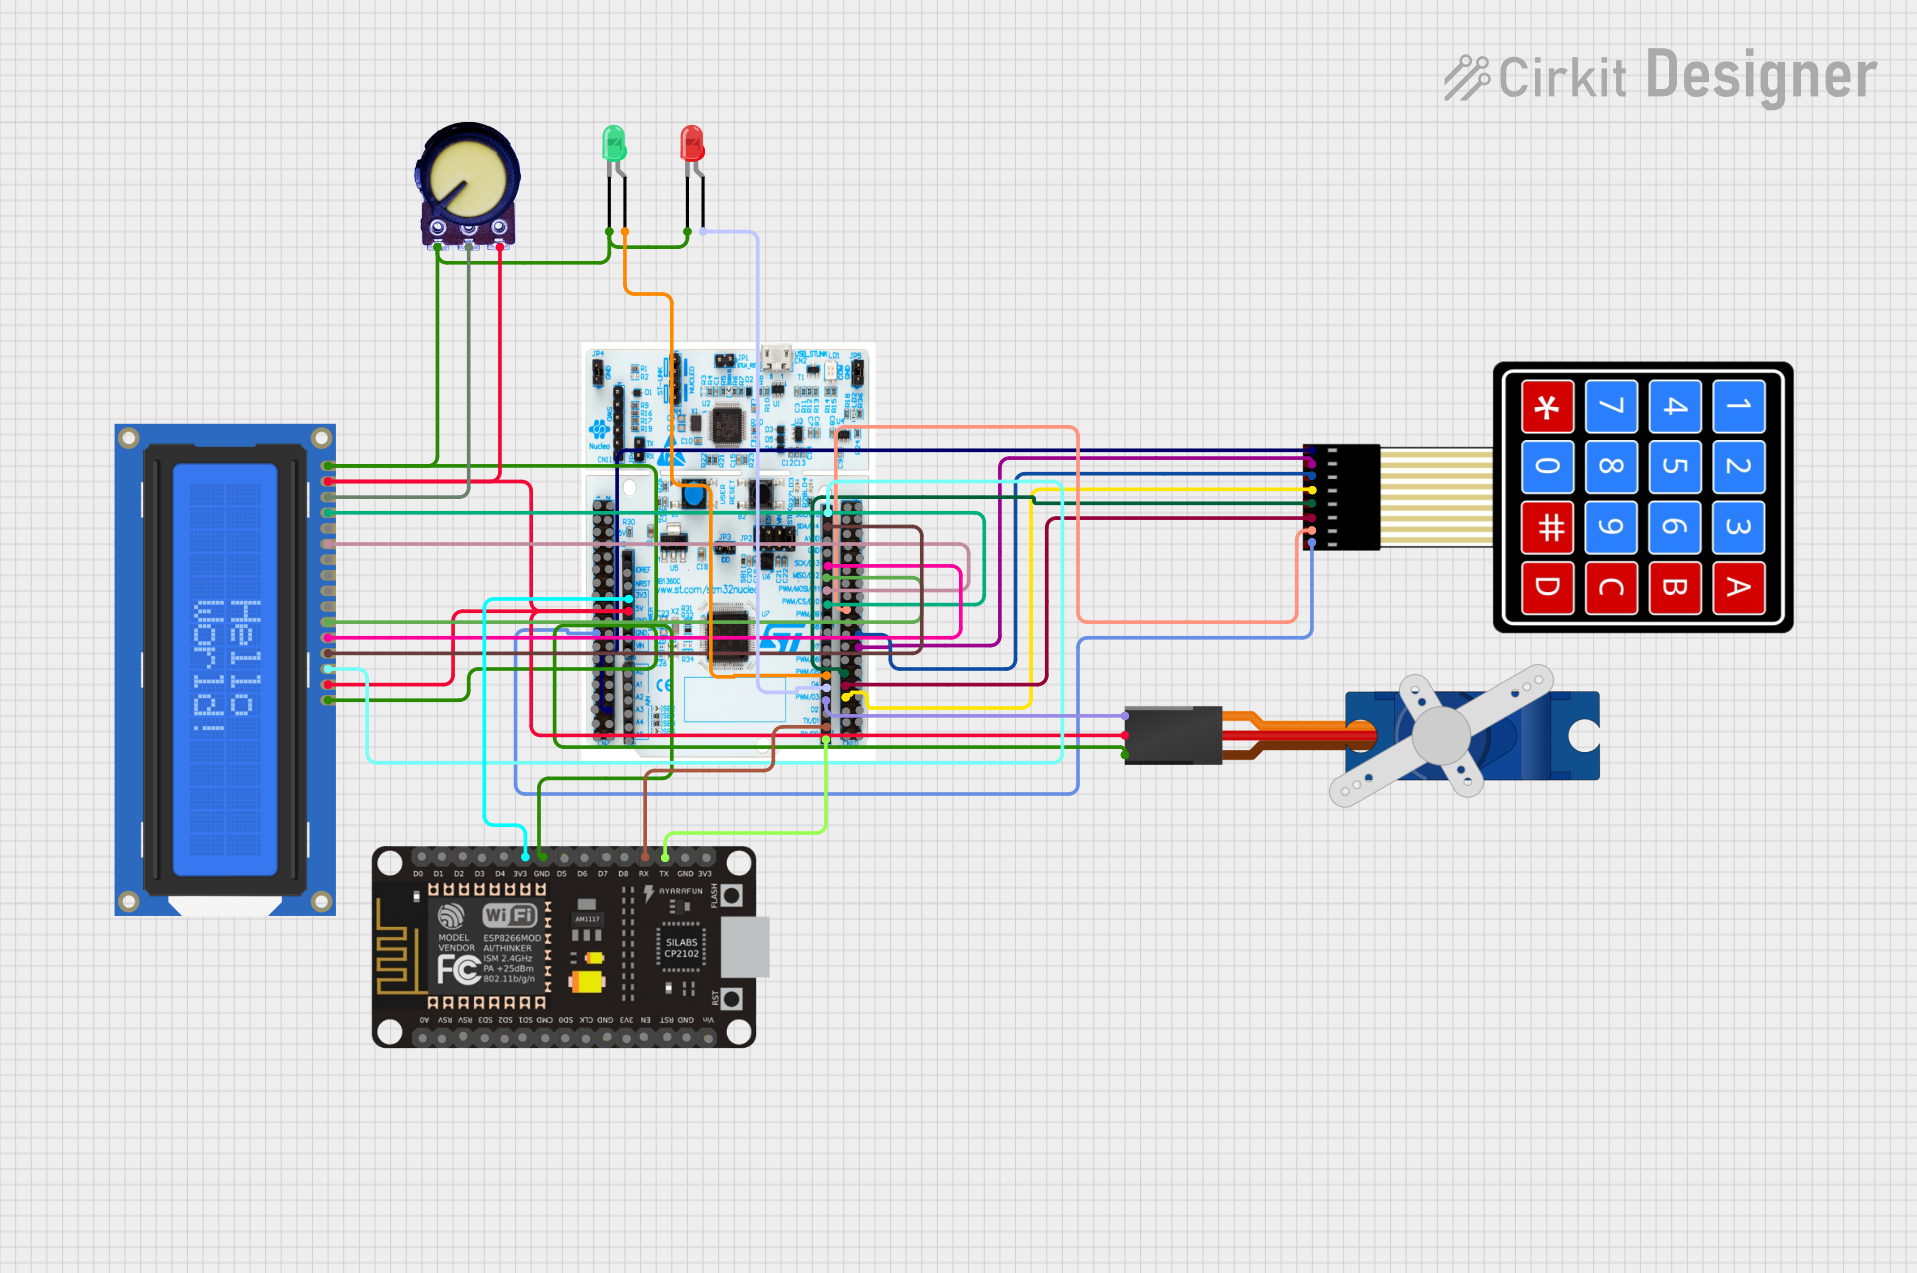
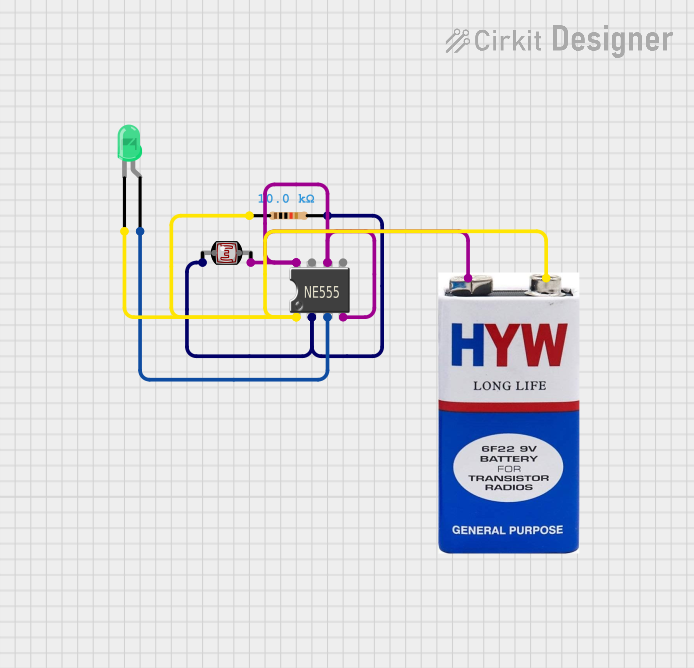
Explore Projects Built with Phase Lock Loop
Technical Specifications
Key Technical Details
- Supply Voltage (Vcc): 2V to 6V
- Input Frequency Range (VCO): 10kHz to 10MHz
- Operating Temperature: -55°C to 125°C
- Package: 16-pin DIP or SOIC
Pin Configuration and Descriptions
| Pin Number | Name | Description |
|---|---|---|
| 1 | PD | Phase Detector Output |
| 2 | ZD | Zero Detect/Comparator Input |
| 3 | VCO IN | Voltage Controlled Oscillator Input |
| 4 | VCO OUT | Voltage Controlled Oscillator Output |
| 5 | C1 | Timing Capacitor |
| 6 | R1 | Timing Resistor |
| 7 | C2 | Timing Capacitor |
| 8 | GND | Ground |
| 9 | INH | Inhibit (Active High) |
| 10 | E/D | Edge Control (Enable/Disable) |
| 11 | PC1 | Phase Comparator 1 Output |
| 12 | PC2 | Phase Comparator 2 Output |
| 13 | DEM OUT | Demodulator Output |
| 14 | SIG IN | Signal Input |
| 15 | Vcc | Positive Supply Voltage |
| 16 | SIG IN | Signal Input |
Usage Instructions
How to Use the CD74HC4046AE in a Circuit
Power Supply: Connect pin 15 (Vcc) to a positive supply voltage between 2V and 6V, and pin 8 (GND) to the ground.
Signal Input: Apply the input signal to pin 14 (SIG IN). Ensure the frequency of the input signal is within the VCO range.
VCO Configuration: Connect a timing capacitor to pin 5 (C1) and a timing resistor to pin 6 (R1) to set the free-running frequency of the VCO.
Phase Comparator: Choose between phase comparator 1 (PC1) and phase comparator 2 (PC2) by connecting the desired output to your circuit.
Output: The VCO output can be taken from pin 4 (VCO OUT), and the phase detector output from pin 1 (PD).
Important Considerations and Best Practices
- Ensure that the power supply voltage does not exceed the maximum rating of 6V.
- The timing components (C1, R1, C2) should be chosen based on the desired frequency range and stability.
- Avoid placing noisy components or high-current traces near the PLL to minimize interference.
- Use bypass capacitors close to the power supply pins to filter out noise.
Troubleshooting and FAQs
Common Issues
- Instability in Output Frequency: This can be caused by incorrect timing components or external noise. Verify the values of C1 and R1, and ensure proper decoupling and layout techniques are used.
- No Lock or Erratic Behavior: Check the input signal level and frequency. Ensure it is within the specified range and that the signal is clean (low jitter and noise).
Solutions and Tips for Troubleshooting
- Use of Decoupling Capacitors: Place a 0.1 µF ceramic capacitor close to the Vcc pin to stabilize the power supply.
- Proper Grounding: Ensure that the ground plane is continuous and well-connected to minimize ground loops.
- Signal Integrity: Use a clean and stable input signal. If necessary, use a buffer or a filter to improve the signal quality.
FAQs
Q: Can the CD74HC4046AE be used for frequency multiplication?
- A: Yes, it can be used for frequency multiplication by setting the VCO to run at a multiple of the input frequency.
Q: What is the function of the INH (Inhibit) pin?
- A: The INH pin can be used to disable the VCO when driven high, effectively stopping the output.
Q: How do I choose the correct timing components for the VCO?
- A: The timing components are chosen based on the desired VCO frequency range. Refer to the manufacturer's datasheet for detailed equations and tables.
Example Code for Arduino UNO
Below is an example code snippet for interfacing the CD74HC4046AE with an Arduino UNO. This example assumes you are using the VCO output to generate a frequency and monitor it using an Arduino pin.
// Define the VCO output pin connected to the Arduino
const int vcoOutputPin = 2; // VCO OUT from CD74HC4046AE connected to digital pin 2

void setup() {
  // Set the VCO output pin as an input
  pinMode(vcoOutputPin, INPUT);
  // Begin serial communication at 9600 baud rate
  Serial.begin(9600);
}

void loop() {
  // Measure the frequency of the VCO output
  unsigned long frequency = measureFrequency(vcoOutputPin);
  // Print the frequency to the Serial Monitor
  Serial.print("Frequency: ");
  Serial.print(frequency);
  Serial.println(" Hz");
  // Wait for a second before measuring again
  delay(1000);
}

unsigned long measureFrequency(int pin) {
  // Measure the duration of a high pulse on the specified pin
  unsigned long duration = pulseIn(pin, HIGH);
  // Calculate the frequency in Hertz (1/period)
  unsigned long frequency = 0;
  if (duration > 0) {
    frequency = 1000000UL / duration; // Convert microseconds to Hertz
  }
  return frequency;
}
This code measures the frequency of the VCO output by timing the duration of a high pulse. The pulseIn function is used to measure the duration of a pulse in microseconds, which is then converted to frequency in Hertz. The frequency is printed to the Serial Monitor every second.