How to Use Strain Gauge Y3: Examples, Pinouts, and Specs
Introduction
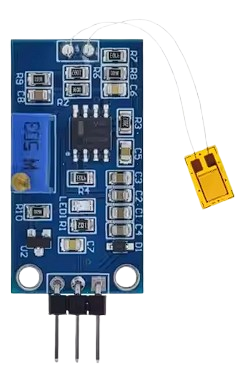
The Strain Gauge Y3 by Taufiq is a high-precision sensor designed to measure the strain (deformation) of an object. This component is widely used in mechanical testing, structural monitoring, and various other applications where accurate strain measurement is crucial. The Y3 model is known for its reliability and precision, making it a popular choice among engineers and researchers.
Explore Projects Built with Strain Gauge Y3

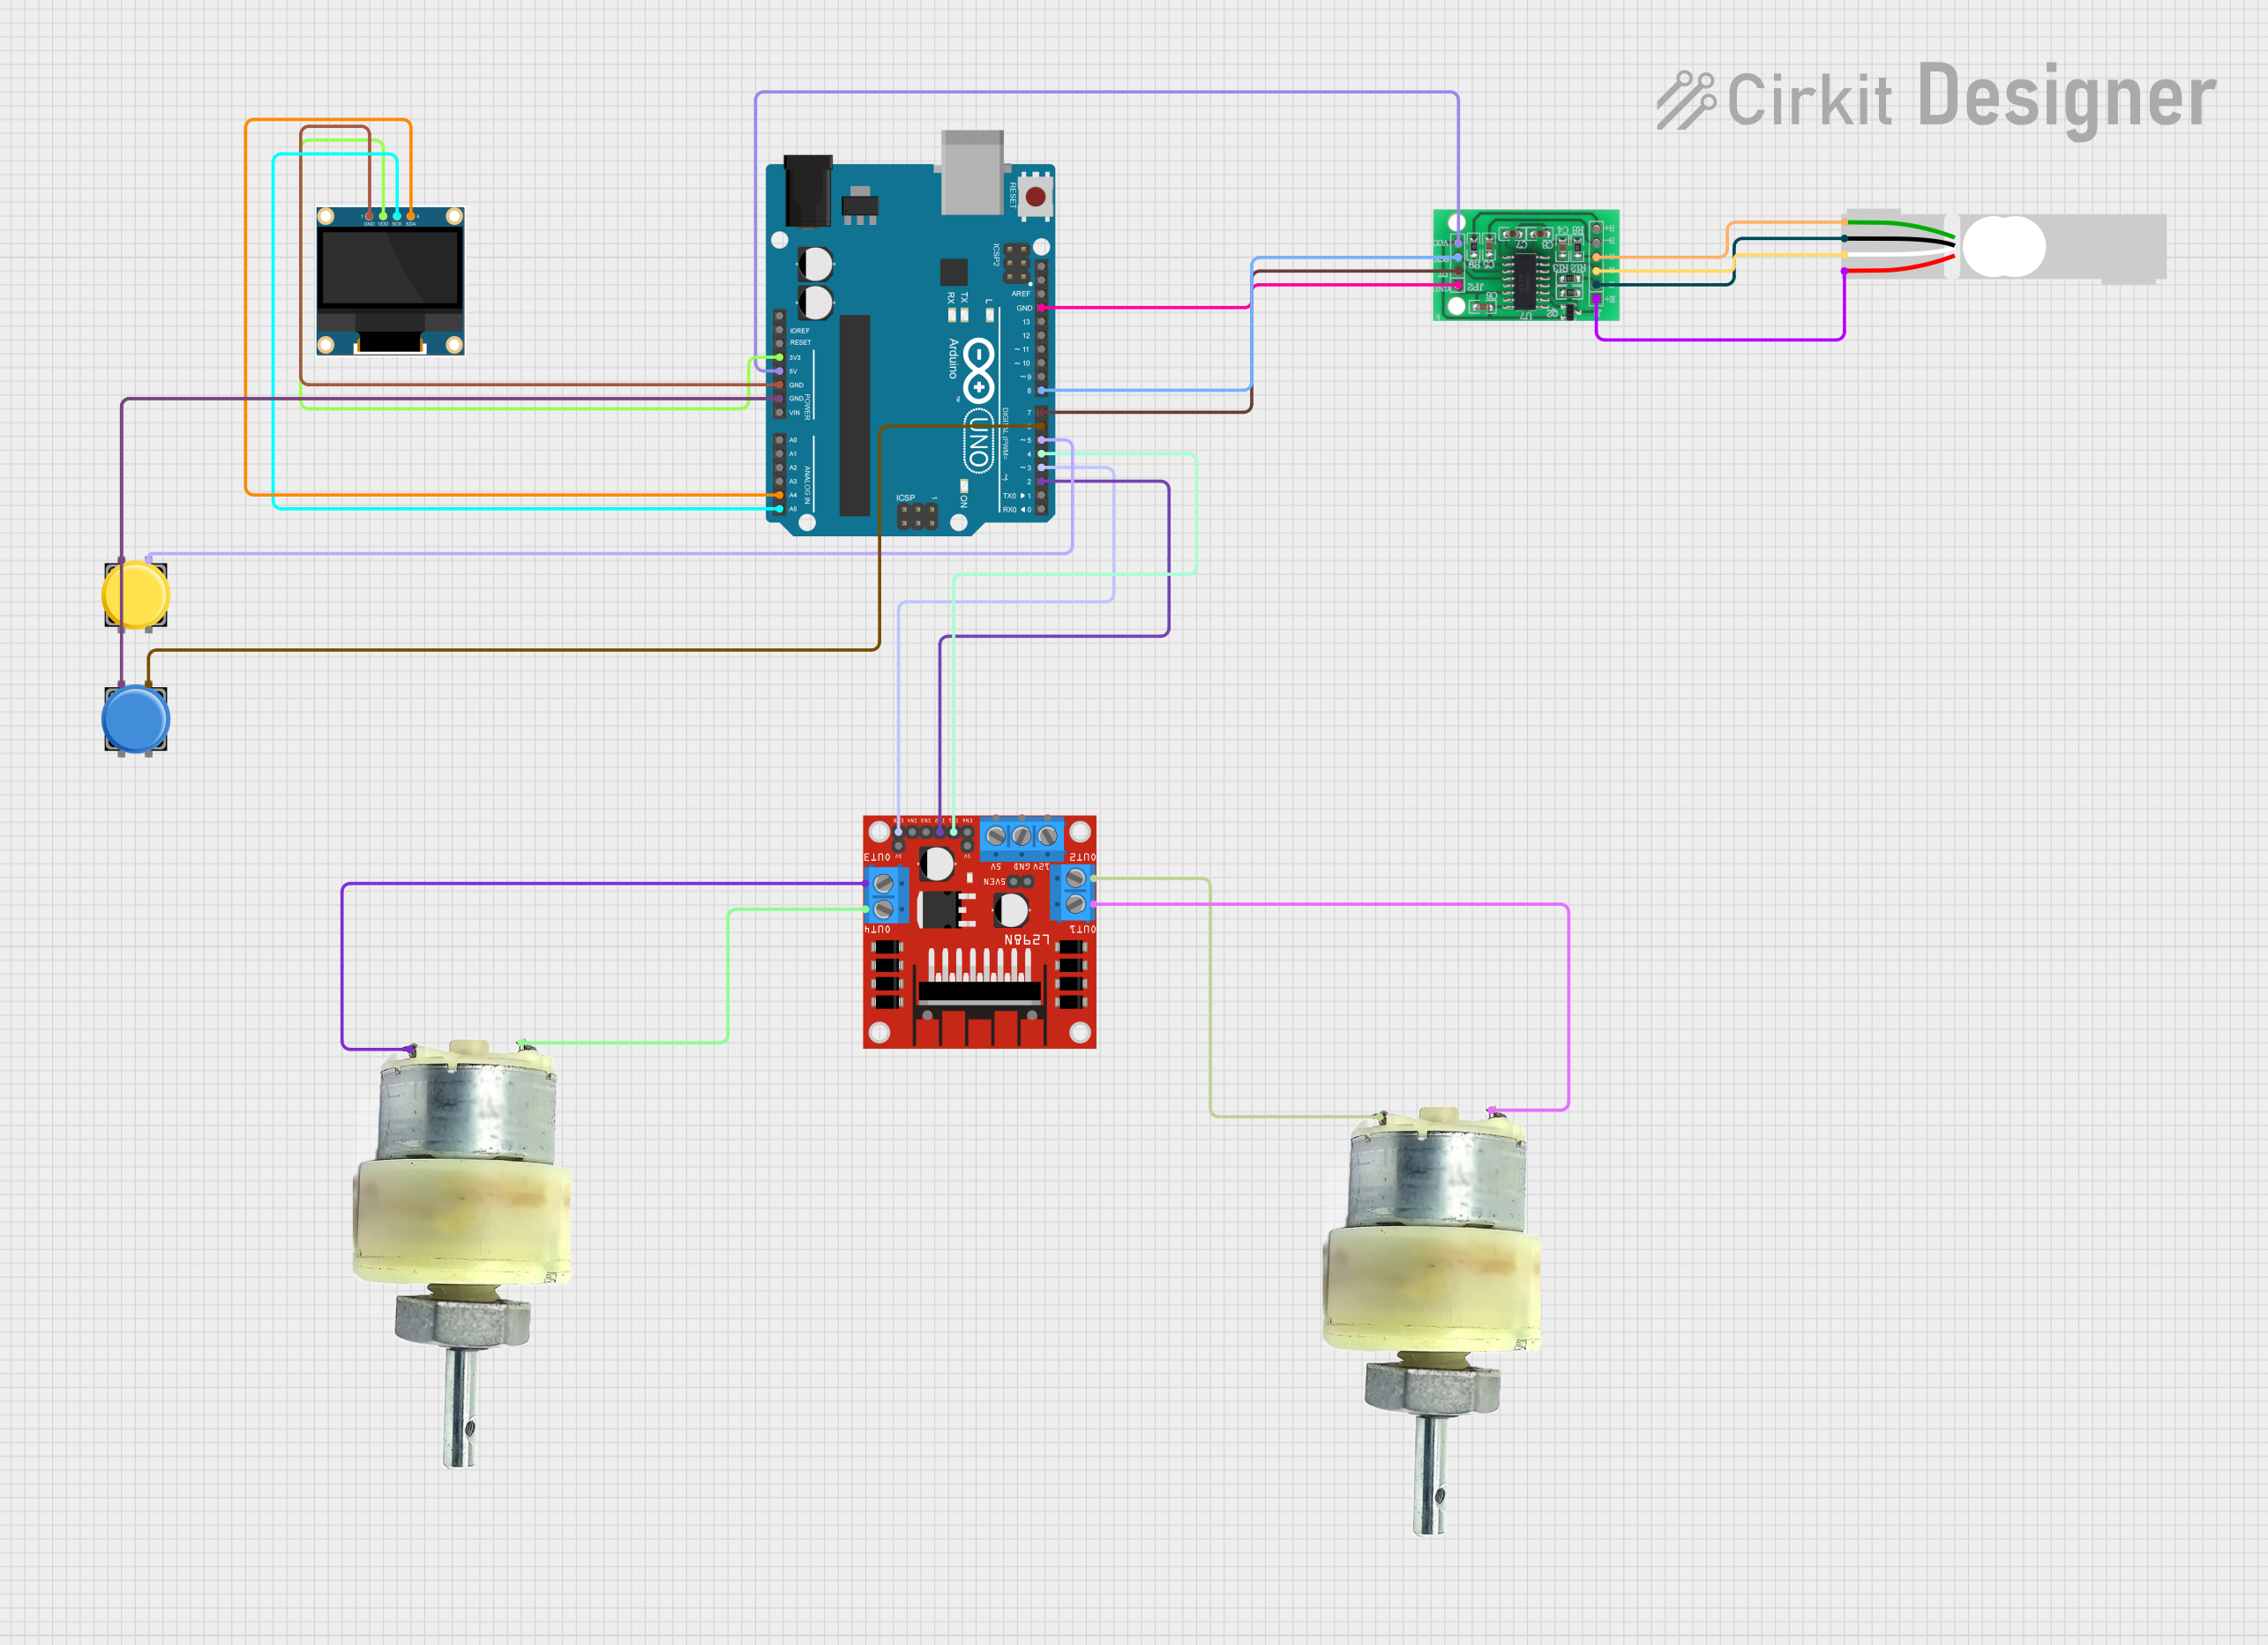
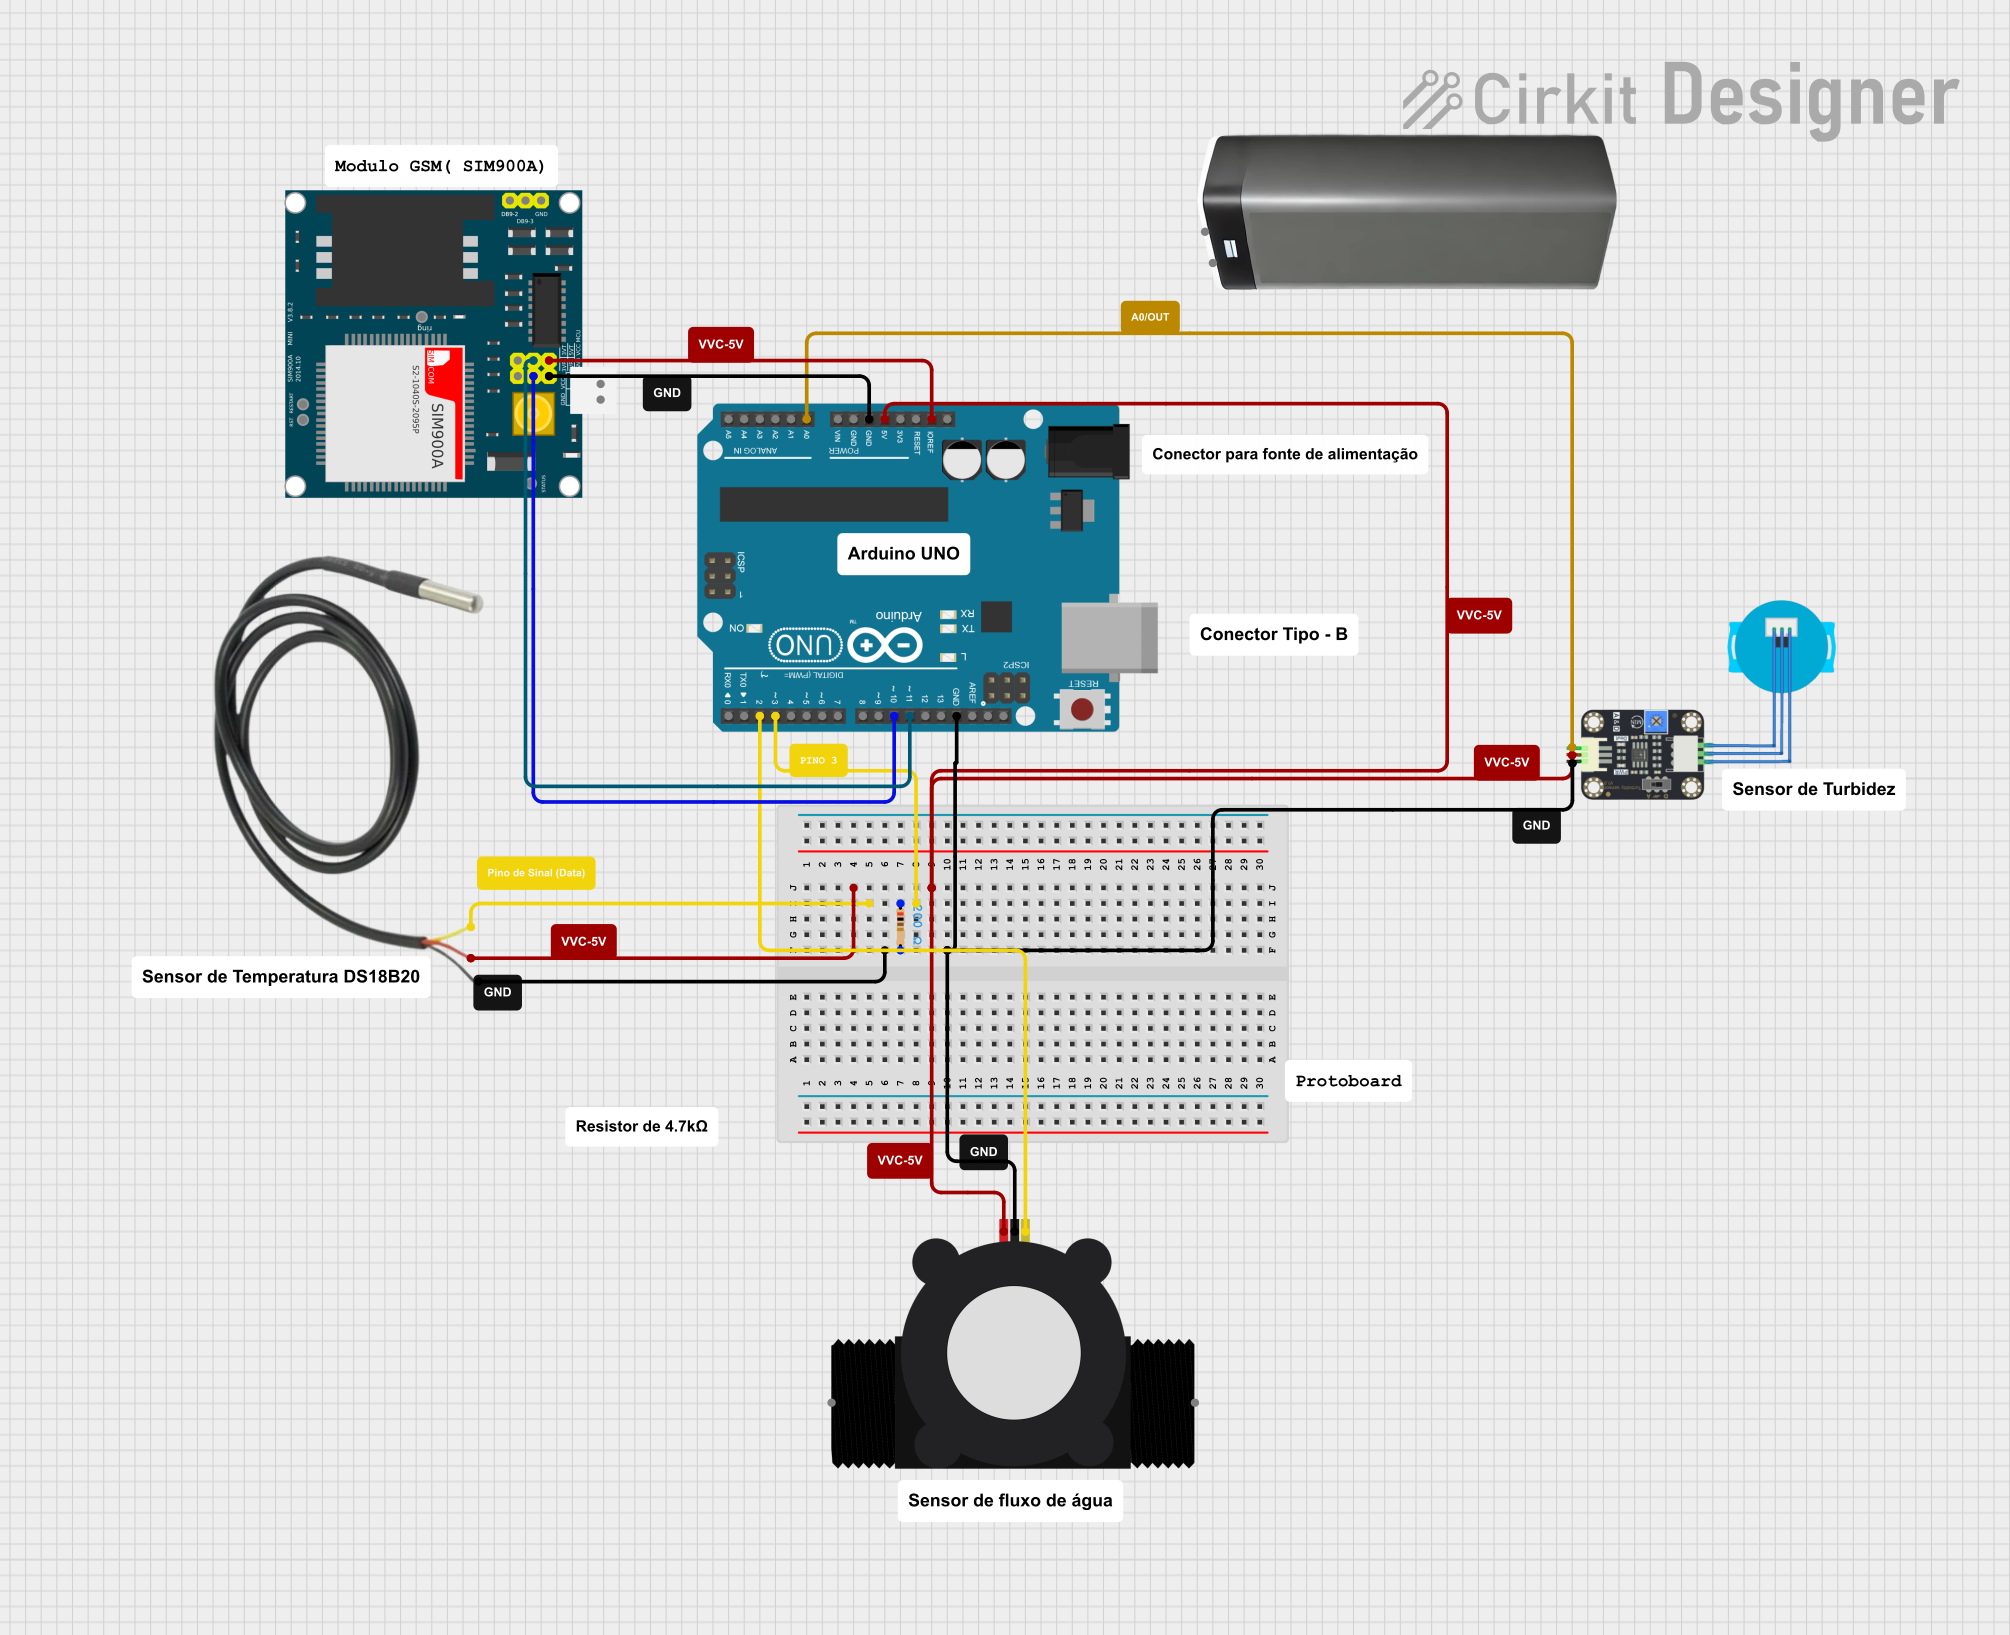
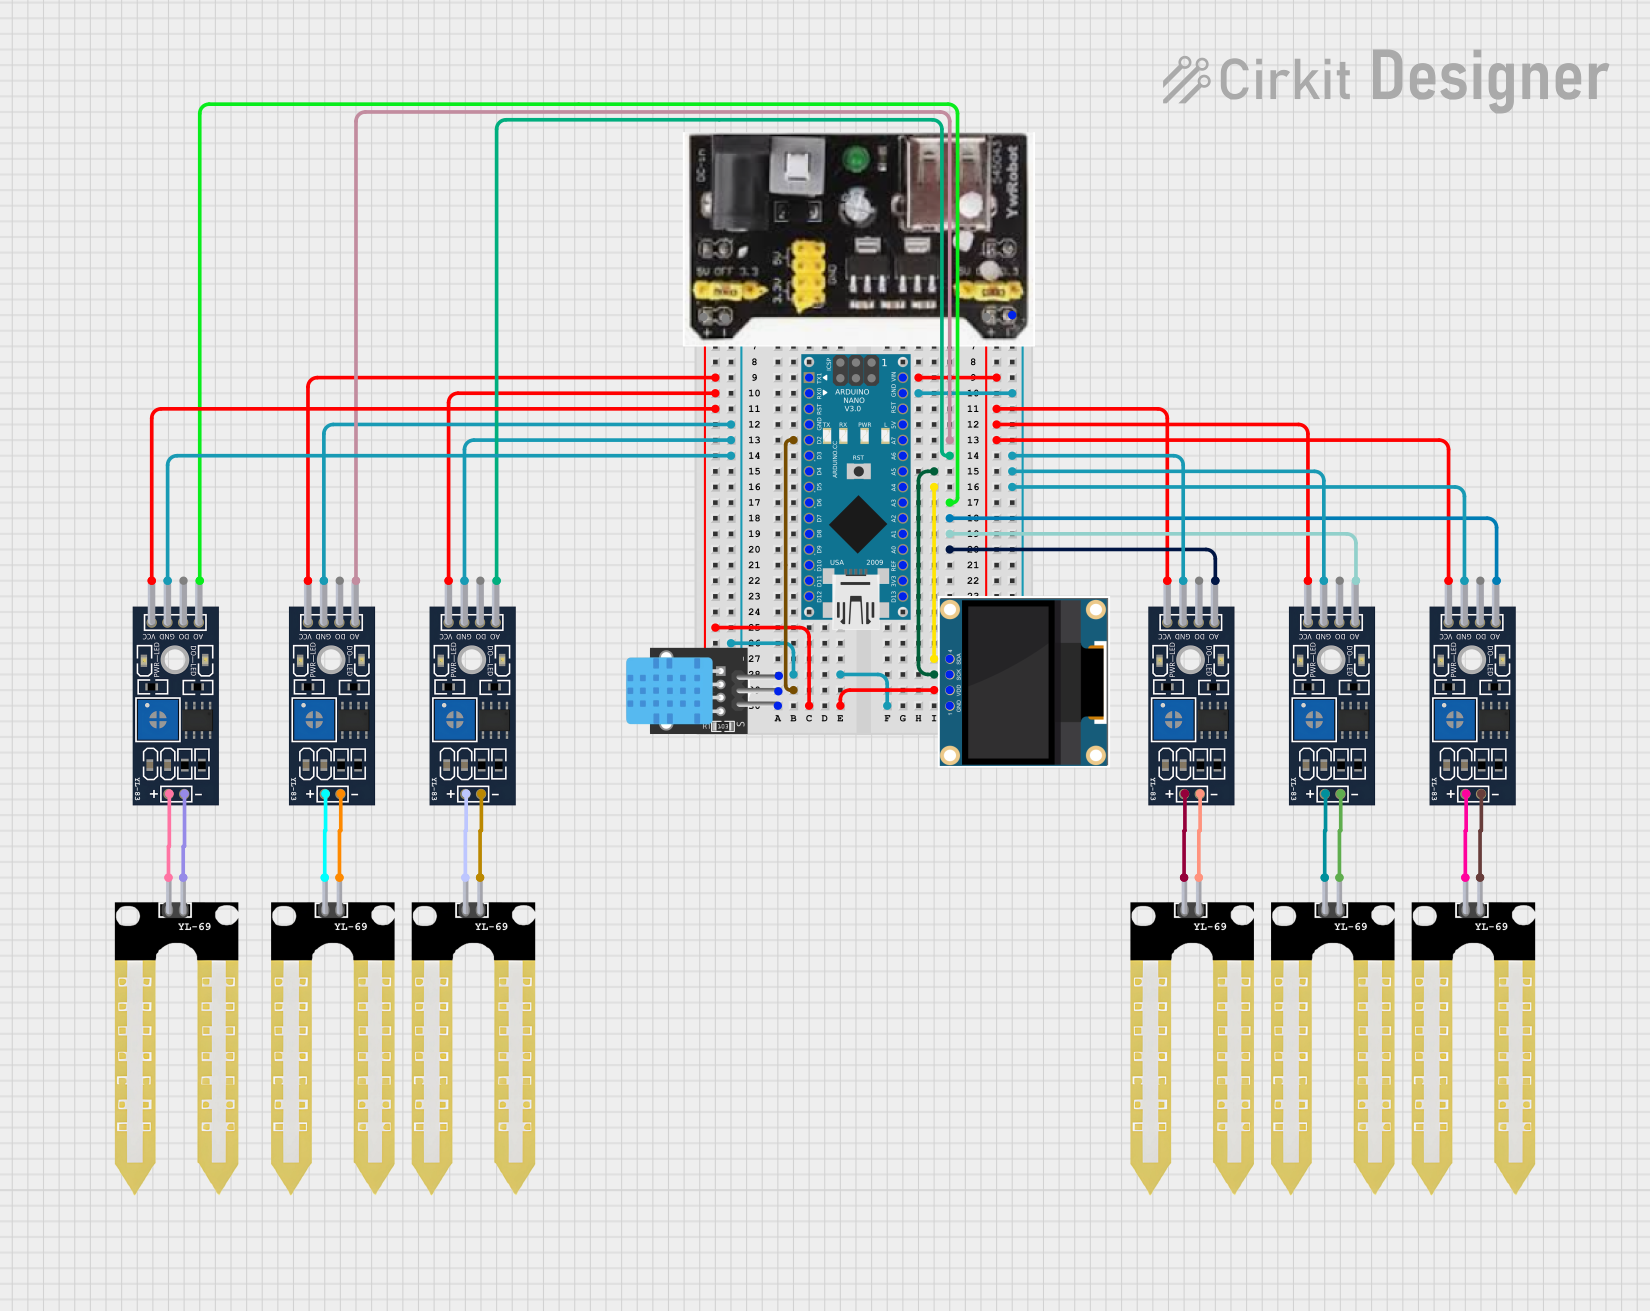
Explore Projects Built with Strain Gauge Y3
Technical Specifications
Key Technical Details
| Parameter | Value |
|---|---|
| Manufacturer | Taufiq |
| Part ID | Strain Gauge |
| Gauge Factor | 2.0 |
| Resistance | 120 Ω |
| Operating Voltage | 5V |
| Operating Temperature Range | -20°C to 80°C |
| Dimensions | 10mm x 5mm x 0.2mm |
| Accuracy | ±0.1% |
Pin Configuration and Descriptions
| Pin Number | Pin Name | Description |
|---|---|---|
| 1 | V+ | Positive voltage supply (5V) |
| 2 | V- | Ground |
| 3 | Signal+ | Positive signal output |
| 4 | Signal- | Negative signal output |
Usage Instructions
How to Use the Strain Gauge Y3 in a Circuit
Wheatstone Bridge Configuration: The Strain Gauge Y3 is typically used in a Wheatstone bridge configuration to measure small changes in resistance due to strain. Connect the strain gauge as one of the resistive elements in the bridge.
Amplification: The output signal from the Wheatstone bridge is usually very small and needs to be amplified. Use an operational amplifier (op-amp) to amplify the signal.
Analog-to-Digital Conversion: If you are interfacing the strain gauge with a microcontroller (e.g., Arduino UNO), you will need an analog-to-digital converter (ADC) to convert the analog signal to a digital one.
Important Considerations and Best Practices
- Temperature Compensation: Strain gauges are sensitive to temperature changes. Use temperature compensation techniques to ensure accurate measurements.
- Calibration: Regularly calibrate the strain gauge to maintain accuracy.
- Mounting: Properly mount the strain gauge on the test object to ensure accurate strain measurement. Use appropriate adhesives and follow the manufacturer's guidelines.
Example: Connecting Strain Gauge Y3 to Arduino UNO
Circuit Diagram
[Strain Gauge Y3] -- [Wheatstone Bridge] -- [Op-Amp] -- [Arduino UNO]
Arduino Code
// Strain Gauge Y3 Example Code
// This code reads the amplified signal from the strain gauge and
// prints the strain value to the serial monitor.

const int analogPin = A0; // Analog pin connected to the op-amp output
float voltage = 0.0;
float strain = 0.0;

void setup() {
  Serial.begin(9600); // Initialize serial communication
}

void loop() {
  int sensorValue = analogRead(analogPin); // Read the analog input
  voltage = sensorValue * (5.0 / 1023.0); // Convert to voltage
  strain = (voltage - 2.5) / 2.0; // Calculate strain (example calculation)

  Serial.print("Voltage: ");
  Serial.print(voltage);
  Serial.print(" V, Strain: ");
  Serial.println(strain);

  delay(1000); // Wait for 1 second before next reading
}
Troubleshooting and FAQs
Common Issues
No Signal Output:
- Solution: Check the connections and ensure the Wheatstone bridge is correctly configured. Verify the power supply and ground connections.
Inaccurate Measurements:
- Solution: Ensure proper calibration of the strain gauge. Check for temperature variations and apply temperature compensation if necessary.
Fluctuating Readings:
- Solution: Verify the stability of the power supply. Use proper shielding and grounding to minimize electrical noise.
FAQs
Q1: Can the Strain Gauge Y3 be used in high-temperature environments?
- A1: The Strain Gauge Y3 is designed to operate within a temperature range of -20°C to 80°C. For higher temperatures, consider using a strain gauge specifically designed for high-temperature applications.
Q2: How often should I calibrate the Strain Gauge Y3?
- A2: Calibration frequency depends on the application and usage conditions. For critical applications, regular calibration (e.g., monthly) is recommended.
Q3: Can I use the Strain Gauge Y3 with other microcontrollers besides Arduino UNO?
- A3: Yes, the Strain Gauge Y3 can be used with any microcontroller that has an analog-to-digital converter (ADC). Ensure proper signal conditioning and amplification.
This documentation provides a comprehensive overview of the Strain Gauge Y3, including its technical specifications, usage instructions, and troubleshooting tips. Whether you are a beginner or an experienced user, this guide will help you effectively utilize the Strain Gauge Y3 in your projects.