How to Use Adafruit BMP388: Examples, Pinouts, and Specs
Introduction
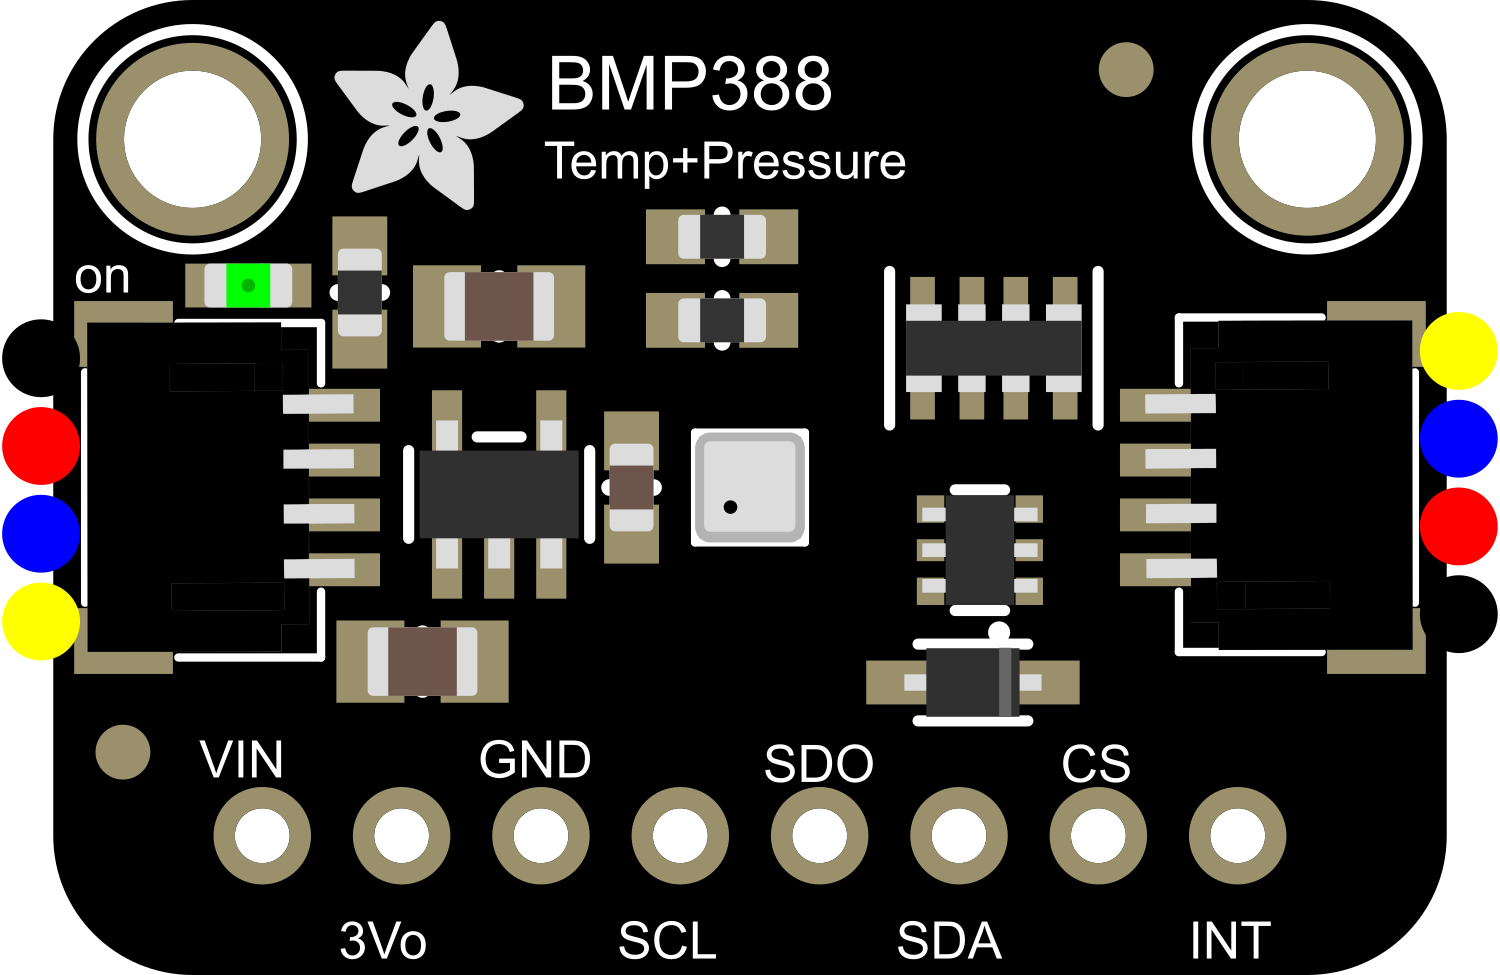
The Adafruit BMP388 is a precision sensor module designed for measuring barometric pressure and temperature. It is a low-power device that offers high accuracy, making it an ideal choice for applications such as weather monitoring, altitude sensing in drones and mobile devices, and environmental sensing. The BMP388 is an upgrade from the earlier BMP280 and BMP180 sensors, providing improved accuracy and lower noise.
Explore Projects Built with Adafruit BMP388
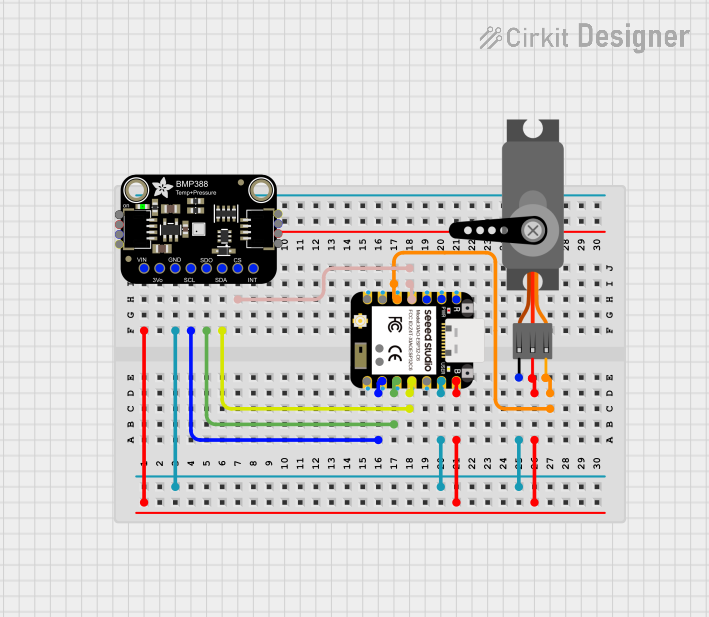
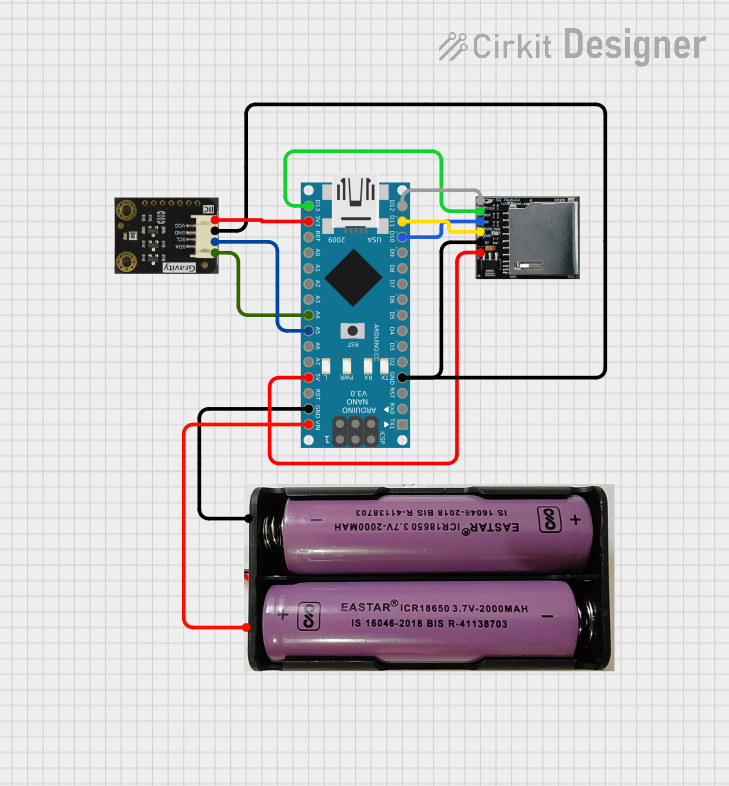
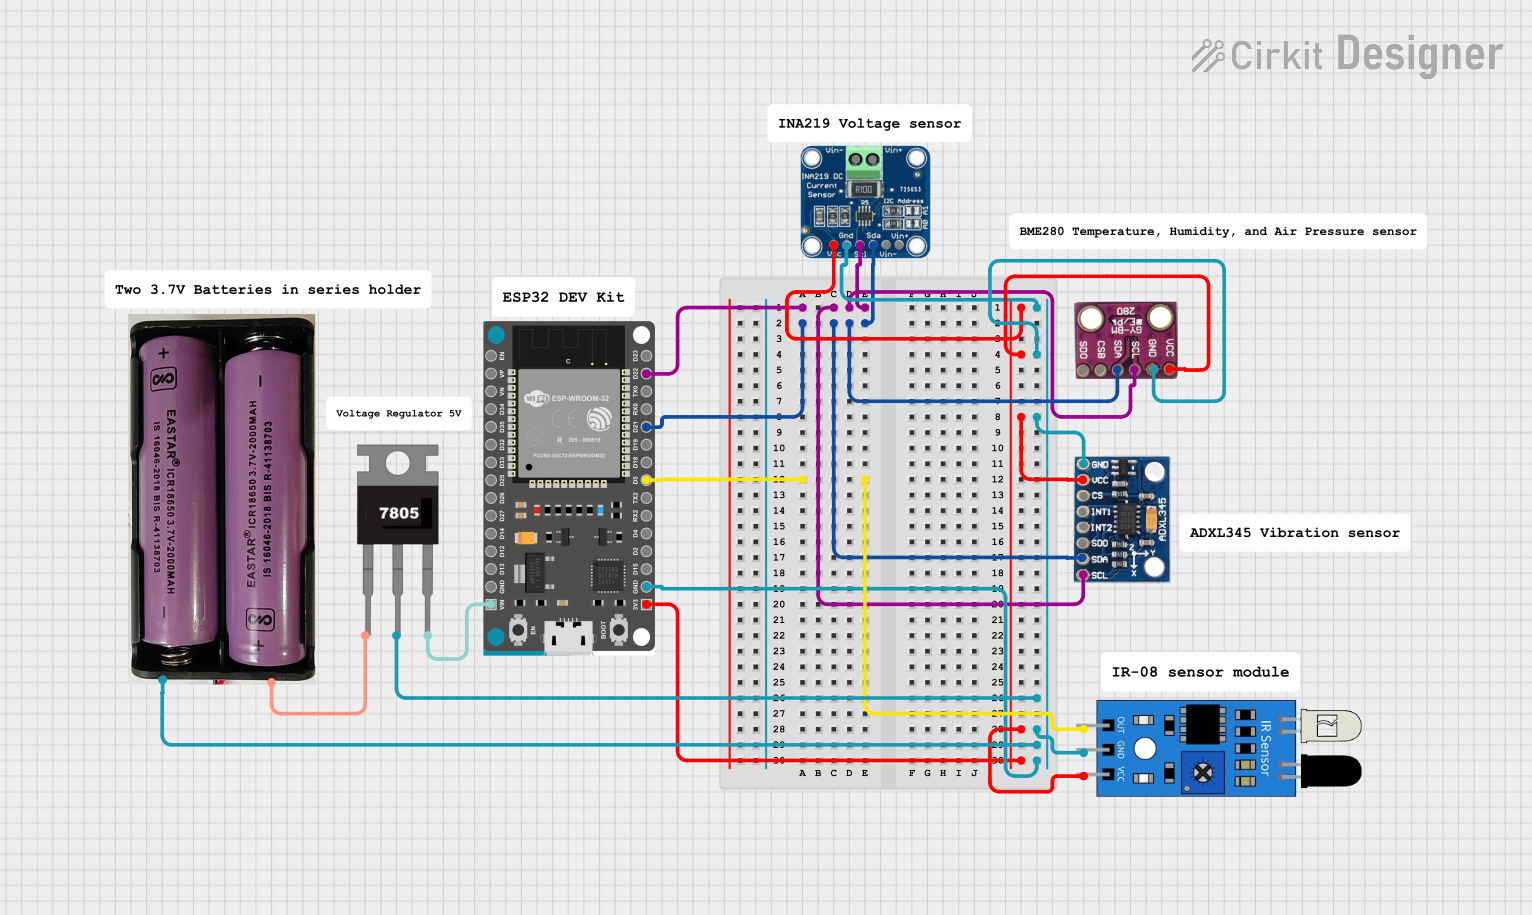
Explore Projects Built with Adafruit BMP388
Technical Specifications
Key Features
- Pressure Range: 300 hPa to 1250 hPa
- Relative Accuracy: ±0.08 hPa (equivalent to ±0.66 m)
- Absolute Accuracy: ±0.5 hPa
- Temperature Range: -40°C to +85°C
- Temperature Accuracy: ±0.5°C
- Interface: I2C (up to 3.4 MHz) and SPI (up to 10 MHz)
- Operating Voltage: 1.65V to 3.6V
- Current Consumption: 2.7 µA at 1 Hz sampling rate
Pin Configuration and Descriptions
| Pin Number | Pin Name | Description |
|---|---|---|
| 1 | VDDIO | Interface voltage supply (1.65V to 3.6V) |
| 2 | GND | Ground |
| 3 | SDO | SPI: Serial Data Output / I2C: Address bit |
| 4 | SDI | SPI: Serial Data Input / I2C: Serial Data |
| 5 | SCK | SPI: Serial Clock / I2C: Serial Clock |
| 6 | CSB | SPI: Chip Select (active low) |
Usage Instructions
Integration with a Circuit
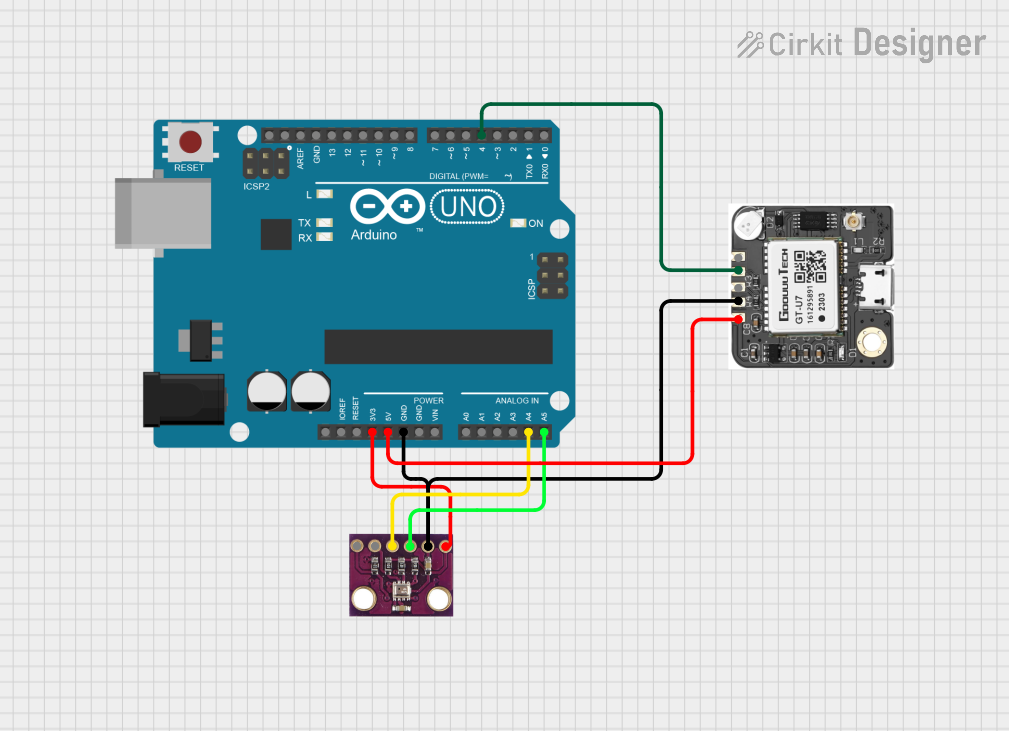
To use the BMP388 with a microcontroller like the Arduino UNO, follow these steps:
- Connect the VDDIO pin to the 3.3V output on the Arduino.
- Connect the GND pin to the ground on the Arduino.
- For I2C communication:
- Connect the SCK pin to the A5 (SCL) pin on the Arduino.
- Connect the SDI pin to the A4 (SDA) pin on the Arduino.
- For SPI communication:
- Connect the SCK pin to the D13 (SCK) pin on the Arduino.
- Connect the SDI pin to the D11 (MOSI) pin on the Arduino.
- Connect the SDO pin to the D12 (MISO) pin on the Arduino.
- Connect the CSB pin to a digital pin on the Arduino (e.g., D10).
Important Considerations and Best Practices
- Ensure that the power supply is stable and within the specified voltage range.
- Use pull-up resistors on the I2C lines if they are not already present on the board.
- Keep the sensor away from heat sources to avoid affecting the temperature readings.
- For accurate pressure readings, calibrate the sensor at a known altitude or pressure.
Example Code for Arduino UNO
Here is a simple example code snippet for reading pressure and temperature from the BMP388 using an Arduino UNO with I2C communication:
#include <Wire.h>
#include <Adafruit_Sensor.h>
#include <Adafruit_BMP3XX.h>

#define SEALEVELPRESSURE_HPA (1013.25)

Adafruit_BMP3XX bmp;

void setup() {
  Serial.begin(115200);
  if (!bmp.begin()) {
    Serial.println("Could not find a valid BMP388 sensor, check wiring!");
    while (1);
  }

  // Set up oversampling and filter initialization
  bmp.setTemperatureOversampling(BMP3_OVERSAMPLING_8X);
  bmp.setPressureOversampling(BMP3_OVERSAMPLING_4X);
  bmp.setIIRFilterCoeff(BMP3_IIR_FILTER_COEFF_3);
}

void loop() {
  if (!bmp.performReading()) {
    Serial.println("Failed to perform reading :(");
    return;
  }
  Serial.print("Temperature = ");
  Serial.print(bmp.temperature);
  Serial.println(" *C");

  Serial.print("Pressure = ");
  Serial.print(bmp.pressure / 100.0);
  Serial.println(" hPa");

  Serial.print("Approx. Altitude = ");
  Serial.print(bmp.readAltitude(SEALEVELPRESSURE_HPA));
  Serial.println(" m");

  delay(2000);
}
Ensure that you have installed the Adafruit BMP3XX library before uploading this code to your Arduino.
Troubleshooting and FAQs
Common Issues
- Sensor not detected: Check the wiring and ensure that the correct voltage is applied. Also, verify that the I2C or SPI address is correctly configured in your code.
- Inaccurate readings: Ensure that the sensor is calibrated and that there are no heat sources affecting the temperature measurement. Also, check for proper oversampling and filter settings.
FAQs
Q: Can the BMP388 be used with a 5V microcontroller? A: Yes, but ensure that the logic level for the I2C or SPI communication is shifted down to 3.3V to avoid damaging the sensor.
Q: How can I calibrate the sensor for altitude measurements?
A: You can calibrate the sensor by providing the current sea level pressure to the readAltitude function or by adjusting the SEALEVELPRESSURE_HPA constant if you know the current sea level pressure for your location.
Q: What is the purpose of the IIR filter in the code? A: The IIR filter helps to reduce noise in the pressure and temperature readings, resulting in more stable measurements.
For further assistance, consult the Adafruit BMP388 datasheet and the Adafruit support forums.