How to Use Glyph C6: Examples, Pinouts, and Specs
Introduction
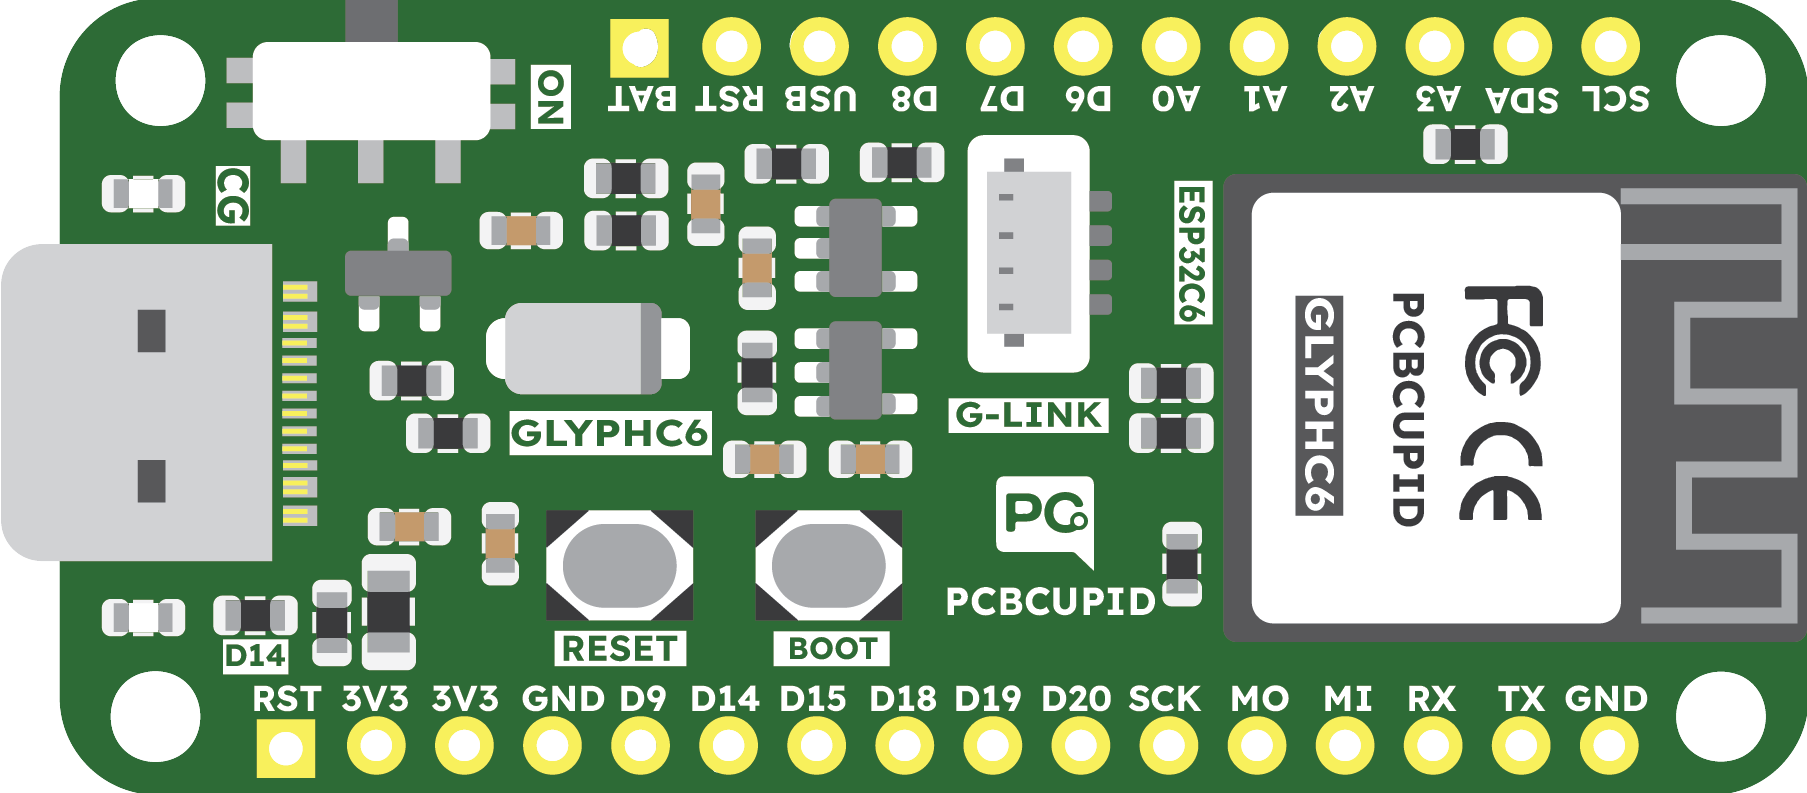
The Glyph C6 is a capacitor designed by PCBCUPID, known for its reliability and efficiency in electronic circuits. Capacitors are fundamental components that store and release electrical energy, and the Glyph C6 is particularly adept at filtering noise and stabilizing voltage levels, making it an essential part of power supply circuits, signal processing, and various other applications where a stable electrical environment is crucial.
Explore Projects Built with Glyph C6
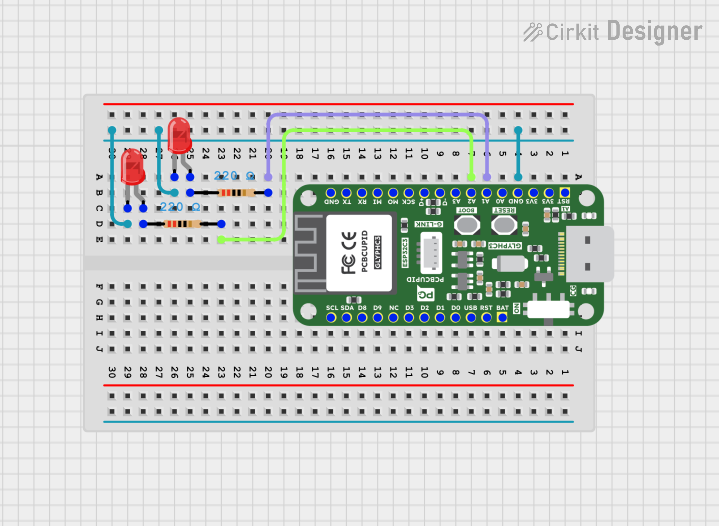
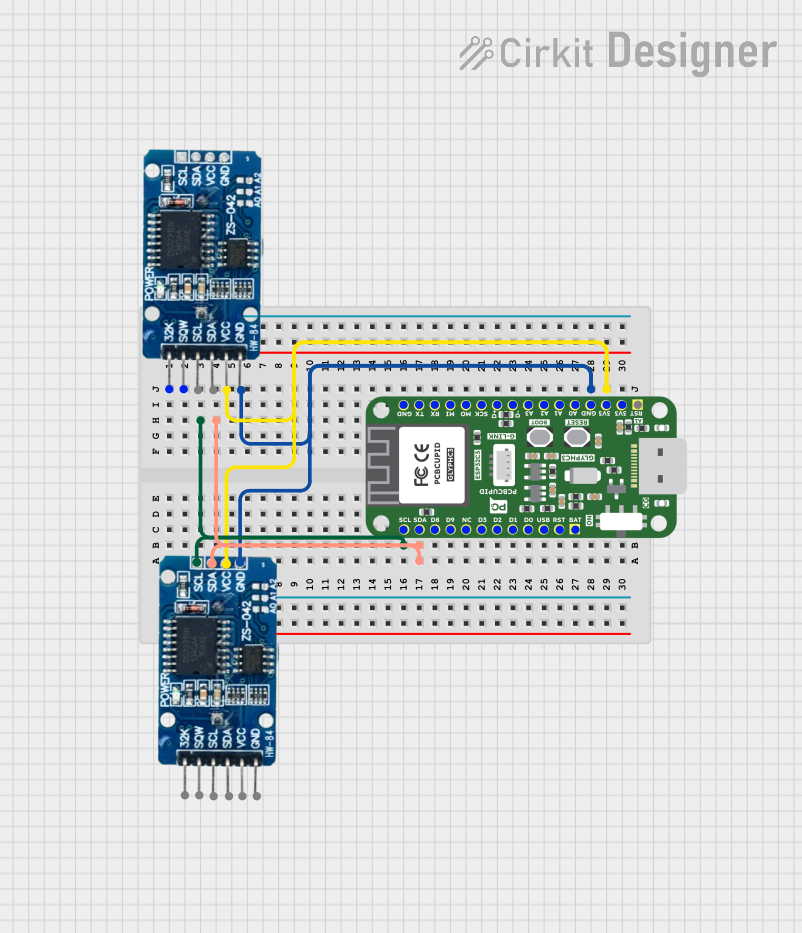
Explore Projects Built with Glyph C6
Common Applications and Use Cases
- Power supply smoothing
- Audio signal processing
- Energy storage in pulsed systems
- Timing circuits
- Coupling and decoupling applications
Technical Specifications
Key Technical Details
| Parameter | Value |
|---|---|
| Capacitance | 6 µF |
| Voltage Rating | 50 V |
| Tolerance | ±5% |
| Temperature Range | -40°C to +85°C |
| Dielectric Material | Polyester Film |
| Terminal Type | Radial |
| Mounting Type | Through Hole |
Pin Configuration and Descriptions
The Glyph C6 capacitor has two terminals, which are not polarized, meaning they can be connected in any direction in a circuit.
| Pin | Description |
|---|---|
| 1 | Terminal A |
| 2 | Terminal B |
Usage Instructions
How to Use the Glyph C6 in a Circuit
Identifying the Terminals: Since the Glyph C6 is non-polarized, you can connect either terminal to the circuit without worrying about polarity.
Circuit Integration: To integrate the Glyph C6 into a circuit for noise filtering, connect it in parallel with the power supply lines near the load. For decoupling applications, place it close to the power pins of integrated circuits.
Soldering: Use a soldering iron with a suitable temperature setting to solder the capacitor onto the circuit board. Avoid excessive heat to prevent damage to the capacitor.
Important Considerations and Best Practices
- Ensure the operating voltage of your circuit does not exceed the 50V rating of the Glyph C6.
- Consider the temperature range of the environment where the Glyph C6 will operate to avoid any temperature-induced failures.
- For audio applications, match the capacitance value closely to the desired frequency response.
- In timing applications, pair the Glyph C6 with a resistor to create an RC time constant that suits your needs.
Troubleshooting and FAQs
Common Issues
- Capacitor not functioning: Check for proper soldering and that the voltage rating has not been exceeded.
- Noise issues persist: Ensure the capacitor is placed as close as possible to the noise source or load.
- Physical damage: Inspect the capacitor for any bulging or leaks, which indicate damage and the need for replacement.
Solutions and Tips for Troubleshooting
- If the capacitor fails to function, verify the circuit's voltage and replace the capacitor if it has been subjected to overvoltage.
- For persistent noise, consider using multiple capacitors in parallel to increase the filtering capability.
- Always discharge the capacitor before handling to prevent electric shock or damage to other components.
FAQs
Q: Can the Glyph C6 be used in AC applications? A: Yes, the Glyph C6 can be used in AC applications due to its non-polarized nature.
Q: What is the lifespan of the Glyph C6? A: The lifespan depends on the operating conditions, but it is designed to last for many years under normal usage within its specified ratings.
Q: Is the Glyph C6 suitable for high-frequency applications? A: The Glyph C6 is suitable for a range of frequencies, but for very high-frequency applications, other types of capacitors may be more appropriate.
Example Arduino UNO Connection
// Example code to demonstrate a simple use of the Glyph C6 capacitor
// in an Arduino-based circuit for debounce in a button press.

const int buttonPin = 2;    // The pin connected to the button
const int ledPin = 13;      // The pin connected to an LED

void setup() {
  pinMode(ledPin, OUTPUT);  // Initialize the LED pin as an output
  pinMode(buttonPin, INPUT); // Initialize the button pin as an input
}

void loop() {
  int buttonState = digitalRead(buttonPin); // Read the state of the button
  if (buttonState == HIGH) {                // If the button is pressed
    digitalWrite(ledPin, HIGH);             // Turn on the LED
  } else {
    digitalWrite(ledPin, LOW);              // Turn off the LED
  }
}

// Note: Connect the Glyph C6 across the button terminals to debounce the signal.
// This will smooth out the button press signal and prevent false triggering.
Remember to connect the Glyph C6 capacitor across the button terminals to filter out any noise caused by the bouncing effect of the button's contacts. This will provide a cleaner signal to the digital input of the Arduino.