Cirkit Designer Logo
Cirkit Designer
Your all-in-one circuit design IDE
Home / 
Component Documentation

How to Use Analog Joystick: Examples, Pinouts, and Specs

Image of Analog Joystick
Cirkit Designer LogoDesign with Analog Joystick in Cirkit Designer

Introduction

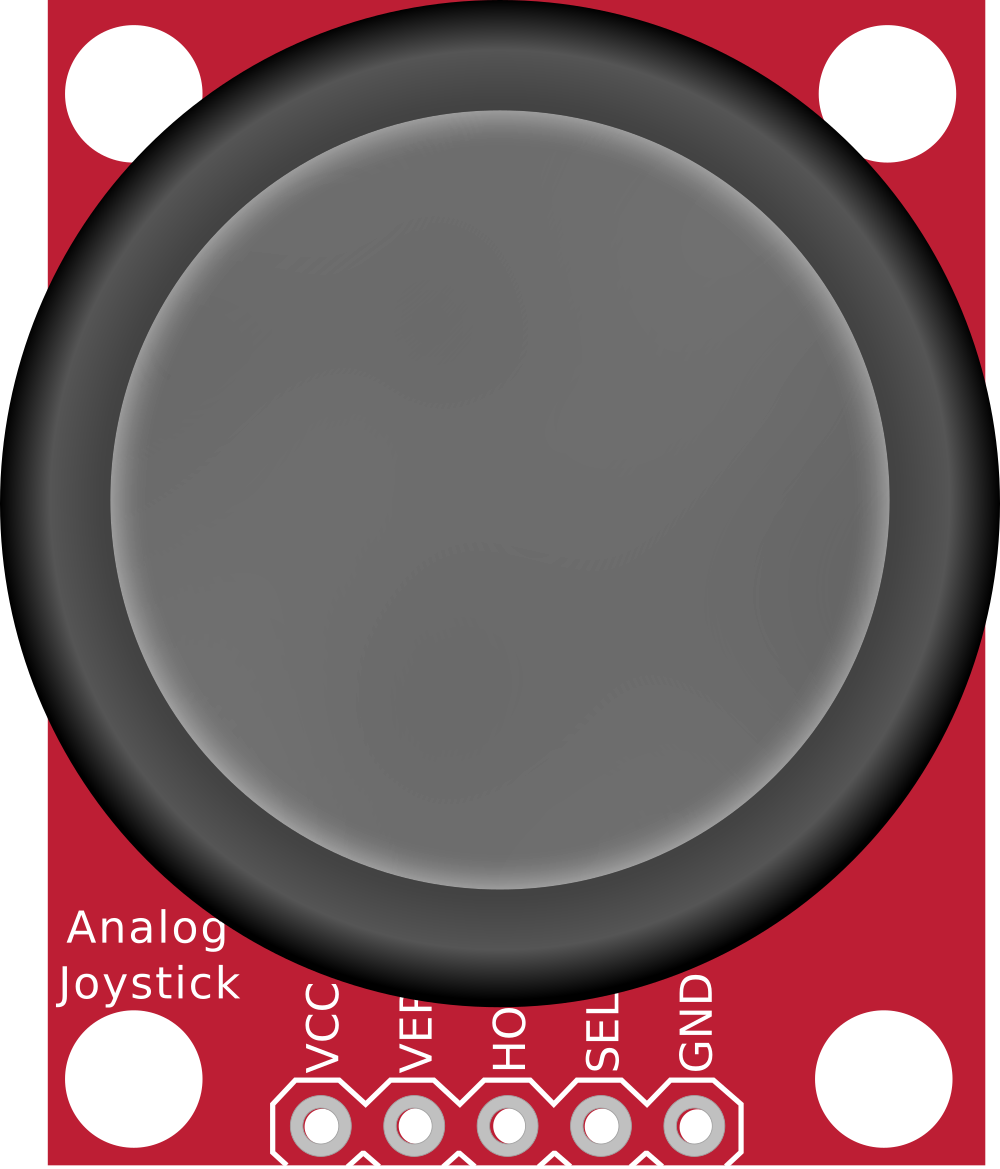
The Analog Joystick is an input device that provides two-dimensional analog input, typically used for controlling movement in games or for precise control in various applications. It consists of two potentiometers (one for the X-axis and one for the Y-axis) and a push-button switch. The joystick can be used to detect the direction and magnitude of movement, making it ideal for applications such as robotics, remote controls, and interactive projects.

Explore Projects Built with Analog Joystick

Use Cirkit Designer to design, explore, and prototype these projects online. Some projects support real-time simulation. Click "Open Project" to start designing instantly!
Arduino Nano Joystick-Controlled Bluetooth Module with Battery Power
Image of padelpro transmitter: A project utilizing Analog Joystick in a practical application
This circuit is a wireless joystick controller that uses an Arduino Nano to read analog signals from a KY-023 Dual Axis Joystick Module and transmits the data via an HC-05 Bluetooth Module. The system is powered by a 18650 Li-Ion battery with a rocker switch for power control.
Cirkit Designer LogoOpen Project in Cirkit Designer
Arduino UNO Based Analog Joystick Interface
Image of PILAPIL_JOYSTICK: A project utilizing Analog Joystick in a practical application
This circuit consists of an Arduino UNO microcontroller connected to an analog joystick. The joystick's vertical and horizontal movements are read by the Arduino through analog pins A0 and A1, respectively. The microcontroller is programmed to read these analog values and output the joystick's position to the serial monitor.
Cirkit Designer LogoOpen Project in Cirkit Designer
Arduino UNO-Based Analog Joystick Interface
Image of Joystick: A project utilizing Analog Joystick in a practical application
This circuit consists of an Arduino UNO microcontroller connected to an analog joystick. The joystick's vertical and horizontal movements are read by the Arduino's analog pins A0 and A1, respectively. The embedded code on the Arduino reads these analog values and outputs the joystick's position to the serial monitor.
Cirkit Designer LogoOpen Project in Cirkit Designer
ESP32-Based Dual Joystick Controller with Wi-Fi Connectivity
Image of new_project: A project utilizing Analog Joystick in a practical application
This circuit features an ESP32 microcontroller interfaced with two analog joysticks. The joysticks provide analog input to the ESP32, allowing it to read horizontal and vertical positions as well as the select button state from each joystick.
Cirkit Designer LogoOpen Project in Cirkit Designer

Explore Projects Built with Analog Joystick

Use Cirkit Designer to design, explore, and prototype these projects online. Some projects support real-time simulation. Click "Open Project" to start designing instantly!
Image of padelpro transmitter: A project utilizing Analog Joystick in a practical application
Arduino Nano Joystick-Controlled Bluetooth Module with Battery Power
This circuit is a wireless joystick controller that uses an Arduino Nano to read analog signals from a KY-023 Dual Axis Joystick Module and transmits the data via an HC-05 Bluetooth Module. The system is powered by a 18650 Li-Ion battery with a rocker switch for power control.
Cirkit Designer LogoOpen Project in Cirkit Designer
Image of PILAPIL_JOYSTICK: A project utilizing Analog Joystick in a practical application
Arduino UNO Based Analog Joystick Interface
This circuit consists of an Arduino UNO microcontroller connected to an analog joystick. The joystick's vertical and horizontal movements are read by the Arduino through analog pins A0 and A1, respectively. The microcontroller is programmed to read these analog values and output the joystick's position to the serial monitor.
Cirkit Designer LogoOpen Project in Cirkit Designer
Image of Joystick: A project utilizing Analog Joystick in a practical application
Arduino UNO-Based Analog Joystick Interface
This circuit consists of an Arduino UNO microcontroller connected to an analog joystick. The joystick's vertical and horizontal movements are read by the Arduino's analog pins A0 and A1, respectively. The embedded code on the Arduino reads these analog values and outputs the joystick's position to the serial monitor.
Cirkit Designer LogoOpen Project in Cirkit Designer
Image of new_project: A project utilizing Analog Joystick in a practical application
ESP32-Based Dual Joystick Controller with Wi-Fi Connectivity
This circuit features an ESP32 microcontroller interfaced with two analog joysticks. The joysticks provide analog input to the ESP32, allowing it to read horizontal and vertical positions as well as the select button state from each joystick.
Cirkit Designer LogoOpen Project in Cirkit Designer

Technical Specifications

Key Technical Details

Parameter Value
Operating Voltage 5V DC
X-axis Range 0V to 5V
Y-axis Range 0V to 5V
Push-button Active Low (0V when pressed)
Dimensions 40mm x 40mm x 32mm

Pin Configuration and Descriptions

Pin Number Pin Name Description
1 GND Ground
2 +5V Power Supply (5V)
3 VRx Analog Output for X-axis (0V to 5V)
4 VRy Analog Output for Y-axis (0V to 5V)
5 SW Digital Output for Push-button (Active Low)

Usage Instructions

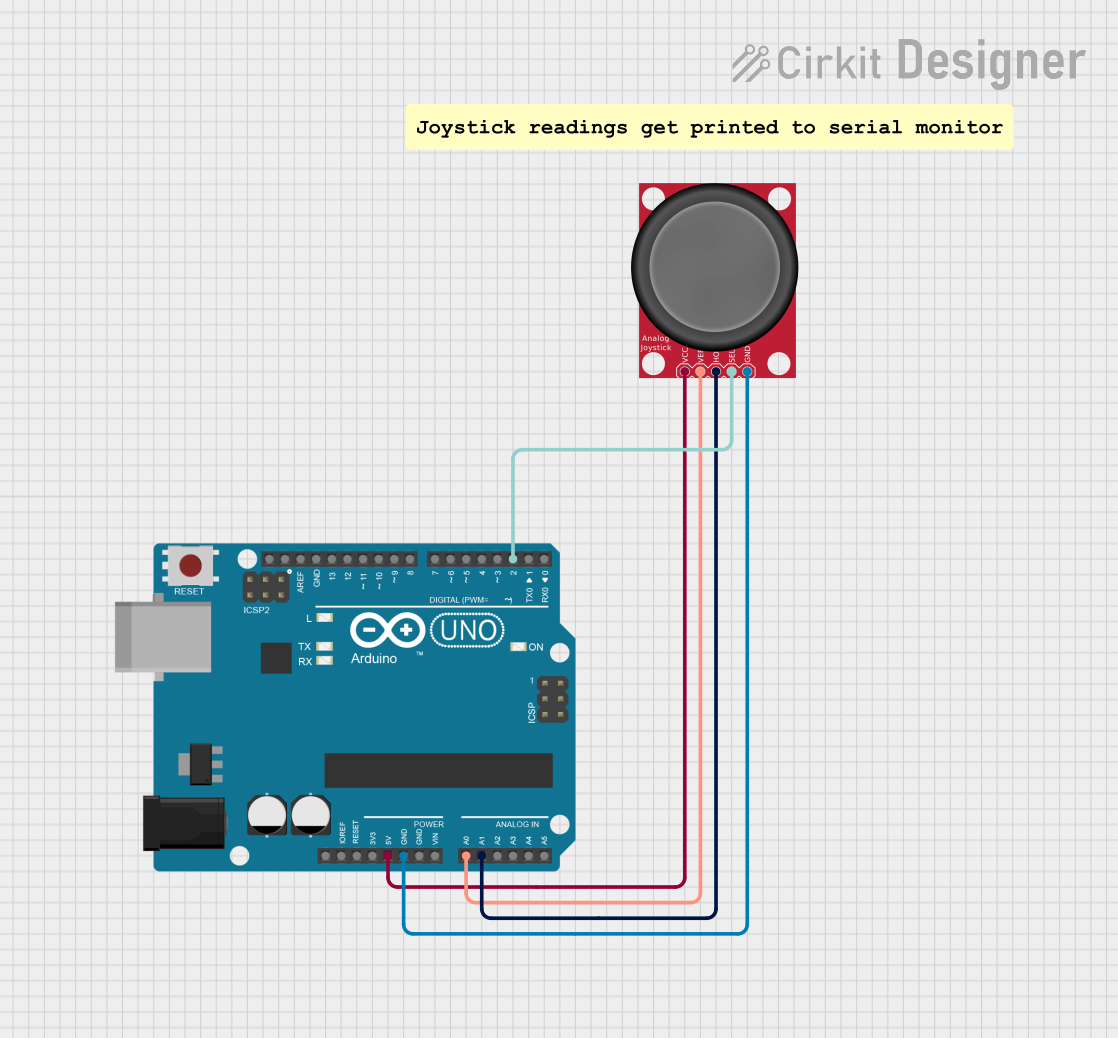
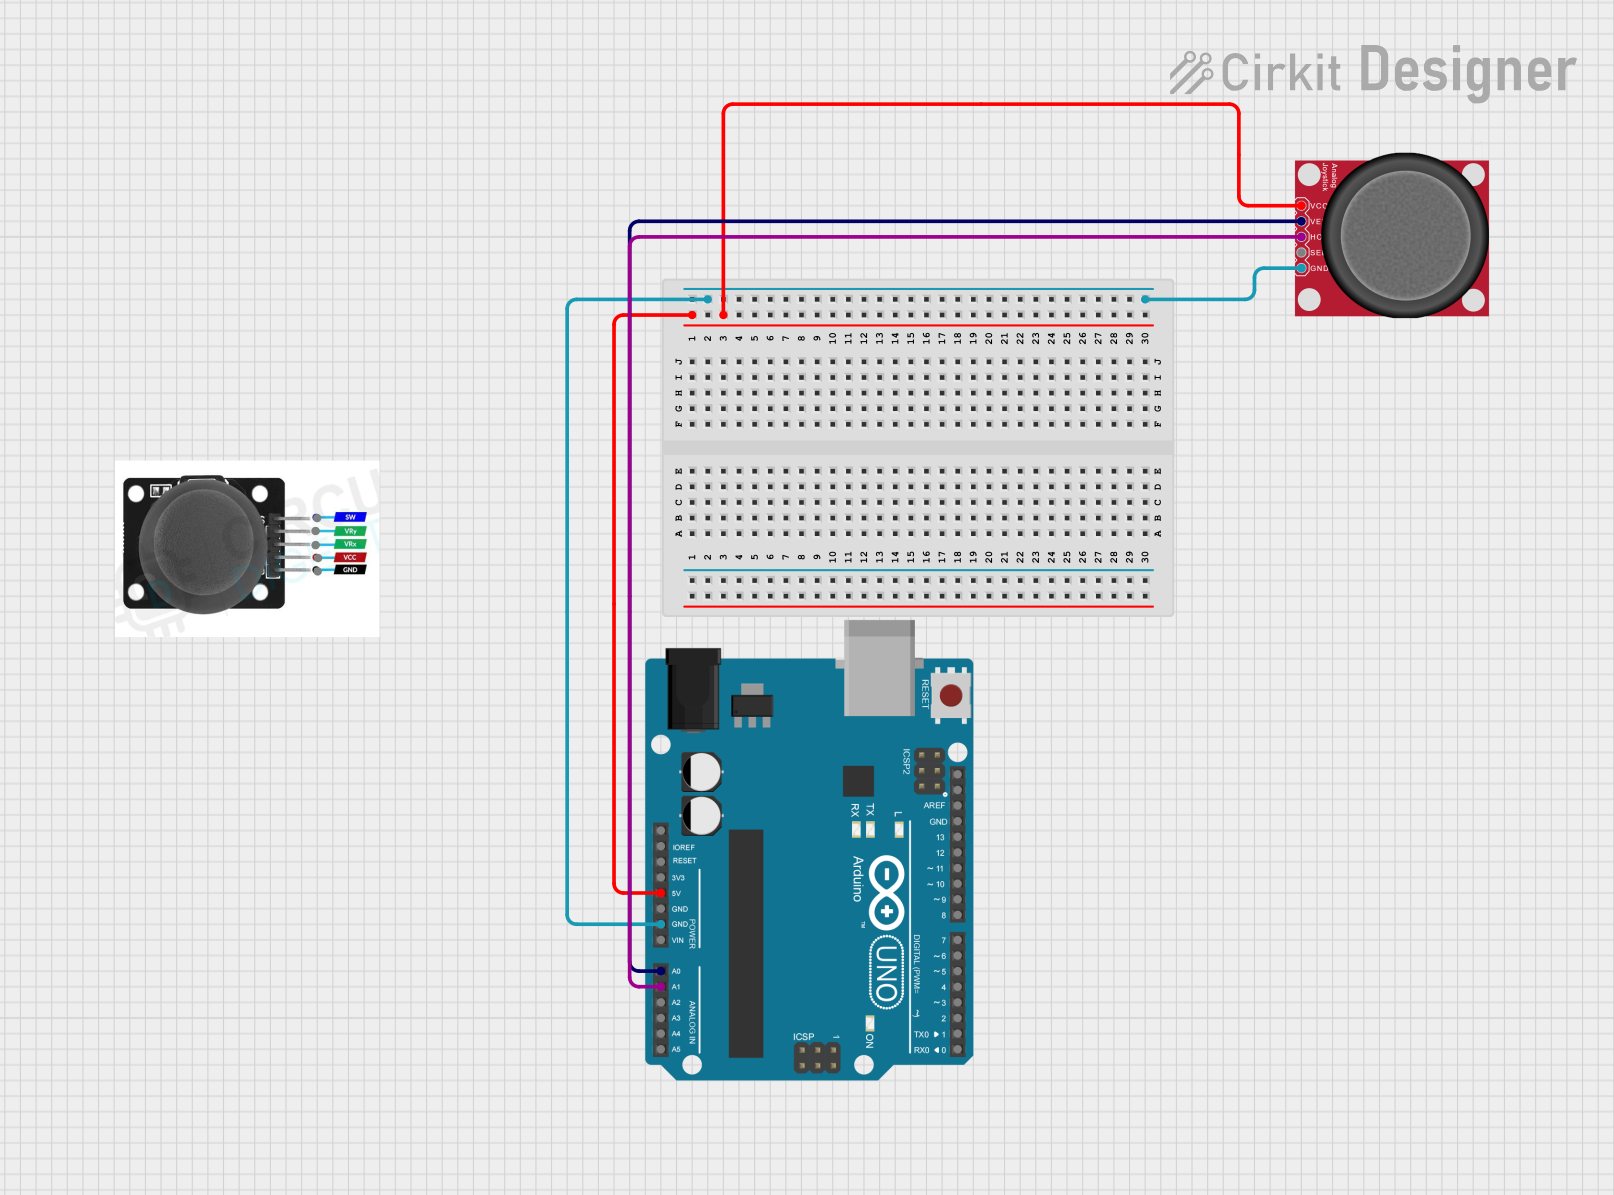
How to Use the Component in a Circuit

  1. Power Supply:

    • Connect the +5V pin of the joystick to the 5V pin on the Arduino UNO.
    • Connect the GND pin of the joystick to the GND pin on the Arduino UNO.
  2. Analog Outputs:

    • Connect the VRx pin to an analog input pin on the Arduino UNO (e.g., A0).
    • Connect the VRy pin to another analog input pin on the Arduino UNO (e.g., A1).
  3. Push-button:

    • Connect the SW pin to a digital input pin on the Arduino UNO (e.g., D2).

Important Considerations and Best Practices

  • Ensure that the joystick is properly calibrated in your software to account for any variations in the analog readings.
  • Use pull-up resistors for the push-button to ensure reliable readings.
  • Debounce the push-button in software to avoid false triggers.

Sample Arduino Code

// Define the pins for the joystick
const int VRxPin = A0; // X-axis
const int VRyPin = A1; // Y-axis
const int SWPin = 2;   // Push-button

void setup() {
  // Initialize serial communication
  Serial.begin(9600);
  
  // Set the push-button pin as input with internal pull-up resistor
  pinMode(SWPin, INPUT_PULLUP);
}

void loop() {
  // Read the analog values from the joystick
  int xValue = analogRead(VRxPin);
  int yValue = analogRead(VRyPin);
  
  // Read the digital value from the push-button
  int buttonState = digitalRead(SWPin);
  
  // Print the values to the serial monitor
  Serial.print("X: ");
  Serial.print(xValue);
  Serial.print(" | Y: ");
  Serial.print(yValue);
  Serial.print(" | Button: ");
  Serial.println(buttonState == LOW ? "Pressed" : "Released");
  
  // Add a small delay to avoid flooding the serial monitor
  delay(100);
}

Troubleshooting and FAQs

Common Issues Users Might Face

  1. Inconsistent Analog Readings:

    • Solution: Ensure that the joystick is properly connected and that the power supply is stable. Calibrate the joystick in your software to account for any variations.
  2. Push-button Not Responding:

    • Solution: Check the wiring and ensure that the SW pin is connected to a digital input pin on the Arduino. Use a pull-up resistor if necessary.
  3. Joystick Not Centering:

    • Solution: Calibrate the joystick in your software to account for any offset. Ensure that the joystick is not physically damaged.

Solutions and Tips for Troubleshooting

  • Check Connections: Ensure that all connections are secure and that there are no loose wires.
  • Use Serial Monitor: Utilize the serial monitor to debug and verify the readings from the joystick.
  • Debounce Push-button: Implement software debouncing for the push-button to avoid false triggers.

By following this documentation, you should be able to effectively integrate and use the Analog Joystick in your projects. Whether you are a beginner or an experienced user, this guide provides the necessary information to get started and troubleshoot common issues.