How to Use NucleoF303K8: Examples, Pinouts, and Specs
Introduction
The NucleoF303K8 is a compact development board built around the STM32F303K8 microcontroller, which features a 32-bit ARM Cortex-M4 core with a floating-point unit (FPU). This board is designed to provide a flexible and user-friendly platform for prototyping and developing embedded applications. It supports a wide range of expansion boards through its Arduino Nano-compatible headers and ST morpho connectors, making it suitable for a variety of projects.
Explore Projects Built with NucleoF303K8
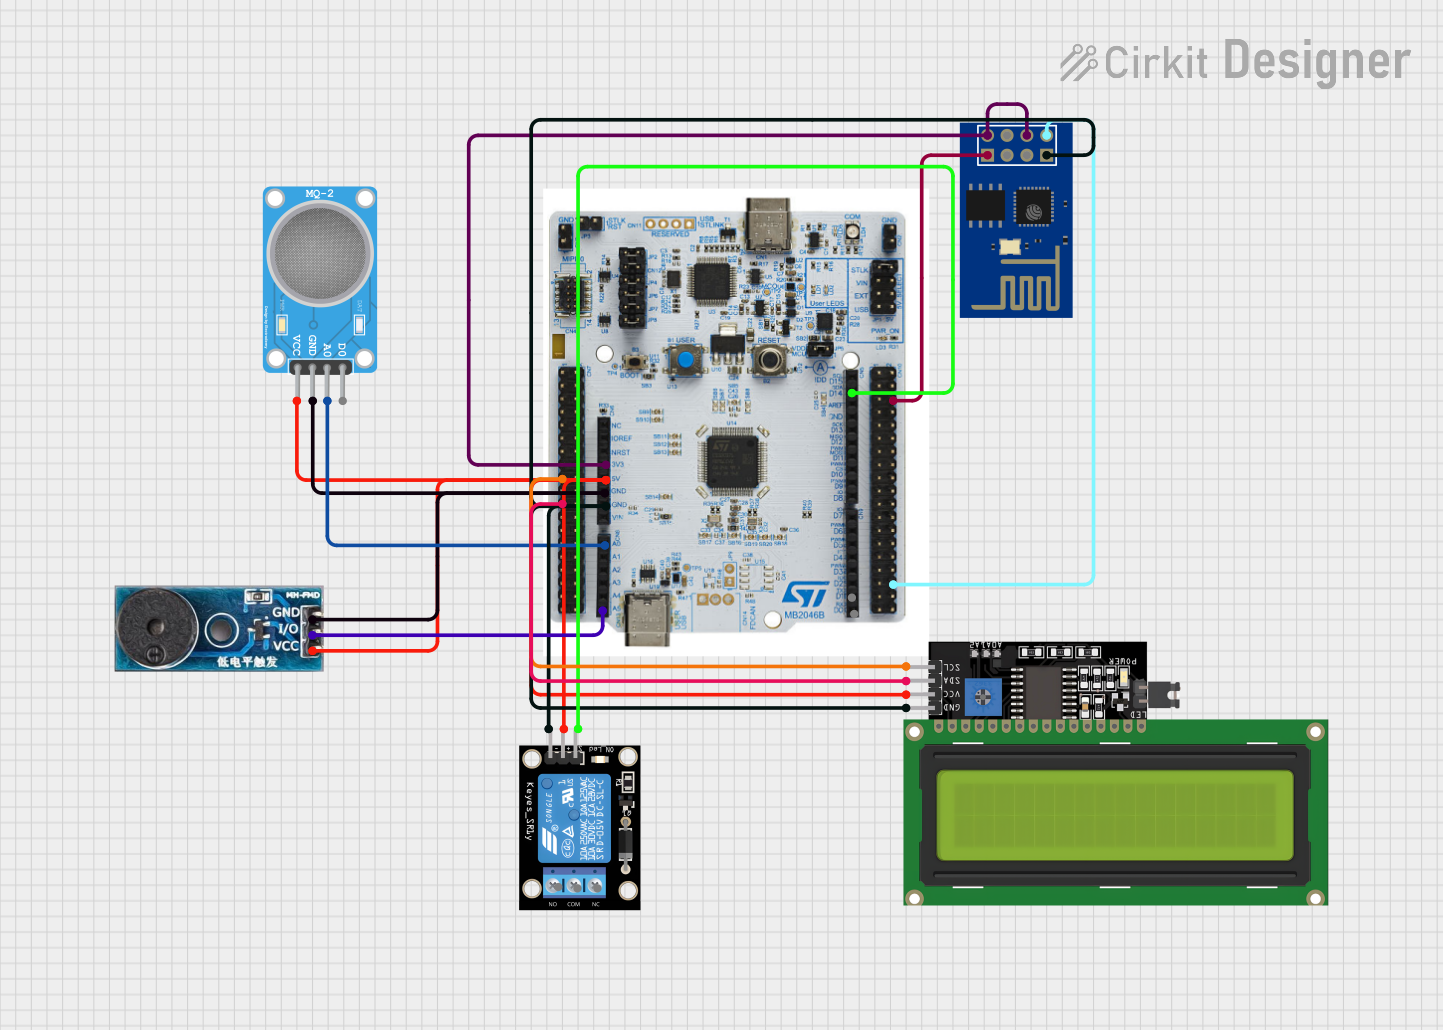

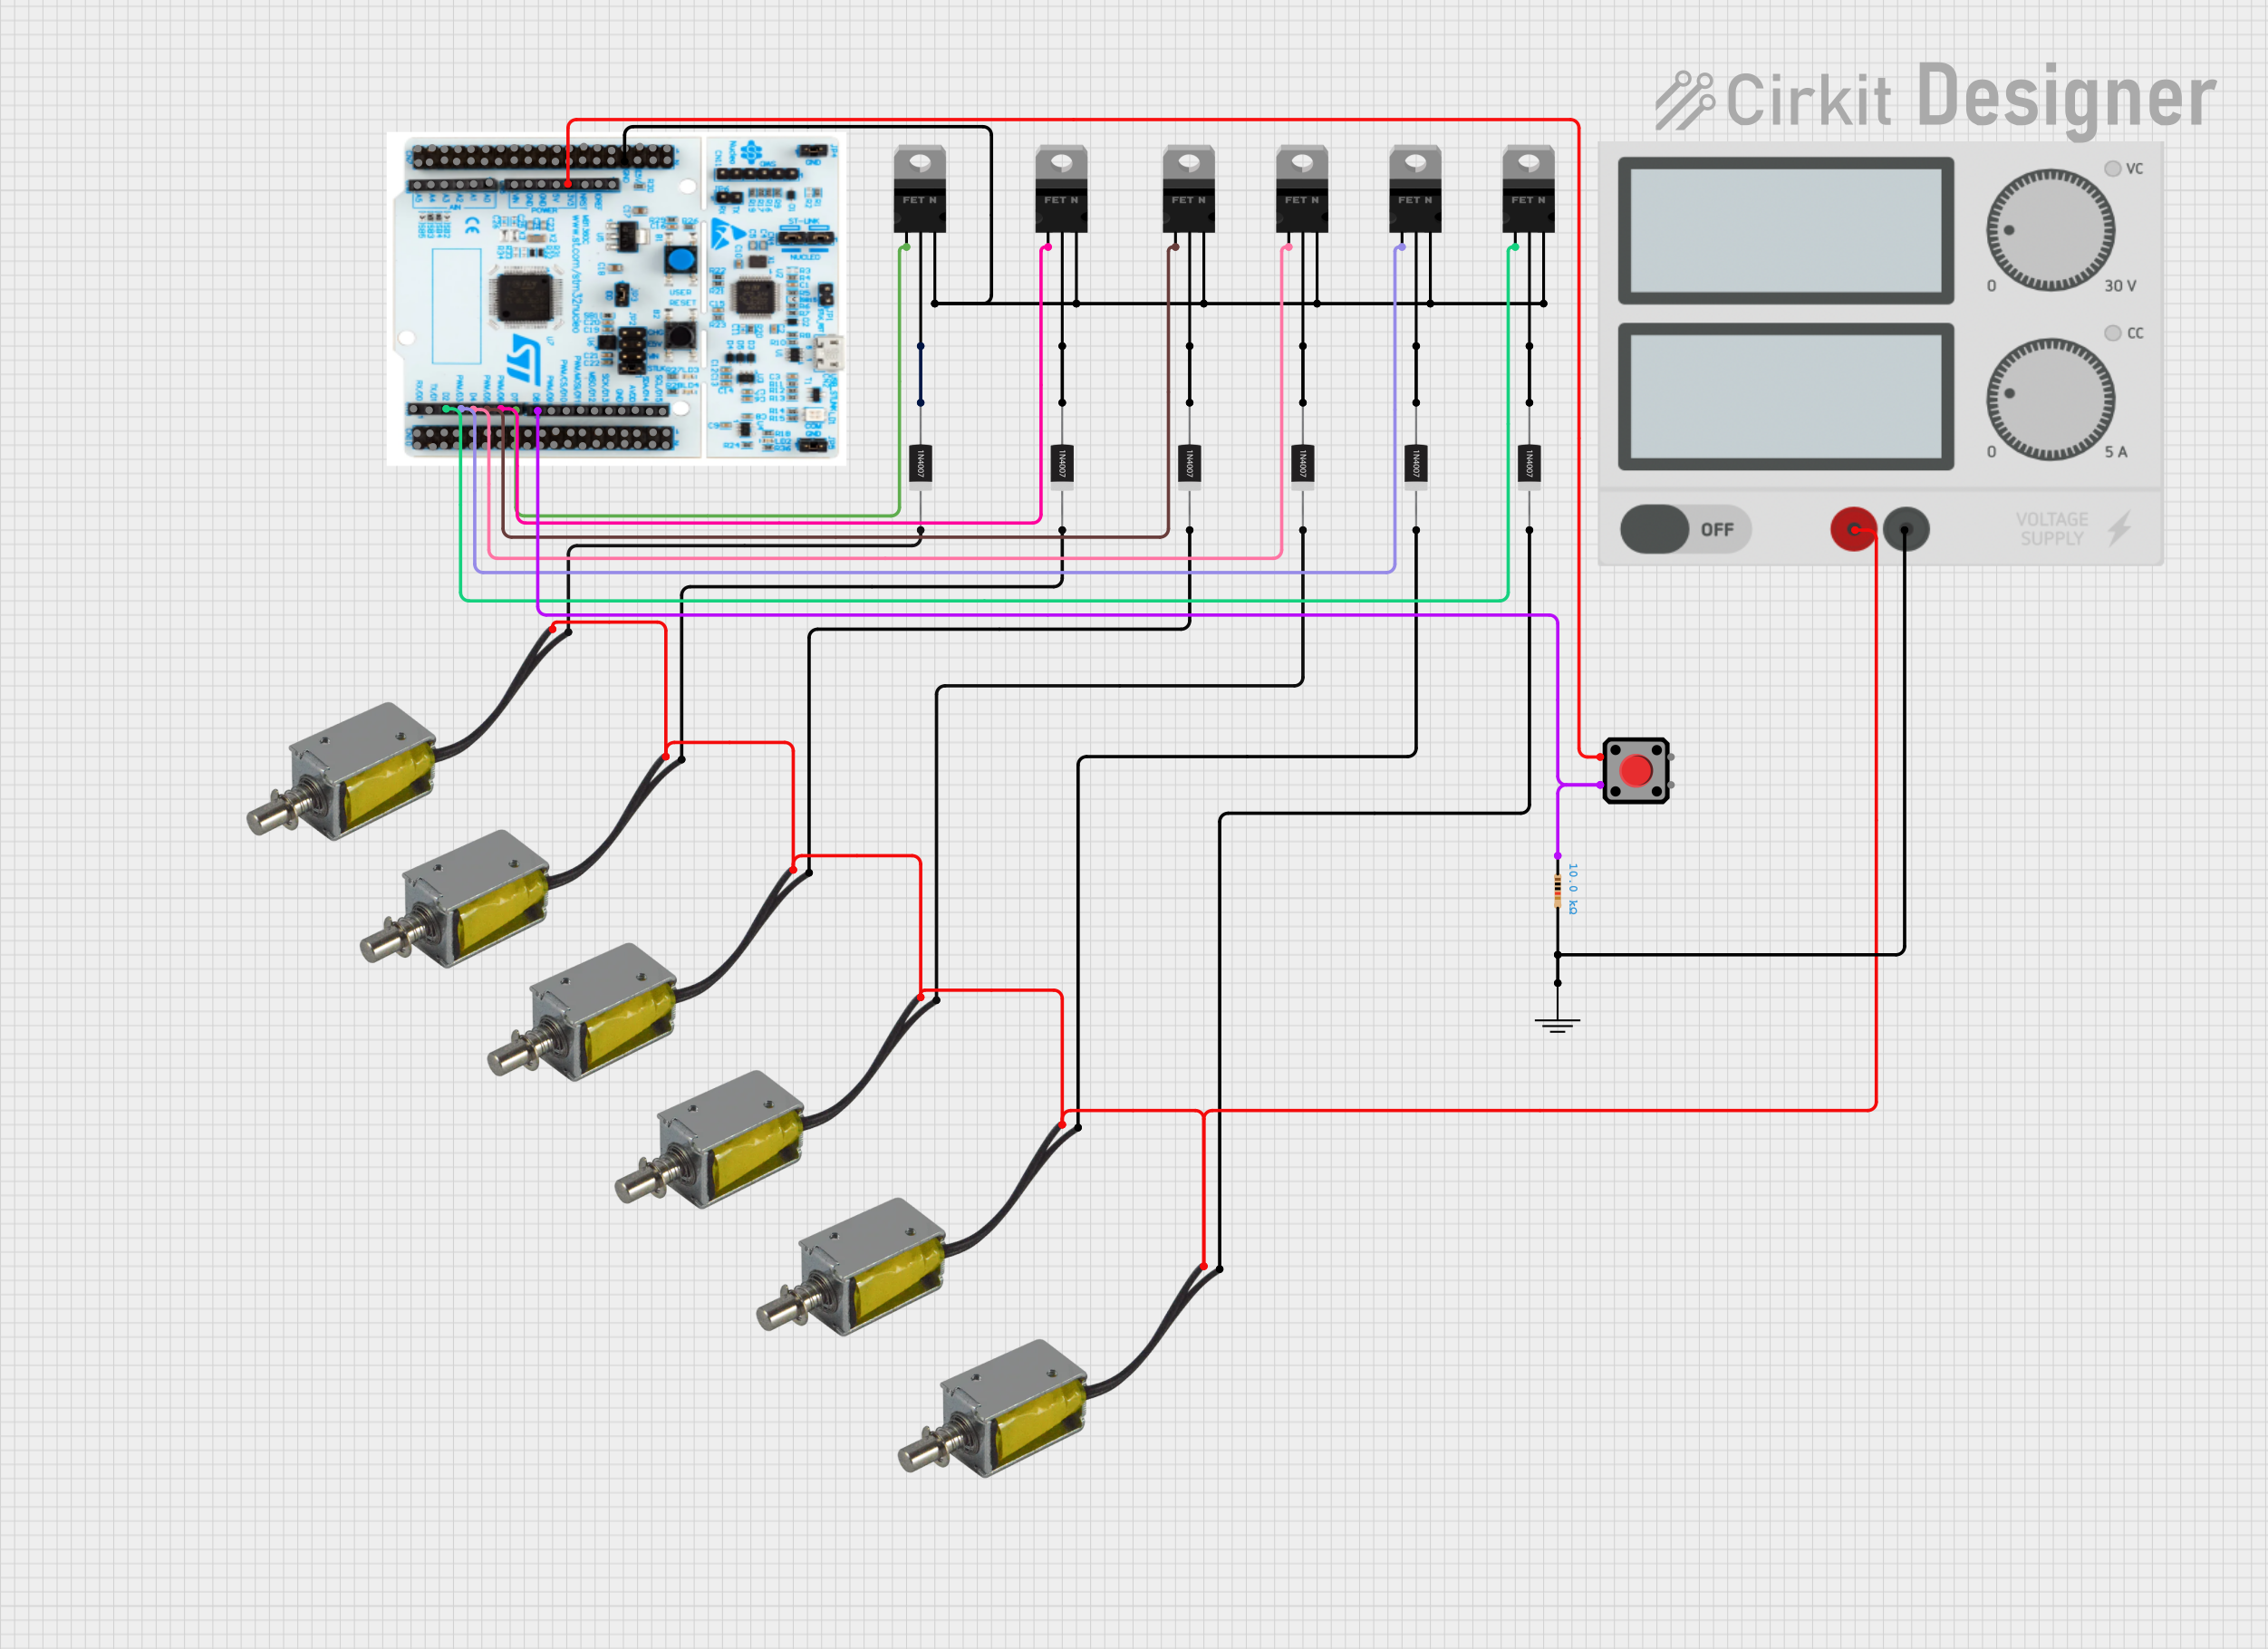

Explore Projects Built with NucleoF303K8
Common Applications and Use Cases
- Motor control and industrial automation
- Sensor interfacing and data acquisition
- IoT (Internet of Things) devices
- Robotics and mechatronics
- Educational and research projects
Technical Specifications
Key Technical Details
| Parameter | Specification |
|---|---|
| Microcontroller | STM32F303K8 (ARM Cortex-M4 @ 72 MHz) |
| Flash Memory | 64 KB |
| SRAM | 12 KB |
| Operating Voltage | 3.3V |
| Input Voltage (VIN) | 7V to 12V |
| I/O Voltage Levels | 3.3V (5V-tolerant I/O pins) |
| Communication Interfaces | UART, I2C, SPI, CAN |
| ADC Resolution | 12-bit (up to 16 channels) |
| DAC Resolution | 12-bit (2 channels) |
| PWM Channels | 7 |
| Debug Interface | ST-LINK/V2-1 (onboard) |
| Dimensions | 43 mm x 17.5 mm |
Pin Configuration and Descriptions
The NucleoF303K8 features Arduino Nano-compatible headers and ST morpho connectors. Below is the pinout description for the Arduino Nano-compatible headers:
| Pin Number | Pin Name | Functionality |
|---|---|---|
| D0 | PA3 | UART RX, GPIO |
| D1 | PA2 | UART TX, GPIO |
| D2 | PA10 | GPIO, External Interrupt |
| D3 | PB3 | GPIO, PWM |
| D4 | PB5 | GPIO |
| D5 | PB4 | GPIO, PWM |
| D6 | PB10 | GPIO, PWM |
| D7 | PA8 | GPIO |
| D8 | PA9 | GPIO, PWM |
| D9 | PC7 | GPIO, PWM |
| D10 | PB6 | GPIO, SPI CS |
| D11 | PA7 | GPIO, SPI MOSI |
| D12 | PA6 | GPIO, SPI MISO |
| D13 | PA5 | GPIO, SPI SCK, LED |
| A0 | PA0 | ADC Input, GPIO |
| A1 | PA1 | ADC Input, GPIO |
| A2 | PA4 | ADC Input, GPIO |
| A3 | PB0 | ADC Input, GPIO |
| A4 | PC1 | ADC Input, GPIO, I2C SDA |
| A5 | PC0 | ADC Input, GPIO, I2C SCL |
Usage Instructions
How to Use the NucleoF303K8 in a Circuit
Powering the Board:
- The board can be powered via the USB port or an external power supply (VIN pin). Ensure the input voltage is within the specified range (7V to 12V for VIN).
Programming the Board:
- The onboard ST-LINK/V2-1 debugger allows you to program the STM32F303K8 directly using tools like STM32CubeIDE or Arduino IDE (with STM32 core installed).
Connecting Peripherals:
- Use the Arduino Nano-compatible headers to connect sensors, actuators, or other modules. Ensure proper pin mapping and voltage compatibility.
Using Communication Interfaces:
- The board supports UART, I2C, SPI, and CAN for communication. Configure the pins and peripherals in your firmware accordingly.
Important Considerations and Best Practices
- Voltage Levels: While the I/O pins are 5V-tolerant, the operating voltage is 3.3V. Ensure connected peripherals are compatible.
- Debugging: Use the onboard ST-LINK/V2-1 for debugging and programming. Ensure the ST-LINK drivers are installed on your computer.
- Clock Configuration: Configure the system clock appropriately in your firmware to achieve optimal performance.
- Heat Management: Avoid overloading the board with high-current peripherals to prevent overheating.
Example Code for Arduino IDE
Below is an example of how to blink the onboard LED (connected to pin D13) using the Arduino IDE:
// Define the LED pin
const int ledPin = D13;

void setup() {
  // Set the LED pin as an output
  pinMode(ledPin, OUTPUT);
}

void loop() {
  // Turn the LED on
  digitalWrite(ledPin, HIGH);
  delay(1000); // Wait for 1 second

  // Turn the LED off
  digitalWrite(ledPin, LOW);
  delay(1000); // Wait for 1 second
}
Troubleshooting and FAQs
Common Issues and Solutions
Board Not Detected by PC:
- Ensure the USB cable is functional and supports data transfer.
- Verify that the ST-LINK drivers are installed on your computer.
- Check the device manager for any connection issues.
Program Not Running After Upload:
- Ensure the correct board and port are selected in the IDE.
- Verify that the firmware is compiled for the STM32F303K8 microcontroller.
Peripheral Not Responding:
- Double-check the wiring and pin connections.
- Ensure the peripheral is powered and compatible with 3.3V logic levels.
Overheating:
- Avoid drawing excessive current from the board.
- Use external power supplies for high-power peripherals.
FAQs
Q: Can I use the NucleoF303K8 with the Arduino IDE?
A: Yes, the board is compatible with the Arduino IDE. Install the STM32 core to program it.
Q: What is the maximum current the GPIO pins can source/sink?
A: Each GPIO pin can source/sink up to 25 mA, but the total current for all pins should not exceed 120 mA.
Q: How do I reset the board?
A: Press the onboard reset button to restart the microcontroller.
Q: Can I use the board for CAN communication?
A: Yes, the STM32F303K8 supports CAN communication. You will need an external CAN transceiver for proper operation.