Cirkit Designer Logo
Cirkit Designer
Your all-in-one circuit design IDE
Home / 
Component Documentation

How to Use Bloc batterie 12V: Examples, Pinouts, and Specs

Image of Bloc batterie 12V
Cirkit Designer LogoDesign with Bloc batterie 12V in Cirkit Designer

Introduction

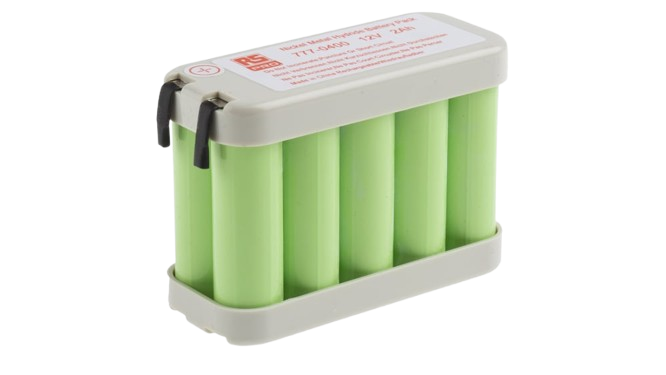
The Bloc Batterie 12V is a versatile and reliable 12-volt battery pack designed to provide electrical power to a wide range of circuits and devices. This battery pack is commonly used in applications such as portable electronics, robotics, backup power supplies, and automotive systems. Its compact design and robust performance make it an essential component for both hobbyists and professionals.

Explore Projects Built with Bloc batterie 12V

Use Cirkit Designer to design, explore, and prototype these projects online. Some projects support real-time simulation. Click "Open Project" to start designing instantly!
12V UPS System with Dual 18650 Li-ion Battery Backup and Voltage Regulation
Image of Power supply: A project utilizing Bloc batterie 12V in a practical application
This circuit is designed to provide an uninterruptible power supply (UPS) system with a 12V DC output. It includes a 12V 5A power supply connected to an AC source through a toggle switch, which charges a pair of 18650 Li-ion batteries via a voltage regulator (XL4016). The UPS module ensures a continuous power supply to the load by switching between the power supply and the battery bank.
Cirkit Designer LogoOpen Project in Cirkit Designer
Battery-Powered Adjustable Voltage Regulator with Li-ion 18650 Batteries and BMS
Image of mini ups: A project utilizing Bloc batterie 12V in a practical application
This circuit is a power management system that uses four Li-ion 18650 batteries connected to a 2S 30A BMS for battery management and protection. The system includes step-up and step-down voltage regulators to provide adjustable output voltages, controlled by a rocker switch, and multiple DC jacks for power input and output.
Cirkit Designer LogoOpen Project in Cirkit Designer
Battery-Powered Router and Raspberry Pi Network with TP-Link Omada
Image of Schéma électrique de case TTT: A project utilizing Bloc batterie 12V in a practical application
This circuit is designed to power a network setup consisting of a router, a TP-Link Omada access point, and a Raspberry Pi using a 12V battery. The battery's voltage is regulated and distributed through various connectors and a 12V to 5V module to provide the necessary power to each device.
Cirkit Designer LogoOpen Project in Cirkit Designer
Battery-Powered UPS System with Waveshare UPS 3S and Solar Charger
Image of Copy of s: A project utilizing Bloc batterie 12V in a practical application
This circuit is a power management system that integrates a 12V power supply, a solar charger power bank, and multiple Li-ion batteries to provide a stable power output. The Waveshare UPS 3S manages the input from the power sources and batteries, ensuring continuous power delivery. The MRB045 module is used to interface the solar charger with the rest of the system.
Cirkit Designer LogoOpen Project in Cirkit Designer

Explore Projects Built with Bloc batterie 12V

Use Cirkit Designer to design, explore, and prototype these projects online. Some projects support real-time simulation. Click "Open Project" to start designing instantly!
Image of Power supply: A project utilizing Bloc batterie 12V in a practical application
12V UPS System with Dual 18650 Li-ion Battery Backup and Voltage Regulation
This circuit is designed to provide an uninterruptible power supply (UPS) system with a 12V DC output. It includes a 12V 5A power supply connected to an AC source through a toggle switch, which charges a pair of 18650 Li-ion batteries via a voltage regulator (XL4016). The UPS module ensures a continuous power supply to the load by switching between the power supply and the battery bank.
Cirkit Designer LogoOpen Project in Cirkit Designer
Image of mini ups: A project utilizing Bloc batterie 12V in a practical application
Battery-Powered Adjustable Voltage Regulator with Li-ion 18650 Batteries and BMS
This circuit is a power management system that uses four Li-ion 18650 batteries connected to a 2S 30A BMS for battery management and protection. The system includes step-up and step-down voltage regulators to provide adjustable output voltages, controlled by a rocker switch, and multiple DC jacks for power input and output.
Cirkit Designer LogoOpen Project in Cirkit Designer
Image of Schéma électrique de case TTT: A project utilizing Bloc batterie 12V in a practical application
Battery-Powered Router and Raspberry Pi Network with TP-Link Omada
This circuit is designed to power a network setup consisting of a router, a TP-Link Omada access point, and a Raspberry Pi using a 12V battery. The battery's voltage is regulated and distributed through various connectors and a 12V to 5V module to provide the necessary power to each device.
Cirkit Designer LogoOpen Project in Cirkit Designer
Image of Copy of s: A project utilizing Bloc batterie 12V in a practical application
Battery-Powered UPS System with Waveshare UPS 3S and Solar Charger
This circuit is a power management system that integrates a 12V power supply, a solar charger power bank, and multiple Li-ion batteries to provide a stable power output. The Waveshare UPS 3S manages the input from the power sources and batteries, ensuring continuous power delivery. The MRB045 module is used to interface the solar charger with the rest of the system.
Cirkit Designer LogoOpen Project in Cirkit Designer

Technical Specifications

Key Technical Details

Parameter Value
Nominal Voltage 12V
Capacity 2000mAh (varies by model)
Maximum Discharge Current 2A (varies by model)
Charging Voltage 14.4V
Charging Current 0.2A - 0.5A
Dimensions 100mm x 60mm x 30mm
Weight 300g
Operating Temperature Range -20°C to 60°C

Pin Configuration and Descriptions

Pin Number Pin Name Description
1 +12V Positive terminal of the battery pack
2 GND Ground terminal of the battery pack

Usage Instructions

How to Use the Component in a Circuit

  1. Connecting the Battery Pack:

    • Connect the +12V pin of the battery pack to the positive power rail of your circuit.
    • Connect the GND pin of the battery pack to the ground rail of your circuit.
  2. Charging the Battery Pack:

    • Use a compatible 12V battery charger.
    • Connect the charger’s positive terminal to the +12V pin and the negative terminal to the GND pin.
    • Ensure the charging voltage does not exceed 14.4V to prevent damage.
  3. Powering an Arduino UNO:

    • Connect the +12V pin to the VIN pin on the Arduino UNO.
    • Connect the GND pin to the GND pin on the Arduino UNO.

Important Considerations and Best Practices

  • Safety First: Always handle the battery pack with care. Avoid short-circuiting the terminals.
  • Proper Charging: Use a charger specifically designed for 12V battery packs to ensure safe and efficient charging.
  • Temperature Monitoring: Avoid exposing the battery pack to extreme temperatures to prevent damage and ensure longevity.
  • Storage: Store the battery pack in a cool, dry place when not in use.

Troubleshooting and FAQs

Common Issues Users Might Face

  1. Battery Not Charging:

    • Solution: Check the charger connections and ensure the charger is functioning correctly. Verify that the charging voltage is within the specified range.
  2. Battery Drains Quickly:

    • Solution: Ensure that the connected devices do not exceed the maximum discharge current. Check for any short circuits or excessive loads in the circuit.
  3. Battery Overheating:

    • Solution: Disconnect the battery immediately and allow it to cool down. Check for any faults in the circuit that may be causing excessive current draw.

FAQs

Q1: Can I use the Bloc Batterie 12V to power my Arduino UNO directly?

  • A1: Yes, you can connect the +12V pin to the VIN pin and the GND pin to the GND pin on the Arduino UNO.

Q2: How long will the battery last on a full charge?

  • A2: The battery life depends on the current draw of the connected devices. For example, a 2000mAh battery can theoretically provide 2A for 1 hour or 1A for 2 hours.

Q3: Is it safe to leave the battery connected to the charger overnight?

  • A3: It is not recommended to leave the battery connected to the charger for extended periods. Use a charger with an automatic cutoff feature to prevent overcharging.

Example Code for Arduino UNO

Here is an example code to read the battery voltage using an Arduino UNO:

const int batteryPin = A0; // Analog pin to read battery voltage
float batteryVoltage = 0.0;

void setup() {
  Serial.begin(9600); // Initialize serial communication
}

void loop() {
  int sensorValue = analogRead(batteryPin); // Read the analog input
  batteryVoltage = sensorValue * (5.0 / 1023.0) * (12.0 / 5.0); 
  // Convert the analog reading to voltage
  Serial.print("Battery Voltage: ");
  Serial.print(batteryVoltage);
  Serial.println(" V");
  delay(1000); // Wait for 1 second before next reading
}

This code reads the battery voltage connected to the analog pin A0 and prints the value to the serial monitor. Adjust the voltage divider ratio in the code if necessary.


This documentation provides a comprehensive guide to using the Bloc Batterie 12V, ensuring both beginners and experienced users can effectively integrate this component into their projects.