How to Use Adafruit MPL115A2 I2C Barometric Pressure, Temperature Sensor: Examples, Pinouts, and Specs
Introduction
The Adafruit MPL115A2 is a compact, I2C-compatible sensor that provides precise measurements of barometric pressure and temperature. This sensor is ideal for a wide range of applications, including weather monitoring systems, altimeters, and environmental controls. Its small form factor and low power consumption make it suitable for portable and battery-powered devices.
Explore Projects Built with Adafruit MPL115A2 I2C Barometric Pressure, Temperature Sensor

Explore Projects Built with Adafruit MPL115A2 I2C Barometric Pressure, Temperature Sensor
Technical Specifications
Key Features
- Pressure Range: 50 to 115 kPa
- Temperature Range: -40 to +105°C
- Resolution: 1.5 kPa (pressure), 1°C (temperature)
- Operating Voltage: 2.375V to 5.5V
- I2C Interface
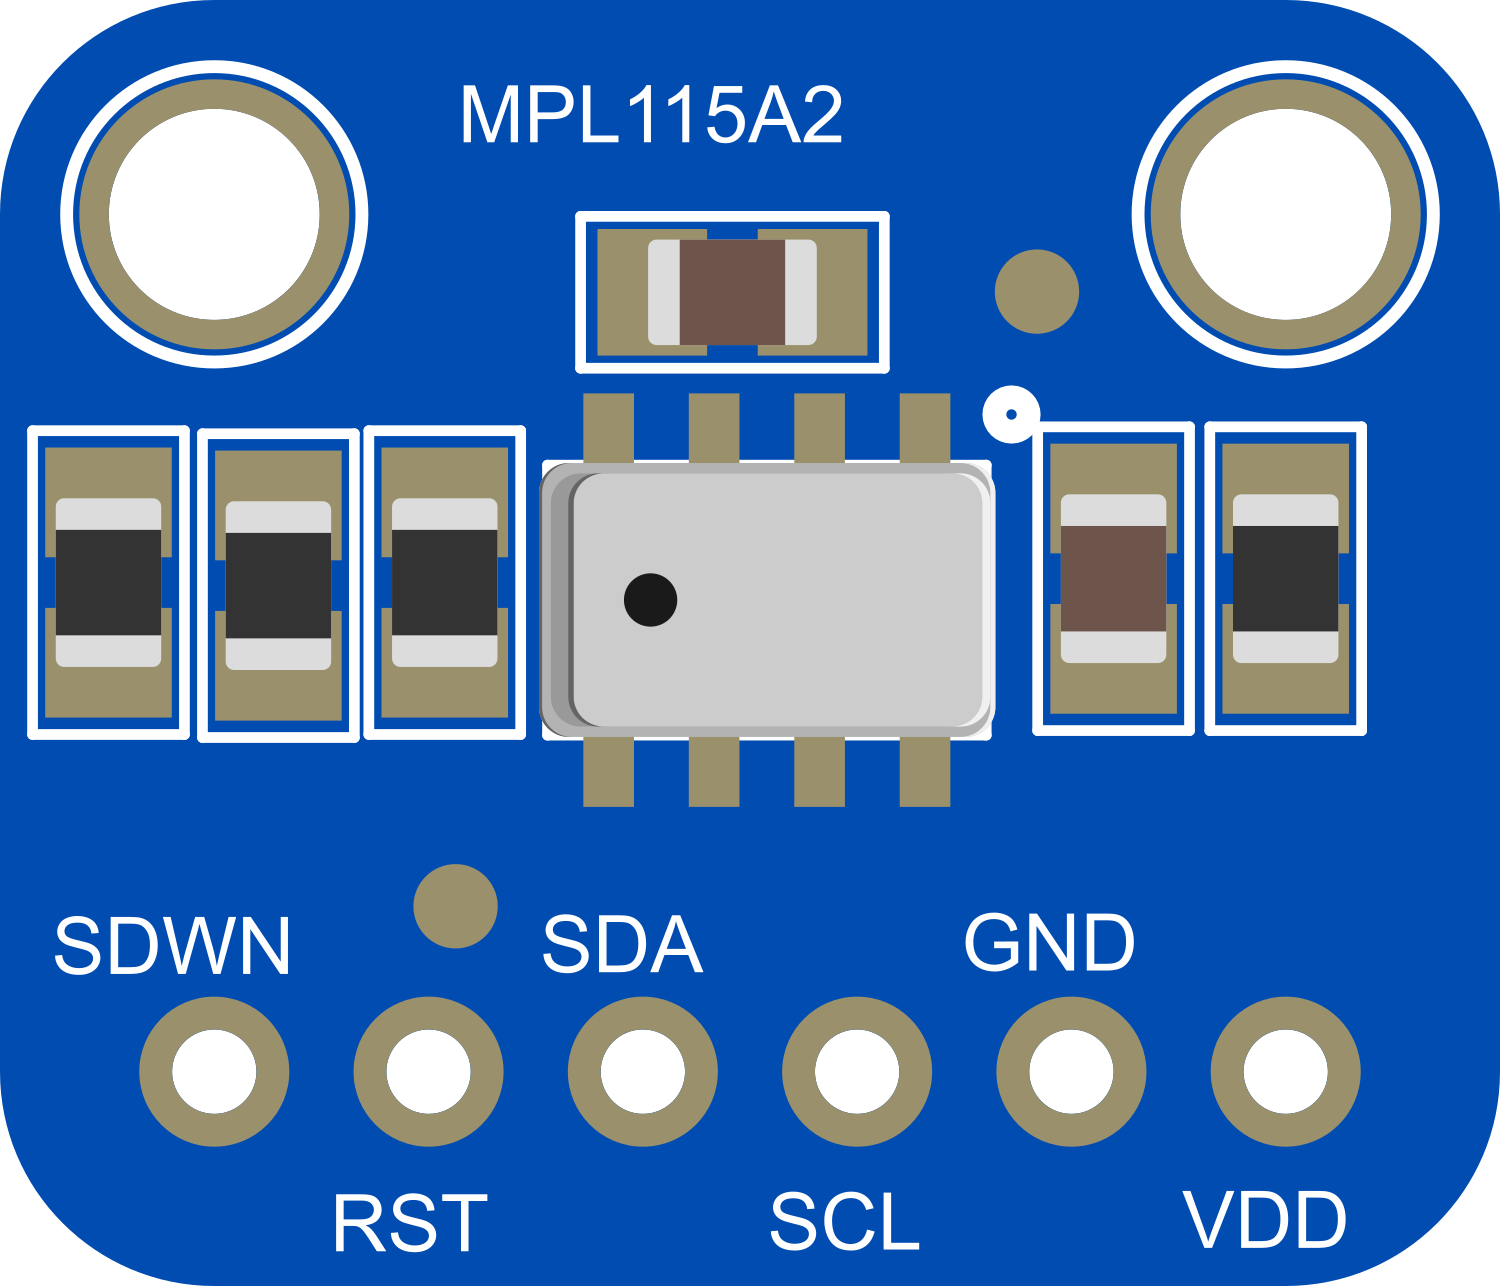
Pin Configuration
| Pin Number | Name | Description |
|---|---|---|
| 1 | VDD | Power supply (2.375V to 5.5V) |
| 2 | GND | Ground |
| 3 | SCL | I2C clock line |
| 4 | SDA | I2C data line |
| 5 | SHDN | Shutdown pin (active low) |
Usage Instructions
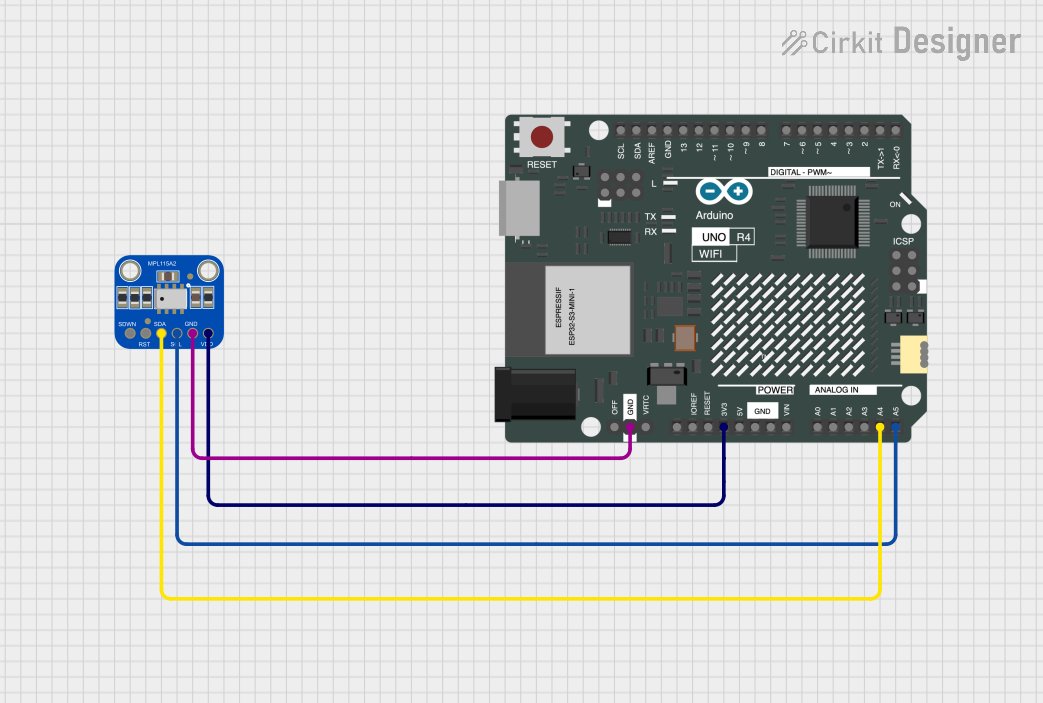
Interfacing with an Arduino UNO
Connecting the Sensor:
- Connect VDD to the 3.3V output on the Arduino.
- Connect GND to a ground pin on the Arduino.
- Connect SCL to the A5 pin (I2C clock).
- Connect SDA to the A4 pin (I2C data).
- SHDN can be left unconnected if not used.
Library Installation:
- Install the Adafruit MPL115A2 library using the Arduino Library Manager.
Sample Code:
#include <Wire.h>
#include <Adafruit_MPL115A2.h>

Adafruit_MPL115A2 mpl115a2; // Create an instance of the sensor

void setup() {
  Serial.begin(9600);
  mpl115a2.begin(); // Initialize the sensor
}

void loop() {
  float pressure = mpl115a2.getPressure(); // Get pressure in kPa
  float temperature = mpl115a2.getTemperature(); // Get temperature in degrees Celsius

  // Print the results to the serial monitor
  Serial.print("Pressure (kPa): ");
  Serial.print(pressure);
  Serial.print(" Temperature (C): ");
  Serial.println(temperature);

  delay(1000); // Wait for a second before reading again
}
Best Practices
- Ensure that the power supply is stable and within the specified voltage range.
- Use pull-up resistors on the I2C lines if multiple devices are connected to the bus.
- Avoid physical stress and exposure to moisture to maintain sensor accuracy.
Troubleshooting and FAQs
Common Issues
- Inaccurate Readings: Ensure that the sensor is not subjected to sudden temperature changes and that it's properly calibrated.
- I2C Communication Errors: Check the wiring, ensure pull-up resistors are in place, and verify that there are no address conflicts on the I2C bus.
FAQs
Q: Can the MPL115A2 be used with a 5V Arduino? A: Yes, the MPL115A2 can operate up to 5.5V, but ensure that the I2C logic levels are compatible.
Q: How can I calibrate the sensor? A: The MPL115A2 comes factory-calibrated. However, for critical applications, you may need to perform additional calibration against a known reference.
Q: What is the sensor's accuracy? A: The MPL115A2 has a pressure accuracy of ±1 kPa and a temperature accuracy of ±2°C.
For further assistance, consult the Adafruit MPL115A2 datasheet or contact technical support.