How to Use Arduino Uno SPE Shield: Examples, Pinouts, and Specs
Introduction
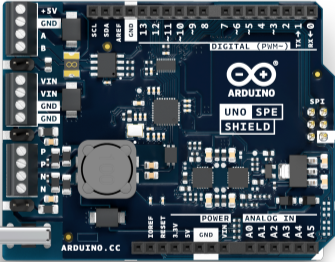
The Arduino Uno SPE Shield is a specialized expansion board designed to enhance the functionality of the Arduino Uno microcontroller. Manufactured by Arduino, this shield simplifies the integration of sensors, peripherals, and external devices by providing a convenient interface and additional features. The SPE Shield is particularly useful for prototyping, educational projects, and IoT applications.
Explore Projects Built with Arduino Uno SPE Shield
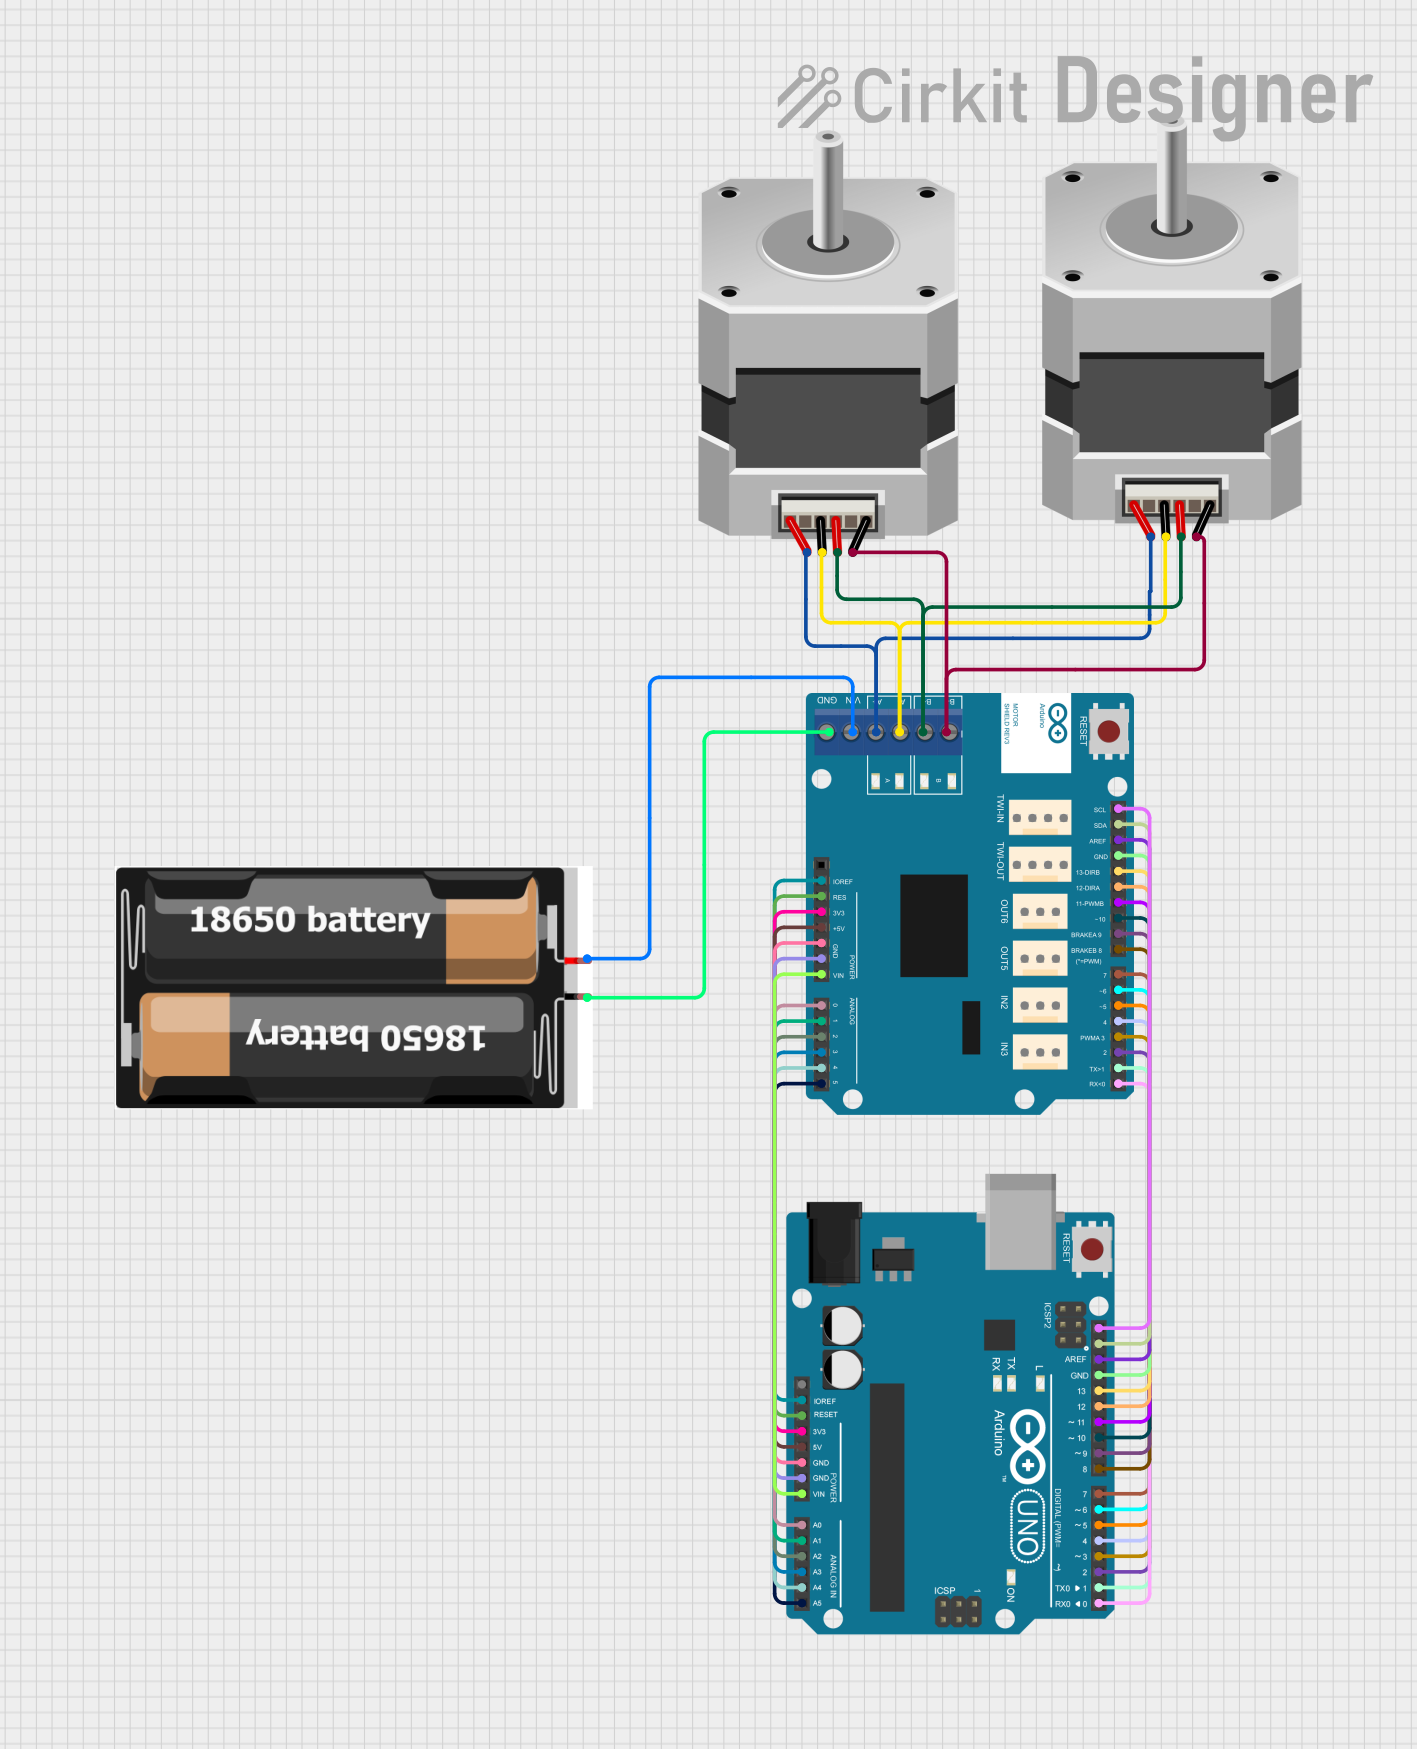
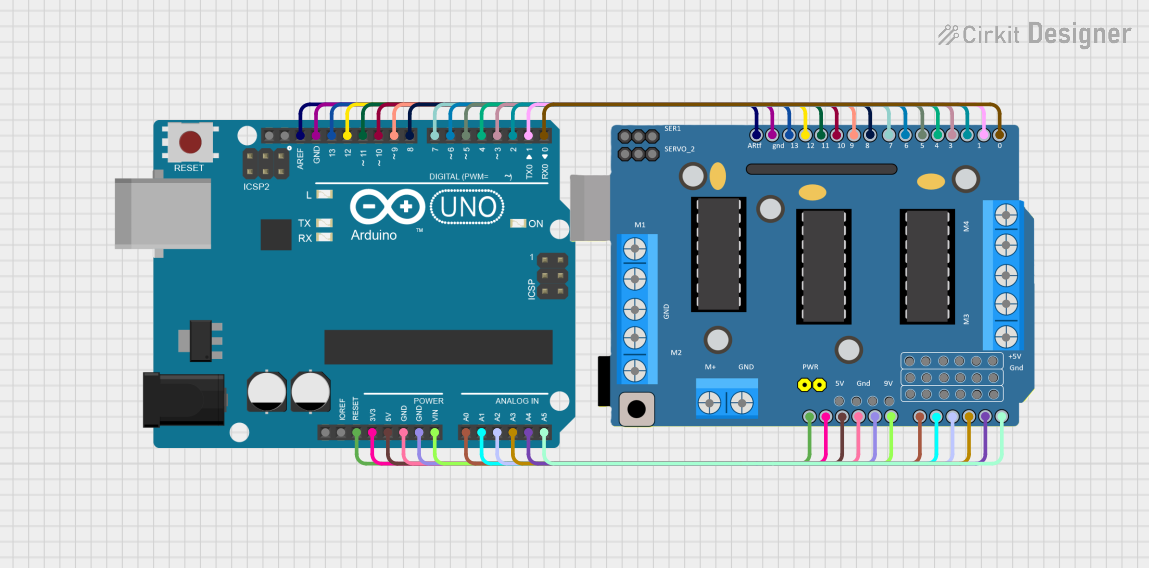
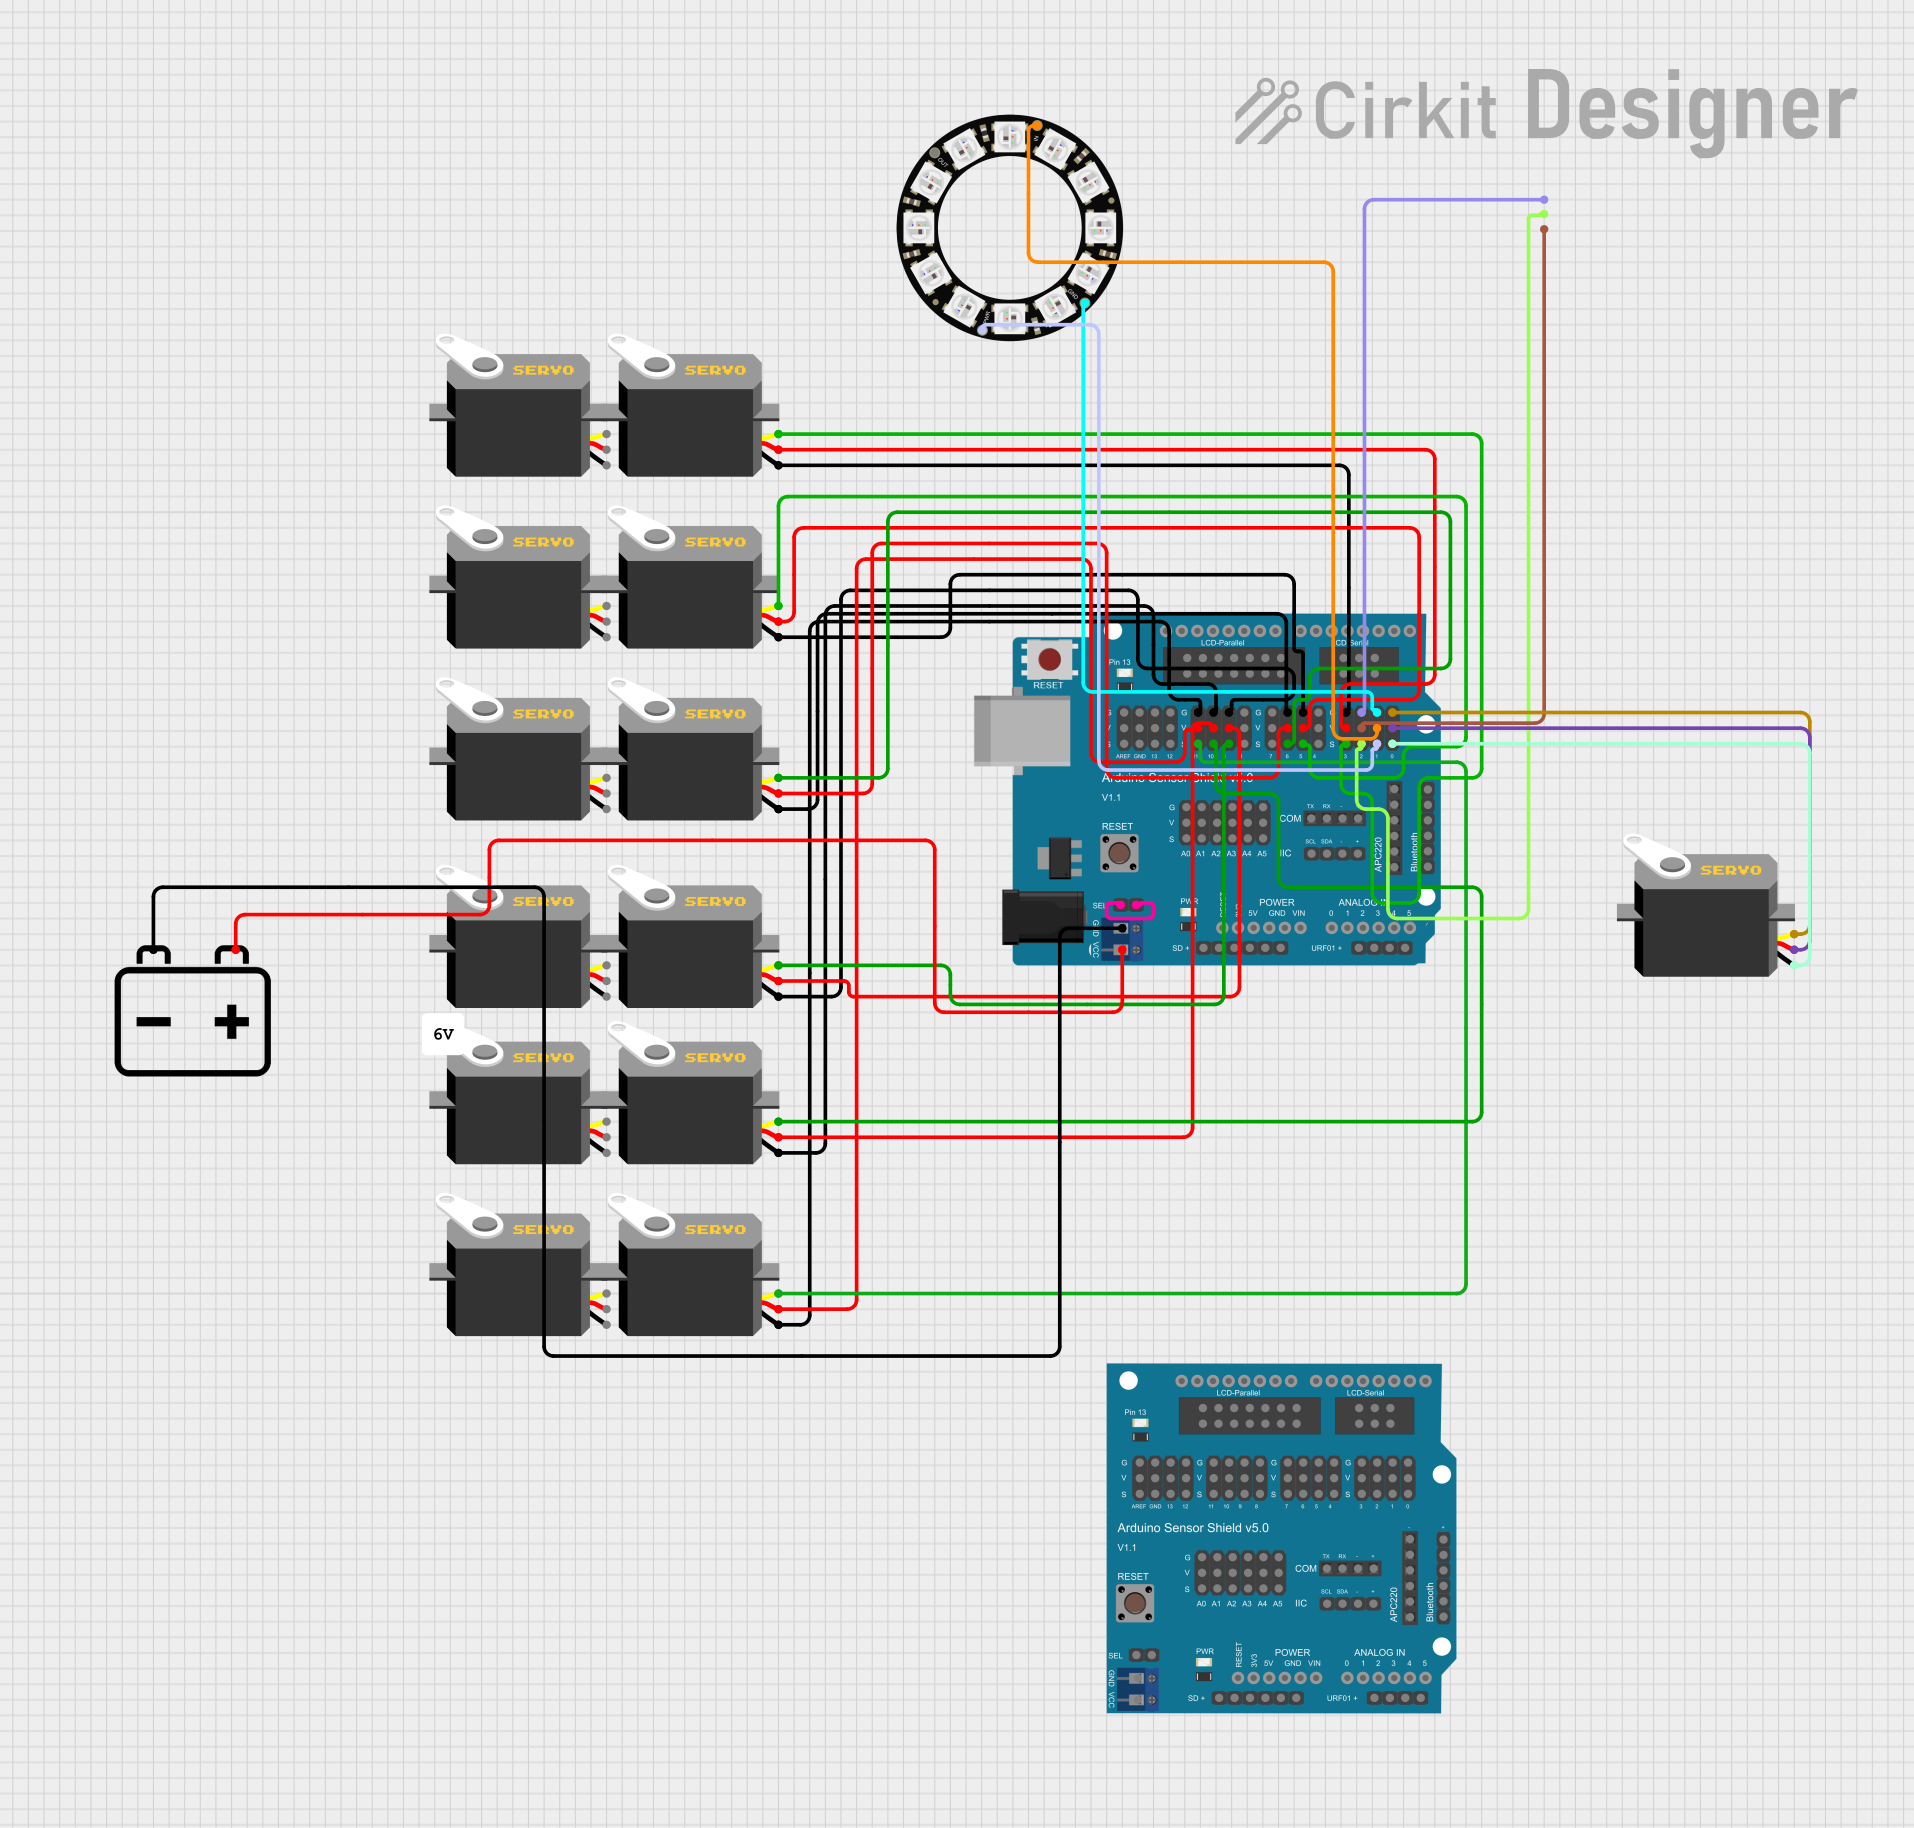
Explore Projects Built with Arduino Uno SPE Shield
Common Applications and Use Cases
- Rapid prototyping of sensor-based projects
- IoT (Internet of Things) applications
- Robotics and automation systems
- Educational tools for learning embedded systems
- Data acquisition and logging
Technical Specifications
The Arduino Uno SPE Shield is designed to seamlessly stack on top of the Arduino Uno, providing additional connectivity and functionality. Below are the key technical details:
General Specifications
| Parameter | Value |
|---|---|
| Manufacturer | Arduino |
| Part ID | UNO Shield |
| Operating Voltage | 5V (powered via Arduino Uno) |
| Communication Protocols | I2C, SPI, UART |
| Dimensions | 68.6 mm x 53.4 mm |
| Weight | ~25 grams |
| Operating Temperature | -40°C to 85°C |
Pin Configuration and Descriptions
The Arduino Uno SPE Shield uses the standard Arduino Uno pinout and provides additional headers for easy access to the pins. Below is the pin configuration:
| Pin Name | Description |
|---|---|
| A0 - A5 | Analog input pins for connecting sensors or other analog devices |
| D0 - D13 | Digital I/O pins for general-purpose input/output |
| SDA | I2C data line for communication with I2C-compatible devices |
| SCL | I2C clock line for communication with I2C-compatible devices |
| TX (D1) | UART transmit pin for serial communication |
| RX (D0) | UART receive pin for serial communication |
| SPI (D10-D13) | SPI interface pins for high-speed communication with SPI devices |
| 5V | 5V power output for powering external components |
| GND | Ground connection |
| RESET | Reset pin to restart the Arduino Uno and the shield |
Usage Instructions
The Arduino Uno SPE Shield is designed for plug-and-play functionality. Follow the steps below to use the shield effectively:
Step 1: Mounting the Shield
- Align the shield's pins with the headers on the Arduino Uno.
- Gently press the shield onto the Arduino Uno until it is securely connected.
Step 2: Connecting Components
- Use the analog (A0-A5) and digital (D0-D13) pins to connect sensors, actuators, or other peripherals.
- For I2C devices, connect the SDA and SCL lines to the corresponding pins on the shield.
- For SPI devices, use the SPI pins (D10-D13) for communication.
Step 3: Programming the Arduino Uno
- Connect the Arduino Uno (with the shield attached) to your computer via USB.
- Open the Arduino IDE and write or upload your code.
- Ensure that the correct board ("Arduino Uno") and port are selected in the IDE.
Example Code: Reading an Analog Sensor
The following example demonstrates how to read data from an analog sensor connected to pin A0:
// Example: Reading an analog sensor connected to A0
const int sensorPin = A0;  // Define the analog pin for the sensor
int sensorValue = 0;       // Variable to store the sensor reading

void setup() {
  Serial.begin(9600);  // Initialize serial communication at 9600 baud
}

void loop() {
  sensorValue = analogRead(sensorPin);  // Read the sensor value
  Serial.print("Sensor Value: ");       // Print a label to the serial monitor
  Serial.println(sensorValue);          // Print the sensor value
  delay(500);                           // Wait for 500ms before the next reading
}
Best Practices
- Avoid stacking multiple shields that may cause pin conflicts.
- Ensure that the shield is properly aligned with the Arduino Uno before powering it on.
- Use appropriate pull-up resistors for I2C communication if required by your devices.
- Disconnect power before making any hardware changes to avoid damage.
Troubleshooting and FAQs
Common Issues and Solutions
The shield is not detected by the Arduino Uno.
- Ensure that the shield is properly seated on the Arduino Uno.
- Check for bent or misaligned pins.
I2C devices are not communicating.
- Verify the SDA and SCL connections.
- Check if the I2C device address is correctly specified in your code.
Analog readings are unstable.
- Use a capacitor across the sensor's power and ground pins to reduce noise.
- Ensure that the sensor is properly grounded.
The Arduino IDE cannot upload code.
- Confirm that the correct board and port are selected in the IDE.
- Disconnect any devices connected to the RX and TX pins during programming.
FAQs
Q: Can I use the Arduino Uno SPE Shield with other Arduino boards?
A: The shield is specifically designed for the Arduino Uno but may be compatible with other Arduino boards that share the same pinout.
Q: Does the shield require an external power source?
A: No, the shield is powered directly by the Arduino Uno.
Q: Can I stack multiple shields on top of the SPE Shield?
A: Yes, but ensure that there are no pin conflicts and that the shields are compatible.
Q: What is the maximum current output of the 5V pin?
A: The 5V pin can supply up to 500mA, depending on the power source of the Arduino Uno.
By following this documentation, you can effectively use the Arduino Uno SPE Shield in your projects. For additional support, refer to the official Arduino documentation or community forums.