How to Use Raspberry pi 4 b: Examples, Pinouts, and Specs
Introduction
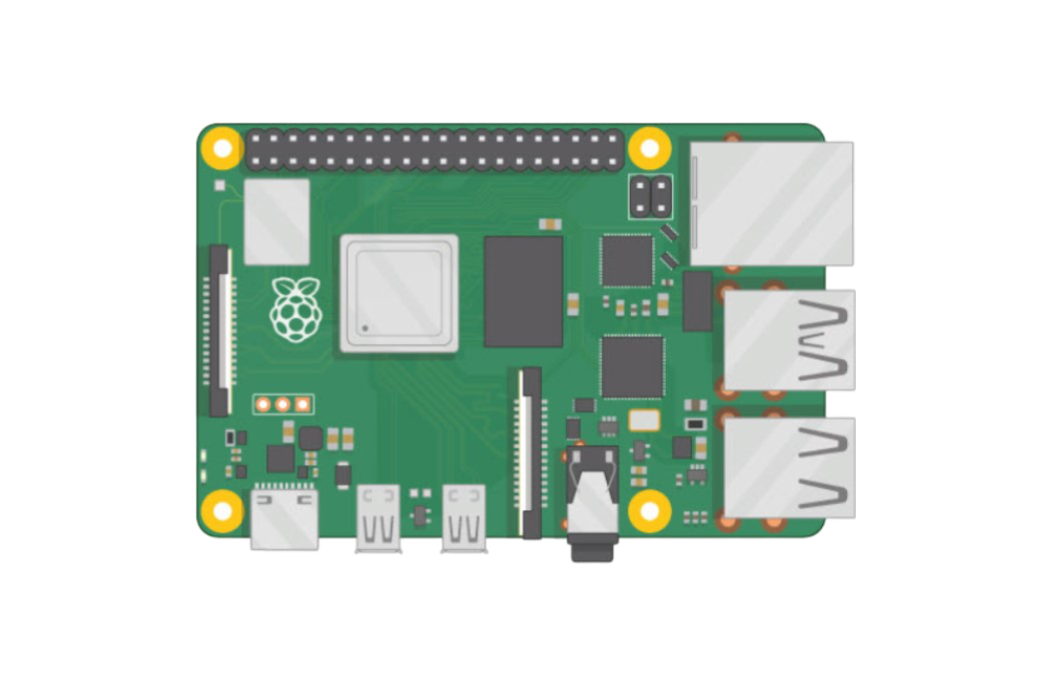
The Raspberry Pi 4 Model B is a powerful single-board computer developed by the Raspberry Pi Foundation. It is the latest iteration of the Raspberry Pi series and offers significant improvements over its predecessors, including a faster processor, higher memory options, and enhanced connectivity. This versatile board is widely used in education, hobbyist projects, and professional applications ranging from media centers to IoT devices, robotics, and even as a desktop replacement.
Explore Projects Built with Raspberry pi 4 b
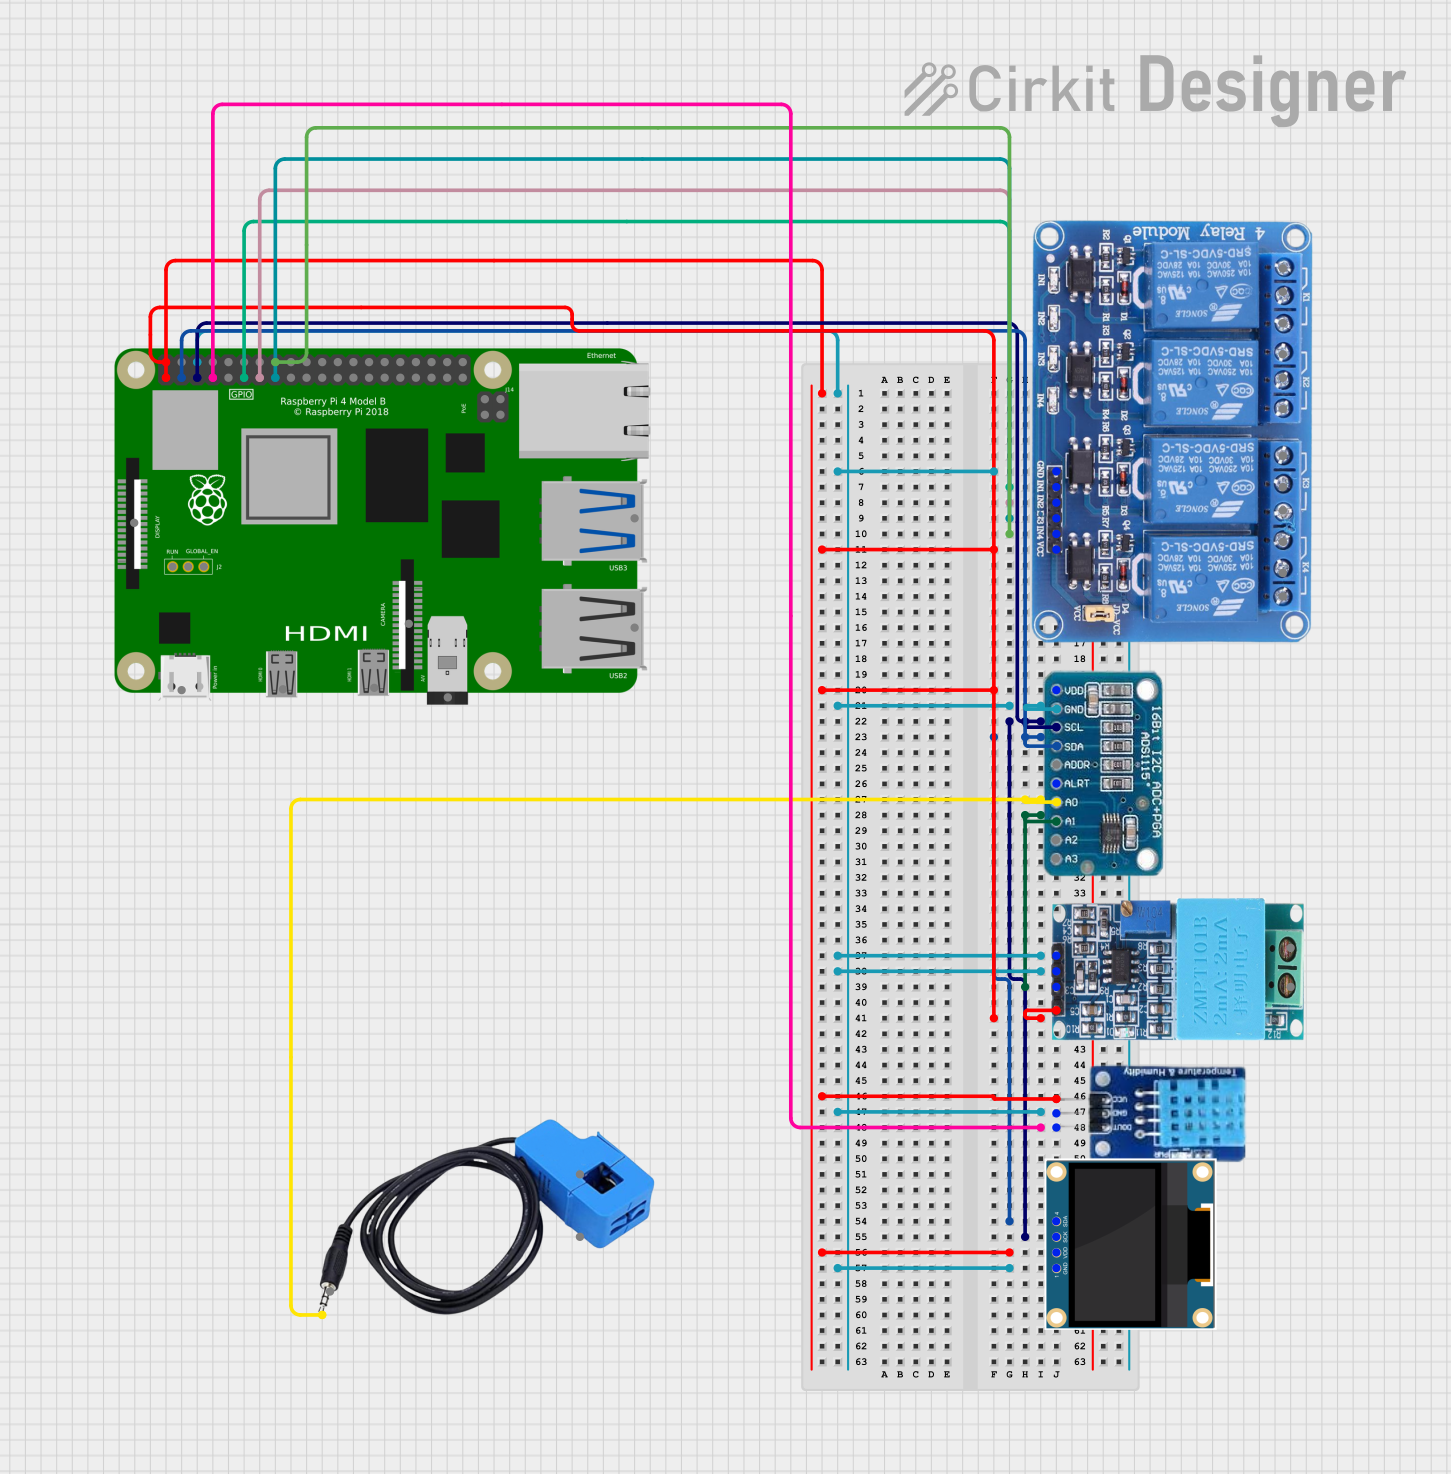
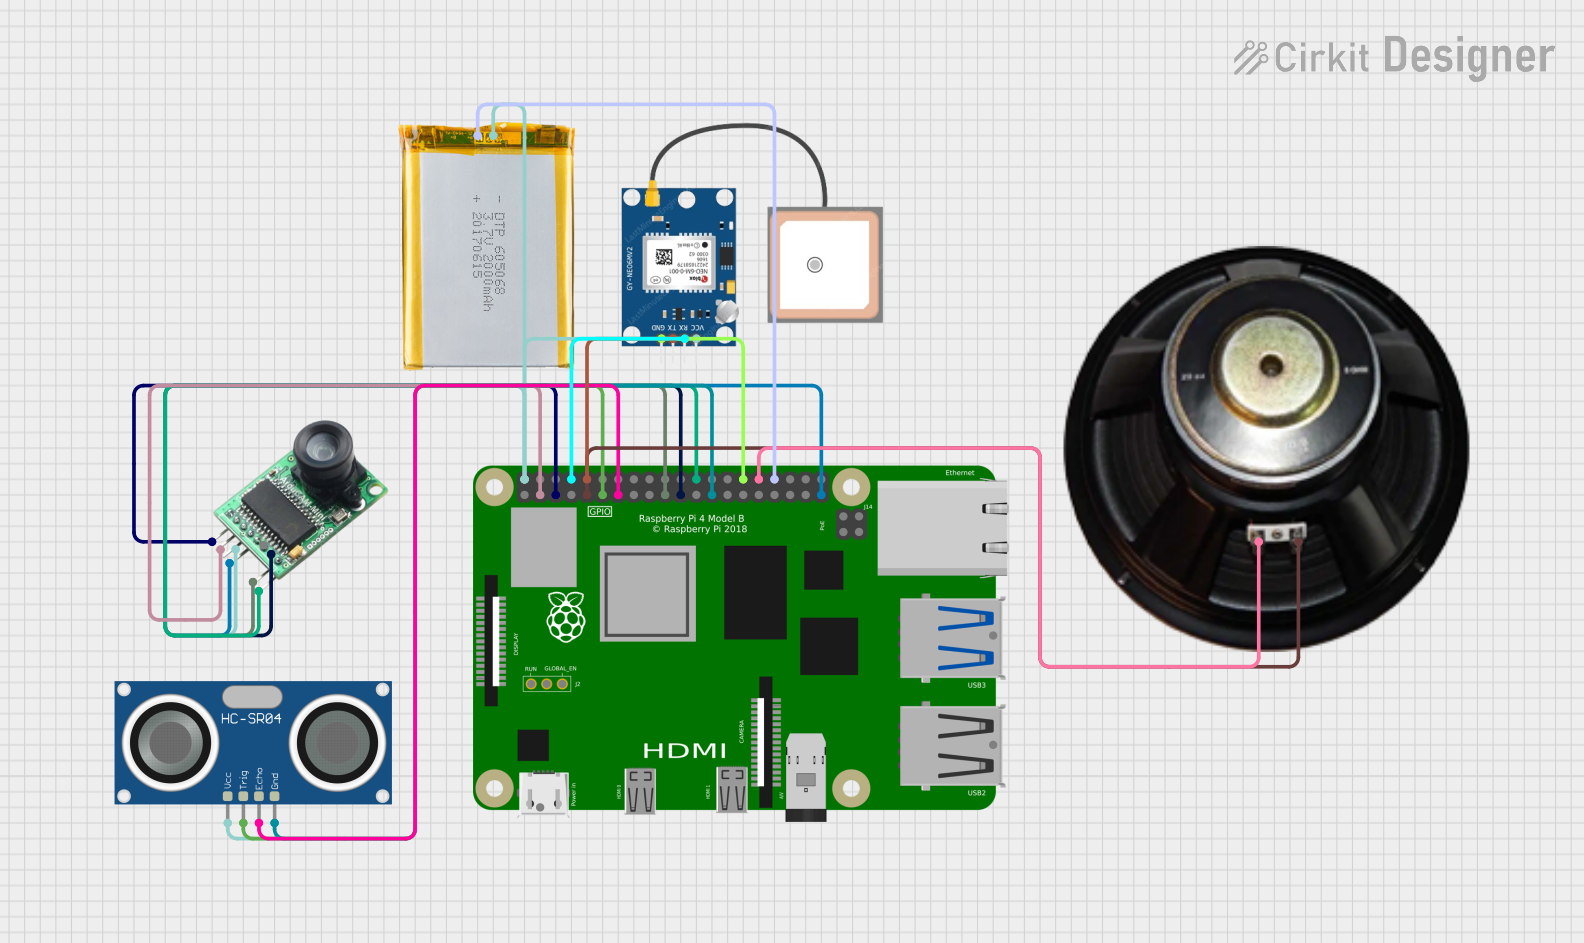
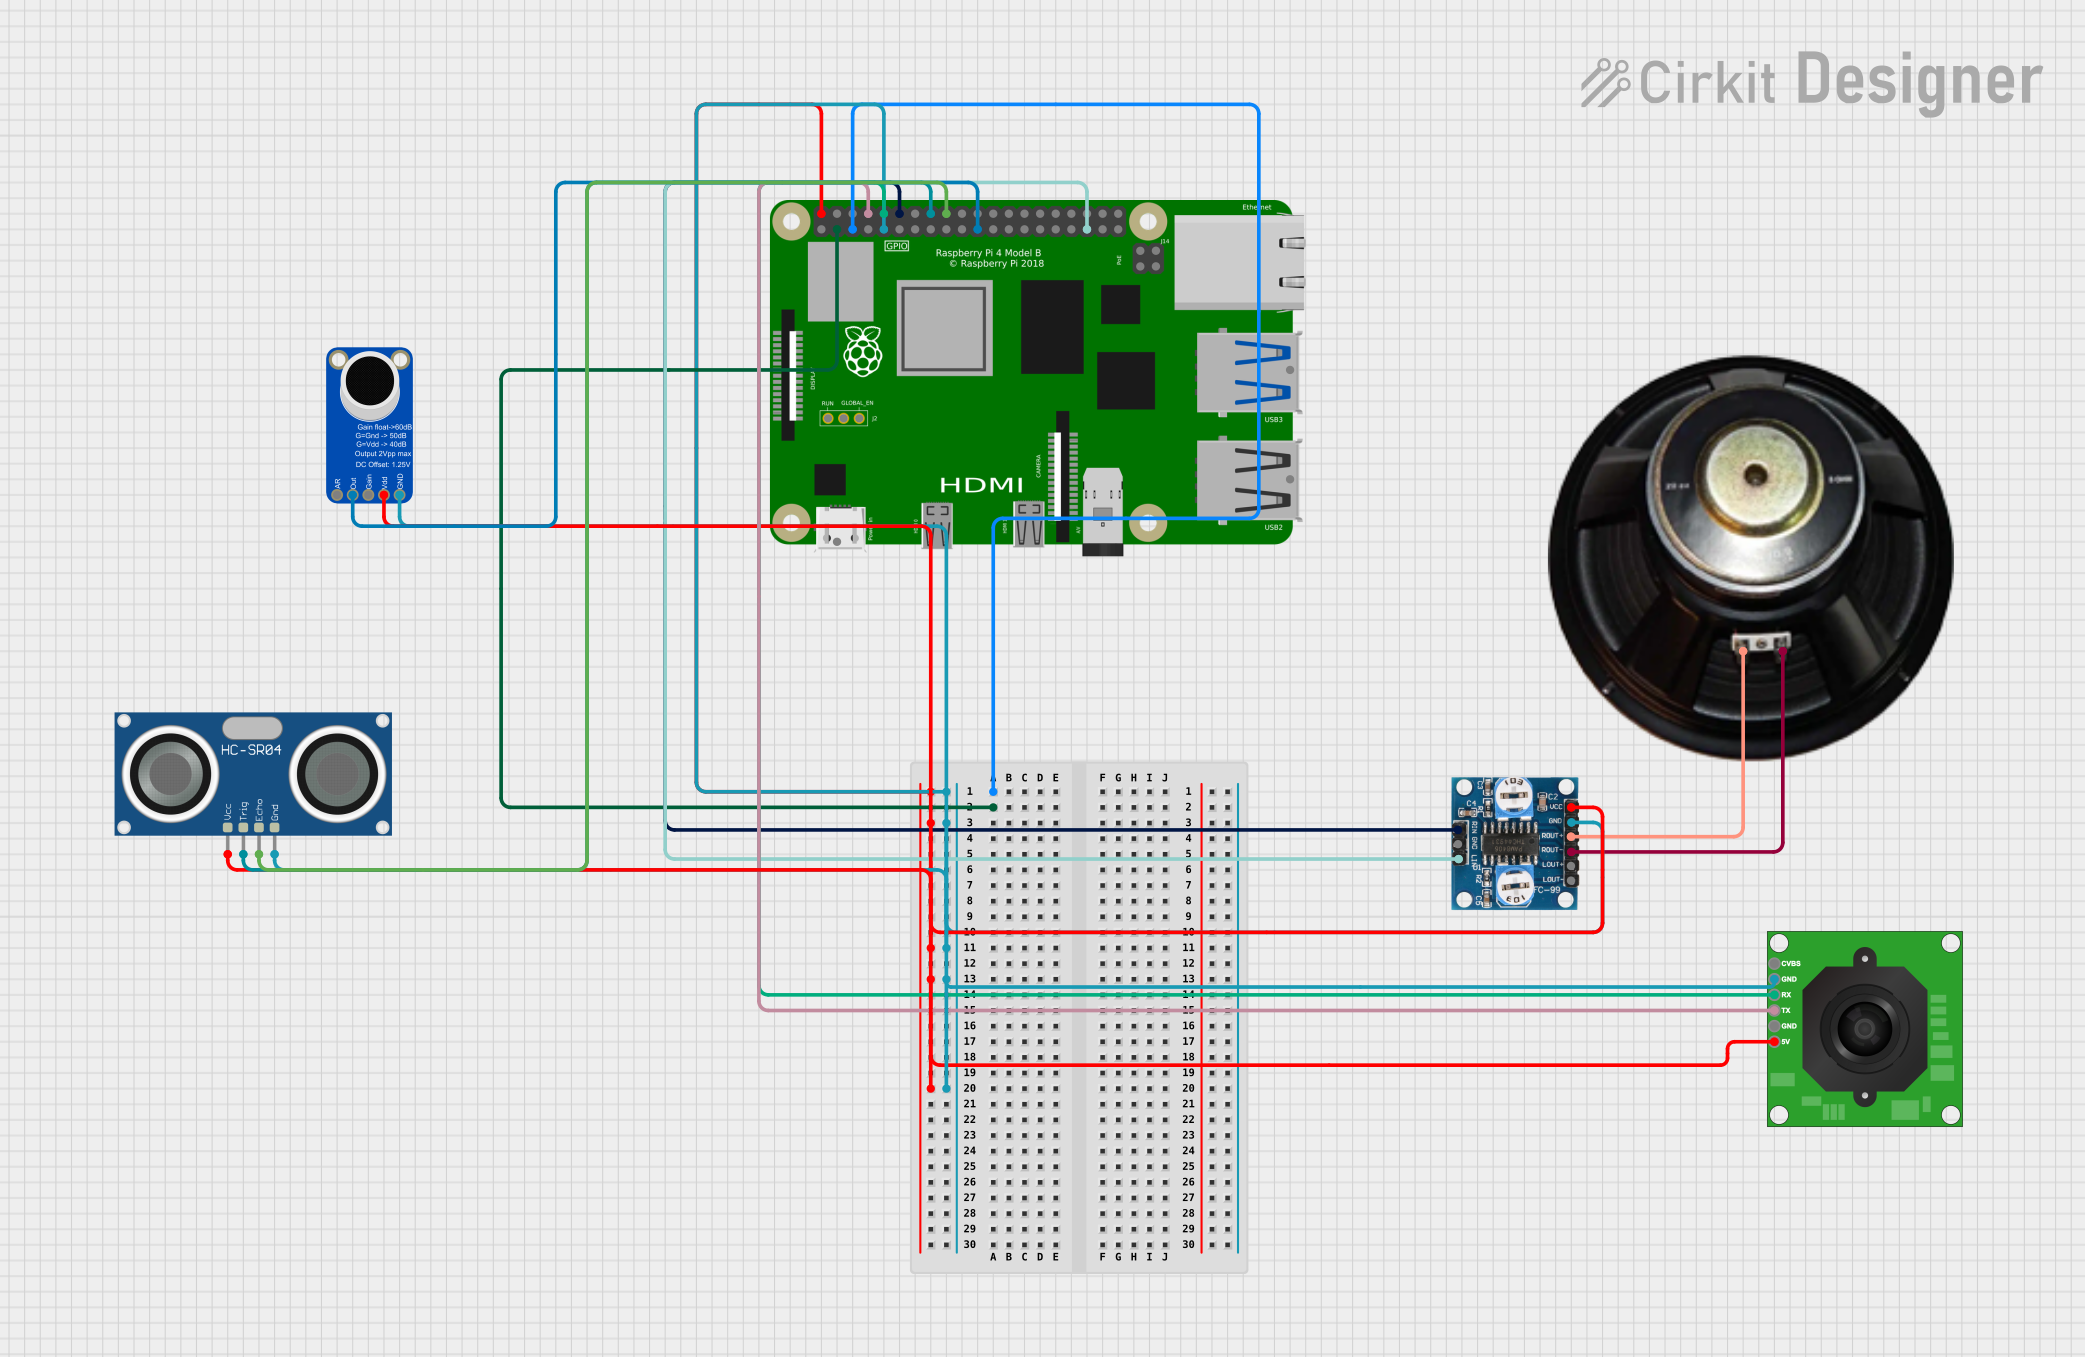
Explore Projects Built with Raspberry pi 4 b
Technical Specifications
Key Technical Details
- Processor: Broadcom BCM2711, Quad-core Cortex-A72 (ARM v8) 64-bit SoC @ 1.5GHz
- Memory: 2GB, 4GB, or 8GB LPDDR4-3200 SDRAM (depending on model)
- Connectivity:
- Gigabit Ethernet
- 2.4 GHz and 5.0 GHz IEEE 802.11ac wireless
- Bluetooth 5.0, BLE
- GPIO: Standard 40-pin GPIO header (fully backward-compatible with previous boards)
- Video & Sound:
- 2 × micro HDMI ports (up to 4kp60 supported)
- 2-lane MIPI DSI display port
- 2-lane MIPI CSI camera port
- 4-pole stereo audio and composite video port
- Multimedia:
- H.265 (4kp60 decode)
- H.264 (1080p60 decode, 1080p30 encode)
- OpenGL ES 3.0 graphics
- Storage: Micro-SD card slot for loading operating system and data storage
- Power: 5V DC via USB-C connector (minimum 3A*)
- Operating Temperature: 0 – 50 degrees Celsius ambient
* A higher amperage power supply may be required for some use cases, such as when using multiple peripherals.
Pin Configuration and Descriptions
| Pin Number | Name | Description |
|---|---|---|
| 1 | 3V3 | 3.3V Power Rail |
| 2 | 5V | 5V Power Rail |
| 3 | GPIO2/SDA1 | I2C SDA |
| 4 | 5V | 5V Power Rail |
| 5 | GPIO3/SCL1 | I2C SCL |
| ... | ... | ... |
| 39 | GND | Ground |
| 40 | GPIO21/SPIO_MOSI | SPI MOSI |
Note: This table is not exhaustive. Refer to the official GPIO pinout diagram for complete details.
Usage Instructions
Setting Up the Raspberry Pi 4 Model B
Prepare the Micro-SD Card:
- Download the latest version of Raspberry Pi OS or another compatible operating system.
- Use software like Raspberry Pi Imager or balenaEtcher to flash the OS image onto the Micro-SD card.
Connect Peripherals:
- Attach a keyboard, mouse, and monitor to the Raspberry Pi via the USB and micro HDMI ports.
- If using Ethernet, connect the cable to the Ethernet port.
Power Up:
- Insert the Micro-SD card into the slot on the Raspberry Pi.
- Connect the USB-C power supply to the Raspberry Pi, ensuring it meets the minimum power requirements.
Initial Configuration:
- Follow the on-screen setup instructions to configure your Raspberry Pi, including setting up Wi-Fi, locale, and account details.
Important Considerations and Best Practices
- Power Supply: Always use a high-quality power supply that can provide a stable 5V and at least 3A of current.
- Heat Management: The Raspberry Pi 4 can generate significant heat under load. Consider using heat sinks or a case with a built-in fan for better thermal management.
- Software Updates: Regularly update the operating system and installed packages to ensure you have the latest security patches and improvements.
- Static Electricity: Handle the Raspberry Pi with care to avoid damage from static electricity. Ground yourself before touching the board.
Troubleshooting and FAQs
Common Issues
- Pi Does Not Boot: Ensure the Micro-SD card is properly inserted and contains a valid OS image. Check the power supply and LED indicators for signs of power issues.
- Overheating: If the Pi is overheating, verify that any heat sinks are properly attached and that there is adequate ventilation. Consider using a cooling fan.
- Network Connectivity Problems: Check the Wi-Fi settings or Ethernet cable connection. Ensure the network is functioning correctly.
Solutions and Tips
- Red Power LED Not Lit: This usually indicates a power supply issue. Try a different USB-C power supply and cable.
- Green LED Blinks in a Specific Pattern: Refer to the Raspberry Pi documentation for LED blink error codes, which can help diagnose SD card and boot issues.
- Performance Issues: Close unnecessary applications and background processes. If using the Pi as a desktop, consider a lightweight desktop environment.
FAQs
Q: Can I use the Raspberry Pi 4 as a desktop computer? A: Yes, with adequate memory (4GB or 8GB model recommended) and a proper setup, the Raspberry Pi 4 can function as a basic desktop computer.
Q: What operating systems can I run on the Raspberry Pi 4? A: The most common OS is Raspberry Pi OS (formerly Raspbian), but it also supports other Linux distributions, as well as a version of Windows 10 IoT Core.
Q: Can I connect multiple displays to the Raspberry Pi 4? A: Yes, the Raspberry Pi 4 supports dual monitors via its two micro HDMI ports.
For more detailed information and support, visit the official Raspberry Pi website and community forums.