Cirkit Designer
Your all-in-one circuit design IDE
Home /
Component Documentation
How to Use Air Pressure Modul: Examples, Pinouts, and Specs
Introduction
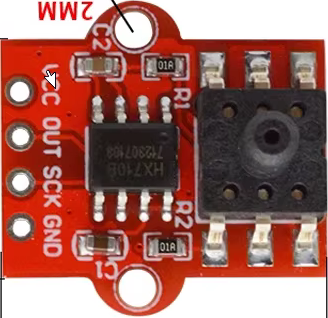
The HX710B Digital Barometric Pressure Sensor, manufactured by HuiSheng DongYe, is a highly accurate device designed to measure and regulate air pressure in pneumatic systems. This sensor is widely used in various applications, including weather stations, altimeters, and industrial automation systems. Its digital output makes it easy to interface with microcontrollers and other digital systems, providing precise pressure readings.
Explore Projects Built with Air Pressure Modul
ESP32-Based Smart Air Purifier with Wi-Fi and Blynk Integration
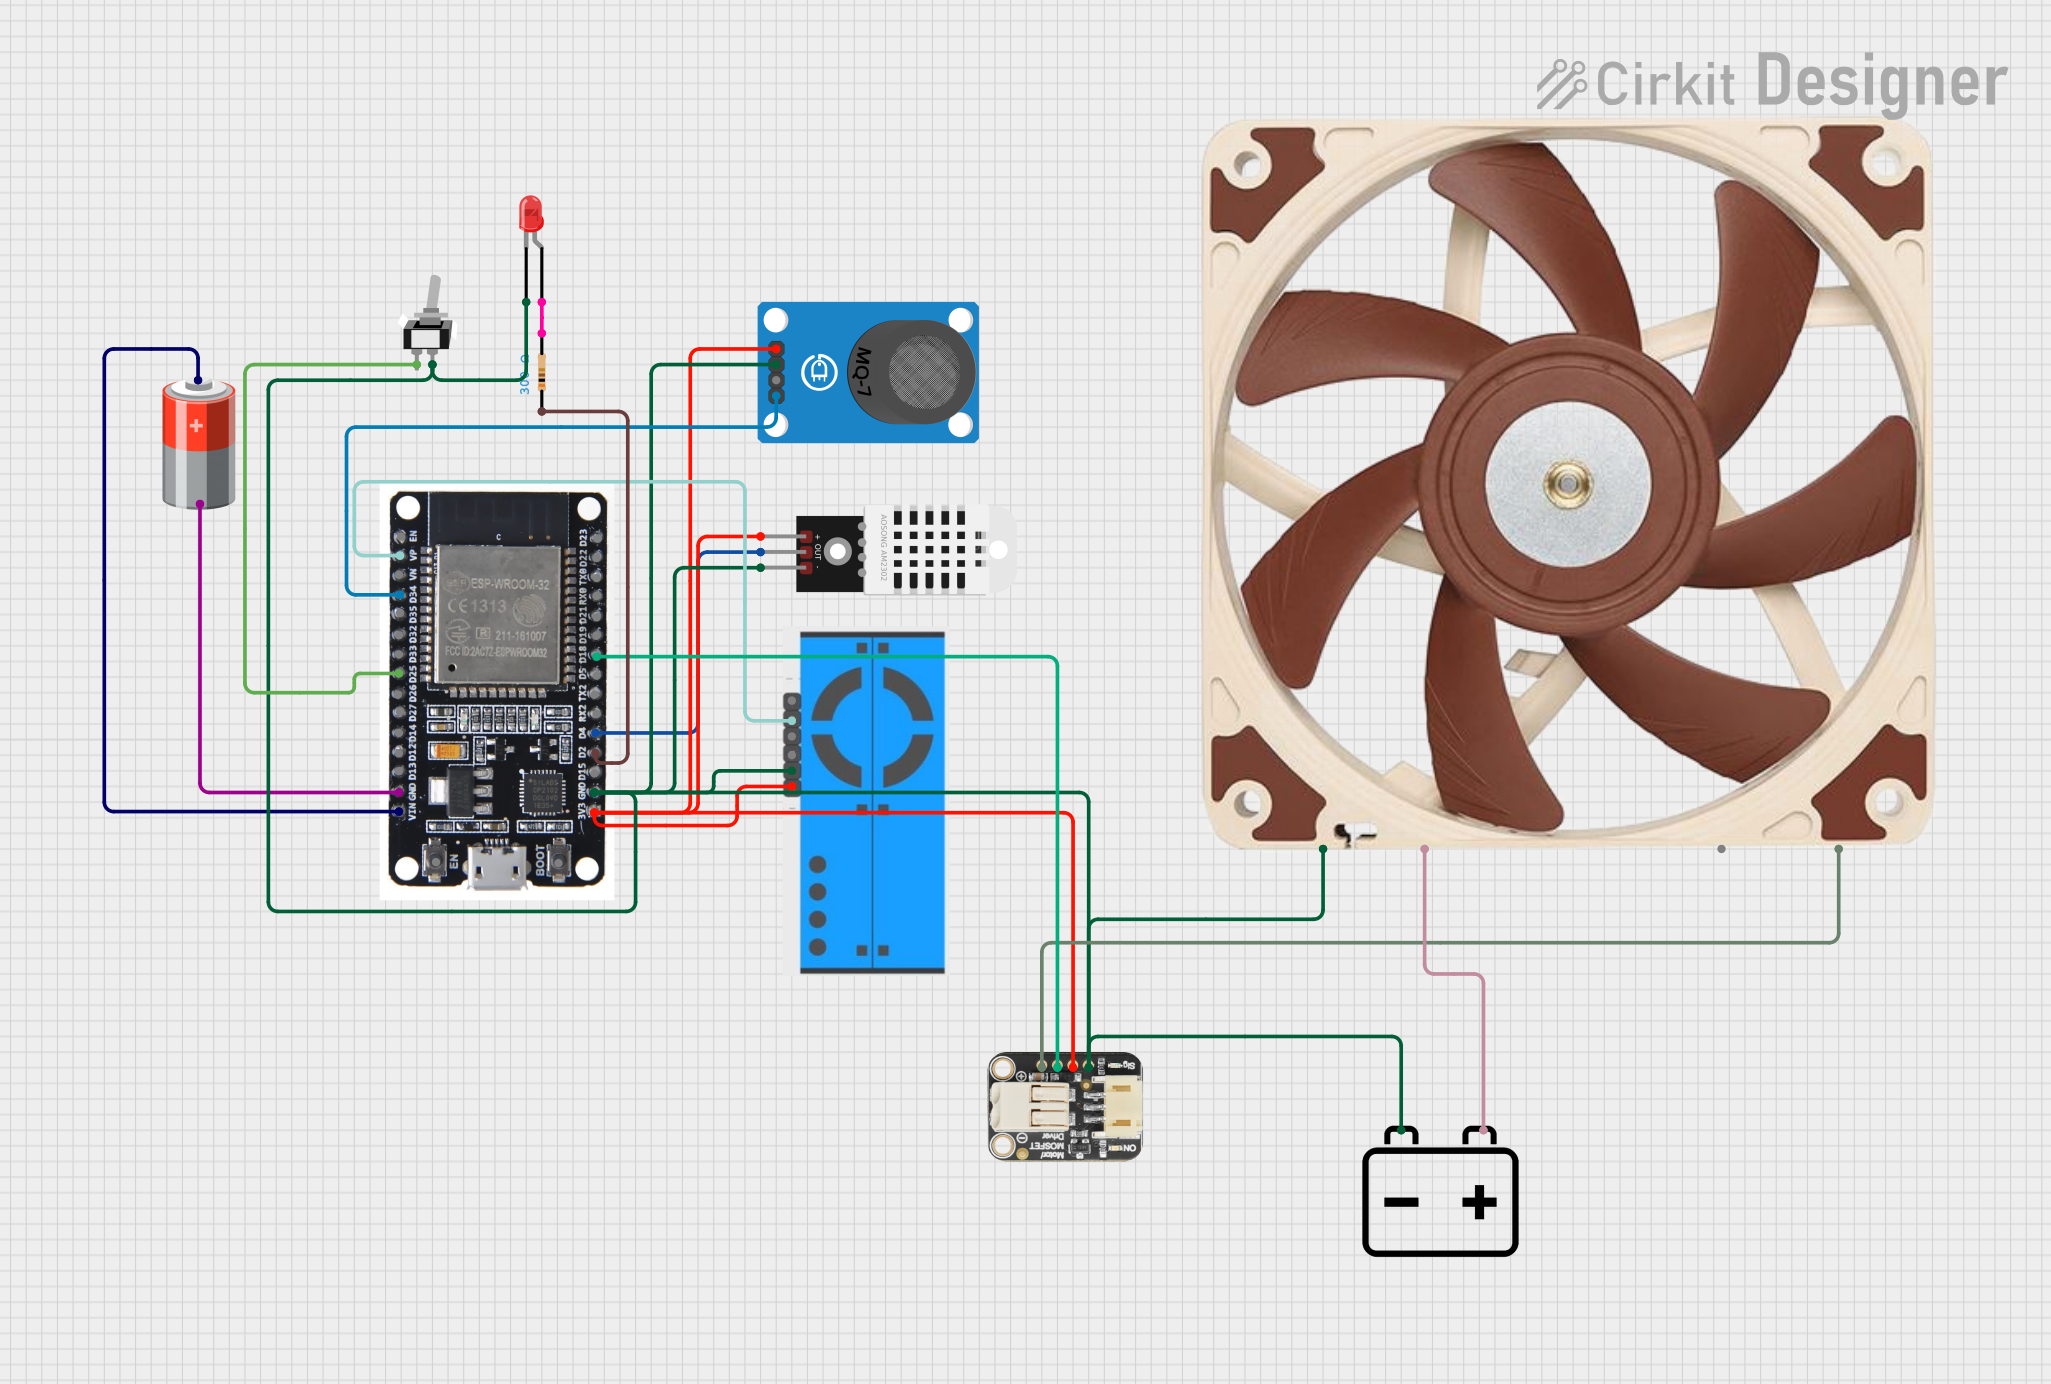
This circuit is a smart air purifier system that uses an ESP32 microcontroller to monitor indoor air quality through various sensors, including a DHT22 for temperature and humidity, an MQ-7 for CO levels, and a PMS5003 for particulate matter. The system adjusts a 12V PWM fan's speed based on air quality readings and integrates with the Blynk app for real-time monitoring and control, including a manual mode switch and an LED indicator.
Arduino-Based Automatic Tyre Inflator with LCD Display and Pressure Sensor
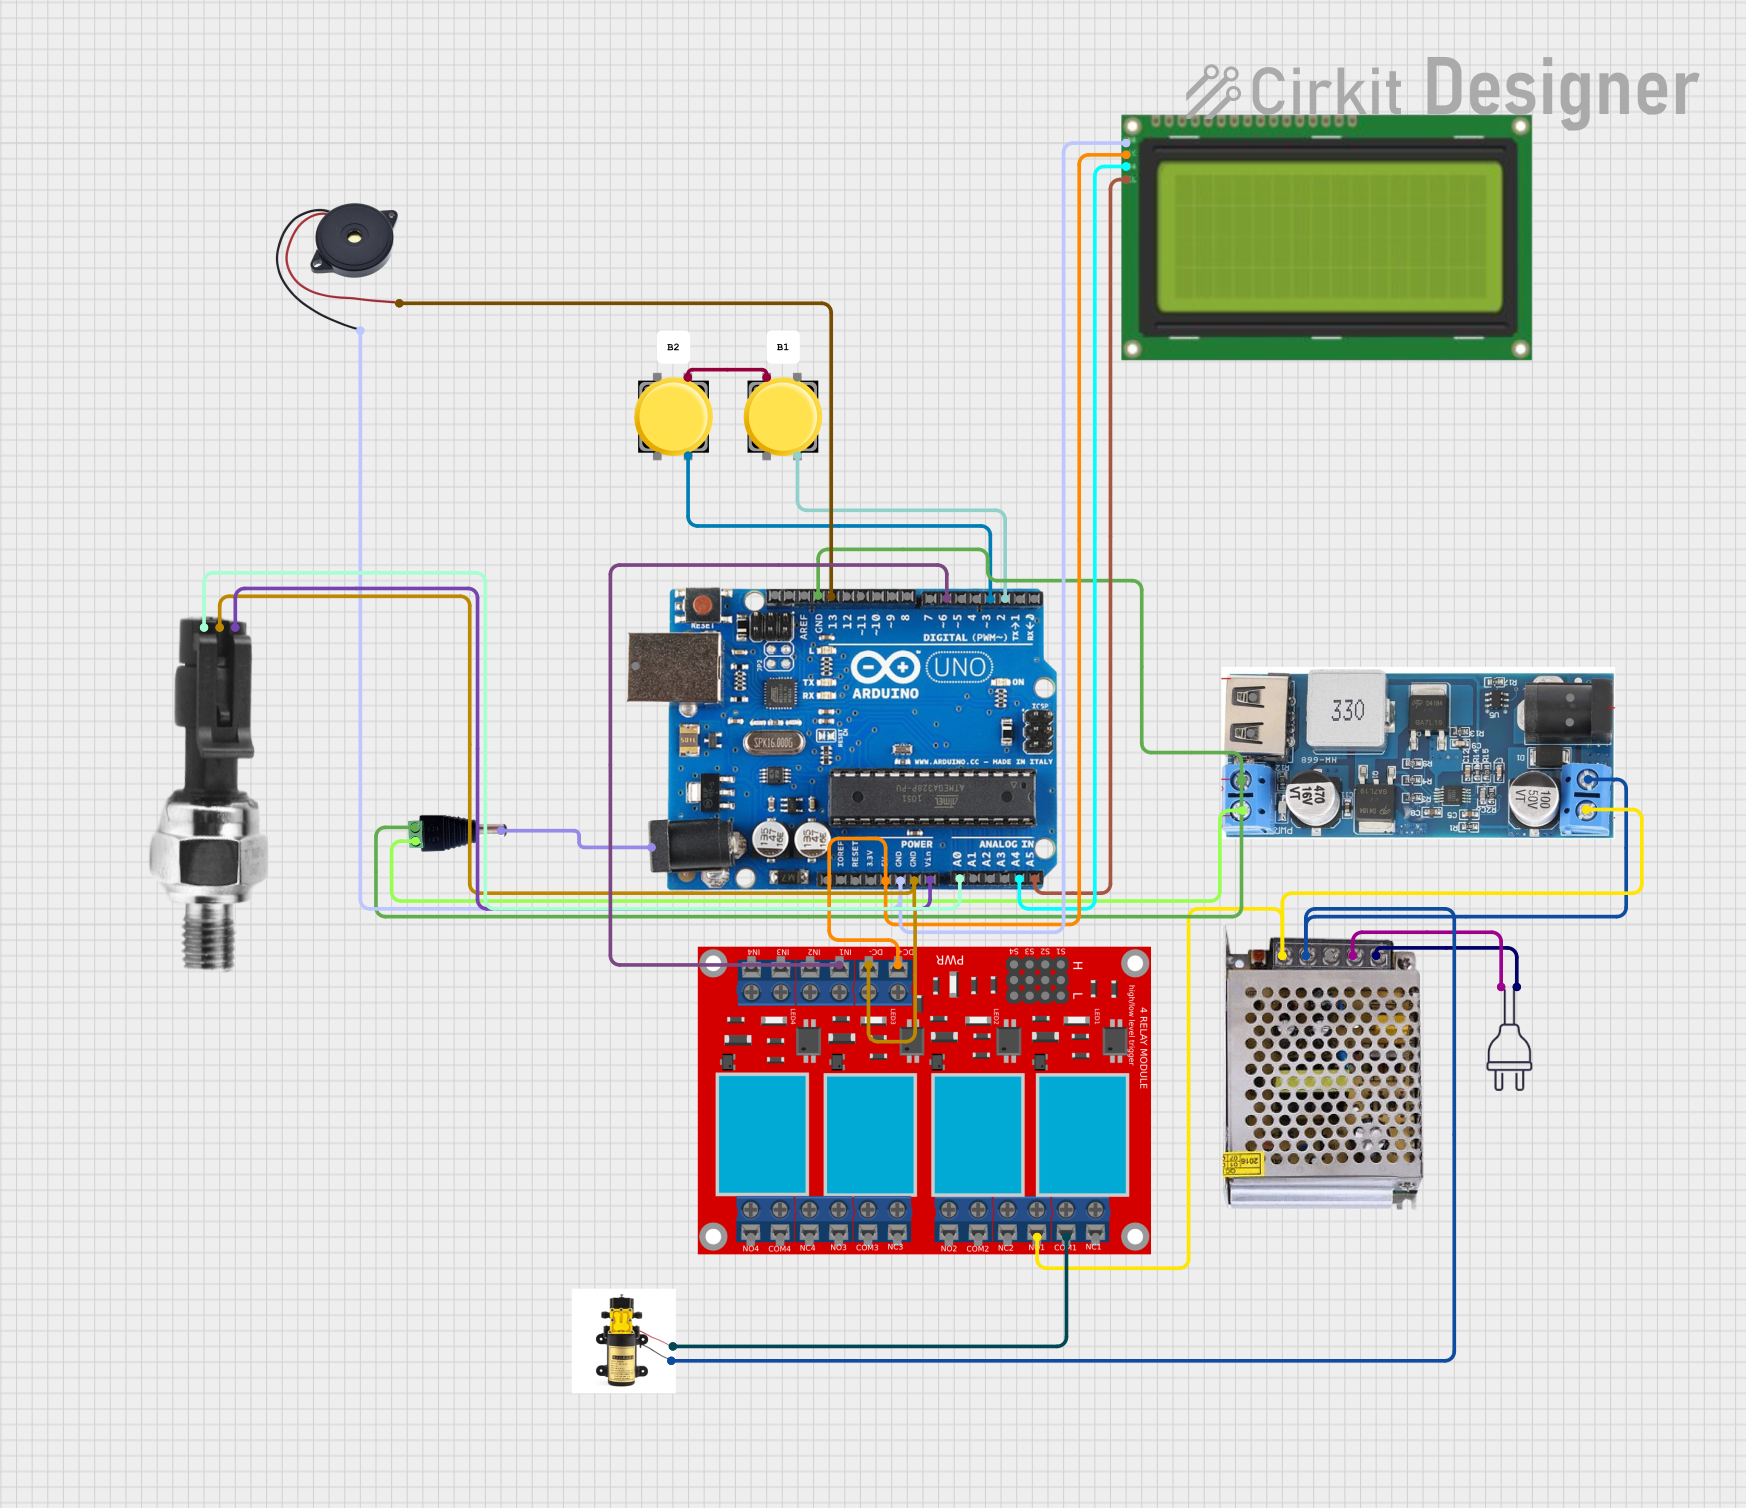
This circuit is an automated tire inflator system controlled by an Arduino Uno. It uses an industrial pressure sensor to monitor tire pressure, an LCD to display information, and a relay module to control a pump and solenoid valves for inflating and purging air. The system includes pushbuttons for user input and a buzzer for alerts.
Arduino-Based Automatic Tyre Inflator with LCD Display and Pressure Sensor

This circuit is an automated tire inflator system controlled by an Arduino Uno. It uses multiple pushbuttons for user input, an industrial pressure sensor to monitor tire pressure, and a 4-channel relay module to control solenoid valves for inflating and purging air. The system also includes an LCD display for user interface and feedback.
Arduino BMP180 Tire Pressure Monitoring System with LCD Display and NRF24L01 Wireless Transmission
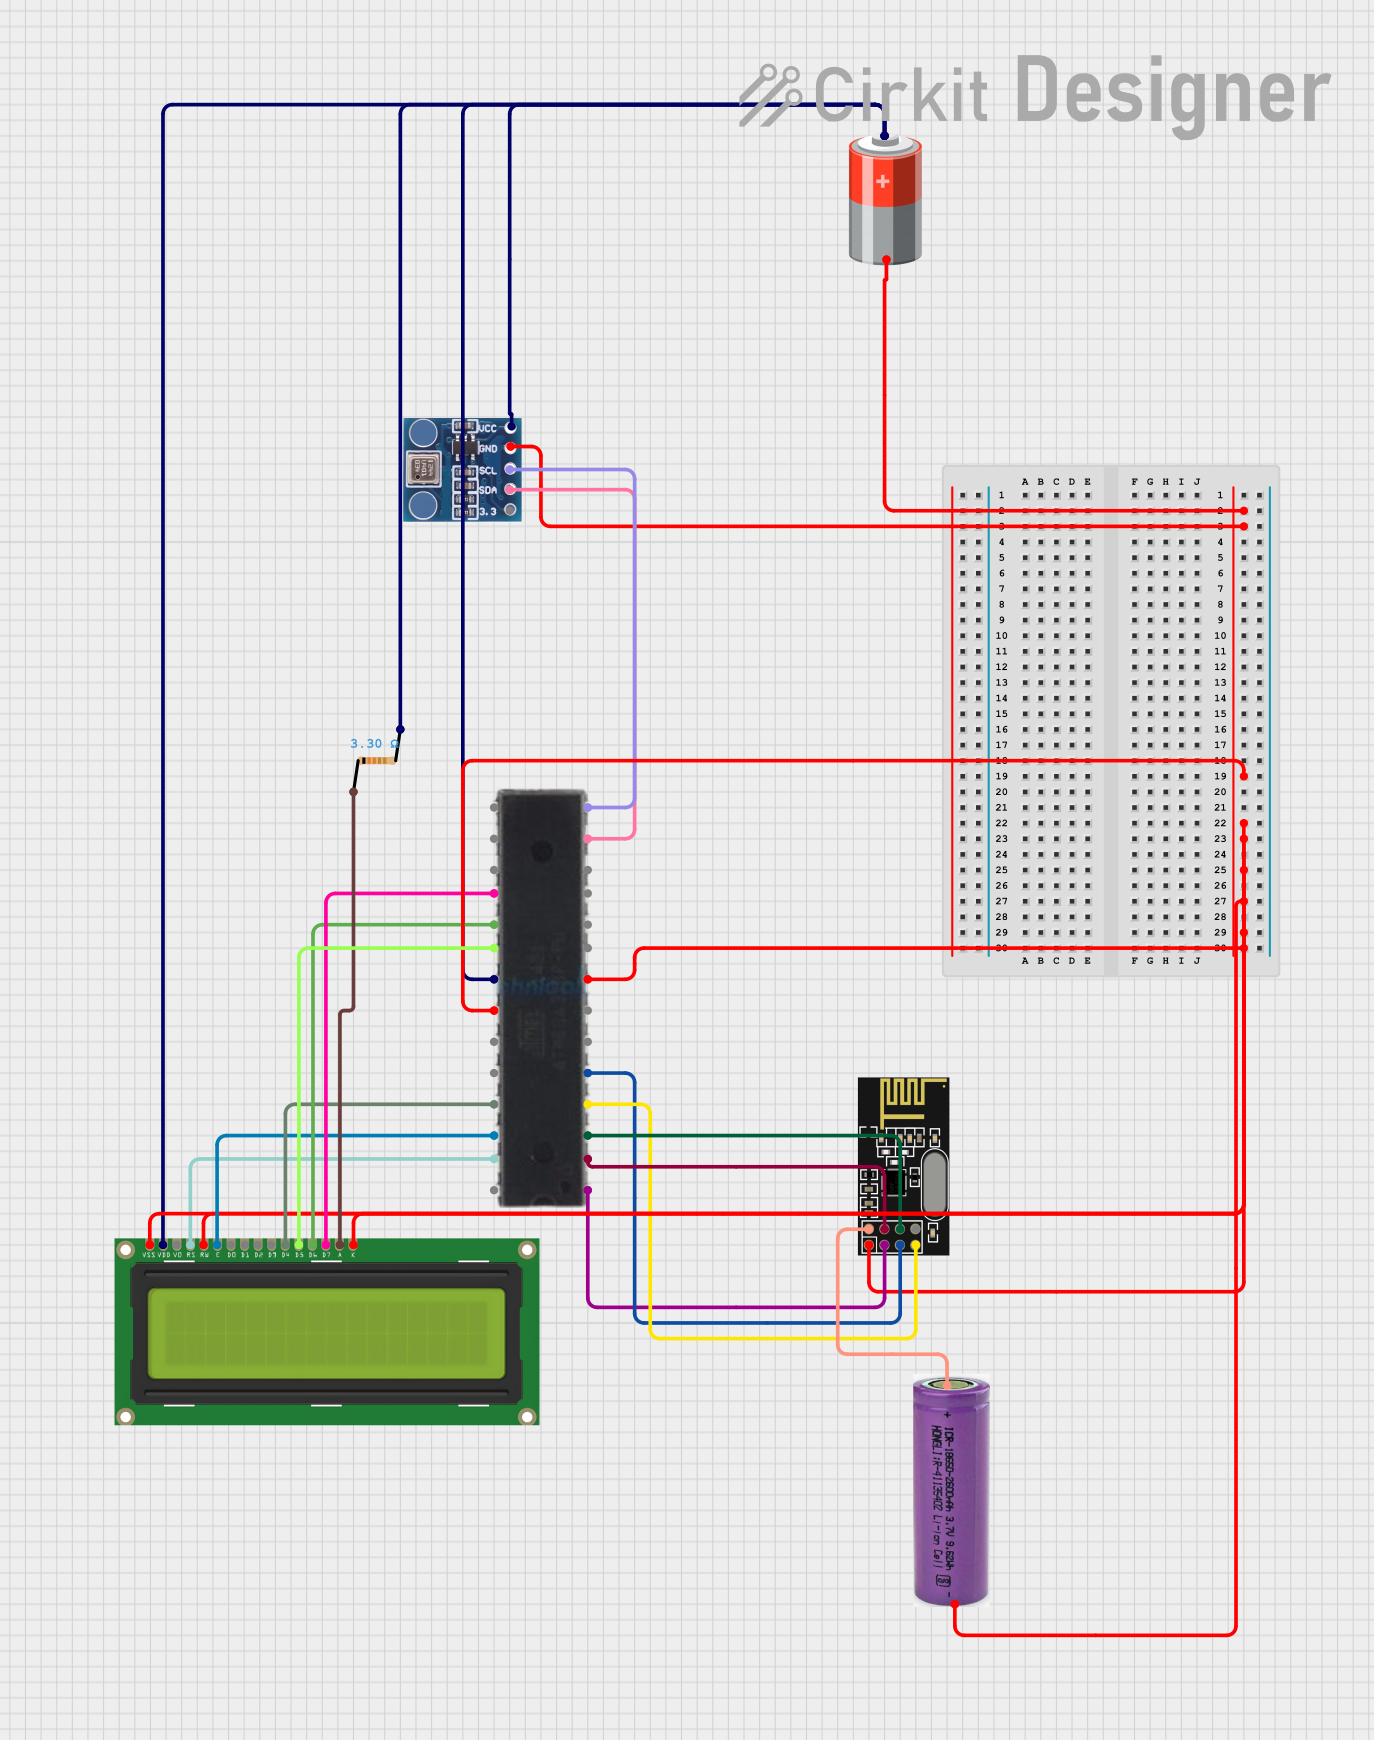
This circuit is designed for a Tire Pressure Monitoring System using an ATmega328P microcontroller. It reads temperature and pressure data from BMP180 sensors, displays the readings on a 16x2 LCD, and transmits the data wirelessly via an NRF24L01 module. The circuit is powered by a 5V battery, with a 3.3V battery specifically for the NRF24L01, and includes a resistor for the LCD backlight.
Explore Projects Built with Air Pressure Modul
ESP32-Based Smart Air Purifier with Wi-Fi and Blynk Integration
This circuit is a smart air purifier system that uses an ESP32 microcontroller to monitor indoor air quality through various sensors, including a DHT22 for temperature and humidity, an MQ-7 for CO levels, and a PMS5003 for particulate matter. The system adjusts a 12V PWM fan's speed based on air quality readings and integrates with the Blynk app for real-time monitoring and control, including a manual mode switch and an LED indicator.
Arduino-Based Automatic Tyre Inflator with LCD Display and Pressure Sensor
This circuit is an automated tire inflator system controlled by an Arduino Uno. It uses an industrial pressure sensor to monitor tire pressure, an LCD to display information, and a relay module to control a pump and solenoid valves for inflating and purging air. The system includes pushbuttons for user input and a buzzer for alerts.
Arduino-Based Automatic Tyre Inflator with LCD Display and Pressure Sensor
This circuit is an automated tire inflator system controlled by an Arduino Uno. It uses multiple pushbuttons for user input, an industrial pressure sensor to monitor tire pressure, and a 4-channel relay module to control solenoid valves for inflating and purging air. The system also includes an LCD display for user interface and feedback.
Arduino BMP180 Tire Pressure Monitoring System with LCD Display and NRF24L01 Wireless Transmission
This circuit is designed for a Tire Pressure Monitoring System using an ATmega328P microcontroller. It reads temperature and pressure data from BMP180 sensors, displays the readings on a 16x2 LCD, and transmits the data wirelessly via an NRF24L01 module. The circuit is powered by a 5V battery, with a 3.3V battery specifically for the NRF24L01, and includes a resistor for the LCD backlight.
Technical Specifications
Key Technical Details
| Parameter | Value |
|---|---|
| Supply Voltage | 2.7V to 5.5V |
| Operating Current | 1.5mA (typical) |
| Pressure Range | 300 hPa to 1100 hPa |
| Resolution | 24-bit ADC |
| Interface | I2C |
| Operating Temperature | -40°C to +85°C |
Pin Configuration and Descriptions
| Pin No. | Pin Name | Description |
|---|---|---|
| 1 | VCC | Power supply (2.7V to 5.5V) |
| 2 | GND | Ground |
| 3 | SCL | I2C Clock Line |
| 4 | SDA | I2C Data Line |
| 5 | DRDY | Data Ready (Interrupt output, optional) |
| 6 | NC | Not Connected |
Usage Instructions
How to Use the Component in a Circuit
- Power Supply: Connect the VCC pin to a 3.3V or 5V power supply and the GND pin to the ground of your circuit.
- I2C Communication: Connect the SCL and SDA pins to the corresponding I2C pins on your microcontroller. For an Arduino UNO, connect SCL to A5 and SDA to A4.
- Data Ready (Optional): If you want to use the Data Ready (DRDY) pin, connect it to a digital input pin on your microcontroller to receive an interrupt when new data is available.
Important Considerations and Best Practices
- Pull-up Resistors: Ensure that the I2C lines (SCL and SDA) have pull-up resistors (typically 4.7kΩ) to the supply voltage.
- Power Supply Stability: Use a stable power supply to avoid fluctuations in the sensor readings.
- Temperature Compensation: The sensor operates over a wide temperature range, but for critical applications, consider implementing temperature compensation in your software.
Example Code for Arduino UNO
#include <Wire.h>

#define HX710B_ADDRESS 0x76 // I2C address of the HX710B sensor

void setup() {
  Serial.begin(9600);
  Wire.begin(); // Initialize I2C communication
  initializeSensor();
}

void loop() {
  long pressure = readPressure();
  Serial.print("Pressure: ");
  Serial.print(pressure);
  Serial.println(" Pa");
  delay(1000); // Wait for 1 second before the next reading
}

void initializeSensor() {
  Wire.beginTransmission(HX710B_ADDRESS);
  Wire.write(0x1E); // Reset command for the sensor
  Wire.endTransmission();
  delay(100); // Wait for the sensor to reset
}

long readPressure() {
  Wire.beginTransmission(HX710B_ADDRESS);
  Wire.write(0xF7); // Command to read pressure
  Wire.endTransmission();
  Wire.requestFrom(HX710B_ADDRESS, 3); // Request 3 bytes of data

  if (Wire.available() == 3) {
    long pressure = Wire.read() << 16;
    pressure |= Wire.read() << 8;
    pressure |= Wire.read();
    return pressure;
  } else {
    return -1; // Return -1 if data is not available
  }
}
Troubleshooting and FAQs
Common Issues Users Might Face
- No Data Output: Ensure that the I2C connections are correct and that pull-up resistors are in place.
- Incorrect Readings: Verify that the power supply is stable and within the specified range. Check for any loose connections.
- I2C Communication Errors: Ensure that the I2C address used in the code matches the sensor's address. Check for any address conflicts with other I2C devices.
Solutions and Tips for Troubleshooting
- Check Connections: Double-check all wiring and connections to ensure they are secure and correct.
- Use a Multimeter: Measure the voltage at the VCC and GND pins to ensure the sensor is receiving the correct power supply.
- Review Code: Ensure that the code is correctly implemented and that the I2C address and commands match the sensor's specifications.
By following this documentation, users can effectively integrate the HX710B Digital Barometric Pressure Sensor into their projects, ensuring accurate and reliable pressure measurements.