
How to Use Solar Cell 18V 100W: Examples, Pinouts, and Specs
 Design with Solar Cell 18V 100W in Cirkit Designer
Introduction
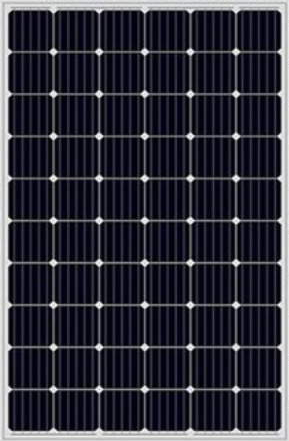
The Solar Cell 18V 100W is a photovoltaic device designed to convert sunlight into electrical energy. With a maximum output of 18 volts and 100 watts, this solar cell is ideal for renewable energy projects, off-grid power systems, and portable solar applications. Its high efficiency and robust design make it suitable for both residential and commercial use.
Explore Projects Built with Solar Cell 18V 100W
 Open Project in Cirkit Designer
 Open Project in Cirkit Designer
 Open Project in Cirkit Designer
 Open Project in Cirkit Designer
Explore Projects Built with Solar Cell 18V 100W
Open Project in Cirkit DesignerOpen Project in Cirkit DesignerOpen Project in Cirkit DesignerOpen Project in Cirkit DesignerCommon Applications
- Solar-powered battery charging systems
- Off-grid power supply for small appliances
- Integration into solar panels for residential or industrial use
- Portable solar generators and camping equipment
- Educational and DIY renewable energy projects
Technical Specifications
Key Technical Details
| Parameter | Value |
|---|---|
| Maximum Power (Pmax) | 100 W |
| Maximum Voltage (Vmp) | 18 V |
| Maximum Current (Imp) | 5.56 A |
| Open Circuit Voltage (Voc) | 22 V |
| Short Circuit Current (Isc) | 5.95 A |
| Efficiency | ~18% |
| Dimensions | 1200 mm x 540 mm x 35 mm |
| Weight | ~8 kg |
| Operating Temperature | -40°C to +85°C |
| Connector Type | MC4 or bare wire leads |
Pin Configuration and Descriptions
The Solar Cell 18V 100W typically comes with two output terminals or wires:
| Pin/Terminal | Description |
|---|---|
| Positive (+) | Outputs the positive DC voltage |
| Negative (-) | Outputs the negative DC voltage |
Note: Ensure proper polarity when connecting the solar cell to a circuit to avoid damage to connected components.
Usage Instructions
How to Use the Solar Cell in a Circuit
Positioning the Solar Cell:
- Place the solar cell in direct sunlight for optimal performance.
- Ensure the surface is clean and free from obstructions like dirt or debris.
Connecting to a Load or Battery:
- Use the positive (+) and negative (-) terminals to connect the solar cell to a charge controller, battery, or load.
- For battery charging, always use a charge controller to prevent overcharging or damage to the battery.
Wiring Considerations:
- Use appropriate gauge wires to handle the maximum current (5.56 A).
- Secure all connections to prevent loose contacts or short circuits.
Mounting:
- Use a sturdy frame or mounting brackets to secure the solar cell.
- Tilt the solar cell at an angle that maximizes sunlight exposure based on your geographic location.
Important Considerations and Best Practices
- Avoid Shading: Even partial shading can significantly reduce the output power of the solar cell.
- Overcurrent Protection: Use a fuse or circuit breaker to protect the circuit from overcurrent conditions.
- Temperature Effects: High temperatures can reduce efficiency; ensure proper ventilation around the solar cell.
- Series/Parallel Connections: For higher voltage or current requirements, multiple solar cells can be connected in series or parallel. Ensure the total voltage and current do not exceed the ratings of connected devices.
Example: Connecting to an Arduino UNO
To measure the voltage output of the solar cell using an Arduino UNO, you can use a voltage divider circuit to step down the voltage to a safe range (0-5V) for the Arduino's analog input.
Circuit Diagram
- Connect the solar cell's positive terminal to one end of the voltage divider.
- Connect the output of the voltage divider to the Arduino's analog pin (e.g., A0).
- Connect the solar cell's negative terminal to the Arduino's GND.
Arduino Code
// Solar Cell Voltage Measurement with Arduino UNO
// Ensure the voltage divider steps down the solar cell voltage to 0-5V range.

const int analogPin = A0;  // Analog pin connected to the voltage divider
const float voltageDividerRatio = 3.6; // Adjust based on your resistor values
const float referenceVoltage = 5.0;    // Arduino's reference voltage (5V)

void setup() {
  Serial.begin(9600); // Initialize serial communication
}

void loop() {
  int analogValue = analogRead(analogPin); // Read analog input
  float measuredVoltage = (analogValue / 1023.0) * referenceVoltage;
  float solarCellVoltage = measuredVoltage * voltageDividerRatio;

  // Print the measured voltage to the Serial Monitor
  Serial.print("Solar Cell Voltage: ");
  Serial.print(solarCellVoltage);
  Serial.println(" V");

  delay(1000); // Wait for 1 second before the next reading
}
Note: Use appropriate resistor values in the voltage divider to ensure the Arduino's analog input pin is not exposed to voltages above 5V.
Troubleshooting and FAQs
Common Issues and Solutions
Low or No Output Power:
- Cause: Insufficient sunlight or shading.
- Solution: Ensure the solar cell is in direct sunlight and free from obstructions.
Overheating:
- Cause: Poor ventilation or excessive ambient temperature.
- Solution: Improve airflow around the solar cell and avoid placing it in enclosed spaces.
Incorrect Polarity Connection:
- Cause: Reversed positive and negative terminals.
- Solution: Double-check the polarity before connecting to the circuit.
Voltage Drops Under Load:
- Cause: Load exceeds the solar cell's maximum power output.
- Solution: Use a load within the solar cell's power rating or add additional solar cells in parallel.
FAQs
Q1: Can I use this solar cell indoors?
A1: The Solar Cell 18V 100W is designed for outdoor use in direct sunlight. Indoor use will result in significantly reduced power output.
Q2: How do I clean the solar cell?
A2: Use a soft cloth and water to clean the surface. Avoid abrasive materials or harsh chemicals.
Q3: Can I connect multiple solar cells together?
A3: Yes, you can connect solar cells in series for higher voltage or in parallel for higher current. Ensure the total output matches the requirements of your system.
Q4: What type of battery is compatible with this solar cell?
A4: This solar cell is compatible with 12V lead-acid, lithium-ion, or LiFePO4 batteries when used with an appropriate charge controller.