
How to Use ADS1115: Examples, Pinouts, and Specs
 Design with ADS1115 in Cirkit Designer
Introduction
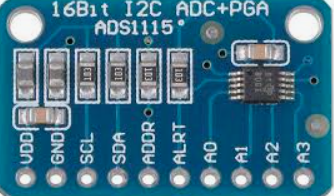
The ADS1115 is a high-precision 16-bit analog-to-digital converter (ADC) with an I2C interface. It is capable of measuring up to four single-ended inputs or two differential inputs, making it ideal for applications requiring accurate sensor data acquisition. The ADS1115 features a programmable gain amplifier (PGA), allowing it to handle a wide range of input voltages. Its small size and low power consumption make it suitable for portable and embedded systems.
Explore Projects Built with ADS1115
 Open Project in Cirkit Designer
 Open Project in Cirkit Designer
 Open Project in Cirkit Designer
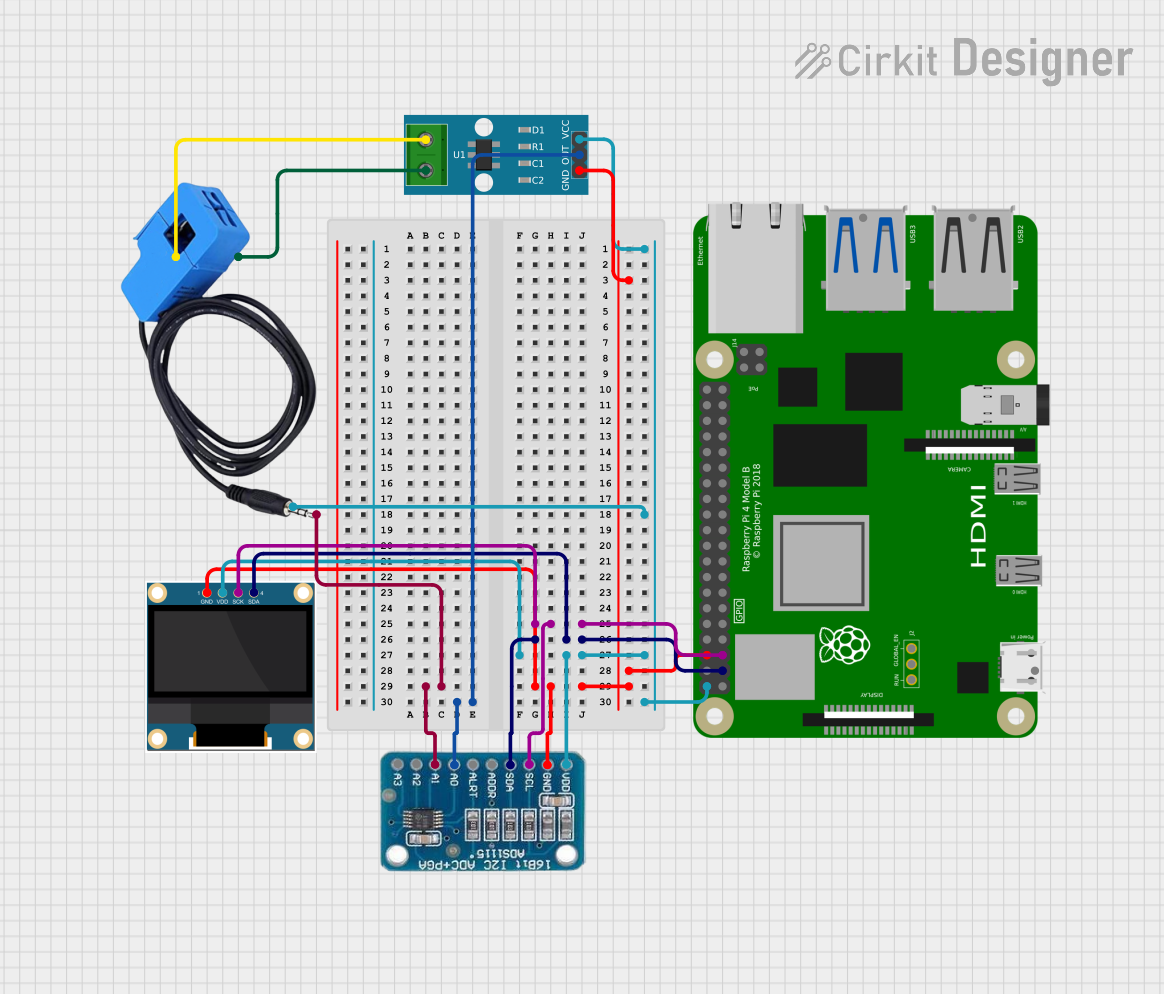 Open Project in Cirkit Designer
Explore Projects Built with ADS1115
Open Project in Cirkit DesignerOpen Project in Cirkit DesignerOpen Project in Cirkit DesignerOpen Project in Cirkit DesignerCommon Applications
- Sensor data acquisition (e.g., temperature, pressure, light sensors)
- Battery monitoring
- Industrial process control
- Portable instrumentation
- Data logging systems
Technical Specifications
Key Technical Details
- Resolution: 16-bit
- Input Channels: 4 single-ended or 2 differential
- Input Voltage Range: ±0.256V to ±6.144V (configurable via PGA)
- Supply Voltage: 2.0V to 5.5V
- Interface: I2C (up to 3.4 MHz)
- Programmable Data Rates: 8 SPS to 860 SPS (samples per second)
- Operating Temperature: -40°C to +125°C
- Low Power Consumption: 150 µA (typical)
Pin Configuration and Descriptions
The ADS1115 is typically available in an 8-pin package. Below is the pinout and description:
| Pin | Name | Type | Description |
|---|---|---|---|
| 1 | VDD | Power | Power supply input (2.0V to 5.5V). |
| 2 | GND | Ground | Ground reference for the device. |
| 3 | SCL | Input | I2C clock line. Connect to the I2C master clock. |
| 4 | SDA | Input/Output | I2C data line. Connect to the I2C master data line. |
| 5 | ALERT/RDY | Output | Configurable as an alert pin or ready signal. |
| 6 | A0 | Input | Address pin 0. Used to set the I2C address. |
| 7 | A1 | Input | Address pin 1. Used to set the I2C address. |
| 8 | ADDR | Input | Address selection pin. Determines the I2C address of the device. |
I2C Address Configuration
The ADS1115 supports up to four unique I2C addresses, determined by the ADDR pin configuration:
| ADDR Pin Connection | I2C Address |
|---|---|
| GND | 0x48 |
| VDD | 0x49 |
| SDA | 0x4A |
| SCL | 0x4B |
Usage Instructions
How to Use the ADS1115 in a Circuit
- Power Supply: Connect the VDD pin to a 2.0V–5.5V power source and the GND pin to ground.
- I2C Interface: Connect the SCL and SDA pins to the corresponding I2C lines of your microcontroller. Use pull-up resistors (typically 4.7kΩ) on both lines.
- Input Signals: Connect your analog input signals to the AIN0–AIN3 pins. Configure the ADS1115 for single-ended or differential mode as needed.
- Address Selection: Set the ADDR pin to configure the I2C address, ensuring it does not conflict with other devices on the bus.
- Alert/Ready Pin: Optionally, use the ALERT/RDY pin for interrupt-driven applications or to monitor conversion readiness.
Important Considerations
- Input Voltage Range: Ensure the input voltage does not exceed the configured PGA range or the supply voltage.
- Bypass Capacitor: Place a 0.1µF ceramic capacitor close to the VDD pin for noise filtering.
- I2C Pull-Up Resistors: Use appropriate pull-up resistors on the SDA and SCL lines to ensure reliable communication.
Example Code for Arduino UNO
Below is an example of how to use the ADS1115 with an Arduino UNO to read a single-ended input:
#include <Wire.h>
#include <Adafruit_ADS1X15.h>

// Create an ADS1115 object
Adafruit_ADS1115 ads;

void setup() {
  Serial.begin(9600); // Initialize serial communication
  while (!Serial);    // Wait for Serial Monitor to open

  // Initialize the ADS1115
  if (!ads.begin()) {
    Serial.println("Failed to initialize ADS1115!");
    while (1); // Halt execution if initialization fails
  }
  Serial.println("ADS1115 initialized.");
}

void loop() {
  // Read a single-ended input from channel 0
  int16_t adcValue = ads.readADC_SingleEnded(0);

  // Convert the ADC value to voltage (assuming default gain ±6.144V)
  float voltage = adcValue * 0.1875 / 1000; // 0.1875 mV per bit

  // Print the results
  Serial.print("ADC Value: ");
  Serial.print(adcValue);
  Serial.print(" | Voltage: ");
  Serial.print(voltage, 4); // Print voltage with 4 decimal places
  Serial.println(" V");

  delay(1000); // Wait 1 second before the next reading
}
Notes on the Code
- The
Adafruit_ADS1X15library is used for simplicity. Install it via the Arduino Library Manager. - The default PGA setting is ±6.144V, resulting in a resolution of 0.1875mV per bit.
Troubleshooting and FAQs
Common Issues
No I2C Communication:
- Ensure the SDA and SCL lines are connected correctly.
- Verify that pull-up resistors are present on the I2C lines.
- Check the I2C address configuration and ensure it matches the software settings.
Incorrect Voltage Readings:
- Confirm that the input voltage is within the configured PGA range.
- Check for noise or interference on the input signal.
- Verify the power supply voltage is stable and within the specified range.
ADS1115 Not Detected:
- Ensure the ADDR pin is configured correctly for the desired I2C address.
- Use an I2C scanner sketch to verify the device address.
Tips for Troubleshooting
- Use an oscilloscope or logic analyzer to monitor the I2C lines for proper communication.
- Double-check all connections and solder joints for continuity.
- Test the ADS1115 with a simple setup (e.g., single-ended input) before integrating it into a complex circuit.
By following this documentation, you should be able to successfully integrate and use the ADS1115 in your projects.