How to Use Loudspeaker: Examples, Pinouts, and Specs
Introduction
A loudspeaker is a device that converts electrical energy into sound waves, enabling audio signals to be heard by humans. It is a fundamental component in audio systems, ranging from home entertainment setups to public address systems. Loudspeakers are available in various sizes and designs, tailored for specific applications such as high-fidelity audio, portable devices, and industrial use.
Explore Projects Built with Loudspeaker
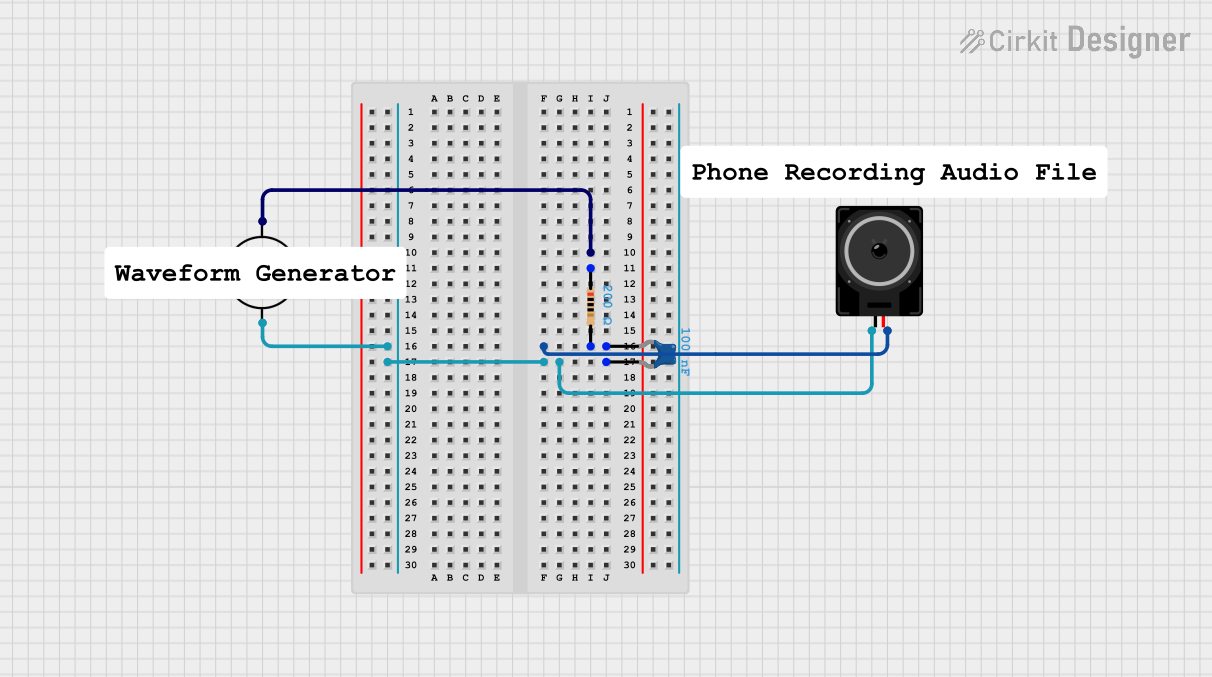
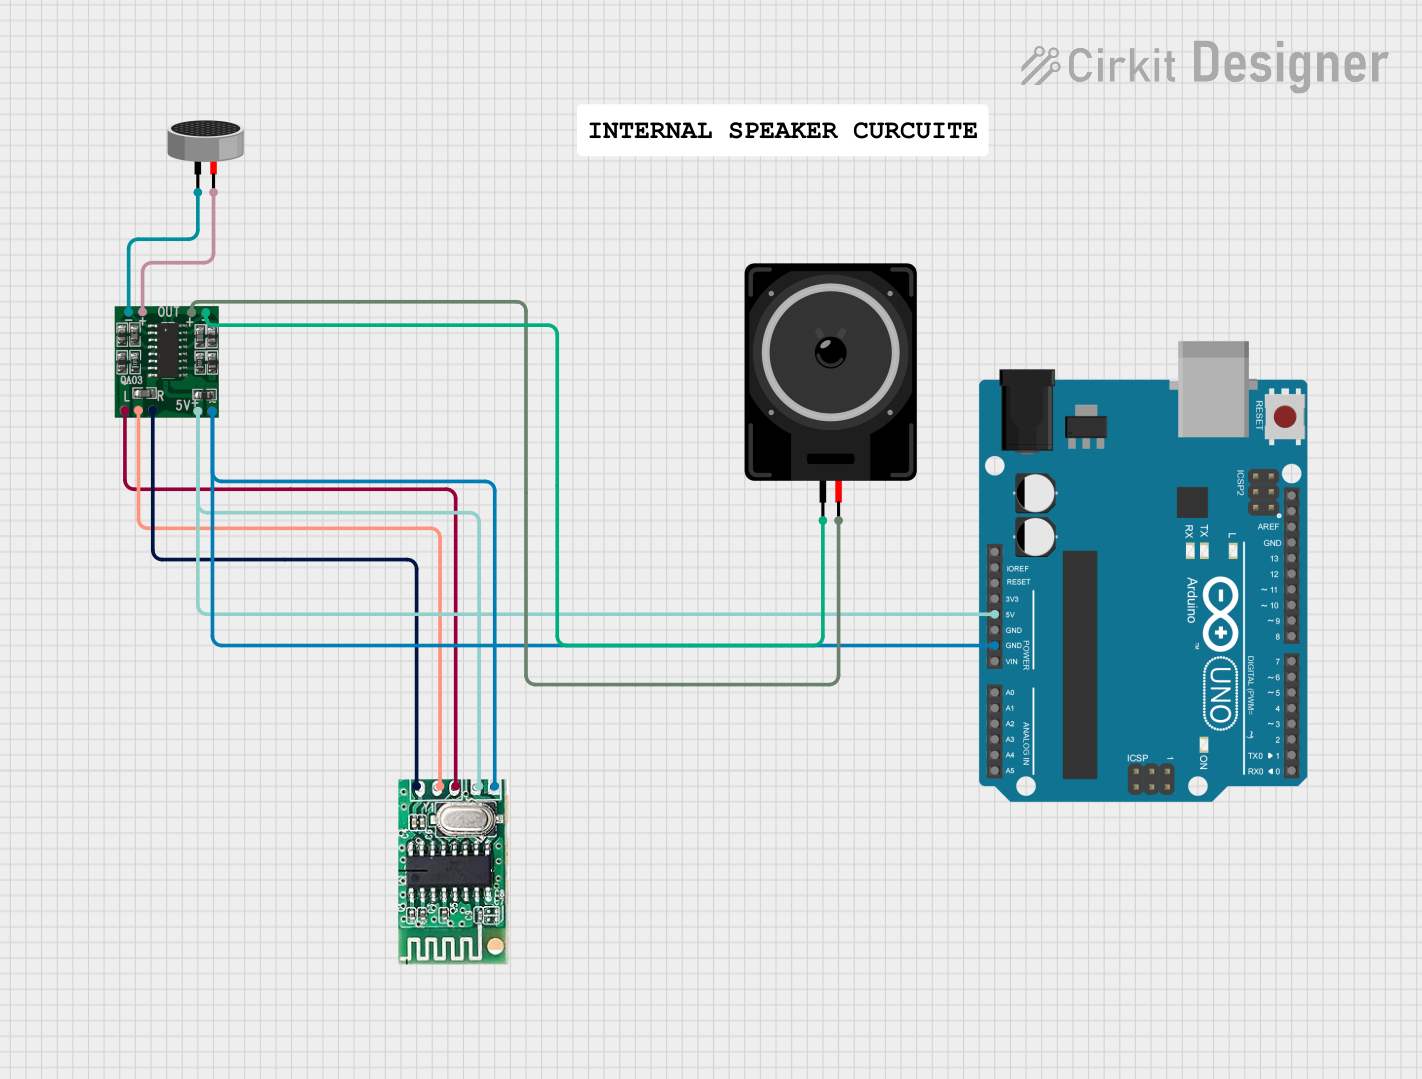

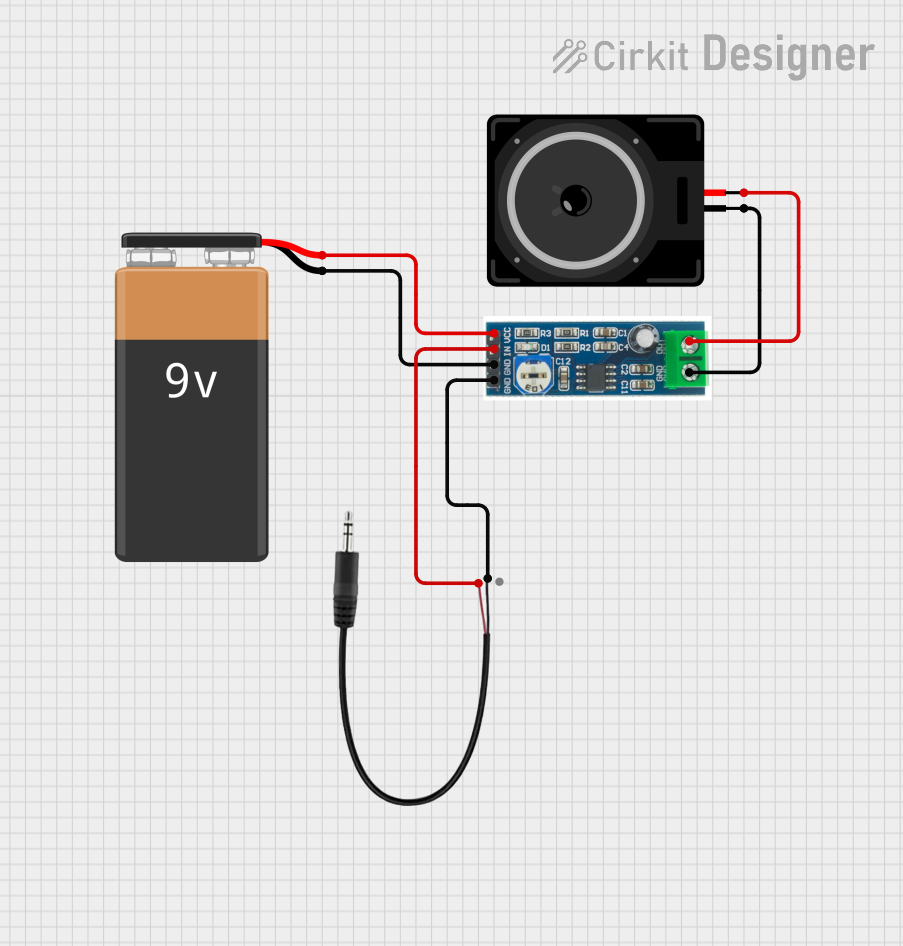
Explore Projects Built with Loudspeaker
Common Applications and Use Cases
- Home audio systems (e.g., stereo speakers, soundbars)
- Public address systems and megaphones
- Portable devices like smartphones and Bluetooth speakers
- Automotive audio systems
- Musical instrument amplifiers
- Theater and concert sound systems
Technical Specifications
Below are the general technical specifications for a typical loudspeaker. Note that actual values may vary depending on the specific model and manufacturer.
Key Technical Details
- Impedance: 4Ω, 8Ω, or 16Ω (common values)
- Power Handling: 1W to 1000W (depending on the application)
- Frequency Response: 20Hz to 20kHz (varies by design)
- Sensitivity: 85dB to 100dB (measured at 1W/1m)
- Operating Voltage: Typically driven by an amplifier
- Cone Material: Paper, plastic, or metal (varies by model)
Pin Configuration and Descriptions
Loudspeakers typically have two terminals for electrical connections. These terminals are often labeled as "+" (positive) and "-" (negative).
| Pin/Terminal | Description |
|---|---|
| + (Positive) | Connects to the positive output of the amplifier or audio source. |
| - (Negative) | Connects to the negative output of the amplifier or audio source. |
Usage Instructions
How to Use the Loudspeaker in a Circuit
- Connect to an Amplifier: Loudspeakers require an audio amplifier to drive them. Ensure the amplifier's output impedance matches the loudspeaker's impedance (e.g., 8Ω).
- Polarity Matters: Connect the "+" terminal of the loudspeaker to the positive output of the amplifier and the "-" terminal to the negative output. Reversing polarity may result in phase cancellation when using multiple speakers.
- Power Handling: Ensure the amplifier's output power does not exceed the loudspeaker's rated power handling to avoid damage.
- Enclosure Design: For optimal sound quality, mount the loudspeaker in an appropriate enclosure (e.g., sealed, ported, or open-back designs).
Important Considerations and Best Practices
- Avoid Overloading: Do not exceed the loudspeaker's power rating, as this can cause permanent damage to the voice coil.
- Impedance Matching: Use an amplifier with an output impedance that matches the loudspeaker's impedance to ensure efficient power transfer.
- Protect from Moisture: Keep the loudspeaker away from water or high humidity to prevent damage to the cone and internal components.
- Use Filters: For multi-speaker setups (e.g., tweeters, woofers), use appropriate crossover filters to direct the correct frequency range to each speaker.
Example: Connecting a Loudspeaker to an Arduino UNO
To use a loudspeaker with an Arduino UNO, you can generate simple tones using the tone() function. Note that the Arduino cannot directly drive a loudspeaker; you must use a small amplifier or a transistor circuit.
Circuit Diagram
- Connect the loudspeaker's "+" terminal to the collector of an NPN transistor (e.g., 2N2222).
- Connect the "-" terminal to the ground.
- Use a 1kΩ resistor between the Arduino's digital pin (e.g., pin 9) and the transistor's base.
- Connect the emitter of the transistor to the ground.
Example Code
// Arduino code to generate a tone on a loudspeaker
// Connect the loudspeaker to a transistor circuit as described above.

#define SPEAKER_PIN 9  // Pin connected to the transistor base via a resistor

void setup() {
  // No setup required for tone generation
}

void loop() {
  tone(SPEAKER_PIN, 440);  // Generate a 440Hz tone (A4 note)
  delay(1000);             // Play the tone for 1 second
  noTone(SPEAKER_PIN);     // Stop the tone
  delay(1000);             // Wait for 1 second before repeating
}
Troubleshooting and FAQs
Common Issues and Solutions
No Sound from the Loudspeaker
- Cause: Incorrect wiring or loose connections.
- Solution: Verify that the "+" and "-" terminals are correctly connected to the amplifier or circuit.
Distorted Sound
- Cause: Overdriving the loudspeaker or using an amplifier with excessive power.
- Solution: Reduce the amplifier's volume or use a loudspeaker with a higher power rating.
Low Volume
- Cause: Mismatched impedance between the amplifier and loudspeaker.
- Solution: Ensure the amplifier's output impedance matches the loudspeaker's impedance.
Speaker Cone Damage
- Cause: Physical impact or exposure to moisture.
- Solution: Replace the damaged loudspeaker and use protective enclosures.
FAQs
Q: Can I connect a loudspeaker directly to an Arduino?
A: No, the Arduino cannot supply enough current to drive a loudspeaker directly. Use a transistor or an amplifier circuit.
Q: What is the purpose of an enclosure for a loudspeaker?
A: An enclosure improves sound quality by controlling the movement of air around the loudspeaker, enhancing bass response and reducing distortion.
Q: How do I choose the right loudspeaker for my project?
A: Consider factors such as impedance, power handling, frequency response, and size based on your application's requirements.